Pat Stanford
-
Posts
12,660 -
Joined
-
Last visited
Content Type
Profiles
Forums
Events
Articles
Marionette
Store
Everything posted by Pat Stanford
-
Yes, that is where you want to put your new custom files. Look in the same relative path in the Applications:Vectorworks:Libraries:Defaults for the factory loaded Default Content
-
David, You are correct. The User Fields in the PIOs are defined as Text type fields, not Numbers. Change your formula to =D4/Value(F4) and you should get what you need. The only thing to be careful of there is that only numbers or things that can be converted to numbers (i.e. 12" or 17mm) are stored in the User Field or the Value function will not be able to properly convert it to a number.
-
Yes, Marionette Objects can be included in symbols. In fact, the recommended way to make a Marionette reusable between files is to make it into a symbol with the "convert to group" option selected. This will have it be stored as a symbol (Resource), but inserted into the drawing as an individual object. But you can leave it as part of a symbol also. But it will have to be the same Marionette for all instances of the symbol. You can't edit the parameters for just some of the instances.
-
Are you successfully quitting VW? Or are you crashing on quit? The preference file is only written when you successfully quit. A crash prevent the file from being written. Art's idea of forcing VW to recreate the preferences is good.
-
Take a look at this movie and see if that helps. You sometimes need to jiggle the cursor around a little to get it in the right position to get the cursor you need to move instead of resize. VW_Selection_Box.mp4
-
Take a look in your VW Folder:Libraries:Defaults:Railing Fence. There should be several files there that have the Default Content for the profiles. I don't know exactly which file, so you will need to open up the files and figure it out. If you put a Vectorworks file using the same relative path in your User folder (or Workgroup Folder if you use workgroups), you should be able to put whatever profiles you want into the file and have them show up. You probably need to Restart VW after creating the new files in the User Folder to make them visible. It is recommended that you put your custom stuff in the User or Workgroup folder so that you don't have to recreate the information if you have to reinstall VW or if those files are updated in a future service pack. If you don't need the metric or imperial versions, you can either delete the appropriate files, or (my favorite) is to zip/compress the file and then delete it. That makes it easy to get back if you need it (as the compressed version is still in the right location) but not showing you unneeded default content.
-
Thumbnail pictures in reports / classes
Pat Stanford replied to halfcoupler's topic in General Discussion
Classes are supposed to be set based on the classes visible when the worksheet is recalculated. It is currently broken in VW2018. Works properly in VW2017. If you are really on VW2016, it should work. Try changing the class visibilities and recalculating the worksheet. -
Marionette Node Object Text Label only visible in 2D view
Pat Stanford replied to Benny Franke's topic in Marionette
Alternatively, and I don't know if this can be done in Marionette, would be to convert the object to Plane objects instead of Screen Plane objects. There is a Set Plane node in Marionette, but I don't have time to play with it right now. There are also a number of ObjectVariables that control screen plane / layer plane, but again I don't know if those are directly accessible through Marionette and don't have time to check right now. -
Render Viewport colors so they match my custom colors?
Pat Stanford replied to Bruce Kieffer's topic in Rendering
This is always going to be a hard thing to do. I don't think the dimension fill color is rendered, so it does not account for lighting in the scene. Even if you assigned the same color to the object and the text fill, they will not look alike. For flat drawings like you are showing, you might be able to use one of the older rendering modes like Unshaded Polygon that I don't think take the lighting into account and you might get a better match between your colors. -
Marionette Node Object Text Label only visible in 2D view
Pat Stanford replied to Benny Franke's topic in Marionette
Can you post a file with the Marionette object so we can take a look? -
Bruce, go into Vectorworks Preferences and then to the Interactive tab. on the left hand side is a box with sliders next to it for the Selection box size and the Snap box size. Are these set to be the same? The Selection box is the inside box. If you are closer to the end point that this setting, you will get the Interactive Scaling cursor (Diagonal double arrow) and when you click and drag the object will scale. The Snap box is the outside box. If you are further than the Selection distance, but closer than the Snap distance, you will get the two tiny red dots at the top left of the Snap box to tell you you are going to snap to an object. If you make the Selection box bigger, you will be able to move close to an object and get a move cursor (black cross, or open triangle) and be able to click and move the object without rescaling it. It you move closer to you are actually over the blue selection handle, the cursor will change to the Interactive Scaling cursor and you will be able to resize the object. For at least a little while I recommend that you increase the size of both the Selection and Scaling boxes and go into the Interactive Appearance settings and change the color, line thickness and most importantly the opacity of both boxes so you can see where they are and how they work. For me, a bigger Selection box works better as I don't have to be so fiddly about being exactly over the blue selection handle to be able to get the move or rescale option I want.
-
@Art Vis completely correct that it is about screen resolution. Here are some examples. I am basing this on a wide screen monitor (16:9) as it can be considered to be a 3:4:5 right triangle. A 30" monitor with 2K resolution: 30" diagonal = 24" horizontal 24"/2000 pixels = 0.012"/pixel = 12 mils = 83 pixels/inch. So the minimum individual pixel will be 12 mil. Anything with a line weight of 12 mils will show as 12 mil. Depending on the display driver algorithm, line thicknesses between 12 mil and 24 mil will either be scaled up to 24 mil or down to 12 mil. The problem is less at higher thicknesses, but two line thicknesses with less than a 12 mil difference in thickness might show as the same thickness. A 30" monitor with 4K resolution: 30" diagonal = 24" horizontal 24"/4000 pixels = 0.006" = 6 mil = 166 pixels/inch. This will provide a much smaller pixel size and therefore can show finer liner thicknesses and greater difference between line thicknesses. A 45" monitor with 4K resolution: 45" diagonal = 36" horizontal 36"/4000 pixels = 0.009" = 9 mil = 111 pixels/inch. So the larger monitor will have less ability to show differences in line weights because the pixels are larger. Now if you zoom, the line weights will scale proportionally. A line that you drew at 18 mil, when you are zoomed to 50% to be drawn perfectly would need to be drawn as 9 mil wide. This would work on the 45" 4K, but the 30" 4 K would have to draw it as either 6 mil or 12 mil. And the 30" 2K would have to display it as 12 mil (single pixel width). Conversely, as you zoom in 200%, an 18 mil line would need to be displayed as 36 mil. So this could be 3 pixels wide on the 30"2K, 6 pixels wide on the 30"4K and 4 pixels wide on the 45"4K. Until we get to screens giving 300 to 600 dpi resolution like we have in printers, you will never be able to have perfect reproduction of line weights/thicknesses on a display to exactly match a printer. And even when we have 600 dpi screen, someone will still complain about the 1.7 mil pixel dimensions are to much and why can't they see the difference between the 10mil and 11 mil line weights they are using in their drawing. ;-)
-
What calculation do you want to do? You should be able to do any normal calculation using a many field values as you want without needing to resort to scripting. So if the database starts in Row 3 and Area is in Column A and the Load Factor is in Column B, then you should be able to put a formula into the Column C database header of: =A3/B3 and get what you want. If this does not work, can you post a stripped down version of the file so we can try it?
-
Create and export custom Reports - Vectorscript or SDK?
Pat Stanford replied to Floyd's topic in Vectorscript
Developer.vectorworks.net Make sure you read the Vectorscript Language Guide as it has all the information on loops. The Vectorscript Function Reference and the Vectorscript Appendix (both also at the developer site, but also in the VWHelp:Script Reference folder in your Applications folder) are also required information. The Function Reference has sample code for most of the functions, but not a lot on how to combine them together. Since the Python implementation is just to call the Vectorscript functions, these are needed for Python also. -
Why does the snapping pallet work differently?
Pat Stanford replied to Tom Klaber's question in Wishlist - Feature and Content Requests
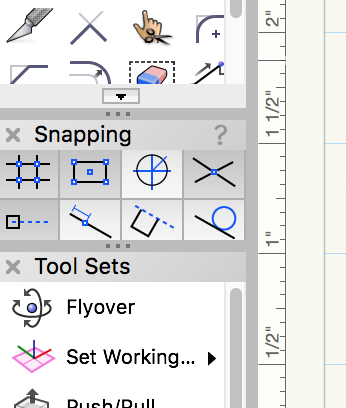
It is actually very similar to the other palettes. Drag the bottom right corner and you can change the width and height. Once you have it sized the way you like, you can snap it to the window or to the other palettes.
-
Turning Off Classes in Worksheet Images
Pat Stanford replied to Chris Busch's question in Troubleshooting
Based on another bug report, I think this is a bug. In VW2017, you could change class visibilities and Recalculate the worksheet and the image would respect the current class settings. In VW2018 it does not work. Hopefully it will be fixed in the next service pack. -
CREATE PATTERN OF STAVES FOR BARREL BUILDING
Pat Stanford replied to kenfrederickson's topic in General Discussion
Since the edges of the staves are straight, there are a few ways to do this. For the barrel, I would start in a Top or Top/Plan tool and then use the SPLIT tool to draw lines across the barrel to break it into the individual staves. Same for the lute, except I would "stand it on end" like the left photo and do the split from that view. Alternatively, you could make multiple copies of the original shapes and use an extrude shape (probably a rectangle) and the Subtract Solids and/or Intersect Solids commands to make the individual 3D staves. You can then probably use the 3D PowerPack, Unfold Surfaces command to get a flat pattern to use. -
The Vectorscript Appendix is your friend. ;-) This one might help also.
-
Possibly to import/export Instrument Data
Pat Stanford replied to MeTheMachine's topic in Python Scripting
@Sam JonesDo you want to hop in here. Sam Jones writes an add-on called AutoPlot Tools for Spotlight. I believe the original version included the ability to import and export data from lights. Hopefully he can help out here. Based on what you are asking, I think this project is bigger than you think. I would estimate multiple 10s of hours to script and debug if you were an experienced programmer. If you are trying to learn to program as well, I think you are probably in the multiple 100s of hours to get is right and include all of the debugging and error checking to make sure you don't overwrite objects of create duplicate objects. And that is only for the VW part. You probably have almost as much time on the Filemaker end as well. If you want to proceed, we will be glad to try and help, but the learning curve will be steep. Sorry. -
VW does not have a setting to have layers or classes not print automatically. You can set the visibility of layers and classes to invisible to get them to not show and therefore not print. You could probably create a saved view (of if not a simple script) that would need to be selected (run) before you print to accomplish what you are looking for.
-
VW 2018 Text is Stretched When Exported to PDF
Pat Stanford replied to LinetteOrigin's question in Troubleshooting
You might want to also check and make sure you don't have a corrupted font. Font Book on the Mac has an option to do this. -
It sounds like you have Use Application Window checked in the Window menu. This consolidates all of the drawings into tabs in a single window. Turn this off and you will have the old style multiple windows. I like the consolidated Application Window as it let's me move drawings and palettes at the same time instead of having to drag 10 different things. When used with the Multiple View Panes and the ability to Create Floating View Pane so you can put part of a drawing on a different monitor it works very well.
-
How to input criteria in spreadsheet row of worksheet
Pat Stanford replied to a topic in General Discussion
Most of the worksheet functions can take criteria as a parameter when they are in worksheet cells even though they don't need criteria when in a database header. =AREA in a database header might become =Area(((L='1-Floor') & (C='Red'))) when in a worksheet cell. Tell us more about what you are doing. Especially why you don't want to use a database and we might be able to give you better suggestions. -
Is VW 10 and 11.5 applescriptable
Pat Stanford replied to Michael Gilbert's topic in General Discussion
I am relatively certain they are, but as with current versions, about the only Apple scriptable command is Run Script. -
Nuno, I am relatively certain this is a bug. If you have a simple file that reliably demonstrates the problem, please file a bug report so the engineers will have a case to study to make the proper fix.