


Tamsin Slatter
-
Posts
1,891 -
Joined
-
Last visited
Content Type
Profiles
Forums
Events
Articles
Marionette
Store
Everything posted by Tamsin Slatter
-
No need for shame David. You produce some beautiful models.
-
Hi all Thanks for your kind comments Barkest and David S. We are very excited to be part of the Vectorworks family and are looking forward to working with you all in the UK. Just to clarify, the conference on 3rd October 2017 was originally being organised by Exertis, but following the transition, is now being run by the new Vectorworks office in the UK. If you would like to join us, please register here: https://www.eventbrite.co.uk/e/bim-and-digital-practices-tickets-36396951261 We are also running events at our Newbury office on 5th October 2017: Architects and Interior Designers: http://bit.ly/2gDsxcS Landscape Designers: http://bit.ly/2eJTIWK As David S mentioned, Vectorworks Inc has acquired one of its former resellers (Design Software Solutions Ltd), to form its first office outside the US. Vectorworks UK Ltd is a wholly owned subsidiary of Vectorworks, Inc and is now providing Vectorworks Service Select in the UK. Customers in the UK can continue to deal with their current chosen reseller.
-
 Wow Stephan, this is amazing! Can't wait.
 -
 Thanks for this amazing tool Stephan. A huge timesaver for interior scenes and will work really nicely for all Vectorworks users, but especially Interiorcad users. I love the Penguin classic covers too.
 -
 Hi Sarah What an excellent resource this is! Thank you so much for putting it together. It's something we're often asked for, and our customers will really appreciate this tool. Users just need to bear in mind that this will create a rectangular grid of points from the top left of the mesh's bounding box, to the bottom right. So, you may end up with points you don't need, and will have to remove those before creating the site model.
 -
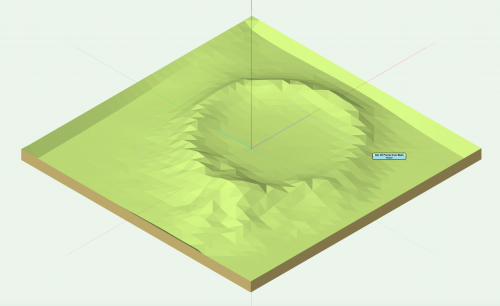
Hi Laura I have had a look at both files. The reason your site model will not export to ifc is because the design layer that contains it has been mapped to the wrong story on the IFC export dialog. To resolve the problem, choose File > Export IFC Project. Click Layer Mapping. Move Design Layer-1 to the story named Site. It will not export if it is mapped to any other story. Hope that helps. Good luck. Tamsin
-
My journey thru Marionette
Tamsin Slatter replied to Luis M Ruiz's topic in Resource Share - Marionette
Thanks for this great resource Luis! Can't wait to get stuck in. Me and my team are fascinated by the possibilities of Marionette. It's great to see the ideas dawning on our customers' faces too when we show it to them. -
DTM modifer calculating as CUT instead of FILL volume
Tamsin Slatter replied to Patrick Fritsch's topic in Site Design
Are they enclosed within a Grade Limit object? -
You're welcome?I'm glad you got it sorted. But you should not need to to Project Screen Objects if the Viewport is set to Top/Plan... Is it possible your Viewport was in a Top view instead of a Top/Plan view? Top view is a 3D view from the top, and therefore would not display the 2D part of the stake. If you change it to Top/Plan, you should see the 2D part of the stakes and also the 2D settings that you have chosen for your Site Model.
-
Hi Neil Stake Objects are hybrid, so they have a 2D display and a 3D element. Click Stake Tool Preferences on the tool bar. Change the mode of the stake to Site Modifier, and set it to change the Proposed model. Choose also what you would like displayed in the Label. Click OK, then place your stakes. Use the Z value to set the desired elevation. In Top/Plan, this is what you'll see displayed by the Stake. No need to duplicate them. Hope that helps.
-
Place Plant tool and get totals query in worksheet?
Tamsin Slatter replied to unearthed's topic in Site Design
Use Tools > Reports > Choose Schedule. Then select Plant List Simple (for example). This will give you a list of all the plant objects present in the drawing. For more information on creating plant schedules, we have a couple of videos on this page that you might find useful: http://www.vectorworks-training.co.uk/buy-vectorworks/training-for-design-vectorworks-training-gifts/ -
You're welcome.
-
The plant has massing turned on. This hides everything but the rearmost polygon within the symbol. Before placing the plants, click the Plant Tool Preferences button on the tool bar. Click the Render tab and then uncheck Mass Plants. Then place your plants.
-
I second what Jim says, but you will also need to make sure that your Plant tags are being inserted in the Plants-Component-Tags class. The Plant tool has changed a fair bit now that you have upgraded... you might find the following blog post useful to help you migrate: http://www.vectorworks-training.co.uk/blog/plant-tool-migration-in-vectorworks-2013/ Hope that helps T
-
However, do be aware that if your old licence has been upgraded, it has effectively been replaced by the upgraded licence and cannot be sold on.
-
Hi Jeremy You need to do this through the UK distributor - Computers Unlimited in the UK. Best regards Tamsin
-
Hi Jeremy Plants have changed significantly since 2010. The Plant tool has had a makeover. If you would like a demonstration, please let us know. All the best
-
Displaying existing and proposed site sections overlaid.
Tamsin Slatter replied to Neil Barman's topic in Architecture
Neil Draw a Polyline (with the Polyline tool) across the Top/Plan view of the Site Model. Choose AEC > Terrain > Site Model Section. Complete the dialog, choosing the colours you would like for each profile and how often you want data annotations etc. Click OK. VW will draw a 2D section through the site, showing the existing and proposed site profiles. This is not a live section, nor is it a viewport. So, if the site updates, you will need to delete it and repeat the process to create a new one. Hope that helps -
Renderworks very slow, screen goes black for before rendering . . .
Tamsin Slatter replied to Brooklyn's topic in Rendering
Sounds like you have turned on Indirect Lighting in the View>Lighting>Lighting Options. Indirect lighting takes longer to calculate, but is work it in the end! It could also be turned on by using a Renderworks Style. -
Select the Viewport and click Advanced Properties. Change the Extents to "Limited by Section Line Length". Hope that helps...
-
Trouble moving license to new machine
Tamsin Slatter replied to Brookems's topic in General Discussion
Hi Brooke Sorry, but there is nothing you can do until Nemetschek Vectorworks Tech Support open up on Monday. They will need to free up a further activation for you. -
Design Layers are transparent - in that you CAN see objects on layers below. You are right that changing the layer transparency will affect the objects on the transparent layer, which in this case sounds undesirable. Check the following: View > Layer Options?ensure that they are set to Show/Snap Others (or Show Others) Now edit the layer and check it's layer scale. It should be the same scale as the layer on which your photograph is stored. Tools > Organisation?make sure the layer on which you wish to draw is above the layer with the image. That means it will be higher in the list and will have a lower stacking order number. If the layer continues to obscure the layer below, I suspect there may be a large filled object on it?
-
Excellent news! Just check the touching modifiers - that can catch you out.
-
Forgive me if you this is an obvious question... have you created a Grade Limits modifier around these changes? I wonder if that is the cause of the problems you are seeing there? It is important that all modifiers are enclosed within a Grade Limits object (each Grade Limit can enclosed multiple modifiers). Also, ensure that modifiers are not touching - if they touch, one set of elevations will be ignored. Hope that helps you.
-
Ensure you have a Grade Limit (previously called a Boundary and before that at Fence) object around the pad?
