Scott C. Parker
-
Posts
498 -
Joined
-
Last visited
Content Type
Profiles
Forums
Events
Articles
Marionette
Store
Everything posted by Scott C. Parker
-
Did you do the delete thing and insert into a design layer process I mentioned? I'm bug hunting and if this process works, it's helpful to know.
-
Lain, Would you please post a test file so we can follow the steps you mention?
-
Is this in a sheet layer or design layer? If you started in a sheet layer... Delete all summary keys. Insert a summary key in a design layer. If the text looks like line, adjust the text via the three text formatting buttons. Once placed in the design layer and the text is visible, placing new summary keys in sheet layers should work. Please let me know how this goes. If this doesn't work, please share with me a file. Thanks, Scott
-

Data visualisations in Equipment Summary Key
Scott C. Parker replied to Mike Wright's topic in Entertainment
This is what I was going to play with. It should work. -
Braceworks Calculation report PDF low quality
Scott C. Parker replied to Mathijs van Ommen's topic in Braceworks
You might have used the page setup or print setup settings in the template file that carried over with the new file. -
Data visualisations in Equipment Summary Key
Scott C. Parker replied to Mike Wright's topic in Entertainment
Hi @Wesley Burrows I've not played with this. Would you please post a test file so we can explore? Thanks, Sc ott -
Have you played with using the slice/split tool instead of the aisle tool to separate the seating into separate sections? It might serve you better. Can you share a file for testing? Just the seating layer.
-
Please post a sample file showing how you used the User Field or a custom record mentioned above. It'll help us explain how to get where you need to be.
-
How did you build your data tag? It sounds like it might not be associated with the LED screen. I find the easiest way is first to select the object to which you wish to attach the data tag and then use the "create data tag style" command under the tools menu. This makes sure the data tag will be associated with my object. If I created my data tag for a TV, it won't work with an LED screen. With that said, you can use the small triangle of the data tag to "associate" the data tag to the LED screen. Perhaps that will fix the issue. Do you have a sample file you can share? Como você construiu sua etiqueta de dados? Parece que ela pode não estar associada à tela LED. Eu acho que a maneira mais fácil é primeiro selecionar o objeto ao qual você deseja anexar a etiqueta de dados e depois usar o comando "criar estilo de etiqueta de dados" no menu de ferramentas. Isso garante que a etiqueta de dados estará associada ao meu objeto. Se eu criar minha etiqueta de dados para uma TV, ela não funcionará com uma tela LED. Dito isso, você pode usar o pequeno triângulo da etiqueta de dados para "associar" a etiqueta de dados à tela LED. Talvez isso resolva o problema. Você tem um arquivo de exemplo que pode compartilhar?
-
@Tom Lightbody Could you share a small file for testing please?
-
I shared this one that might be useful to play with. Though, it's not linked to layer height.
-
You'll need to turn off Summarize for that column. Then, you'll need to use other columns to force sorting in the order you wish to have the info displayed.
-
Braceworks Calculation report PDF low quality
Scott C. Parker replied to Mathijs van Ommen's topic in Braceworks
Can you provide a sample file? My test looks sharp. -
Create steelflex slings from existing slings in the library
Scott C. Parker replied to ldenambride's topic in Entertainment
Hi @Martijn Wingelaar, If you can point us to incorrect symbols and the supporting paperwork from manufacturers, we're all for making needed corrections. These would be counted as bugs and would be added to the list of needed fixes as VW continues to be developed. -
Equipment Summary / Compare to inventory not displaying
Scott C. Parker replied to tspilman's topic in Entertainment
@jkirchhofer Thanks for looking into this. We are working on solutions, but the timeline will likely not make either of us happy in the short term. -
Booms that just work when you make schematics?
Scott C. Parker replied to Tom Lightbody's topic in Entertainment
We are working on improving the schematic view workflow to deal with many of these issues. It's not you, it's us. For now, the best workflow I've seen is seen in @markdd's video on YouTube. Search YouTube for Mark Doubleday Schematic Views and see if his workflow works for you. -
@Sam Joneshas a script that places all symbols in a file into a design layer, along with the symbol name.
-
@Alex Keen You may need to clear your local RM cache file. Refreshing the RM doesn't always do this. Delete the RM Cache folder and then refresh the RM and it'll pull down a complete set of updated RM files. Win: C:\Users\username\AppData\Roaming\Nemetschek\Vectorworks RMCache\rm2024 Mac: /Users/username/Library/Application Support/Vectorworks RMCache/rm2024 Your file location might differ.
-
Cable paths are not obtaining the names of the objects they are snapping to yet. Here's what I do: Set the auto numbering to match what you're snapping to before placing the paths. For example, if I'm snapping to my truss runs 1-6, I'll set auto number with a prefix of Truss- with the first number matching the first/next truss to be snapped and set the suffix to -Path. Then place paths in the order matching the truss clicks. This results in: Truss-1-Path Truss-2-Path Truss-3-Path You can also use the spotlight numbering tool to number after the fact.
-
This was fixed in Update 4. What build are you working with?
-
PS, here's the file back with my changes.Default Classes.vwx
-
Have you played with the custom class settings in the spotlight preferences dialog? You can choose any field shown in the OIP for a light for the unit class. Here's a video with two methods for changing class names for symbols, which will help you build a custom library with the needed classes. It might be easiest to use the instrument type for the classes which removes the need to do the custom record editing I show. LightingUnitClasses.mp4
-
Data Viz in the Equipment Summary Key
Scott C. Parker replied to Scott C. Parker's topic in Entertainment
Hi Tom, I confess, I don't use the Graphic legends, so I don't know. -
@LeeElston I don't know why placing the data tag as an annotation in a viewport strips it of its color. I've asked the tech support team and await a reply. However, if you place the data tags in your design layer, the colors show in the viewport.
-
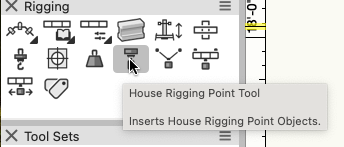
Have you tried the House Rigging Point tool?