Matt Panzer
-
Posts
3,328 -
Joined
-
Last visited
Content Type
Profiles
Forums
Events
Articles
Marionette
Store
Everything posted by Matt Panzer
-

Plug-in objects fail to display properly in 2D plan view
Matt Panzer replied to mdawson69's topic in General Discussion
You're welcome! I'm glad you got them showing now. -Matt -
Plug-in objects fail to display properly in 2D plan view
Matt Panzer replied to mdawson69's topic in General Discussion
The First thing I would check is the class visibilitys in your file. I’m thinking the updated plug-ins may’ve added some additional default classes. If that’s not the case, can you attach a small file showing the issue? -
Vectorworks Error Message (Symbols)
Matt Panzer replied to Ryan Edwards's question in Troubleshooting
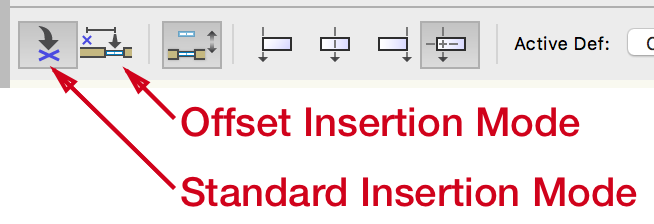
It sounds like the Symbol Insertion tool is set to Offset Insertion mode. Switch it to Standard Insertion mode and all should be well.
-
I believe this is the full list: Bath-Shower Cabinet Base Cabinet Utility Cabinet Wall Campanile Column Comm Device Compartment Sink Desk Door Elevator Escalator Fireplace Grab Bar HVAC Damper HVAC Diffuser HVAC Elbow Duct HVAC Flex Duct HVAC Outlet HVAC Splitter HVAC Straight Duct HVAC Transition HVAC Vertical Duct HVAC Vertical Elbow Incandescent Fixture Pilaster Ramp Receptacle Shelving Unit Switch Tables and Chairs Toilet Stall Window Workstation Counter Workstation Overhead Workstation Panel Workstation Pedestal
-
Slab objects are also good for creating flat roofs. The Slab Drainage feature allows drains to be placed and will create low pitched slopes to them:
-
Check the Advanced Properties of the Viewport and make sure the "Adjust Flipped Text" option is selected there. Viewports have control over this setting independent from the document preference.
-
Very simple: .tab files allowed for text import
Matt Panzer replied to SamIWas's question in Wishlist - Feature and Content Requests
You're welcome, Gerard. PS: The problem with this old dog is not learning new tricks, it's remembering them a week later. ;-) -
Very simple: .tab files allowed for text import
Matt Panzer replied to SamIWas's question in Wishlist - Feature and Content Requests
Mac OS also has a rename feature. Select the files, right-click on one, and choose the Rename Items command. You can then replace ".tab" with ".txt" for all of the files at once. -
Hi Bruce, You're right. I cannot think of a better solution than you've done.
-
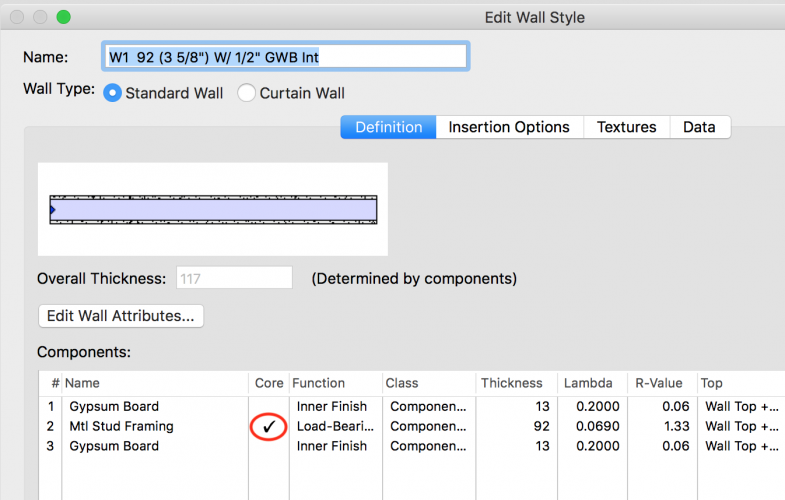
Hi Jim, The first component (Gypsum Board) in the wall style was selected as the Core. Change the core to Mtl Stud Framing and they should join properly. Was this wall style included in a template that shipped with Vectorworks, or did you pull from default content (via the Resource Manager or Wall tool)? I checked our default content and a couple of templates and they are correct. If you can find the offending wall style in any of these places, please let me know so we can correct it. If you cannot, maybe the setting was accidentally changed?
-
Marvin Windows in the Vectorworks Library
Matt Panzer replied to Dick Jenkins's topic in Architecture
This was recently clarified in the help for an upcoming service pack. -
Marvin Windows in the Vectorworks Library
Matt Panzer replied to Dick Jenkins's topic in Architecture
Hi Dick, This post from another thread should answer your question: -
You're welcome, Bruce! A slab can have one tapered component. The tapered component will taper its top surface as required to create slopes for slab drainage (eg: rigid insulation). Everything below the tapered component will remain level, everything above it will slope along along its top surface. If no tapered component exists in the slab, all components will slope for the drainage.
-
First, make sure the slab style has no tapered components. With the Slab Drainage Tool: Add a drain at the two corners to be the lower side of the slab. Connect the two drains. Move the control points for the valleys (that are closest to the high side of the slab) to the corners to be the highest side. Edit the two valleys and use the "Define by Elevation" option with an elevation of 1". Voilla! 🙂 ScreenFlow.mp4
- 19 replies
-
- 11
-

-
A trick I often use is to create an "empty" sheet layer viewport (with no layers visible), set the scale, then place my detail in its annotations. If needed, you can make a symbol of the detail (from within the annotations) and place it in other "empty" viewports. The symbols can be copied or referenced between files and placed in more "empty" viewports as needed. The nice thing about this approach is that you don't need to worry about creating any design layers for this.
-
Hi Jim, Can you send me a file with the offending walls?
-
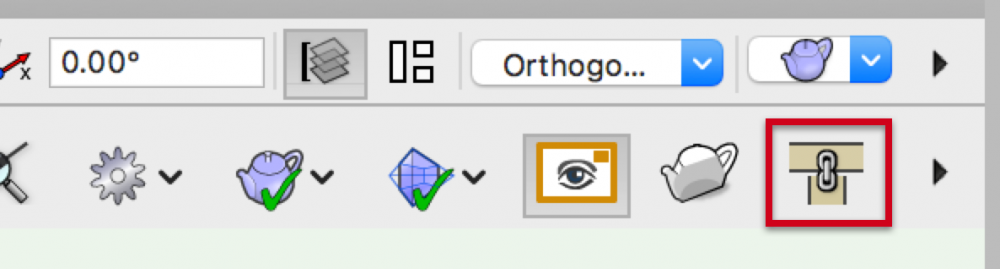
It looks to me like the wall auto-joining preference is on (which is the default). This preference will auto-join walls when you drag the end of one over another. Try turning off that preference and see if it helps. The quick-pref toggle button looks like this:
-
Hi Mike, The vertical edge of the tile is a slab modifier. Modifiers do not associate with slab edges and remain in their position when the slab boundary changes. The only way to fix this is to right-click on the slab and choose the "Edit Modifiers" contextual command. If you have the "show others while in groups" pref on, you will be able to see the slab object so you can move the modifier objects into their new position. The drainage can be edited in the same way as the modifiers by right-clicking on the slab and choose the "Edit Drainage" contextual command. However, you must be in op/Plan view to edit the drainage.
-
OK, thanks. Good to hear this isn't a common issue. In any case, if the problem can be reproduced, there's a good chance it can be fixed.
-
Whoa! This is something I have not seen. Can you send (privately) a file that demonstrates this behavior?
-
The download should've had the PDF version of the file: Velux Modular Skylight Plug-in Installation.pdf I'll contact Velux about this and have them update this on their site. The custom size option was something they were looking into. Hopefully they will add this in a future update.
-
Thanks for the kind words, bc! Quite a bit of work went into that plug-in and I'm happy to see feedback on it! :-) Just to clarify, the plug-in was originally developed for Vectorworks 2014-2016. The only incompatibility with later versions of Vectorworks is that the plug-in doesn't know about the Slab Drainage feature (introduced in VW 2017). As for the lag in high detail: The high detail level has a lot of detail and can slow things down, but looks great in section. I recommend using medium detail until you're happy with the configuration and settings, then switch to high if needed for larger scale drawings. If anyone has any comments, bugs, or wishes on this, I'd love to hear them. While I'm no longer involved with the development of this plug-in, I'm happy to pass this feedback to those that are.
-
Door Style Mark
Matt Panzer replied to Tom Klaber's question in Wishlist - Feature and Content Requests
You still need to use the same method outlined above for Vectorworks 2018. Best regards, Matt -
Hi Zeno, Right. This only works with 2D poly added/clipped from a wall. Unfortunately, 3D geometry is not handled the same.
-
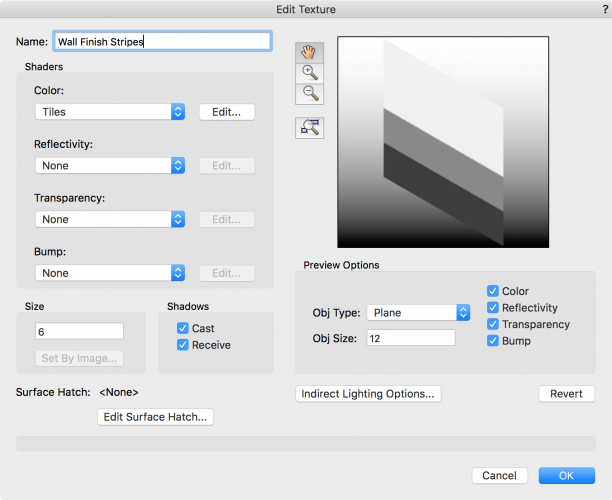
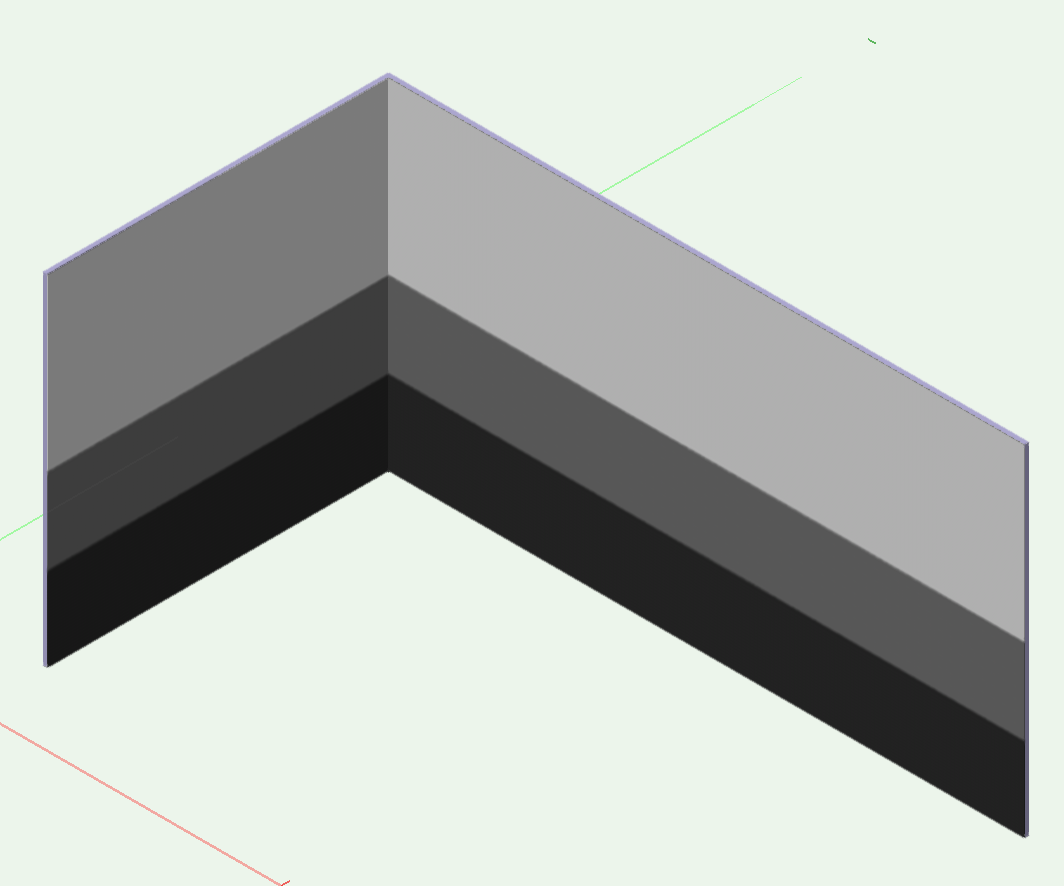
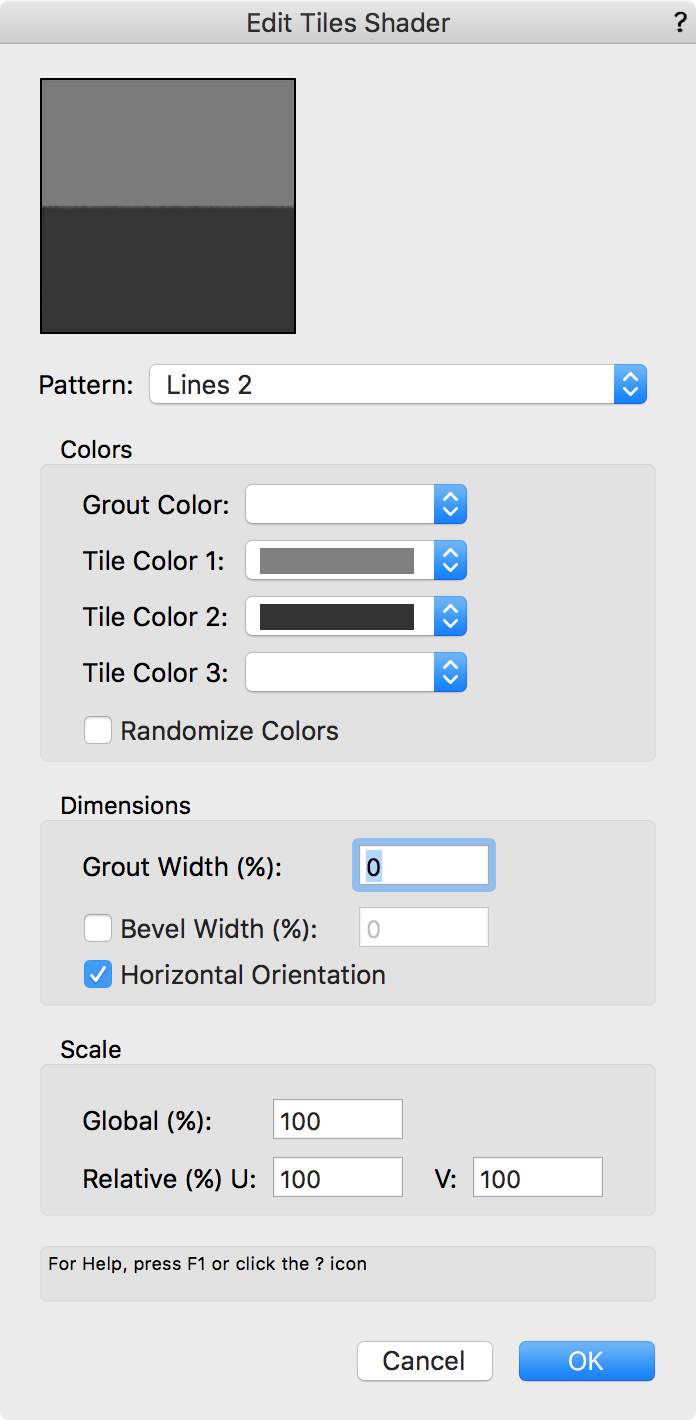
Here's one more way using the "Lines 2" option in the Tile shader of the texture. Note that there is limited control over the size of the stripes, but it might be workable for some cases. Set Color to Tiles Set the Size as needed Edit the Tiles shader: Set the Grout With and Bevel Width to zero Set the colors as needed Striped Wall.vwx