-
Posts
587 -
Joined
-
Last visited
Content Type
Profiles
Forums
Events
Articles
Marionette
Store
Everything posted by Elite Exhibits
-
Lighting tutorial NOT related to Spotlight
Elite Exhibits replied to MGuilfoile's topic in General Discussion
MGuilfoile I find it easier to visualize in the VW_RW app, than to create a similar description. Peter -
Pat Thanks for the Script - I find that many VW_RW users have a workflow with what I refer to as work arounds vs the process of this example, changing preferences. Knowing that this simplicity (One line Script) exist would make VW_RW much easier to use. Added this Script to my ever growing selection. Peter Preference Toggles.pdf
-

Lighting tutorial NOT related to Spotlight
Elite Exhibits replied to MGuilfoile's topic in General Discussion
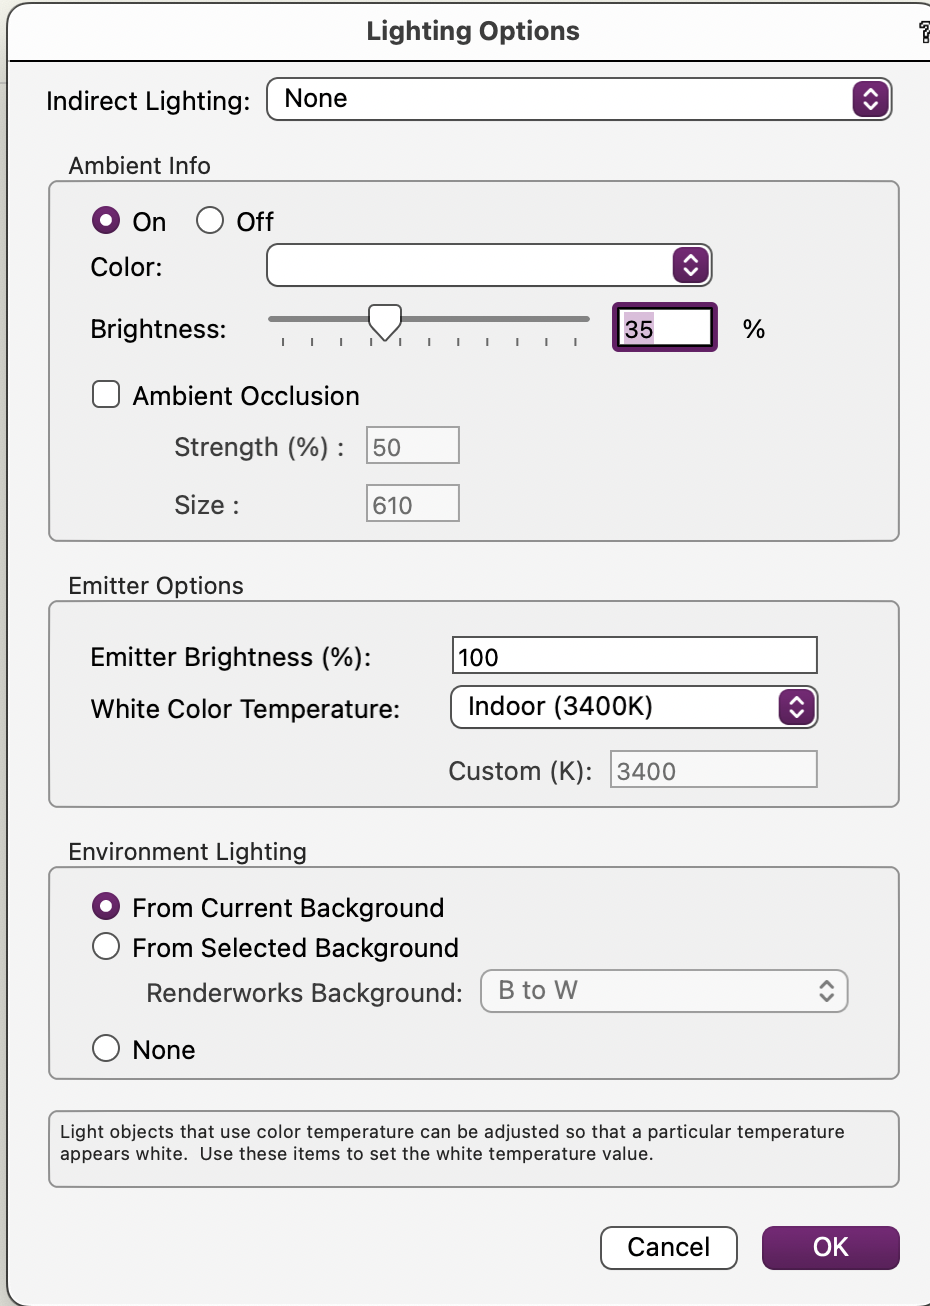
MGuilfoile 7. What is "emitter" ... In the attached (VW_RW 2020) - Open and render with RenderWorks (Custom with all set to low - Anti Alias turned off is faster tan Final RenderWorks) Select the Saved View 111 if the scene opens in Top / Plan) In the View / Set Lighting Options change the Emitter setting lower number and re render - change again higher number and re render - The three lights all change as they are set to use Emitter Brightness Peter 408346396_LightsEmitter.vwx -
Ian Lane While we are on the subject, I find the Text Field / Search ability in newer versions of VW_RW to be extremely smooth & efficient. Example: find & change a class or replace a texture through the OIP. As Ian-DO stated, the text indicator/caret is there waiting, vs the need to click the cursor first. This would be idea in all such locations for efficiency. Always where there is only one option for text. Please Check ... The Organization Palette Thanks Peter
-
Andy Thanks much (Also Pat) love the efficiency track on the TBB How To ... Peter
-

Sheet Layer Stacking Order in a Title Block or Worksheet ?
Elite Exhibits replied to Elite Exhibits's topic in Architecture
Nikolay Excellent - Thanks In the Organization Palette there are no Page Numbers - Only Stacking Order (Same thing ?) Your suggestion works Thanks again Peter -
Pat Looking to use (for a long time...) the Align Selected Mappings check box in the Object Info Palette. Used GOOGLE to search the Forum back to 2010 ... No such luck on how it actually works Created a test file with two textured extrudes and tried as many combinations in the Object Info Palette as I could think of. ¿ Align Selected Mappings check box appears to ALWAYS be greyed out - What is the magic combination (VW_RW Designer 2020) ? ¿ Anyone have any thoughts ? Peter
-
jolo2881 Start with your selected image. Higher resolution to start with gives a better texture, though there is a happy medium between size and rendering. Less complexity in the background of this image makes for an easier edit. Clean up this Image of your desired rail / fence / pattern in a pixel editor. Pixelmator Pro does a great job of removing the background. What you want to have left is the fence image with a mono color background. It could have the background in green screen or as an Alpha Channel. These options work for the textures Trans Shader - though I am not sure if one is better than the other - my example was a plain white background. Save this file as a PNG Create a texture in VW_RW …with above file as the Color / Image (Shader) Rotate the image (90 degree). Inside the Texture creation dialog / Edit Image Color panel (ie: so it appears on its side). You will use this same image for the Transparency / Image Mask (Shader) For the Transparency / Image Mask (Shader) select Reuse an Image from Another Resource / This Texture's Color and you have the same image for the Color & Trans Mask Select the Transparent Color option (Or the Alpha Channel if that is available in the image file ...) I usually push the Color Matching slider to the left / Mask Contrast to the right (You can always go back to these settings) Check the Anti Alias option, also Infinite repetitions of the image. Set the size to match the desired height of the fence. I applied this texture to an extrude of zero thickness, arbitrary length, and the desired height, then rotated the applied texture, on the extrude, 90 degrees. Do this in the Object Info Dialog / Render Tab. This is so the Texture Size is the same dimension as the height of the fence / height of the extrude, not the width. You are then able to alter the length of the fence by altering the extrusions length. (Infinite Repetitions of the Texture Image Shader) Altering the stop / start point is facilitated in the Object Info Dialog / Render Tab, with the Offset V number (Not the Offset H as you may think) Render in a RenderWorks Mode for the Trans Mask. If there are white edges on the rendered texture, clean up the image some more, or add additional black to cover this artifact. What you see in my example started as a screen shot of your FORUM posted image - cleaned up and used for the texture. A quick clean up trick with any symmetrical item (as your fence example photo is ...) Work hard and clean up half the image, then mirror that half to make the whole image. How you Render is How you Draw ... Peter 1453139110_FenceRailingImageShader.vwx
-

VW2023 is slicing my models in front of my eyes (shaded view)
Elite Exhibits replied to line-weight's question in Troubleshooting
FYI I have seen this for a long time ... will look for an example. (MacBook Pro) I believe that it appears when the view is rendered Open GL (Shaded) and a Symbol is edited (Maybe a Hybrid Symbol) on the drawing, NOT through the Resource Manager. Peter -
Tom W .. Many Thanks Peter
-
FYI Also had issues when we upgraded to VW_RW 2022 - It often went into automatic APPLY TO FACE mode when that was not desired. As we already mapped textures to different faces based on geometry & need (How you render, is How you draw...) Ended up deleting the tool from the workspace and that put an end to the problems / bugs. One Question left unanswered: What is the easiest way to change from objects with existing Face Override to Texture Overall ? (My original question : Posted June 14, 2022) Assistance is appreciated Peter
-
FYI Also had issues when we upgraded to VW_RW 2022 - It often went into automatic APPLY TO FACE mode when that was not desired. As we already mapped textures to different faces based on geometry & need (How you render, is How you draw...) Ended up deleting the tool from the workspace and that put an end to the problems / bugs. One Question left unanswered: What is the easiest way to change from objects with existing Face Override to Texture Overall ? Assistance is appreciated Peter
-

Sheet Number and Title in Title Block Layout
Elite Exhibits replied to Andriusv's topic in General Discussion
Pat or Andy Thanks - Great input from all - Followed this thread and I have what I need for a current drawing, except ... Have only the Sheet Number & Sheet Title in a Title Block based on a Title Block Style based on a Title Block edited from the Standard Title Blocks.vwx file. When I edit the Style from the Resource Manager, I am able to see the two linked items - I move them, except they do not move accordingly on the Sheet Layer. The text NAME for the Sheet Style is in RED in the Resource Manager - Does that indicate a ? Do I need to make it a Symbol ? - Insert it into a Symbol ? FYI - Set up the Title block on a single sheet layer till it looked as needed - then copy and paste onto other sheet layers. Location changed Sheet Layer to Sheet Layer Any assistance is appreciated Peter -
fuberator Is this a similar topic on Light Visibility ? Peter
-
jolo2881 I tend to find greater realism & simplicity with a masked Image - attached Peter Fence Rendered.pdf
-
Visibility script Hides the Light, not the geometry ... Try it ... Peter
-
Try a Custom Visibility VW Script - Hide Lights / and One to Show lights ... Peter
-

Experienced designer, very, very new to Vectorworks
Elite Exhibits replied to Iainy1961's topic in General Discussion
lainy1961 Possible option: Workflow for past projects I have done: In a new drawing, alter the Page Set Up to a grid like 3 pages x 3 pages. This gives you a large drawing area. Option #1 would be to set the drawing scale to fit this large drawing area. You are able to Zoom - Fit To Page and see this entire 3x3 grid (KB=4) In the middle make a rectangle around the center page - Go back to the Page Set Up and turn the Page Breaks off. (Now 3 pages x 3 pages looks like / zooms one large page) Convert this center page rectangle to a Guide (Modify/Guides/Make Guide) Guides are Locked by default The overall drawing area is the 3 pages x 3 pages, with the print area inside the middle page (ie: inside this Guide) Option #2 is to set the drawing scale to fit this middle page ie, scale to what you want to print on this one center page. Hide or Show this Guide in the Modify/Guide menu - If it is the only Guide, then one is able to Select this Guide (From the Modify / Guides Menu) then Zoom - Fit to Objects (KB=6) from any location on the drawing … Alternate is to make a Saved View of this center page / print location, and select it to see the middle page. (As we use Saved Views for rendered PDF output rather than Sheets / Viewports...) When you print, select Page 5 and only this middle page will print. (Or make a Sheet / Viewport to get the desired print.) Peter -

Changing stacking numbers on sheet layers
Elite Exhibits replied to Michelvh's question in Wishlist - Feature and Content Requests
Avoid some VW aggravation - Make sure that the Stacking Order "#" column is selected ... Peter -

Worksheet of Classes in a File
Elite Exhibits replied to Pat Stanford's topic in Resource Share - Vectorscript
Pat Please and Thank You email me a current postal address and I send you a token of my thanks for your efforts Peter -

Worksheet of Classes in a File
Elite Exhibits replied to Pat Stanford's topic in Resource Share - Vectorscript
Pat ¿ You are reference the database option ? Let Me Know ... Peter -

Worksheet of Classes in a File
Elite Exhibits replied to Pat Stanford's topic in Resource Share - Vectorscript
Pat I am most grateful Peter -

Worksheet of Classes in a File
Elite Exhibits replied to Pat Stanford's topic in Resource Share - Vectorscript
Pat Is there a version of the script that works in 2020 - 2023 ? Appreciated Peter


