Gadzooks
-
Posts
523 -
Joined
-
Last visited
Content Type
Profiles
Forums
Events
Articles
Marionette
Store
Everything posted by Gadzooks
-
I think both mac Mac and Windows OS fonts are already chosen for being 'easy on the eyes', and are bound in to their systems pretty tightly in all sorts of ways, so to consider changing will bring moderate benefits at best. And could set you back quite massively. If you google 'change OS font', or other variations, there's a variety of suggestions - mostly 'don't do it!'. I think you'd run the risk of untoward problems. Just searching for 'mono spaced' fonts, or similar key words, produces some quite good variations on your theme and it's plain that others are keen to adopt this. Try these as an example (this was just the first in the list of suggestions). https://wesbos.com/programming-fonts/
-
I think the doors on the one you'd downloaded look for placement purposes only - the door would need to be replaced with a correct choice. (so possibly unfair of me to describe as rubbish) You'll do better to draw you own styles then you'll have everything as you want.
-
You misunderstand The file you've downloaded is rubbish. It doesn't look like IKEA product and is composed of 3D objects without thickness. Yeh - bin in it and find better quality stuff if you want to start with existing assets. The door Ive shown you above is a single door from a file I downloaded ages ago. It has better detail and correct spec parts. They are out there if you look.
-
18mm
-
That doesn't even look like IKEA Have a better look - there's better ones out there. With much better detail...
-
Thats the only part of your post I saw! Its your call, so use what you can of others suggestions - bin as appropriate! Yes - but whatever suits your planned workflow. Probably better (in my view) to keep things together and class them down to the last bracket - if you are confident you and your colleagues can manage the visibilities. Symbols can be used within symbols if you wish
-

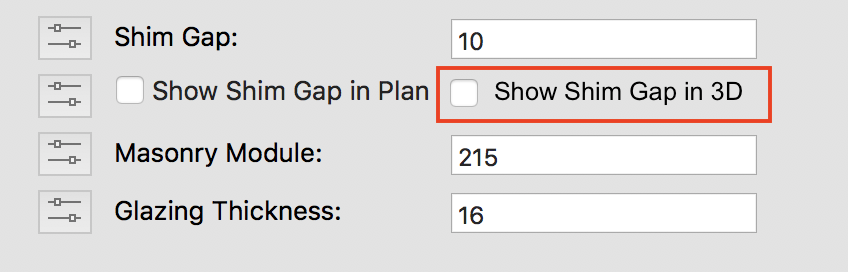
Filling shim gaps so they don't render as open cavities?
Gadzooks replied to Christiaan's question in Troubleshooting
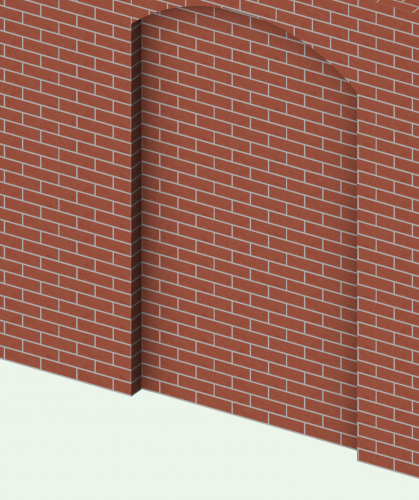
Bit nasty? NEVER A design management decision at the highest level!! "Its the silicone line Mr Client" (I like the bricks Christiaan) Edit: Maybe a Wishlist item? Default to unselected.
-
(Just a suggestion - You'll start to arrange things to suit your workflow later I'm sure) Create a drawing 'KitchenUnits'. Create and set out the individual units (as symbols) as and when you need them. Some organisation of these items in the file will help as a reference when you need to open the file directly (basically, don't just create the units and leave them in a heap on the design layer - spread them out (columns/rows?) and give them each a label). This file can then be directly 'seen' by Resource Manager without opening. You will need to place these sorts of drawings as a 'Workgroup Resource' so everyone can use them - Prob best to look that up and take advice about organising for the workgroup. (With the above accomplished) The individual resources (carcasses/plinths etc..) can now be selected and placed into your new design layouts. As an option (e.g.. with the IKEA types above) you could have the door colours change by 'classing' the colour options and choosing visibilities for presentation. Harder - and why would you want to? Picking from a limited number of standard options isn't too dificult. Of course. VW worksheets can be designed to pick up your data and list as a schedule with all types of information (costs, areas, materials etc..) Just be sure to create that info as you go, so plan the information you'll need to report and make sure its attached to each of the individual parts as you draw them. Going back over things is a real chore!!
-
Regretfully, VW has a cabinet tool that gets you part way there (like a lot of the VW tools its the last part that proves annoying). Thats why there's been an opportunity for InteriorCad to step in. I can't speak for their software, but others are pleased with it. You seem to be doing a reasonable job of adjusting things to suit your requirements. Of course - that is one of the most powerful attributes - creating your own libraries. Start work with a set of the most used cabinets drawn by yourself (lets face it, cabinets use many standard parts, its easy to very swiftly create a 'Standard Set' covering most often used layouts and then when there a need for a 'special' you can create and add to the Resource Manager for future use. Tip - Have a look on the web for kitchen parts heres one for IKEA https://3dwarehouse.sketchup.com/search/?q=ikea kitchen metod and the collections.. https://3dwarehouse.sketchup.com/search/?q=ikea kitchen metod&searchTab=collection
-
Would you believe it!! I should've gone the super simple obvious route first @joerg Although your file opens with 'updated' viewports, I just found that choosing to update is the simplest way to return the cursor cues etc.. Sometimes VW can be so irritating😂
-
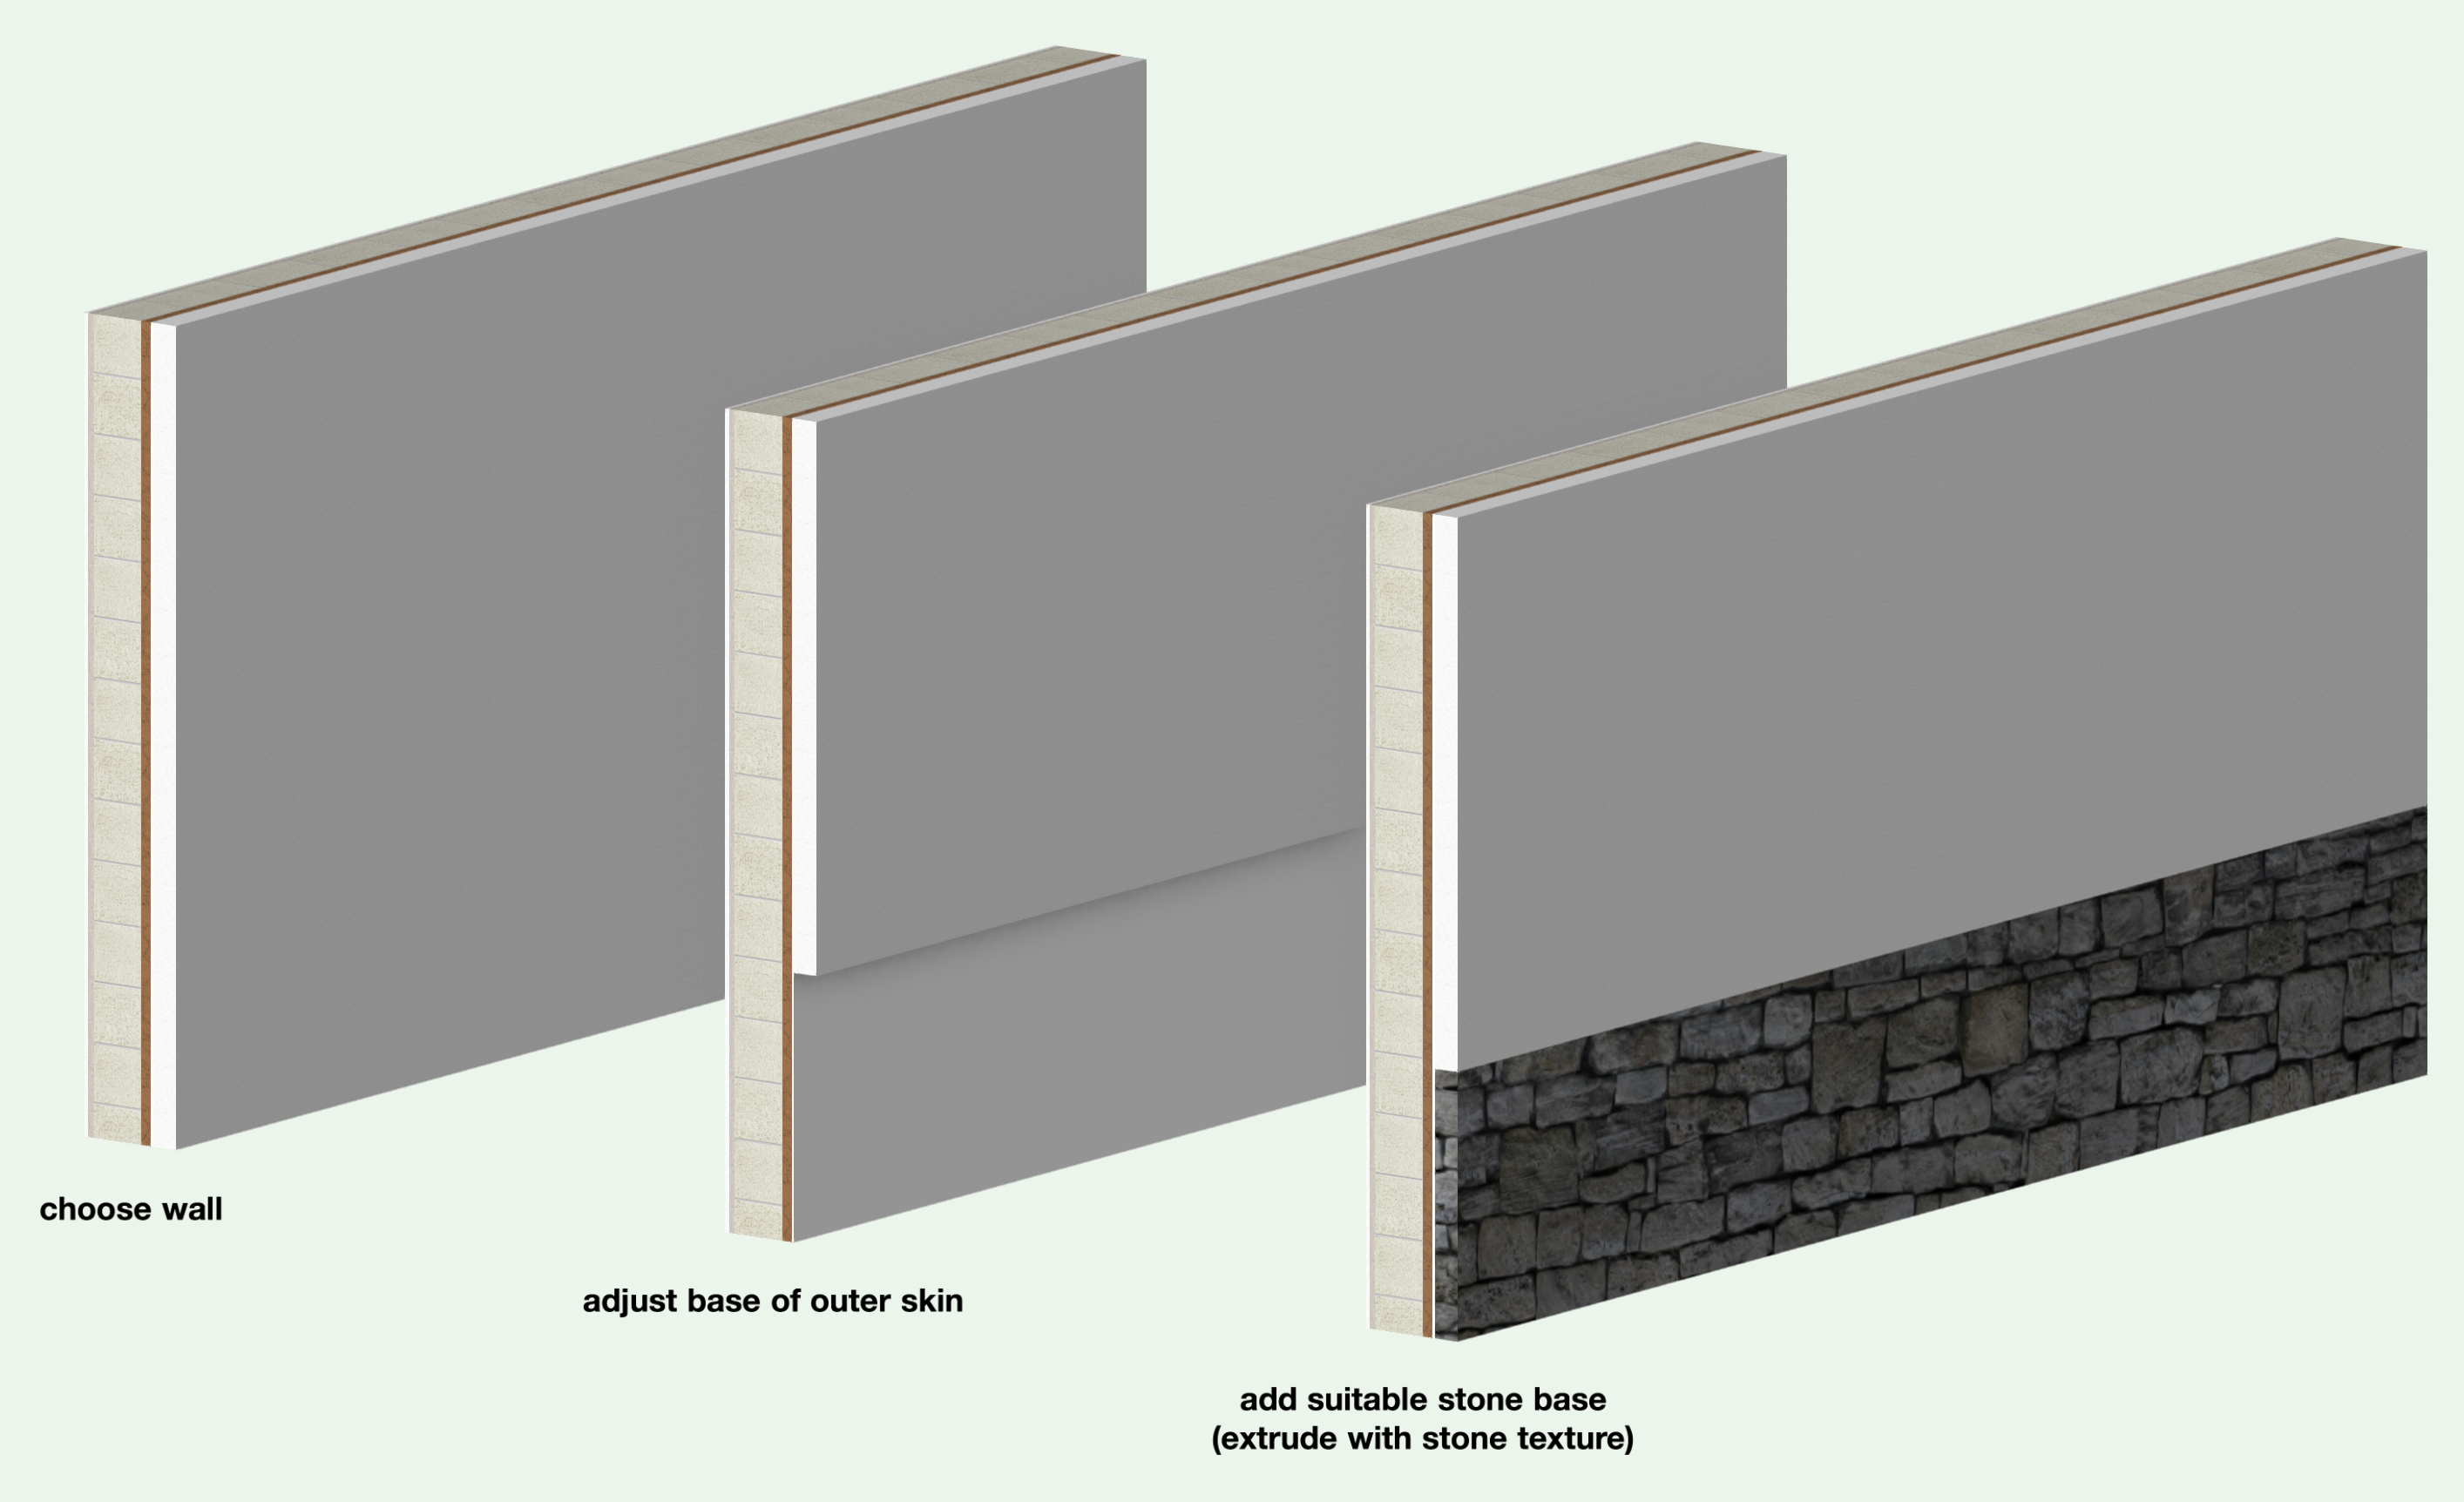
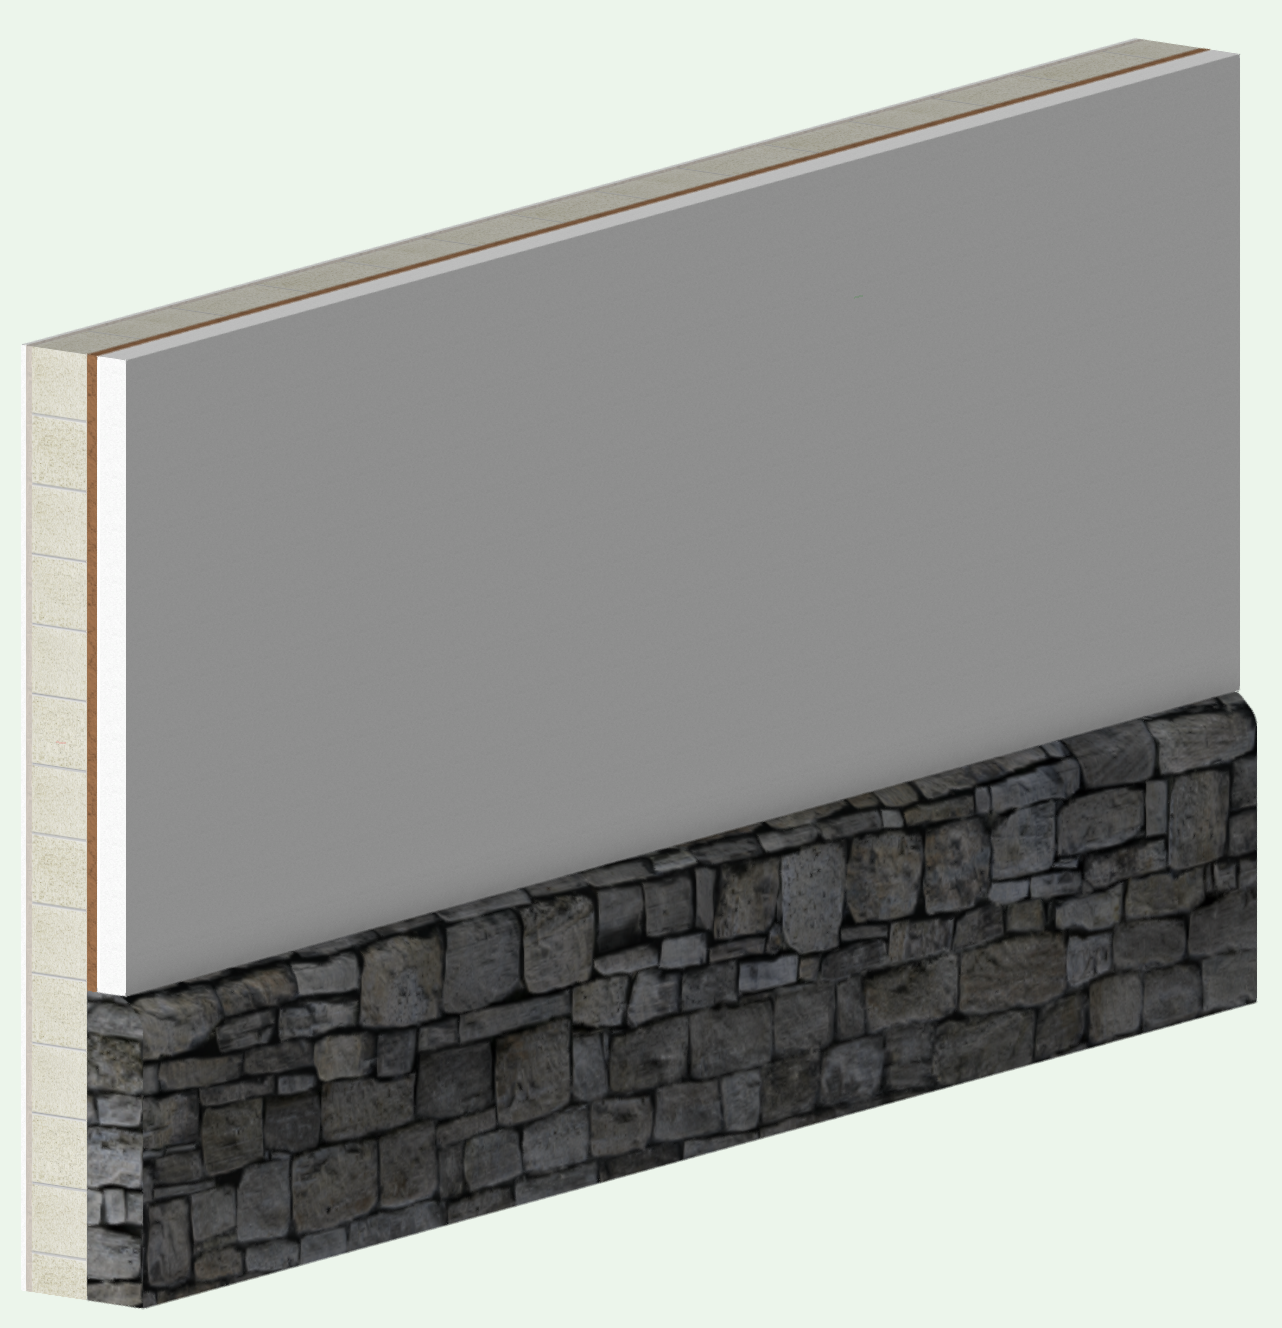
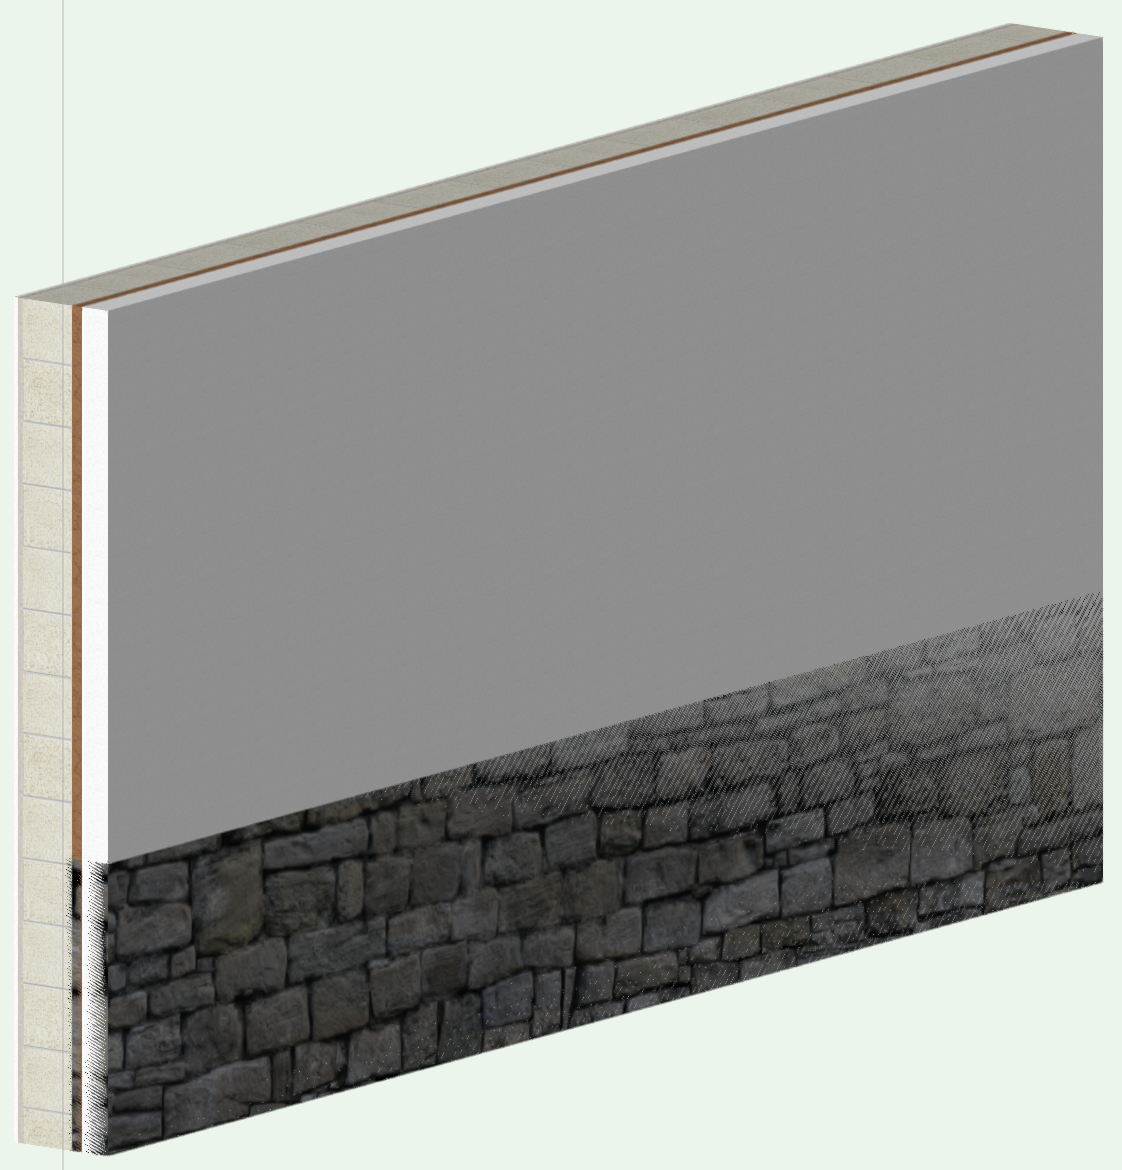
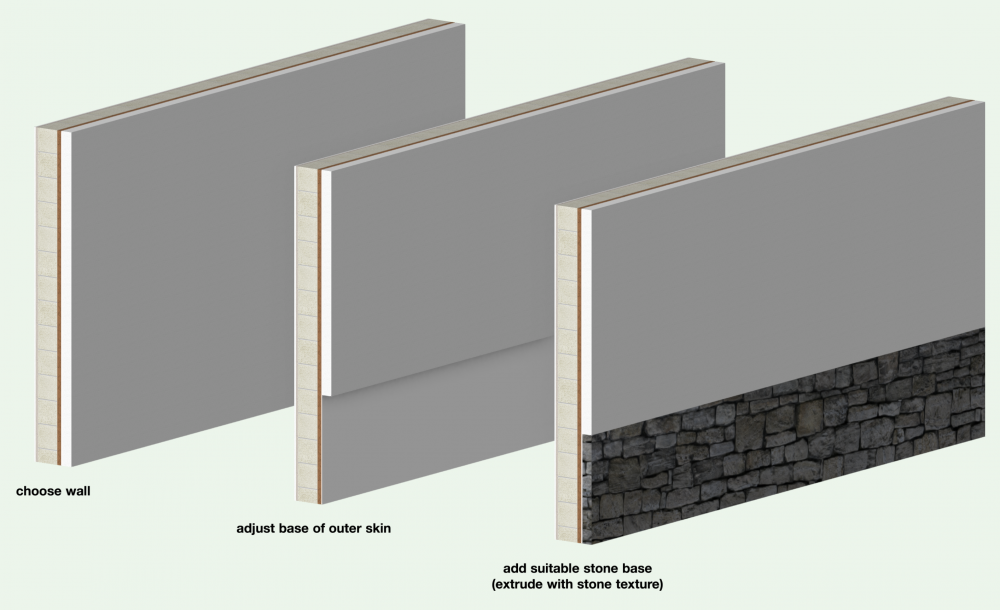
I reckon this can be 'fudged' depending on your requirements. @CipesDesign 's suggestion of a classing approach I think will work well - you just need to organise how the 'magic' will work in practice. For me, the way you want to use the end result determines the (VW) construction method. You could just replace the lower external area of the wall with 'in place' geometry (an extrusion with your chosen texture)... Often these feature wall bases are thicker rather than flush and this gives you the flexibility to provide this... This could work well for you if you need to section through these walls - unless you have huge lengths of wall like this? It will just take a bit of time applying the areas of additional geometry (don't even think of going the 'create wall projection' route!!). Alternatively, you could maybe take the 'cosmetic' approach. Using a wall with an extra external component, being the stone, set just to show proud of the wall above. If you're after this 'flush' finish you'll have to set the component thickness as slight as VW will allow. I experimented with less than 1mm (as you correctly say this influences the wall thickness overall.) VW will not accept zero as I thought it might (interesting, because you can 'extrude' a floor base with zero thickness in VW). However you can input (say) 0.1 - this is taken as 1mm and this is added to your wall thickness - which I believe you wanted to avoid. So try thinner - theres a 'sweet spot' where VW thinks it's so small it can't add it to your (declared) wall thickness, but renders OK. For me, this was 0.01. This was with 0.0001 Hope this helps.


- 3 replies
-
- 1
-

-
- walls
- wall components
- (and 2 more)
-
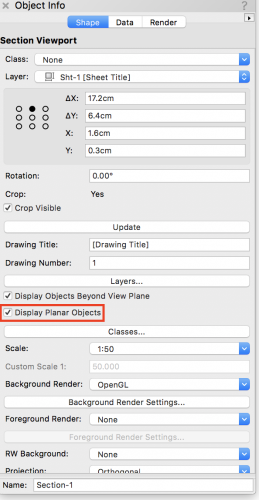
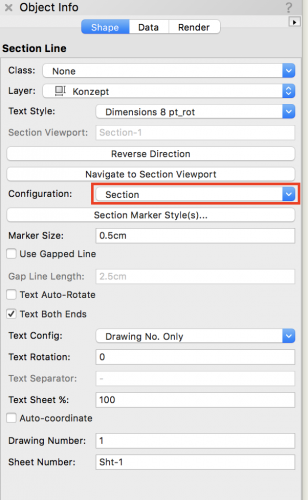
Strange, no-one has replied. This is the same for me still on SP4. Ive decided I can't trust updates from NNA atm. (and Ive taken to wearing a tin-foil helmet when using VW) The settings for your section viewport need changes...but I can't reason why.... See if you can reason... Set as above then update (stay with me!) Now deselect Display Planer Objects Update - and it seems fixed BUG? The other thing I found is your choice of section line appears to have the same effect. Open the file again (revert to saved) and look at the section line... If you change it to either of the other two options in the OIP your Viewport comes to life - and says alive to curser cues even when returned to your first option. BUG? Perhaps someone else can confirm (or point out I need to lay off the tin-foil helmet) Hope this helps (its been a long day)
-
Not what you want to hear @lgoodkind, but Ive tested this again and I can't get it to not work. Surely its just that symbol? Or maybe a group of symbols that you use a lot. (Although I know you said it was a stock VW Library issue) Edit - What version(s) are you guys running?
-
Oh - sorry thats not worked. I felt sure it was just the 'quirky at best' image function not displaying correctly and that by experimenting with the settings in cell format you would crack it. Seems its more problematic. You say its all symbols? Maybe others can offer advice if they've experienced similar problems. Happy to take a look at a sample worksheet if you think that may help.
-
Hi @Sade are you using a student copy? This will explain the (reasonable) terms Hope this helps. If this is not the case come back.
-
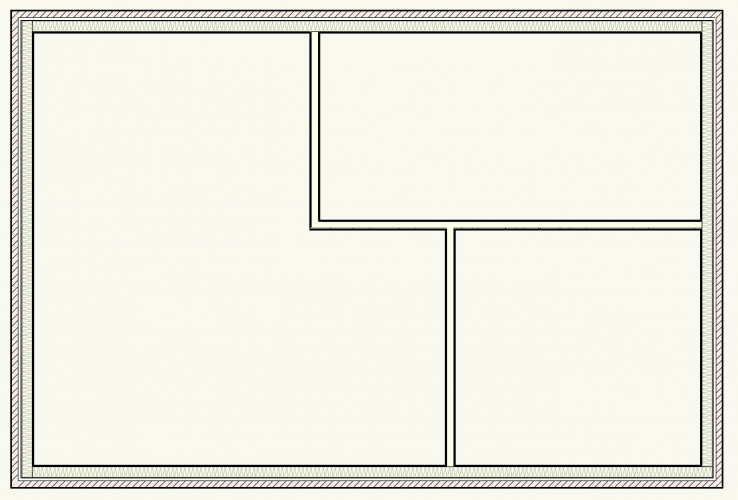
@Michael Gilbert VW has a 'Virtual Wall' as a choice in the 'Wall Styles'. Often a good way of 'sketching' out positions of walls. Replacing your chosen internal wall with virtual walls will show just the centre lines (which is as you say you want). The style of line can of course be altered by editing the Virtual Wall Type. You could even use a more informative line type of your own making. If you need to see both versions of these walls (which, no doubt you do) you could maybe class them appropriately and then choose to use the class visibilities to control what appears in different views/presentations. I assume you do not have 'Spaces'. If you do, you can vary (by choosing to make 'custom') the way the Gross and Net areas are calculated - by identifying which part of walls are used as the boundary. In your case you would choose internal line of external walls and the centreline of your internal walls. Hope that helps

- 1 reply
-
- 2
-
-
Yes tbh I did make that mistake first off, but it put me on the hunt for the solution I thought you'd done some time ago. Having found it I realised the difference. Listing locations for the duplicate objects may then report, in some cases, a huge list all in one cell. Difficult to control the output cell when there are multiple locations to report and therefore 'messy' I think. Pat, your option to create mini sheets for each location maybe solves nicely? Totally agree - So I still think your solution is far better, in that most design layouts have a finite number of locations - perhaps better still if there's floor by floor counts. (i.e. You're not going to populate a random 'unidentified' space with a variety of the items that need counting). So for the sheet to find objects first and then identify the space/locations (as your worksheet) seemed a better basis for an ongoing and reasonably simple solution for most situations. One additional feature might be to add a 'check calc' to flag up if items are counted but have no location found. (Stray symbol accidentally placed out of sight?) If the sheet is to be used for (say) FF&E then I'd add additional columns for each of the locations to simply calculate and flag under/over the stipulated requirements. (All design offices to have at least one extra coffee machine in LOC = ’close’ 😂) I think the kudos stays where it's deserved.
-
@DCarpenter - This may help you.. Open the VW file from @Pat Stanford and reconfigure for your options (then go back and give Pat a huge 👍)
-
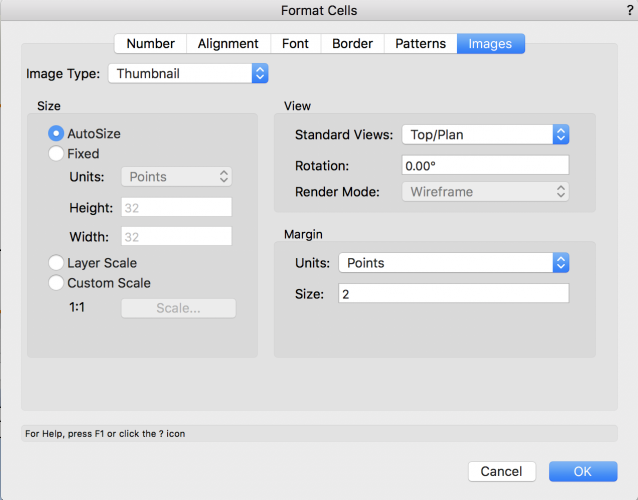
@lgoodkind - have you set the column format correctly? Playing with the options will maybe provide a better layout for the image you are hoping to show.

-
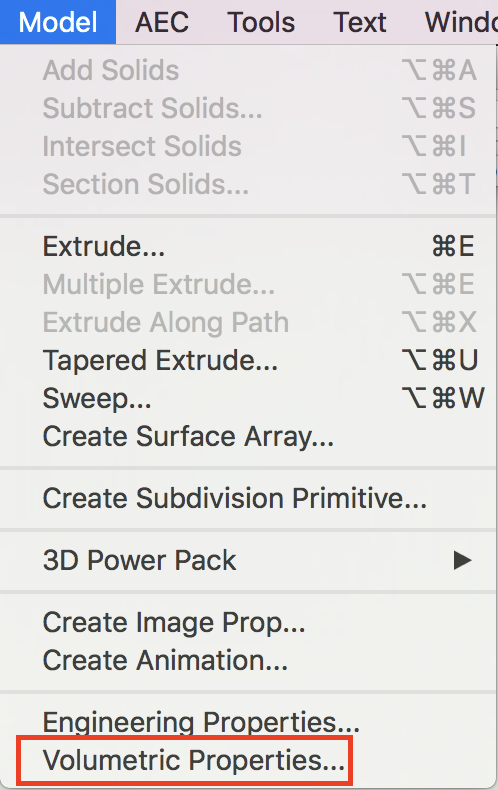
Calculating Cubic Feet from Extrusion or other Tool???
Gadzooks replied to CW2020's topic in General Discussion
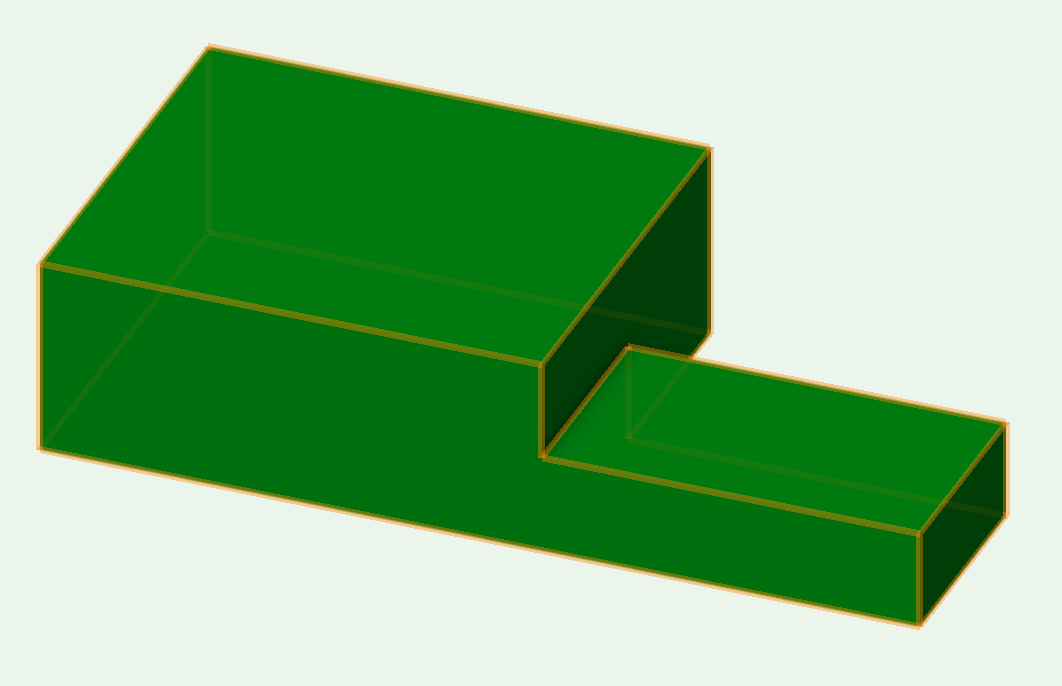
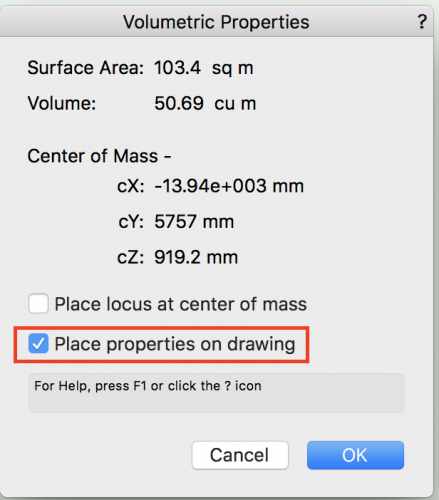
The Volumetric Properties tool can be useful for the odd time you need this information. You have your object.. The figures are displayed straight away - but you can choose to place these on the drawing This places a grouped text block - I generally remove the centre of mass info for simple drawings, but its been really useful for an on going design project where I need to know the the c of m position on concrete worktops where I have odd areas for hobs and designed-in underside void areas to reduce overall weight etc. For this, choose also to place locus at centre of mass For a drawing with many objects, @michaelk's suggestion is a better route I think.This would allow you to develop the information to a more comprehensive output.


-
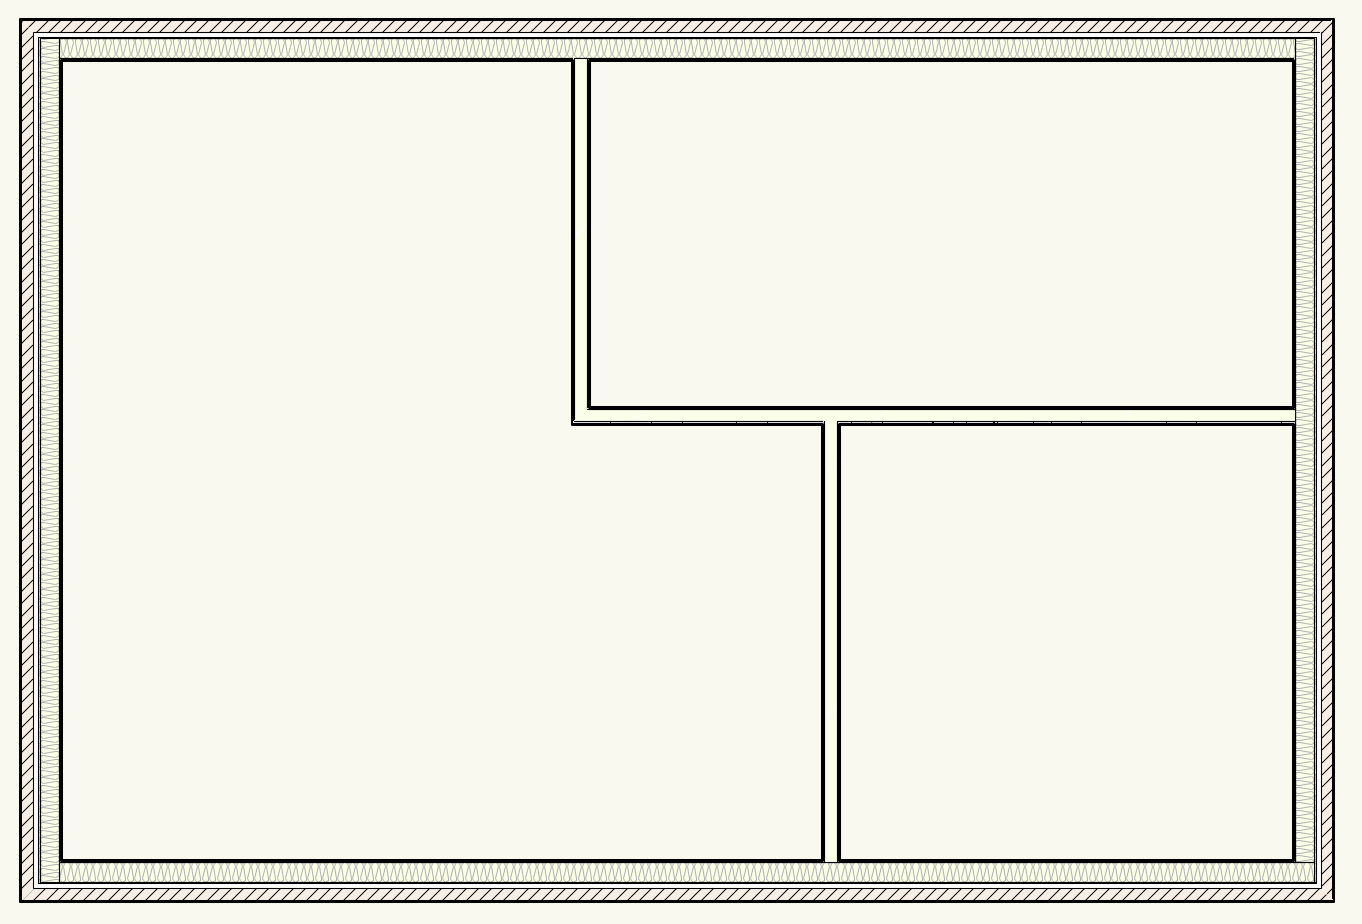
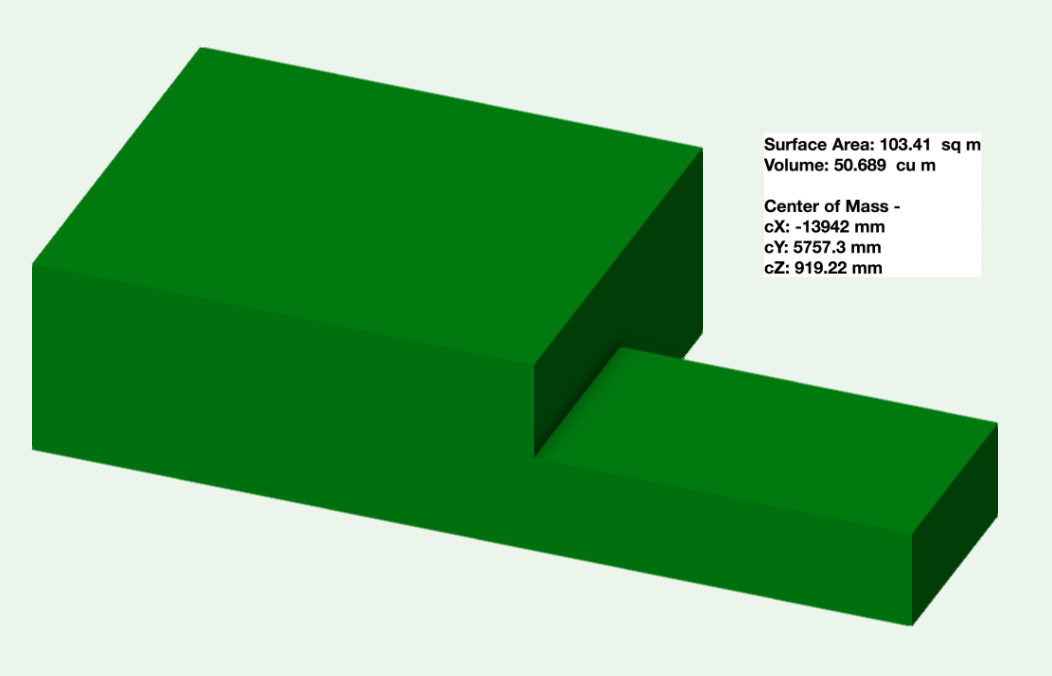
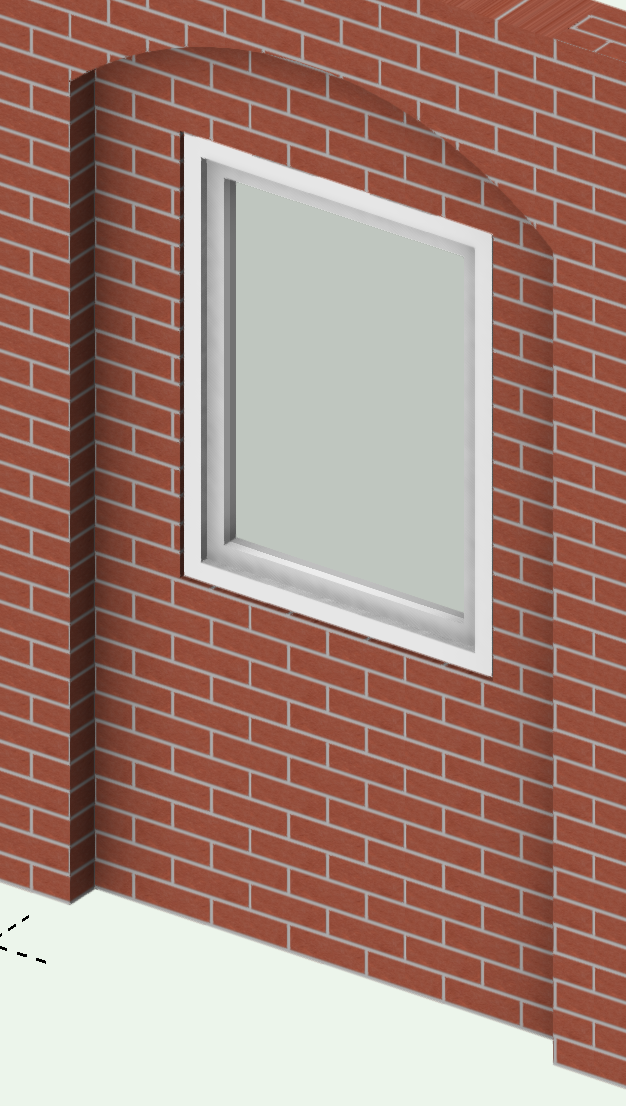
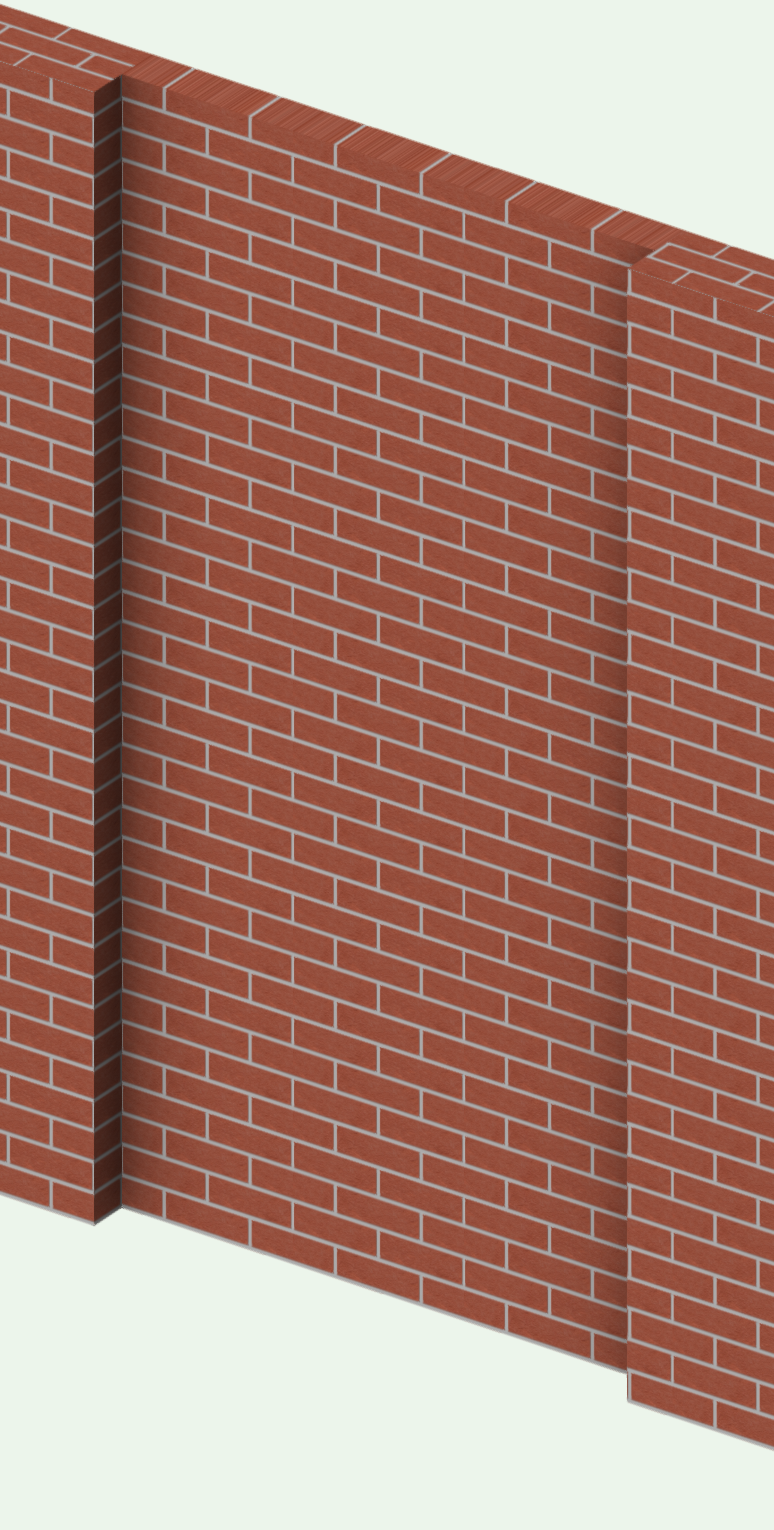
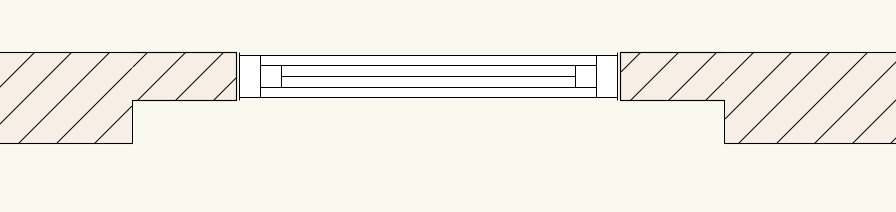
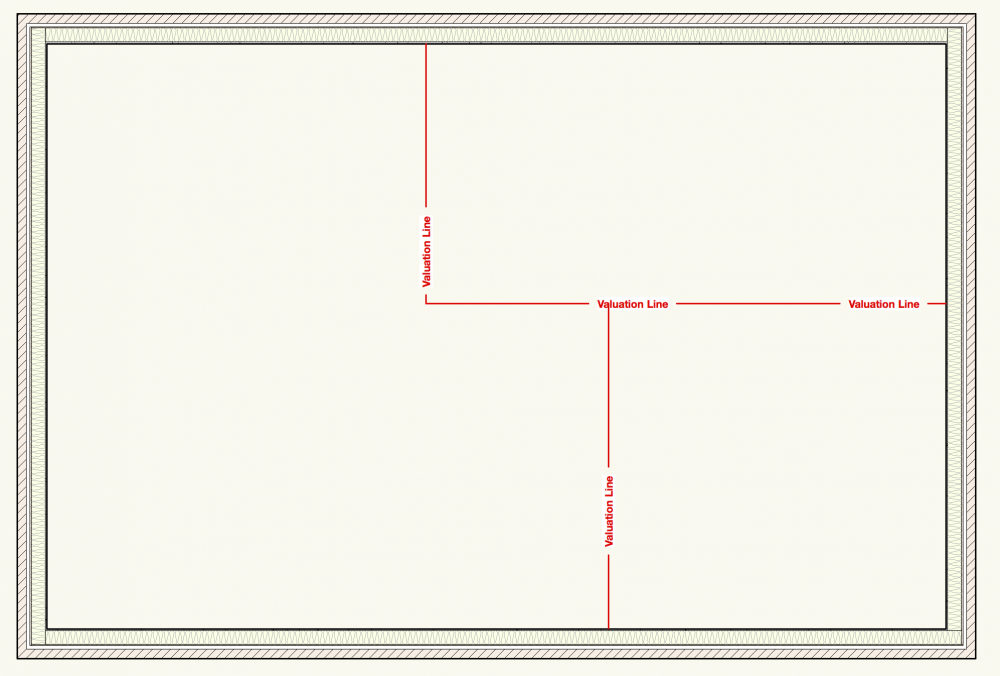
This is quite common with VW. Your expectation that the recessed area has now recognised it has less depth (and therefore will work with windows and doors) than wall parts either side is not carried through by the software. This is one of those areas where we users moan about the way the boffins create these features. It seems (and this happens over and over) they don't 'see the thing through'. They devised a way to create recesses and seem not to have bothered to make the feature a real 'winner'. I have a way around this for you @Jeremiah Russell. I think sometimes you need to be the Forrest Gump of design and think 'simple is as simple does' If VW doesn't play ball one way, try coming at it another way. It seems you have your window choice set, so all we have to do is sort the wall. Try it by using two wall types, main wall thickness and then a thickness to achieve the recessed areas. All you do now is attack the problem 'from the opposite direction' - use create wall projection... to create the arched area to the upper part of your recess. Then the wall will take a window (OK, not the one you've shown!) and deal with the thickness of the wall as you'd expect. Hope this helps. Edit - I think I should prove the Top/Plan view...


-
This is worrying. Seems anything issued recently is one step forward and (fill in what you want!) steps back. I'm sticking where I am - both VW and MacOS. I can't afford to play Russian roulette with my choice of upgrades. It's my income VW is playing with. Shouldn't be like this!!!!
-
Thanks @Polly - hope its all going good for you now.
-
The boffins haven't got the time to address these 'reasonable' suggestions. They've been tasked year after year to put more and more 'lace around the sheet'. Trouble is, if they stepped back and looked they'd all see there's a hole in the sheet.
-
@Polly is there a reason you've adopted this 'to-and-fro'? Your license will allow desktop and laptop to have 2017 (won't it?). I assume desktop too old? The posting subject is a little off target. Can it be changed so others will see @Jim Smith's good advice for this situation.