M5d
-
Posts
460 -
Joined
-
Last visited
1 Follower

-
Probably not the answer you're after, but WinDoor has the feature I think you are looking for . . .
-
Worksheet - Reporting framing or structural members within CSG solids
M5d replied to Mykbee's topic in Architecture
I haven't made the leap to VW2024 yet, so I cannot speak for the latest edition, but this is a known limitation of the software. There's a (cumbersome) workaround for the problem and a wishlist item from 2018 in the posts below. -
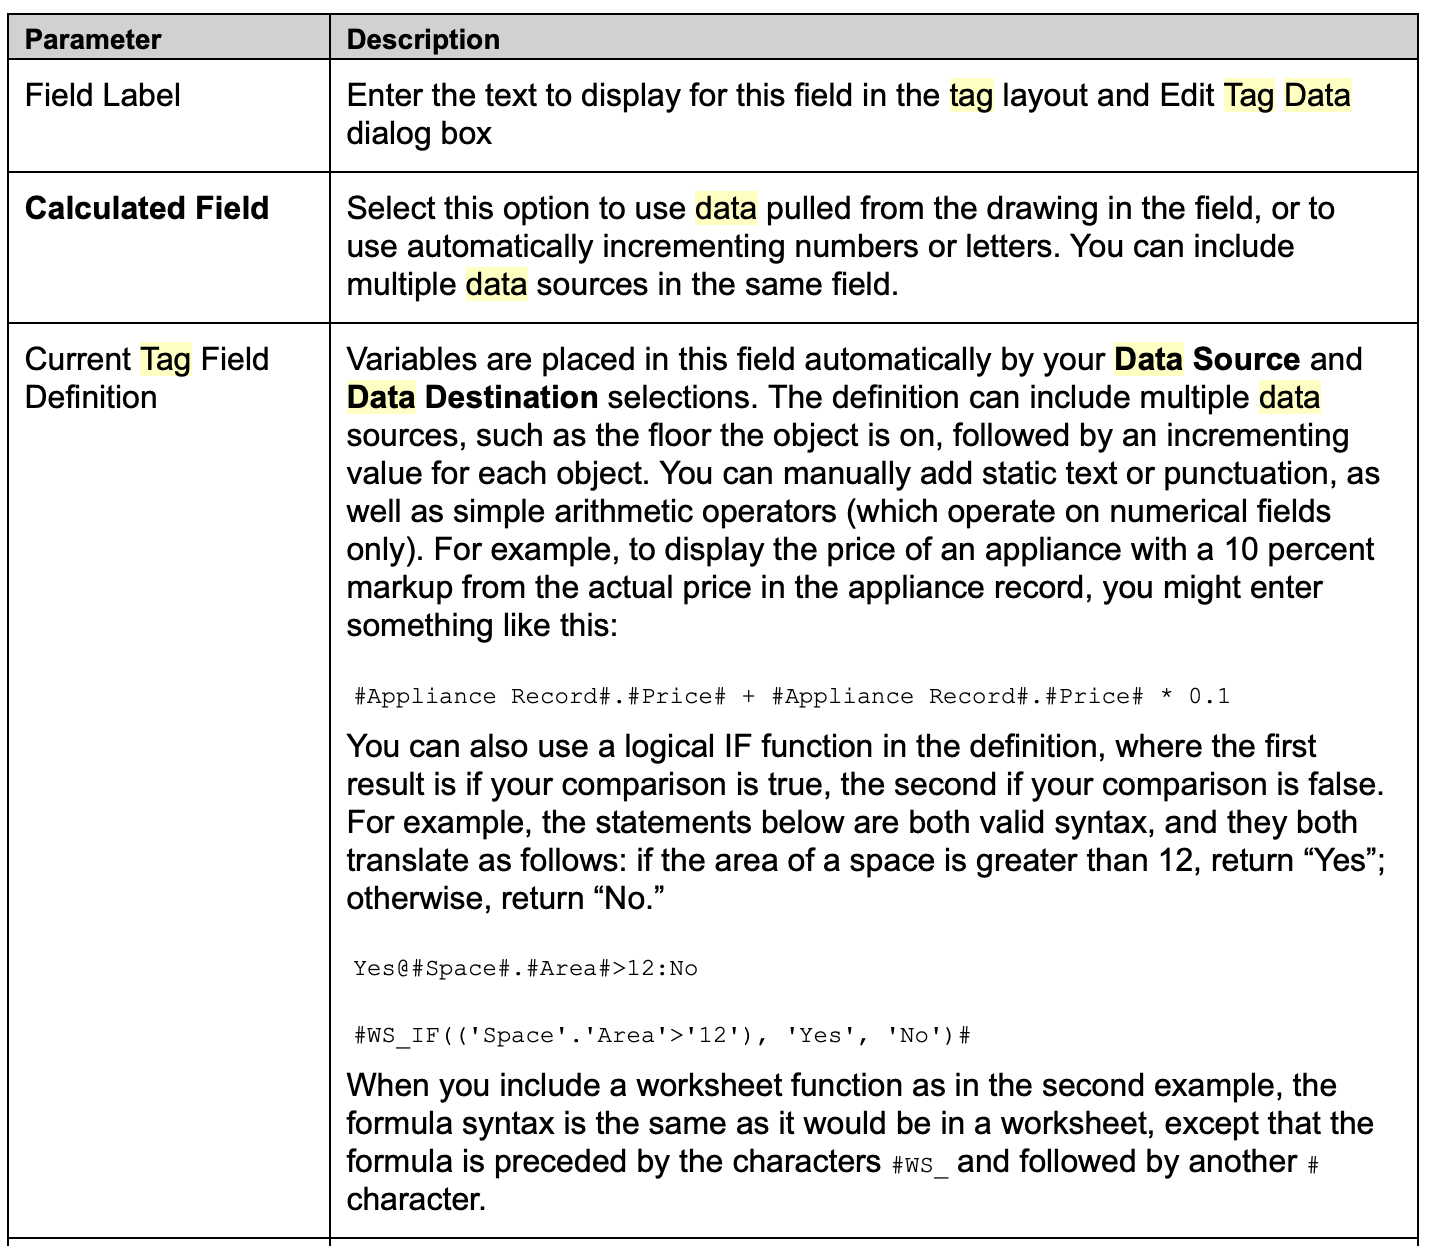
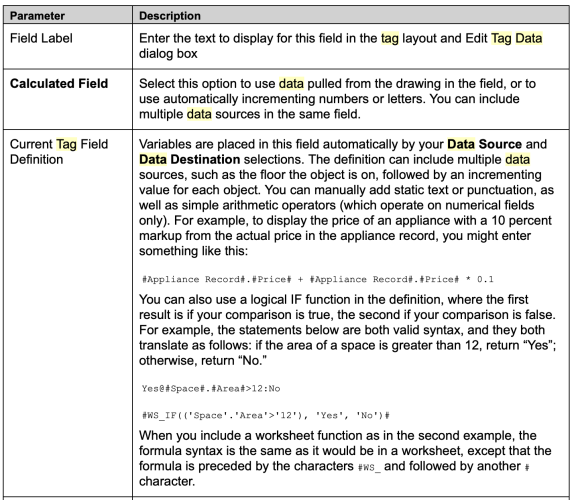
From Create Data Tag Styles:
-
That is good news. So Redshift RT, I'm guessing, will go even further than an IPR, i.e. similar to working in Shaded mode . . .
-
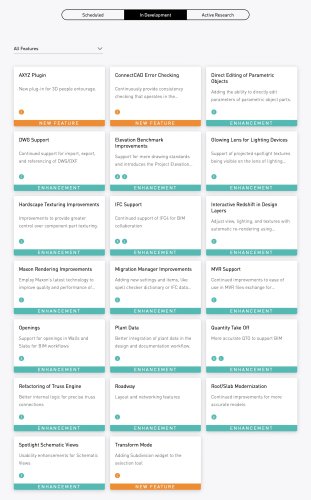
Not sure if this will end up like the IPR, but Redshift RT, or real-time, is on the Roadmap. Is your example render from VW 2024?
-
M1 Mac - VW causing brightness controls to not respond?
M5d replied to studiovarey's topic in Hardware
Same here, Mac Studio + Studio Display. If Vectorworks is left as the current desktop of Spaces and the screen saver activates, the monitor will (often) go to full brightness and the brightness keys will stop working. I did contact Apple soon after purchase in 2022, but they had no other reports and I soon worked out the bug only occurred with Vectorworks. Most of the time you can just switch spaces and the brightness keys will start working again, occasionally not, at which point I just close and reopen Vectorworks. And if you can remember, switching away from your Vectorworks desktop before leaving your computer for any length of time will prevent the bug happening. HTH -
When you publish a drawing set as a PDF, the viewport names become the Bookmarks Adobe presents in its Bookmarks side bar. This makes navigating PDFs much easier.
-
Been wondering the same . . . I think the problem with the eyedropper has been, it just treated classes and layers like numerical lists between files. Hopefully, this identifies like for like naming and notes the differences . . . ?
-
Renderworks Styles interior final is not rendering two texture maps
M5d replied to MGuilfoile's question in Troubleshooting
I haven't switched to 2023 yet, but I have noticed this or a similar inconsistency in how mapping renders between the Shaded and Renderworks modes in 2022. Have a look at which Map Type the offending objects use, try using Auto-Align Plane if it is not, or just resetting it off and then back to Auto-Align Plane. That works with the 2022 Renderworks modes, but of course, it is not suitable for all geometry.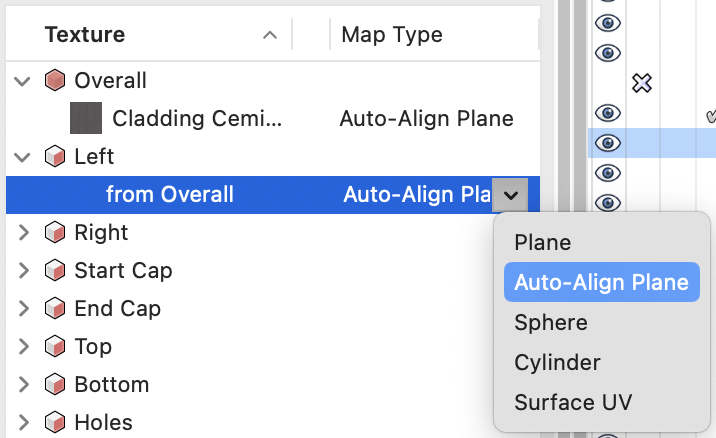
-
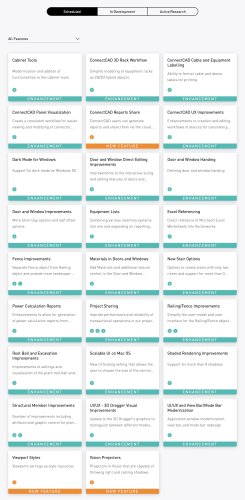
The Roadmap is leaning mostly towards enhancement at the moment, an interesting (positive) shift of emphasis maybe . . .
-
In the News You Need forum.
-
Slab drainage tool - Unable to places drains where I want them
M5d replied to Ed Wachter's topic in Architecture
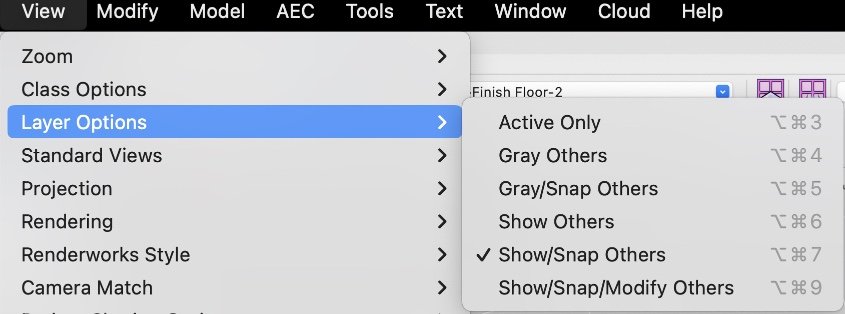
A couple workarounds to prevent the drain tool from selecting the loci: 1. Place the loci or guides on the Layer above the Slab with both Layers on and Show/Snap Others selected. The Drain tool will snap to the loci without deselecting the slab when you place the drain. 2. Use Sent to Back to place the loci behind the slab on the same Layer. Activate the Drain tool and use the 'B' key for X-Ray Select Mode to snap the cursor at the loci's position, then release the 'B' key before placing the drain.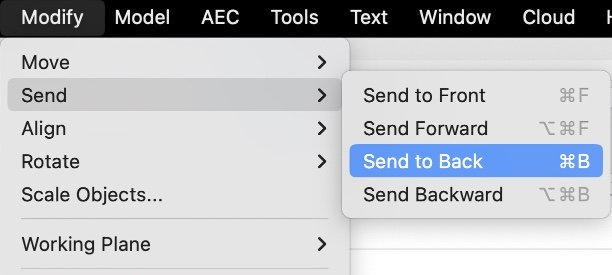
-
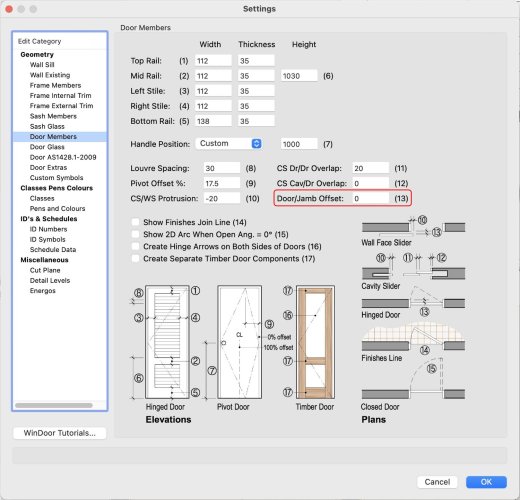
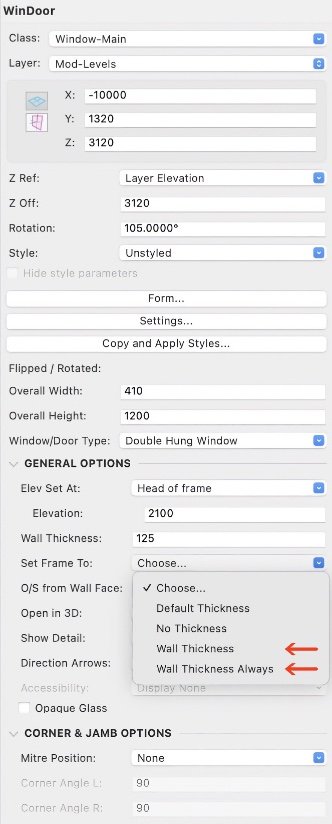
To use the Frame in this way, you can also use the Set Frame To: option in the OIP and select Wall Thickness. Setting the Frame width here makes certain the reveal is removed.
-
Thanks, got it. The difference is I set the frame size and position to match specific window and door series, which requires the reveal. The offset is behaving the same either way though (from the frame), it's just that the architrave is fixed at half its thickness once Windoor creates a reveal.
-
Hi BG, I had no luck with that. There must be another quirk or point of difference in your setting to get the offset working that way. Any chance you could post an example file with your all settings?