
EAlexander
-
Posts
543 -
Joined
-
Last visited
Content Type
Profiles
Forums
Events
Articles
Marionette
Store
Everything posted by EAlexander
-
For resolution - are you rendering to viewports on a sheet layer? If you right click on the name of the sheet layer in the navigation palette and choose edit - from there you can up the resolution of the sheet layer. It defaults to 72dpi, so very low. try 150 or 300 depending on your needs. I assume the white sploches are from the blurry reflection on the floor needing higher quality settings. If you edit your renderworks style - you can up the quality of blurriness. Start there and see if that helps. It will add to render time.
-
I get this sometimes on outside corners with daylight or HDRI. If you expand the ceiling or slightly raise the walls so there is slight overlap in the geometry, does that solve the issue? I know this isn't desirable, but it can help in some cases.
-

Undo AutoHybrid
EAlexander replied to Kevin McAllister's question in Wishlist - Feature and Content Requests
Yes, just like a hybrid. If you're in top /plan and Convert to group you get just the 2D and if you are in any other view when you Convert to Group, you are left with only the 3D. -
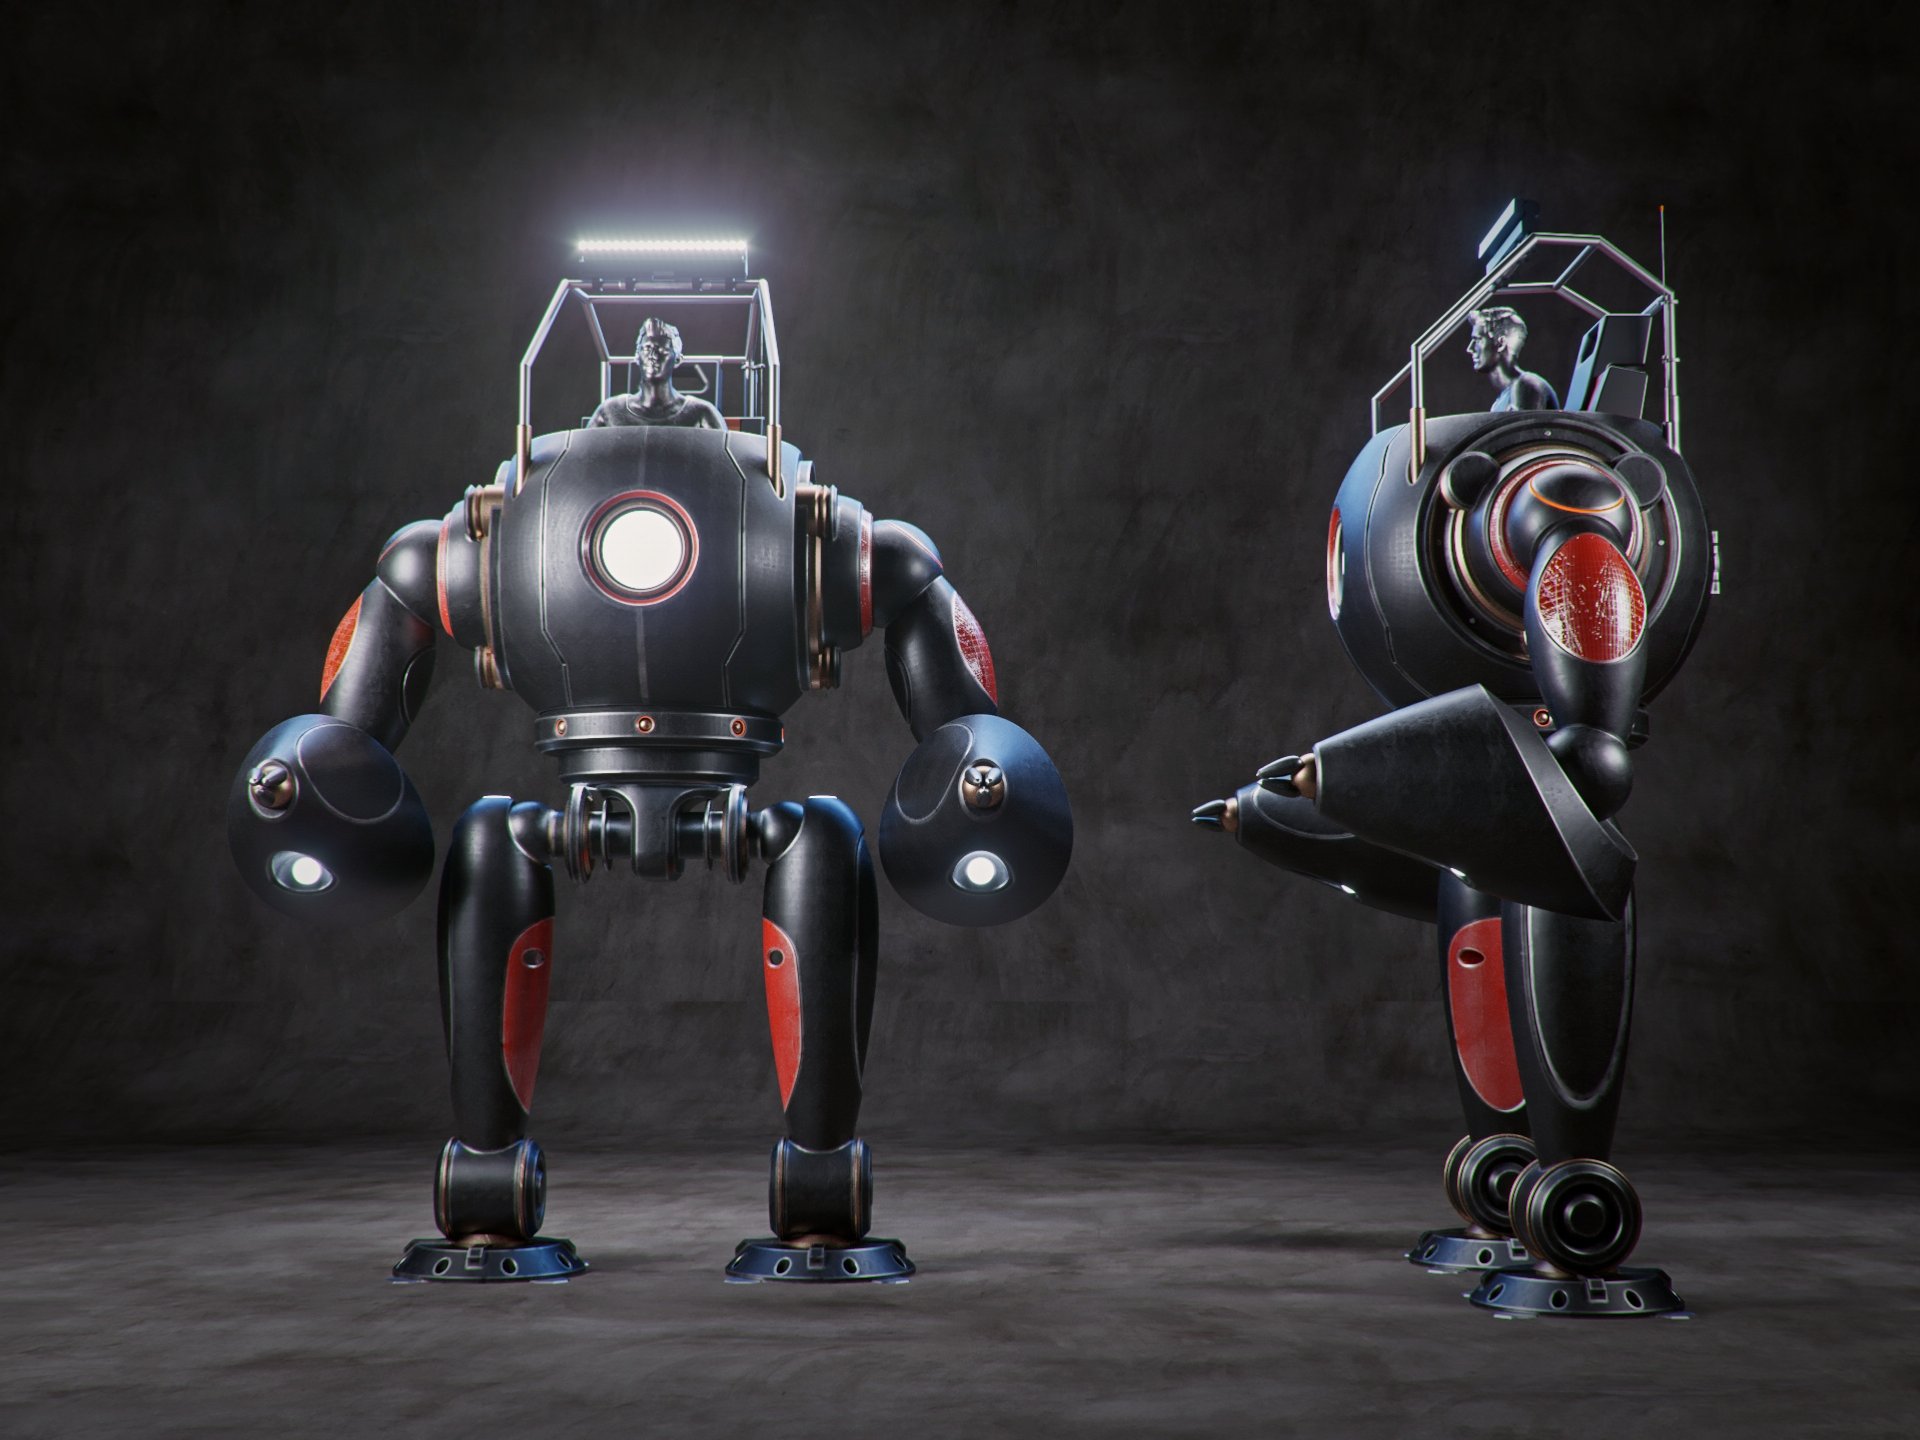
This is why you need Cinema. Corona, Octane, Redshift can chew through those like candy. Model below... Modeled in VW. Rendered with Corona at 1920 px. wide in about 4 minutes. It gives you the freedom to stop worrying about those time trade offs.

-
Blurry reflections for the win.
-
I think he is just referring to the lighting, material and camera work part of the process. You are getting near real time feedback when you are lighting or developing materials (size of scene pending). Yes, the modeling process is a separate part of the workflow. Once you light a scene interactively, it is really hard to go back. You stated earlier in the thread that preview time is what kills you, not render time. I get it - that is what made me move to this workflow - not final render times, but how quickly I can set it up to get to final render. Yes - there is a significant cost there. I run Cinema Broadcast which is about $2K less then Studio and while missing Hair, sculpting and Dynamics, it covers about 97% of what I need it to do. I also look at it this way: How much cost is there for your time and how much time can you save per render, per project, per year? If you are getting a render into your clients inbox in 1/4 of the time multiplied by x number of renders per year, then the overall cost isn't crazy. I realize this isn't for everyone and I am running a visualization business, but in the bigger picture you are talking about more then just software or hardware cost.
-
That would be a hybrid symbol, no?
-
In Your side view - you are showing SCREEN ALIGNED as the plane mode - try switching that to SCREEN PLANE and see if it makes a difference. Not sure this is the issue, but try it.
-
I appreciate that Jim. And to be clear, I do a fair amount of design development and output with Renderworks, so I like using it and am glad that you are continuing to push it forward. But when we start getting into photo realism, or people talking about 40 hour renders when 6-12 minutes is easily obtainable, granted with considerable financial and time investment, I think the conversation changes.
-
I'm with Fabrica. Cinema and Corona for the win with modeling in VW. My average render time for an interior is about 12 minutes.
-
Thanks - I'll look into it more - haven't dived into Marionette at all yet. I asked, not as a challenge to you, but because I really want to know. I have a fair amount of randomization I need to do within VW and I always find it a challenge. It's so easy in Cinema4D and lots of times I do it there, then combine everything and bring a mesh back in VW, but I would like a more elegant solution within VW. I'll check out Marionette. Thanks!
-
Those look great and I am not trying to slag on your product or company here - I too don't work for Adobe, but it seems to me that the bracelet part is easy - it's the distribution for a render in VW that is the challenge. In VW, how would you distribute 25,000 of them onto a crowd through a stadium - with random placement and rotation, but still following the seating layout (voms, rows, etc)....? To me, this is why I do it in post. Again - no disrespect intended.
-
Hi, My issue was that the Lighting designer had place the moving lights as symbols, but then converted into Lighting Instruments to then focus them. So if I imported the lighting instruments to Cinema - they came in correctly, but they are all raw geometry i.e. not one Master symbol and hundreds of instances - So I would have to texture each and every one. If I convert the lighting instruments back to symbols before I export - they all rotate back to their neutral hanging position (barrel straight down, clamps straight up). For basic movers, this isn't such a huge problem, but that show had an array of truss and the fixtures were X-bars that lined them following the angle of the chords. I had to go back and manually rotate them to align with the truss. The Stage plug in looks cool, but I don't use the native Cinema render engine any more, so that is a no go for me (I use Corona). There are no shutter cuts on spotlights, but as Zoomer indicated - you can exclude objects from lights or even set them to only include whatever objects you select and this seems to cover most of the problems. BUT - this is Zeno's thread and we have hijacked it - apologies Zeno! If you want to talk about this more - let's start another thread. In regards to Zeno's scene - touching on Zoomer's earlier comments - I never deal with bringing lights from VW into Cinema, because I never place any lighting or materials in my VW work - I find it really hard to control. I do all of my lighting and textures in Cinema and only use VW for modeling. e.
-
Great work Jeff!
-
Zeno, Have you ever considered adding Cinema 4D to your workflow? You can do amazing things in it with your Vectorworks models. Better lighting and cameras, easier texturing, lots of options for add on render engines (Gpu rendering) that gives you results in minutes, not hours. Look into it, ask questions. They have a nice, long trial period. I've seen your work and the issues you have with RW and think you could really benefit from it. You would have a lot more control over your images. Food for thought. e.
-
Usually the disappearing thing is related to plane modes. I agree - this is basically f***ed in the last few releases. If you are inside a symbol - you might need to be in either "Symbol definition" mode or "3D" from the pulldown before you draw. I don't know if this is the issue, but try it out.
-
I have had to do this a lot and I always come back to doing it in post (photoshop or aftereffects). I can't imagine doing it in VW. I found in Cinema 4D it to be much easier, but still a bit lacking in flexibility for updating "content" or density revisions. I've made some scatter brushes in photoshop that address this pretty well.
-
Video wall tiles with gaps in the housing so you can pass light through it and it works like a scrim effect, albeit not as fine or gauzey.
-
Lighting Instruments back to Symbols in Correct position
EAlexander replied to EAlexander's topic in Entertainment
Nope - not an automated one. If I export to Cinema as Lighting instruments - the fixtures come into Cinema in the correct position, but they are all actual geometry, not symbols with instances. My machines can even handle that much geometry, but texturing each fixture and lens for lighting was just going to be too much work. If I convert them back to symbols from lighting instruments - then they come in rotated back to baseline angle, but the xyz positioning is still correct. This set was an array of truss fingers all lined with X bars...hundred and hundred of them as well as Sharpys and Robe Blades. This way, I have one master model for each fixture and everything else is an instance. So - I ended up doing the second option to manage poly count and only have to texture 5 instruments instead of hundreds. Fortunately, Cinema's rotate tool has an option to apply rotate on a per object basis, so I could grab one whole row of x bars and rotate them by eye back into the correct position. Took a while, but worked okay. I would very much like a better solution to this though. -
convert vectorworks to sketchup
EAlexander replied to michael john williams's topic in General Discussion
What happens if you check "Decompose 3D symbols and Groups" - does that help? I'm guessing you're having problems with plug in objects not translating, but I'm not sure if that check box will address this. I have also gone to an iso view (to reveal all hybrid 3D) and then select all and then Convert to group (Cmd + K) before exporting, but that is a last resort. -
Not a candidate for the job, but just dropping in to say - really lovely work on your site!
-
Best way to Create a Large billowy Sail?
EAlexander replied to Paul S. Morrill's topic in General Discussion
Yes, I would loft this in VW. I would draw a squiggly profile for the bottom, duplicate and modify that a few times for the internal profiles (you'll need to experiment a bit. Off set these left or right to create that swag feel. And then one more for the top that is flatter/thinner for the top hem/pleats. Better to modify the original base profile instead of drawing new ones as you are sure to keep the same number of points (this is important and will give you better lofts). -
Lighting Instruments back to Symbols in Correct position
EAlexander replied to EAlexander's topic in Entertainment
Thanks Kevin. I have a few thousand lights, so mesh isn't an option. I also need them to be symbols so I get instances automatically in Cinema. I rig my moving lights to focus them for renders, and that way, I only need to do one of each kind of light. I feel like there has to be a way to bake down the positioning info. -
Hi - I have received a light plot that I need to move to Cinema 4D for rendering. All the symbols have been converted to lighting instruments - these wont carry over to Cinema. If I choose the lights and Cmd + K - they go back to being just symbols, but they lose their rotation(s) and all just sit vertical like the base symbols. Is there any way to make the conversion and keep the rotations? Thanks, e.
-
Also, note the the offset tool will modify tight corners to avoid overlapping points.