


Julian Carr
-
Posts
320 -
Joined
-
Last visited
Content Type
Profiles
Forums
Events
Articles
Marionette
Store
Everything posted by Julian Carr
-
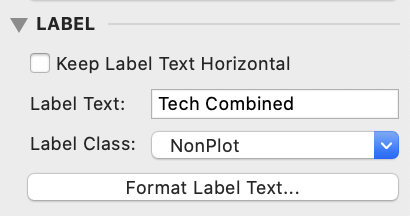
Is there any way to expand or collapse a widget separator group using VS? For example the LABEL line group below... Thanks!
-
This should get you started. It creates 3D loci not stakes, but maybe someone else will offer that bit: Procedure ReplaceTextWith3DLoci; Procedure DoIt(h1 : HANDLE); VAR pX, pY, rAng : REAL; r1 : REAL; Flag : BOOLEAN; i1 : INTEGER; s1 : STRING; BEGIN s1 := GetText(FSActLayer); i1 := Pos(' ', s1); IF i1 = 1 THEN Delete(s1, i1, 1); i1 := Pos(' ', s1); IF i1 > 0 THEN BEGIN Insert('.', s1, i1); Delete(s1, i1 + 1, 1); END; IF NOT ValidNumStr(s1, r1) THEN r1 := RealDialog('Z value:', s1); GetTextOrientation(h1, pX, pY, rAng, Flag); Locus3D(pX, pY, r1); IF h1 <> Nil THEN DelObject(h1); END; BEGIN IF YNDialog('Replace text blocks with 3d loci?') THEN BEGIN ForEachObject(DoIt, (T = 10) & (Sel = True)); END; END; Run(ReplaceTextWith3DLoci);
-
If you get a handle to the parent, then use FInGroup() and NextObj() to cycle through the objects in the group, then use Selected(), it might work. An alternative would be to use FInGroup(), check the first object is not selected using Selected(), then jump straight to the selected object using NextSObj(). All just a guess mind you.
-
Nice one Robert. We've actually had a command like this in the Object Context menu for ages (code below). What I find though, is that it is often a bunch of objects that you want to isolate for a few minutes, so the process in that case is to select the objects, Edit menu > Invert Selection then right click and choose Hide Selected Objects. There should probably be two commands - Hide Selected Objects and Hide Unselected Objects. I added the active layer to the criteria so objects on other layers didn't inadvertently get hidden. We have a matching Show Objects in the Document Context menu. { HideSelectedObjects v 1.1 - Developed by OzCAD Pty Limited } Procedure HideSelectedObjects; VAR gLName : STRING; BEGIN gLName := GetLName(GetLayer(FSActLayer)); Hide((Sel = True) & (L = gLName)); ForEachObject(SetDSelect, (Sel = True) & (L = gLName)); END; Run(HideSelectedObjects);
-
My vague understanding is that a change was made a few Vw versions ago in how database rows were built. I think now the rows don't actually exist until after the full calculation for all rows is completed, so there is no way to know when the first row is calculating. An alternative approach you could try, is do define the worksheet row formula yourself (example below) then use the following for the DB row formula: =DATABASEBYSCRIPT('LoadDBRow') I have no idea if this would work, but might be worth playing with. Note that the first handle found is not influenced by the sort order of the worksheet, but the creation order of the items found by the criteria you enter, in the document. { the script - add something like this to a script in a script palette called LoadDBRow. Sorry I don't know Python so this is VS } Procedure LoadDBRow; VAR gb1 : BOOLEAN; Procedure DoIt(h1 : HANDLE); BEGIN IF NOT gb1 THEN DoMyCalculationAndLoadCell; { load a spare cell with the first row calculation (done here), then use that cell in your column formula } gb1 := True; WSScript_AddHandle(h1); END; BEGIN gb1 := False; ForEachObject(DoIt, <insert your criteria here>); ClearTheCell; { empty out the spare cell } END; Run(LoadDBRow);
-
I had actually been working on this for an internal project so this request prompted me to finish it (Layer Manager Worksheet.zip). The worksheet is editable so will push data back to the layers. It includes a short video describing how it works.
-
Thanks Wouter. Strangely, I could not get it working via a button click, but it does work with a double click on the PIO, which is even better. Thanks again.
-
If you have a PIO that has something in the profile group, you can enter that group using: DoMenuTextByName('Group Navigation Chunk', 1); That produces an error if called from within the PIO however , which is probably not surprising. Does anyone know of a way to jump into the profile group from say a button click in the OIP? Thanks.
-
Not sure if it can work for you Sam, but I have two methods for doing this. The first is using symbols folders, so only the source symbols within a particular folder will get make it into the list. The second is using a prefix or suffix within the symbol name in conjunction with GetActualNameFromResourceList(). I don't think you can get a handle to symbols in a list though, which is obviously a requirement for checking for an attached record.
-
Setting Record Format to Read Only - Or Not
Julian Carr replied to Julian Carr's topic in Vectorscript
What I want to do is to write to the read-only Plant Record that is attached to Plant objects. Exactly what I want to do is to clear most of the record fields in the Plant Data tab when editing the plant style. Currently you have to do it manually one line at a time so it is quite time consuming. It needs a Clear All button because many users will duplicate an existing plant style to create a new plant, and don't necessarily want this data duplicated. Here is the script I am working with, but I need a way to temporarily write to the plant record. It may not be possible. Procedure CPD; Procedure DoIt(h1 : HANDLE); VAR i1 : INTEGER; BEGIN FOR i1 := 1 TO NumFields(GetRecord(h1, 1)) DO CASE i1 OF 3,4,6,14..39: SetRField(h1, 'Plant Record', GetFldName(h1, i1), ''); END; ResetObject(h1); END; BEGIN ForEachObject(DoIt, (Sel=True) & (PON='Plant')); END; Run(CPD); -
Can someone remind me how to set a record format to Read-Only or one that is set that way to NOT Read-Only? Thanks!
-
Best to use Modify menu > Simplify Mesh because the level of simplification will vary from mesh to mesh, so provided the imported mesh is selected, adding this line to the script will activate this command and allow you to adjust each mesh as you go: DoMenuTextByName('Simplify Mesh', 0); There is no other way I know of to do this in Vectorscript that would fully automate the process.
-
And it didn't escape my attention 🙂
-
Richard Diehl actually commissioned me to create the Table and Chairs object for Vectorworks 8 and it has changed very little since then. There are so many things that could be added to it along with the chair position, like using a symbol based chair, place settings, table cloths, etc. It could certainly do with some love.
-
I'm not sure I can be of much assistance here Andy. Because my dialogs are usually jamb packed full of controls, it has always been a bridge too far to fit those by style/instance widgets in. For example: This dialog just fits on a 13" screen. For this PIO I do still use styles though, but only as a way to transfer hundreds of different styles from the library into the tool. Once placed, the instance is no longer styled and that works in this case because there are very few repetitions of any particular setup in the drawing, so not much benefit from being able to pick if controls are by style or instance . When you use a style with this object, it comes into the drawing as being unstyled. But if you have managed to get all the widgets into your dialog then I wouldn't have expected things to be too difficult. Maybe someone else has some clues?
-
Don't have much time but... A1. Yes must be event enabled. A2. You will need this: gFlag := SetObjPropVS(kObjXSupportsStyles, TRUE); { 49 } { Controls whether a parametric type support plug-in styles } and maybe these: gFlag := SetObjPropVS(kObjXPropHideStyleSettingsButton, TRUE ); { 69 } { hide unwanted style editing buttons } gFlag := SetObjPropTxtVS(kObjXPropSupportResourcePopup, 'Object Styles/MyStyledObject'); { 53 } { specified the default content folder } A3. Depends if you are using dialogs to access parameters. If you you have a lot more work to do. If not, then you can let Vw handle it from memory. A4. There are other events you may need too: 60: BEGIN { Edit Plug-in Style } vsoSetEventResult( -10 ); {kObjectEventHandled} { using -10 here causes the object properties dialogue to open next } END; 61: BEGIN { Create Plugin Style } vsoSetEventResult( 0 ); {kObjectEventHandled} END; 62: BEGIN { Update Styled Plugin Object } vsoSetEventResult( 0 ); END; 63: BEGIN { Finalize Create Style } vsoGetPluginStyleSym(gh1); SetAllStyleParams(gh1, 0); { this sets all parameters to not use the style } vsoSetEventResult( 0 ); END; 64: BEGIN { Finalize Update Styled Object } vsoSetEventResult( -8 ); END; 65: BEGIN { Style Widget Chosen } vsoSetEventResult( 0 ); END; { Create Style order of events: 61, 63, 60, 62, 64 } { Edit Style order of events: 60, 62, 64 }
-
Not surprising I guess (editobjectspecial). I use profile groups in WinDoor to store symbols. Here's a code snippet: { put symbol instance into profile group } Symbol(SymName, 0, 0, 0); hSym := LNewObj; h1 := GetCustomObjectProfileGroup(ghParm); IF h1 = Nil THEN Flag := SetCustomObjectProfileGroup(ghParm, hSym) ELSE BEGIN h2 := FInGroup(h1); IF (h2 <> Nil) & (GetTypeN(h2) = 15) THEN BEGIN DelObject(h2); SetPref(9871, True); Flag := SetParent(hSym, GetCustomObjectProfileGroup(ghParm)); SetPref(9871, False); END; END;
-
Try using: EditObjectSpecial(SymHandle, 4); Using 4 as the second argument will just jump you straight into the symbol based on whether the view is Top/plan or not - no dialogue. Curious. Why can't you use the profile group?
-
There is also these procedures which will get and set the brightness: GetLightInfo(h : HANDLE; VAR lightType, brightness : INTEGER; VAR isOn, castShadow : BOOLEAN); SetLightInfo(h : HANDLE; lightType, brightness : INTEGER; isOn, castShadow : BOOLEAN); I think you can also do this using Get/SetObjectVariableReal() using 51.
-
Actually one thing might work. If you run the script from a menu command, it might avoid removing focus from the worksheet, which is what clicking in a script palette is doing. You could use the RunScript command with a keyboard shortcut, then have your scripts in a folder if there is more than one. Alternatively create one or more .vsm's and put the script/s in that, then call them with keyboard shortcuts. If you do this, the only call you will need in the script is SetWSCurrentCell(h,currentCellRow,currentCellColumn);
-
Pretty sure this is not possible as there is no VS procedure to change the focus and I think worksheet cell editing explicitly requires a click into a cell. I think you would need to use dialogs to enter your data and move to another cell, possibly with buttons to control which script is run next and other buttons to control the next cell to go to, etc. Not nearly as easy or workable though.
-
Try this Max: DoMenuTextByName('Wireframe Render Chunk', 1);
-
If you convert the 3D poly to a NURBs curve using ConvertToNURBS() then you should be able to use one of the NURBs calls like NurbsCurveEvalPt().
-
Thanks to everyone for your help with this. It was actually for a worksheet script to enable door thicknesses to be listed at smaller increments than the document units settings allowed. Below is the final code. I saved the script with the name 'WSFixDoorThickness' so the cell formula to use it would be: =RUNSCRIPT('WSFixDoorThickness') This replaced the standard: =(Door.DoorThickness) In Vw 2021, it would be possible to use RUNEDITSCRIPT() instead and so allow the door thickness to be modified from the worksheet too. It was beyond the remit of this little project however so currently it only reports door the thickness. { FDT (Fix Door Thickness) - v1.0 - 27/10/2020 } Procedure FDT; VAR gr1 : REAL; gh1 : HANDLE; gs1 : STRING; Function Num2FandI(r1 : REAL) : STRING; Const kBase = 16; VAR DecPart: REAL; IntPart, FracPart: LONGINT; RetFract : STRING; BEGIN IntPart := TRUNC(r1); DecPart := r1 - IntPart; FracPart := Round(DecPart * kBase); Num2FandI := Concat(IntPart, ' ',FracPart, '/', kBase, '"'); CASE FracPart OF 0: RetFract := ''; 1: RetFract := '1/16'; 2: RetFract := '1/8'; 3: RetFract := '3/16'; 4: RetFract := '1/4'; 5: RetFract := '5/16'; 6: RetFract := '3/8'; 7: RetFract := '7/16'; 8: RetFract := '1/2'; 9: RetFract := '9/16'; 10: RetFract := '5/8'; 11: RetFract := '11/16'; 12: RetFract := '3/4'; 13: RetFract := '13/16'; 14: RetFract := '7/8'; 15: RetFract := '15/16'; 16: BEGIN IntPart := IntPart + 1; RetFract := ''; END; END; Num2FandI:=Concat(IntPart, ' ',RetFract, '"'); END; { Num2FandI } BEGIN gh1 := WSScript_GetObject; gs1 := GetRField(gh1, 'Door', 'DoorThickness'); IF ValidNumStr(gs1, gr1) THEN WSScript_SetResStr(Num2FandI(gr1)); END; Run(FDT);
-
Anyone have a routine for converting decimal inches into fractions, irrespective of the document unit settings? For example: 1.375 -> 1 3/8" 1.188 -> 1 3/16" 1.75 -> 1 3/4" 1.5 -> 1 1/2" 4.25 -> 4 1/4" Thanks!

