
Andy Broomell
-
Posts
3,173 -
Joined
-
Last visited
Content Type
Profiles
Forums
Events
Articles
Marionette
Store
Everything posted by Andy Broomell
-

View History in View Bar
Andy Broomell replied to ThreeDot's question in Wishlist - Feature and Content Requests
As ThreeDot says, this only affects whether/how view changes are affected by the UNDO command (Cmd+Z), not the "Previous View" and "Next View" buttons as circled in the original post above. I personally have the Undo View Changes option set to "Never" and in turn have no control over the view buttons. As in ThreeDot's scenario, I too find myself always having to click the Previous View button 5-10 times. Some of this might be mitigated as I better incorporate 2018's multiple view panes into my workflow, but it'd still be nice to have better control over the view buttons. It might just be a dropdown (when you click and hold the Previous View arrow) which has a list such as: Zoom Out Zoom Out Pan Change Active Layer Zoom in Change Class Visibility -
RM - Preview Pane
Andy Broomell replied to Andy Broomell's question in Wishlist - Feature and Content Requests
Bump. Would love to see this in 2019! -
Render Texture Thumbnails
Andy Broomell replied to Jakerhp's question in Wishlist - Feature and Content Requests
Yes! An example of current shortcomings: https://forum.vectorworks.net/index.php?/topic/46184-texture-previews-and-icons/&tab=comments#comment-235037 -
View History in View Bar
Andy Broomell replied to ThreeDot's question in Wishlist - Feature and Content Requests
The main reason I think this suggestion would be useful is that sometimes with a complex file a view undo takes some time to redraw, and if I know I have to go back about 5 steps I don't want to have to wait for every step to redraw. -
Stopping a rendering
Andy Broomell replied to Kaare Baekgaard's question in Wishlist - Feature and Content Requests
Interesting. How so? -
Stopping a rendering
Andy Broomell replied to Kaare Baekgaard's question in Wishlist - Feature and Content Requests
Agreed that there should never be an instance where you can't stop a render. It's gotten better over the years, but it still happens. But to double check, if you're doing a lot of rendering, have you tried rendering with sheet layer viewports? -
How to extrude images in Vectorworks?
Andy Broomell replied to adrienne2242's question in Troubleshooting
Now what I do is immediately hit Cmd+X to "Cut," then click where I want and Cmd+V to Paste. -
How to extrude images in Vectorworks?
Andy Broomell replied to adrienne2242's question in Troubleshooting
The first few times I ever tried making an Image Prop I thought it just "didn't work". Then I later found all the image props I had made just sitting at 0,0. -
How to extrude images in Vectorworks?
Andy Broomell replied to adrienne2242's question in Troubleshooting
You might also try using the Model<Create Image Prop function. -
For now, the one thing you can do (if they are layers, not classes) and if you're working with sheet layer viewports, is to click your viewport, click the Layers button, click Edit for a layer, and reduce the opacity slider. (This is similar to Viewport Class Overrides.) But yes, it'd be nice to have further control over the display of greyed classes/layers.
-
Password Locked Layers - Feature Request
Andy Broomell replied to James Russell's question in Wishlist - Feature and Content Requests
Interesting idea! It would be nice to have the ability to lock entire layers. In the meantime (and you may already know this) you can "Lock" individual objects which makes them uneditable, but still visible and switchable with classes. But there is no password protection, so any user can simply unlock the objects if they want to edit something. But at least it's a deterrent, and many users might not know how to unlock things in the first place. So in your case for now you'd select all the objects on a layer, and go to Modify<Lock. -
Can you attach your working file where you're experiencing the issue? It'd be easier to trouble shoot with that file, rather than the resource file from which you pulled the symbols. As you probably know, once you insert an instrument from a resource file into your drawing, it actually imports the symbol definition directly into your file, and is no longer related to the symbol definition in the resource file (unless you're referencing symbols which I assume not). So the resource file is in some ways irrelevant. In the Resource Browser if you click the Home icon you'll see the symbols that exist within your file, and that's where you want to make sure the symbol's name matches the OIP Symbol Name precisely. Perhaps you've already checked this and you're actually experiencing a bug, but it's good to run down through all the steps of what might be causing your issue
-
Edit.... Sorry, I misinterpreted the question. Perhaps select the Viewport and see if the Attributes Palette has Drop Shadows turned on for the entire Viewport object?
-
If you're creating renderings with Renderworks (as opposed to just working in OpenGL), I'd also recommend turning on Indirect Lighting. The number of bounces varies depending on your VW version. Indirect Lighting will emulate the lighting bouncing off the stage floor and hitting other surfaces in the room, slightly illuminating other objects in the space (but more subtle and realistic than the "Ambient Lighting" which is too smooth and fake looking).
-
Are you able to attach the file so we can take a closer look at what might be happening?
-
Ctrl+Tab Menu width - Windows
Andy Broomell replied to WhoCanDo's question in Wishlist - Feature and Content Requests
What menu is this? Does it exist on Macs? -
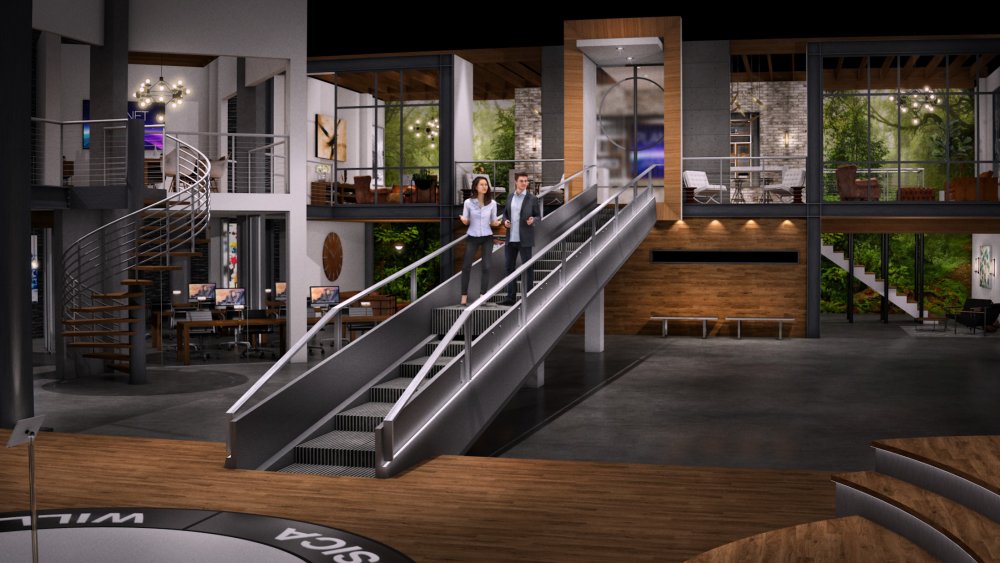
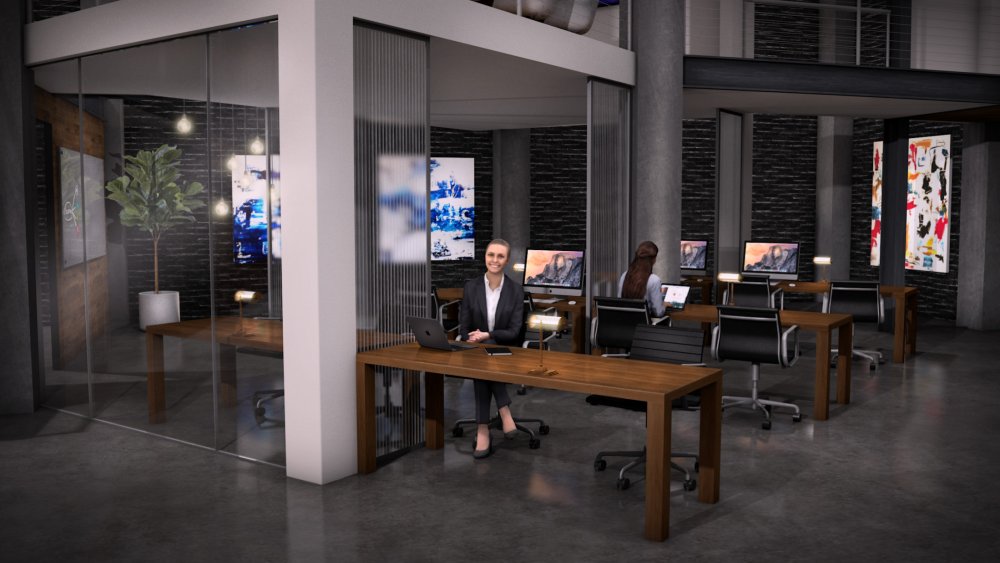
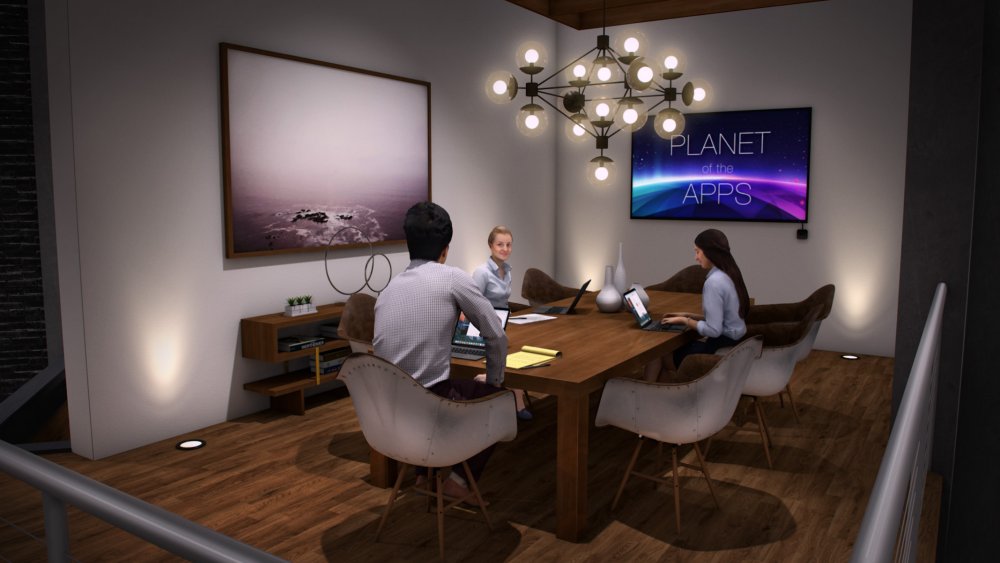
SketchUp, I believe. They import as meshes, so it was helpful to go to the render tab and make sure mesh smoothing was being applied, otherwise the figure looked faceted.
-
Yes, they're all Renderpeople except for the 4 seated celebrities in the white chairs. Those were added in Photoshop.
-
I assume you're asking what the render times were for a viewport after hitting update? For these final renderings it was probably about 2-3 hours or so each (hard to remember since it was a while ago) working on my MBP. This is with my own Render Style; I completely steer clear of FQRW. And while I'm initially working on the rendering I use a much faster, low-quality Render Style (along with a lower sheet layer DPI), then bump up the quality and DPI only for the final renders. Most of the time on this project was spent with revisions, revision, revisions. These renderings show more or less where we landed, though it doesn't 100% match the final built/decorated set.
-
Thank you! No heliodon. Started with a grid of simple downlights (because I like the unevenness compared to the flatness of a heliodon), then just bespoke lighting from there.
-
Hi everyone! Thought I'd share some renderings I did for a TV show about a year ago (I'm finally going through some old projects and adding them to my website). These were created almost entirely in Vectorworks, with Photoshop used for final touches, i.e. lighting halos, vignetting, and some subtle lens distortion. I was pretty happy with how they turned out! Some photos and drafting of the set can be seen at http://www.andybroomell.com/#/planet-of-the-apps/ - along with uncompressed renderings.


-
Still seems to be defaulting to "Status" searches. Any update on this? Also, are inline images now limited to 500px wide? I tried inserting one into a post and it's entirely too small. Most images used to be too huge, now they're too tiny. The weird thing is when I double-click the inline image it actually displays a width of "0", but when I type in a number >500 it says "Value must be equal to or less then 500". If there's going to be a limit could it at least be a width of perhaps 1024px?
-
Kill switch to Paint Bucket Tool
Andy Broomell replied to Jim Smith's question in Wishlist - Feature and Content Requests
Agreed. See this topic: https://forum.vectorworks.net/index.php?/topic/45813-abort-any-command/ -
Thanks! I take it that means it's not currently possible
-
True, but then it adds a ton of bases/verticals along the longer segments. I guess I could just make that small portion a separate object with different settings. Not ideal, but good enough for now. It would be nice to add the ability to turn off the red highlighting feature in the future.