
Luis M Ruiz
-
Posts
462 -
Joined
-
Last visited
Content Type
Profiles
Forums
Events
Articles
Marionette
Store
Everything posted by Luis M Ruiz
-
I'd recommend using Custom Lights (IES). These provide the best realism to a scene. do you have a picture of what you are trying to recreate?
- 1 reply
-
- 1
-

-
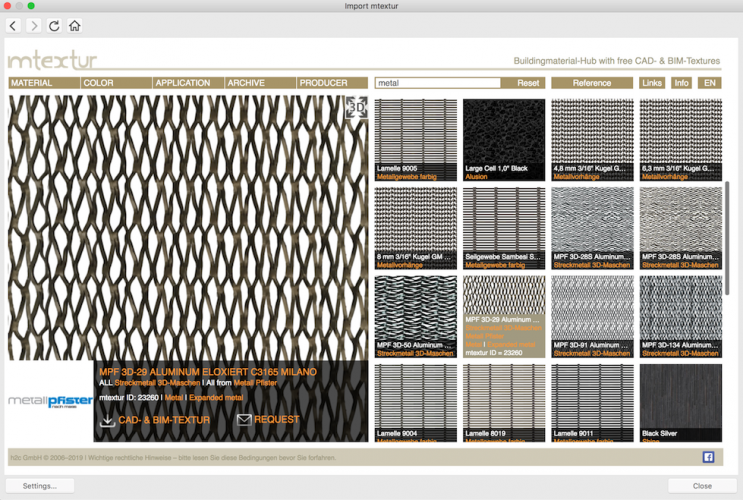
Also, a good idea is to check out the mtexture library. More and more I find cool goodies here. Available in v2019
- 8 replies
-
- 4
-
-
- metal mesh
- curtains
- (and 1 more)
-
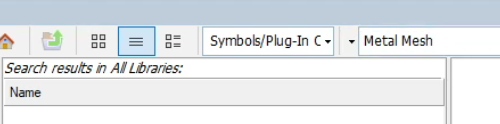
This video tells me there are no symbols called "metal mesh". I learned the hard way to always set the type of resource I need, then type what I am looking for.
-
Are renders saved as image files, in some temp directory?
Luis M Ruiz replied to JMR's topic in Rendering
I typically keep a project folder dedicated for renderings, just to keep a record. Typically a screenshot is enough. Here is a sample of the before, during and after.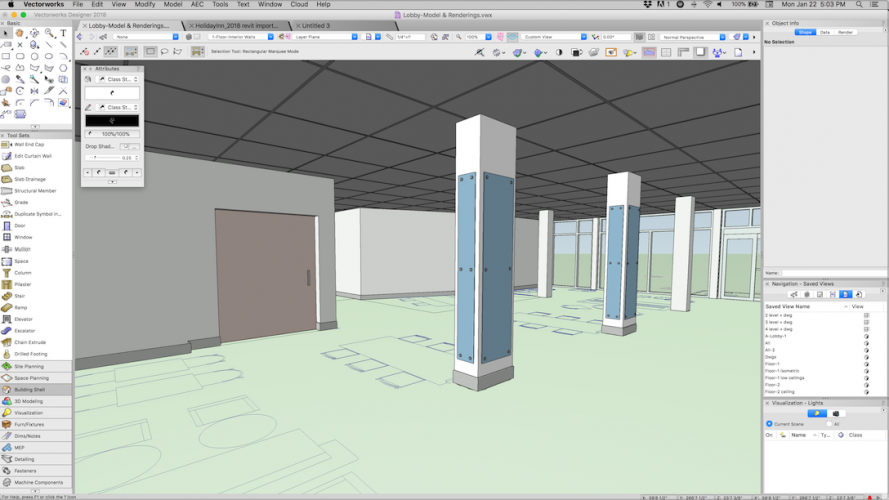
-
@John Erren Hi John. Creating renderings is always a balance between viewport size, sheet resolution and settings. For example, if you have a sheet 36"x24", 300dpi and viewport at best quality, including displacement mapping, it'll take a long, long time to process. If you are just in the process of previewing your renderings, trade size and quality for speed. Perhaps reducing those renderings to 17"x11" at 72dpi and make use of Custom Renderworks, most of them at low quality including 1 reflection. Once you are super happy with the quality, go high on Custom Renderworks and increase your sheet res to 300dpi. Some settings are different in case of interiors. Post a pict of what you are trying to create and I may have a similar file you can take a look at in terms of settings.
-
@jamie innes If you can post a sample file, I think we can take a look at it and give you a better report.
-
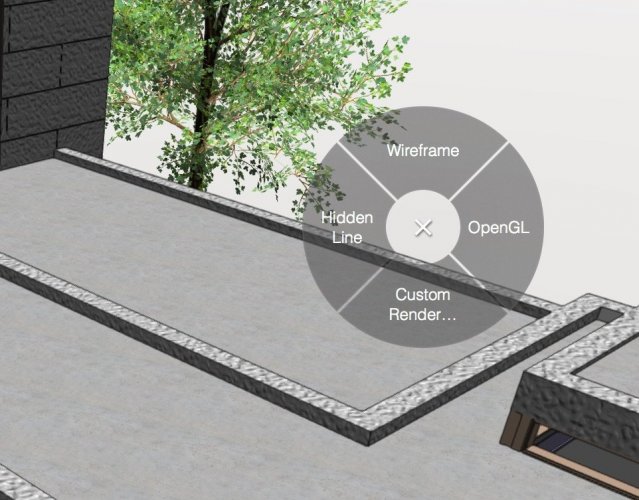
I am going to take a guess here. Are you using Image Effects on top of that viewport? (v2019) is that box checked when you hit update?
-
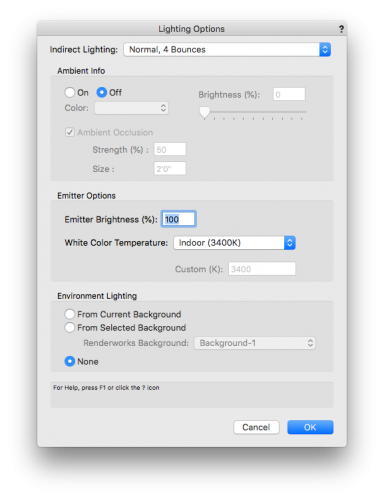
Here is a black and white rendering as I am testing all glow textures included in a working file. Recipe: -At least one light object included in the file and switched off -No ambient light -Four bounces -Ambient occlusion on -Custom Renderworks

- 11 replies
-
- 10
-
-
@Zeno I wonder if you have some screen or plane objects not helping this viewport?
-
With the latest release of Service Pack 3, awesome new updates got included. One that we all requested, was a path to create linked panoramas. I had the opportunity to test it and I'd like to share my results. Click here to view the presentation
-
I tested the output and for this single sheet with all those views at 300dpi res. PDF jumped to 6mb, 18mb if increased at 600dpi. Then again, That same high res pdf got exported again as a jpg for the client to see and it went down to 4.2mb and the quality was excellent (but included no vector lines) I think it is always a balance of the final intent vs quality vs size.
-
RW Style Oddity - Anti-Alias and Full-Screen Options
Luis M Ruiz replied to Charlie Winter's topic in Rendering
@Charlie Winter Thank you for sharing the file. I did some tests and I found a few things that can help the rendering: Sheet resolution was set to default 72dpi. Ok for preview but for finals go up to 300dpi min. That takes away the graininess and makes the carpet and walls look sharper. There was no light source (sun object for example) always create one even if this one is off. That light source can be set to smooth shadows or sharp depending on the effect you are going after. I think for the look you were going after there was no need for hdri background Increase the resolution of some of those light settings, Once you are done with previewing the viewport, uncheck full screen, that'll make the rendering go faster. For quick testing of textures, try artistic cartoon other than OpenGL Add some ambient occlusion, helps to create some volume. I hope these tips may help.

-
@Alex71 Recommendation. Don't be afraid of bringing those sheets with OpenGL viewports at 600dpi.
-
Renderworks texture preview different from actual result
Luis M Ruiz replied to iaincognito's topic in Rendering

-
Renderworks texture preview different from actual result
Luis M Ruiz replied to iaincognito's topic in Rendering
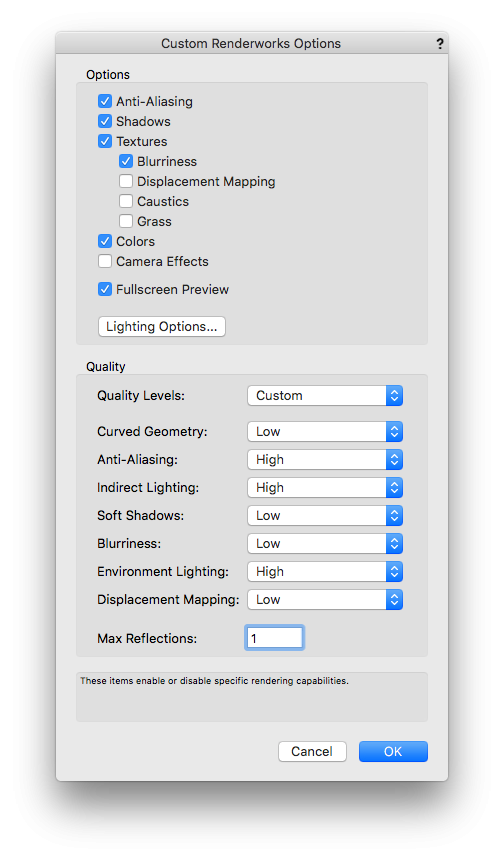
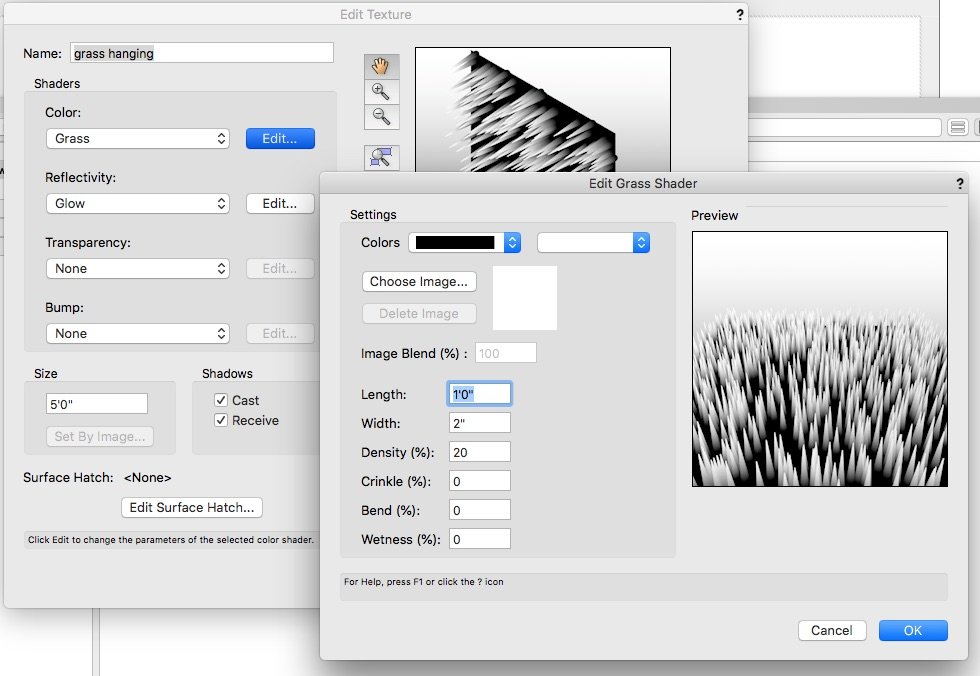
@Kevin Allen I almost forgot about this test. Here is in grass, thick blades but the tips are always sharp. Funny.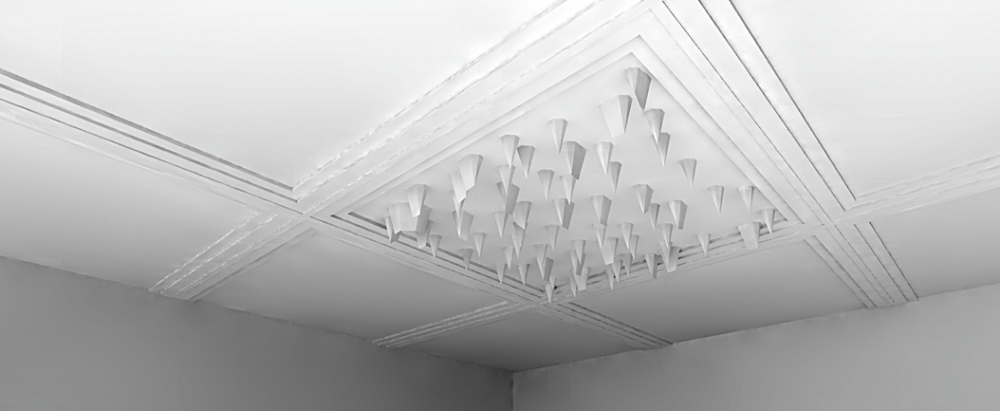
-
Renderworks texture preview different from actual result
Luis M Ruiz replied to iaincognito's topic in Rendering
let me get on it.... -
Renderworks texture preview different from actual result
Luis M Ruiz replied to iaincognito's topic in Rendering
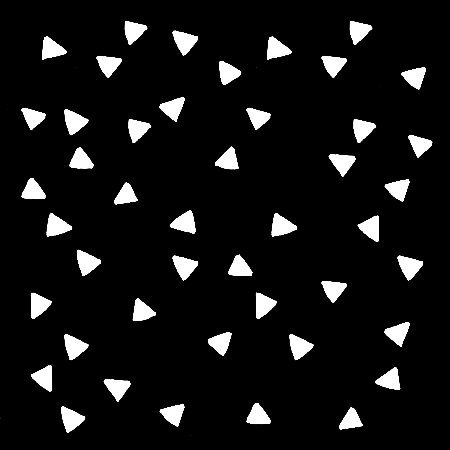
I tried creating a pattern of black and white triangles. Here is what I was able to test. test displacement mapping.vwx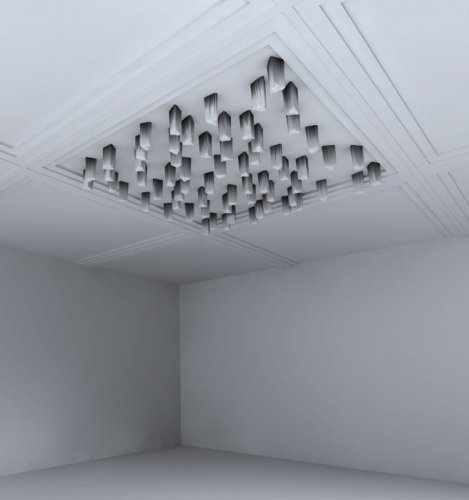
- 10 replies
-
- 1
-
-
- renderworks
- texture
- (and 1 more)
-
I'll be curious about how you achieved that bubble effect. I never had that problem with my files. Would you like me to take a look at your Renderworks settings and backgrounds? if so, send me a link to your file and I'll send you back a report.
-
For shortcuts, try including Multiview, switch to iso and perspective view, clip cube and for the cherry on top, add boolean operations and rendering modes to the radial buttons, these make my days super fun.
-
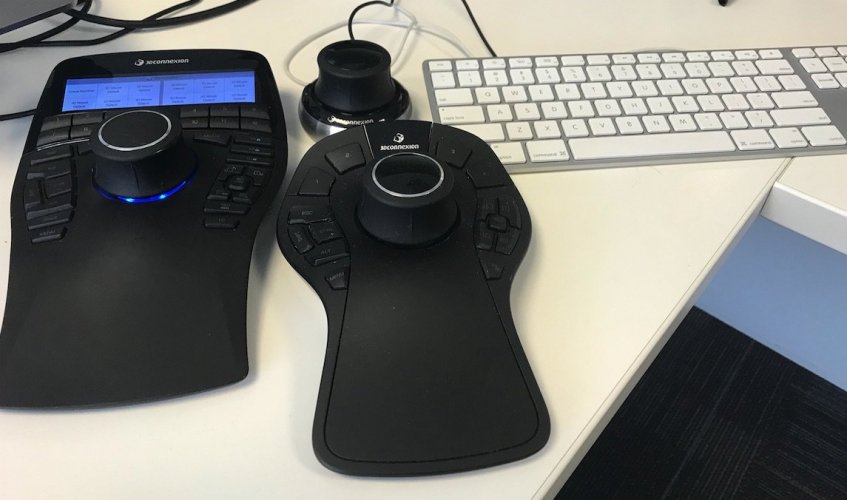
Well.......When all is needed is to fly around and through models for presentation purposes, then my small bucket is cool enough. If it's production at someone else's office then my middle companion does the job well. My big friend over here is my goto device for serious production, especially on any Friday before 5:00 pm. 🙂
-
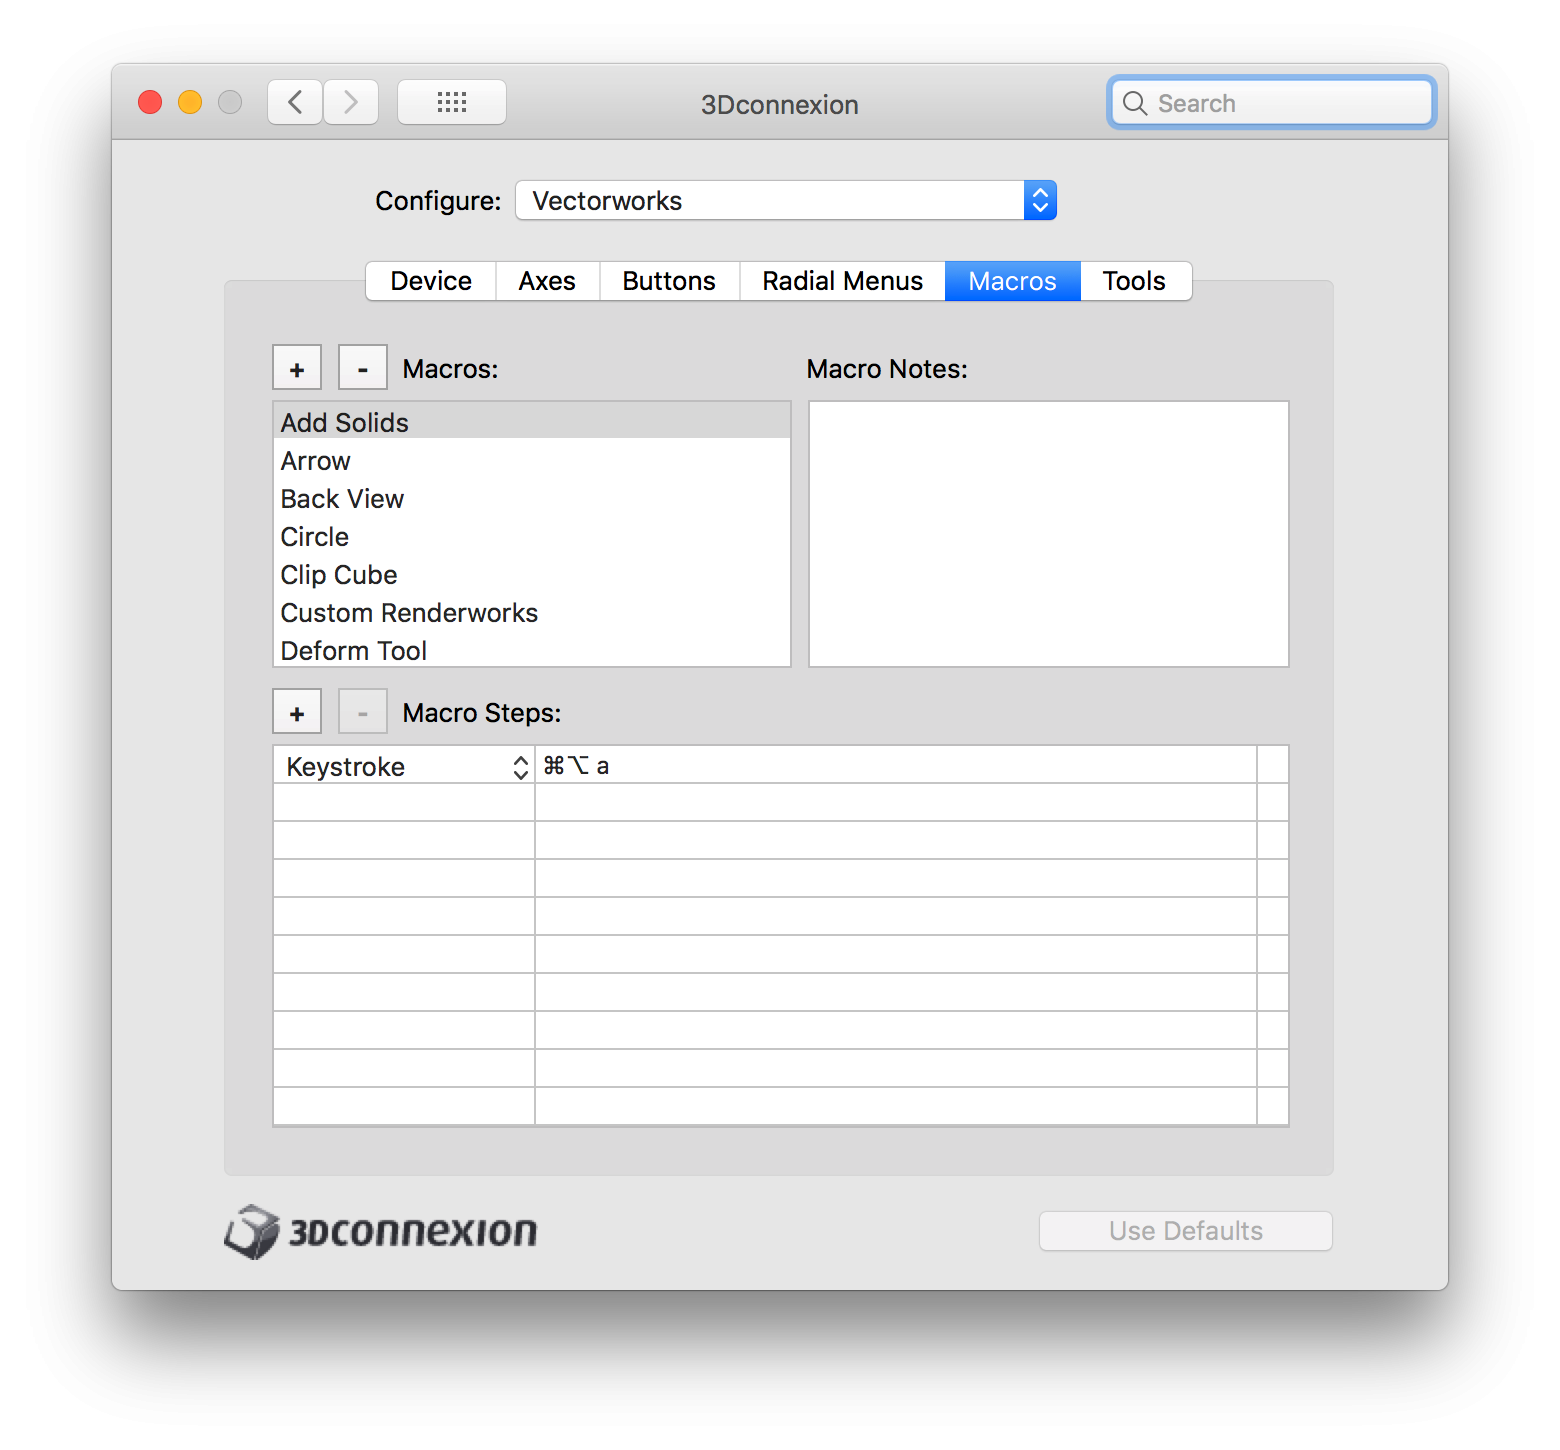
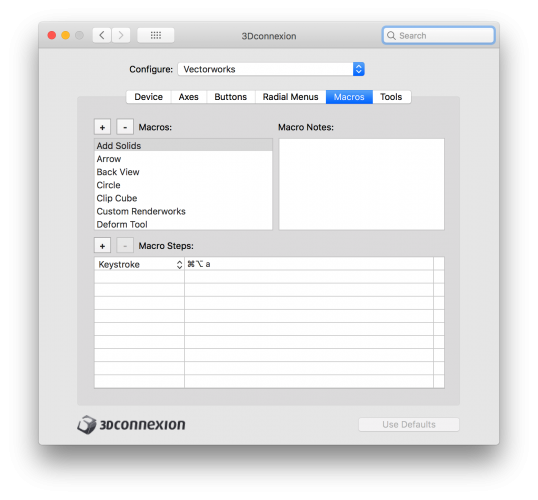
yep. I have about 30 of these macros. List is long
-
@Mattsaxon Since you mentioned you had v2017, here is my troubleshooting first recommendation. Plan A- Download the latest 3dconnexion driver. Migrate your custom workspace Edit custom workspace, now, since you skipped two versions, plenty of new tools and menus are missing from your 2017 workspace. Plan B - Start a new custom workspace from scratch but pay attention to those shortcuts that you are used to. For me jumping from 2018 to 2019 was all about adjusting my workspace, from 2017 to 2018, I created a new and fresh custom workspace, typically for me is a copy of Architect. Is it tedious? Well, I find it to be not an immediate task, but it is something I take care of only once a year. Is it worth it? totally.
-
After migrating my super workspace and update it with all the cool new features in v2019, my 3d enterprise works as usual. Although, I assigned new macros to some of those buttons, for example, activate clip cube seems to be one of my new favorites.
-
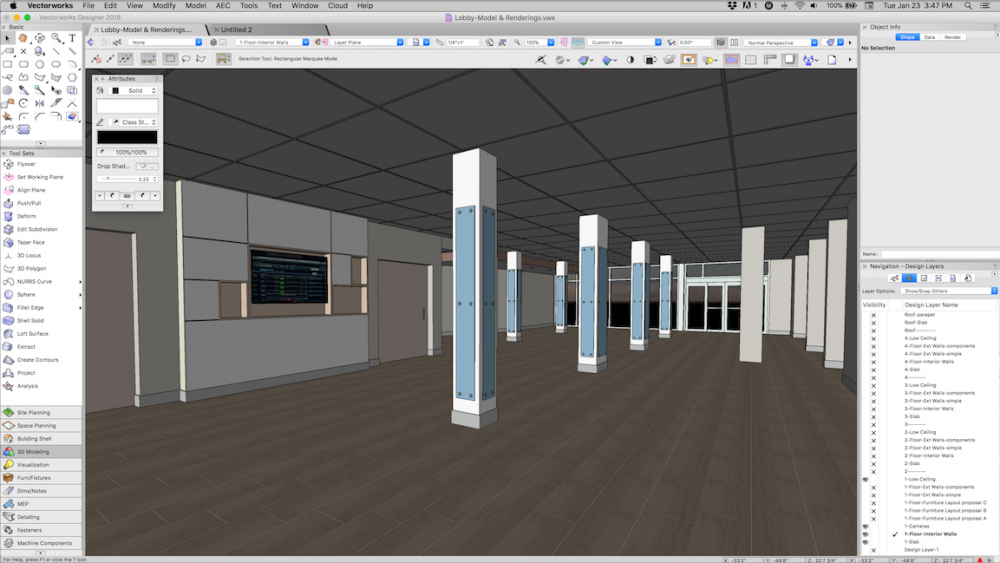
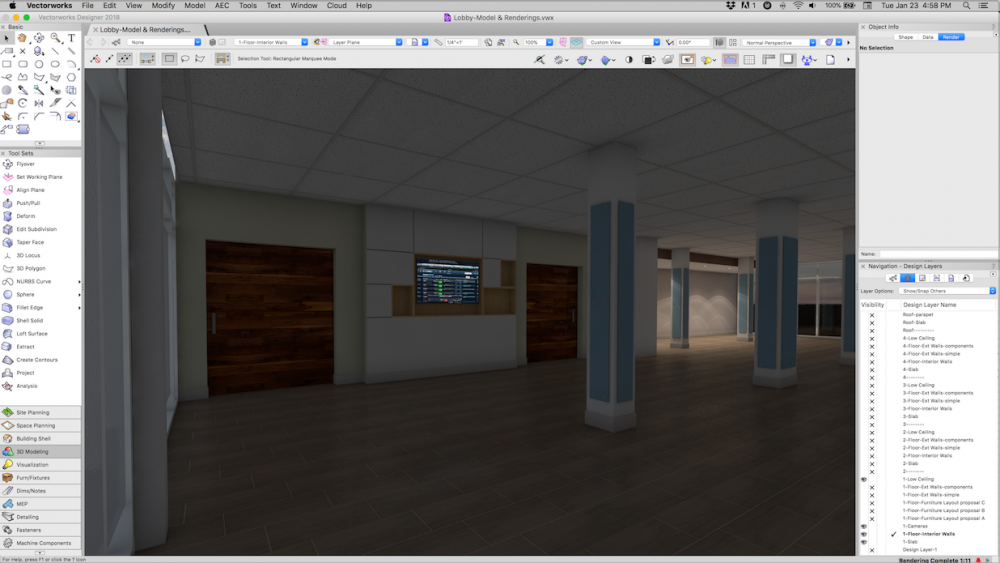
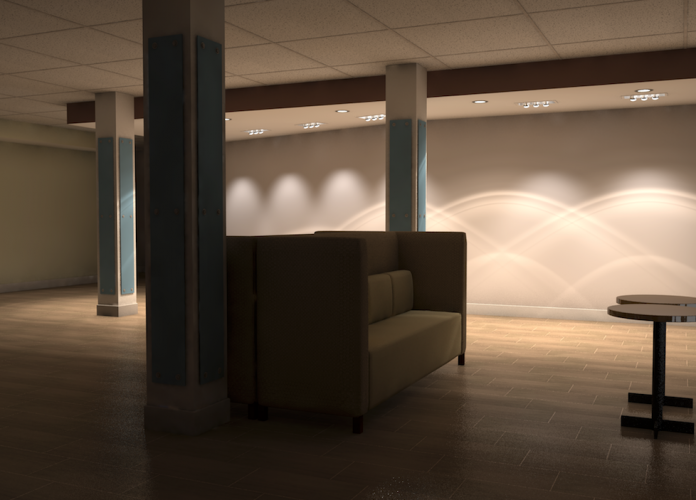
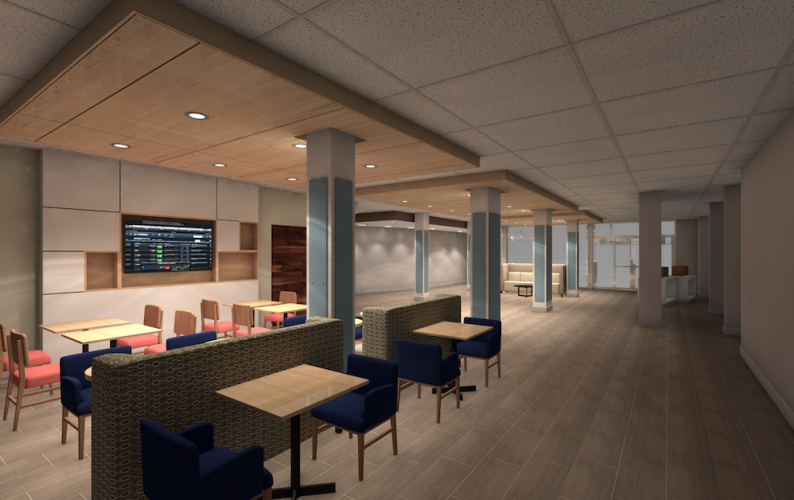
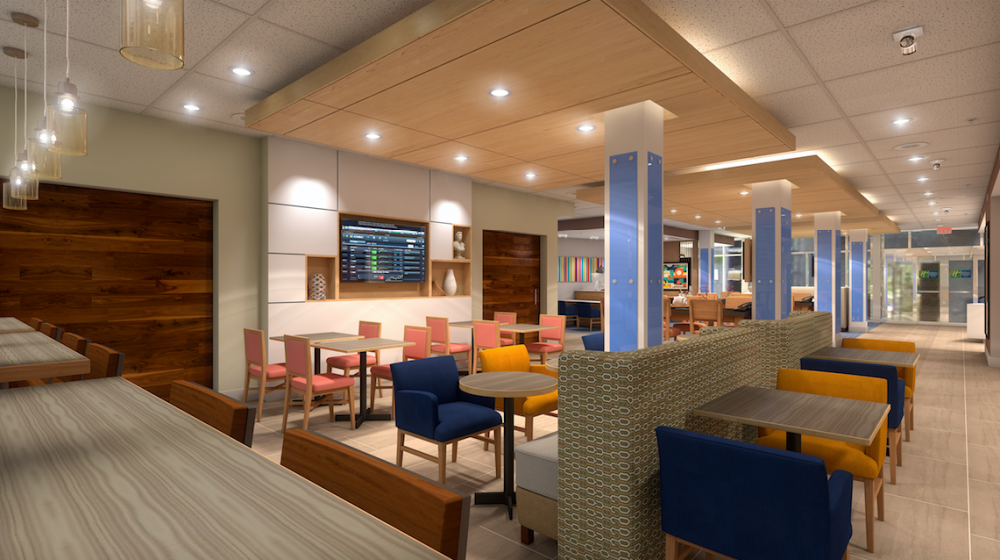
@Zeno Here is a sample model that worked well with the box approach. The illumination is generated from real light sources. The materials are very simple, wood from our library, a bit of blur, reflection, glass, carpet and white texture for the ceiling. And as you can see, no weird spots. If you save your settings as a render style you could reuse it when creating a panorama for example. see link: https://test.vcs.vectorworks.net/links/11e8a20bc32623609be50efe23c56710/
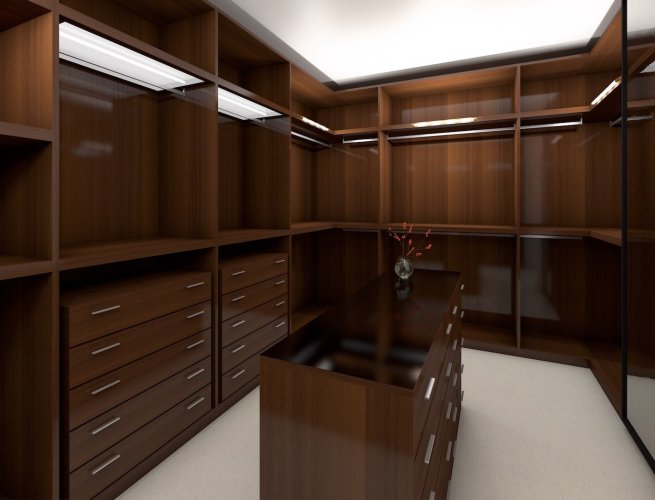
-
@Zeno Correct, literally inside of a box, a cube. But here is the approach, for interior renderings that only make use of real lights inside the model this works, as Jim Wilson said in one of his workshops, prevents the bounces of light from traveling infinitely. Think about this method like building a fake store inside of a black warehouse. But you are right, in case of needing a heliodon object, then no use.