


markdd
-
Posts
3,411 -
Joined
-
Last visited
Content Type
Profiles
Forums
Events
Articles
Marionette
Store
Everything posted by markdd
-
The workflow I use is: Duplicate the Rigging Position in place and delete the original. (You can use the J key to select the bottom position) This will detach the lighting devices immediately. To re-attach the lights, either: Select them all Run the Attach to Rigging Position command or Nudge them left and right/up and down and they will re-attach to the new position. This method is no more than the same amount of clicks that it would take if there was a "Detach from Rigging Position" command. However, I do think that because there is an "Attach" there should also be a "Detach" version alongside the Attach command.
-
Ability To Add A Draft Watermark
markdd replied to Collin Klein's question in Wishlist - Feature and Content Requests
The Title Block Border object can do this for you relatively quickly. Look for the options regarding the Drawing Stamp. It takes a few minutes to set up, but once you have what you need, then it can be added and removed from the Title Block Manager.- 1 reply
-
- 3
-

-
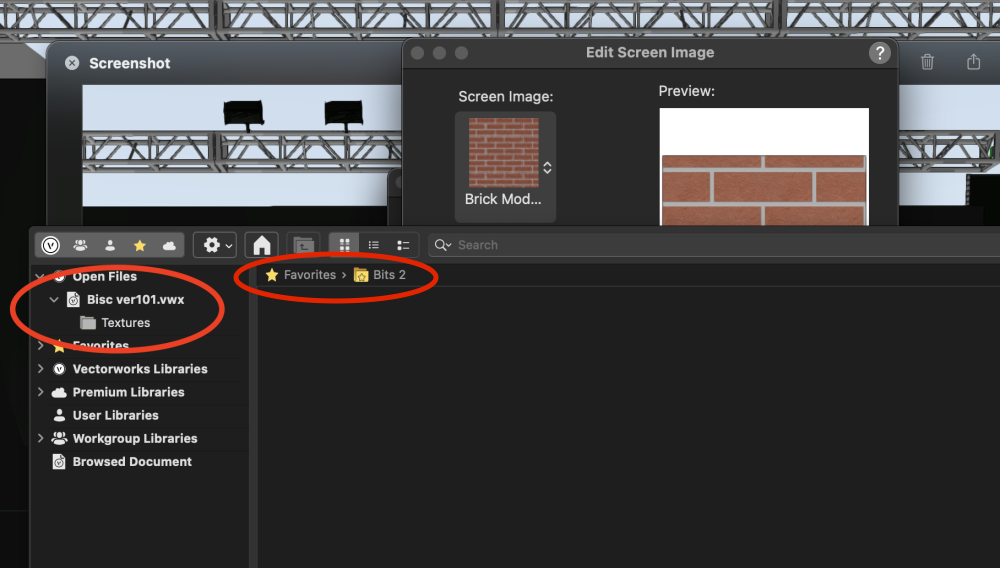
You can't put an Image resource into a Texture Folder. Have you made the Renderworks texture with your custom image yet?
-
The Bits2 Folder contains an Image Resource. The Video Screen is looking for a Texture Resource. I think that is why you are not seeing the folder. I think that the Edit Screen Image is probably misleading you into thinking that you are looking for an image resource when in fact you need to look for a Renderworks Texture.
-
You are currently looking in your favorites folder. Try clicking on the Textures Folder.....?
-
If you want to add a Logo to a Video screen, then you need to make your own Renderworks Texture resource. An Image resource like the one you are showing will not work. The Video Screen will come with a stock Texture resource called Vectorworks Logo RT. This will already be displayed on the screen as you have no doubt noticed. My advice would be to duplicate that texture resource and follow the workflow for editing images within a Texture. It is very straightforward and should take just a few seconds. Right-click on the duplicated texture and select Edit. Under the Color shader menu you will see Image displayed. Click on the Edit button and select Change image. Select Import an Image File and then navigate to the image on your machine that you want to use. Then press Open and OK and OK again and the Image will be loaded onto your Video screen. There are a few rudimentary controls within the Video screen plug-in to change the position and scale of the image, and then you should be done.
-
That particular slip-up gets everyone from time to time. It would be so much better if the Spotlight Numbering DIalog opened showing all of the Parameters at once, or some indication that more than one field is checked for numbering. @Scott C. Parker Perhaps a future enhancement? Especially as it is such a common mistake.
-
It is because you also have Unit Number and Universe checked as well. The Universe and DMX address won't play well together in one operation. Best just leave the DMX and Unit fields checked and the Universe will number itself.
-
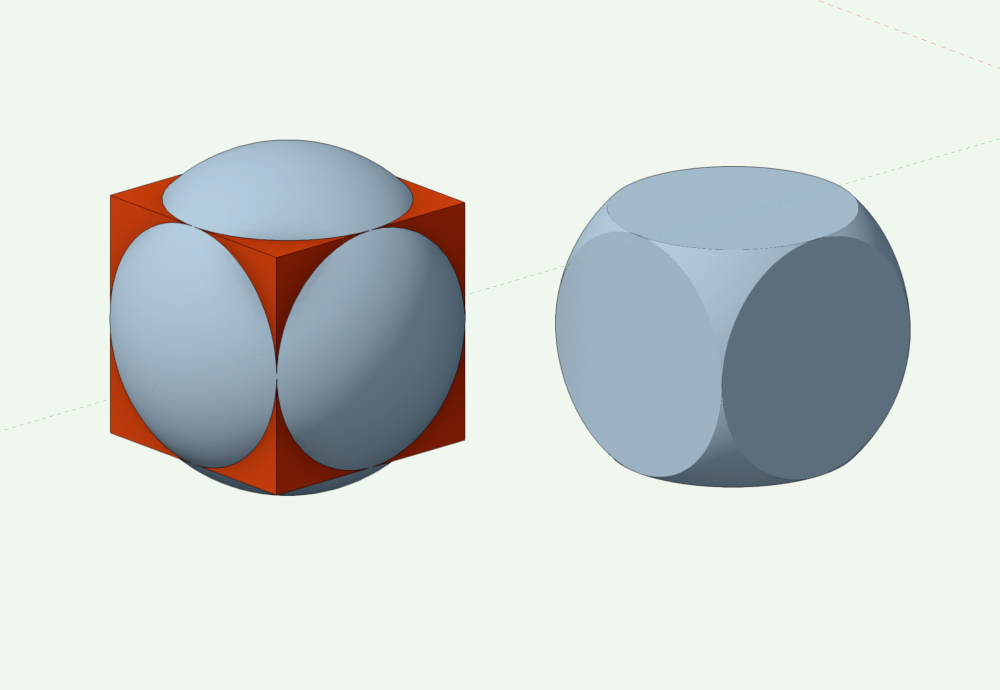
It would be better to consider it a Sphere with the 6 sides of a cube cut off. Create the cube that you want and then create a sphere directly over it so that they are aligned. Then select the Cube and the Sphere and run the Intersect Solids command.
-
Section viewport, or Viewport from Clip Cube in wireframe
markdd replied to Mickey's question in Wishlist - Feature and Content Requests
Have you tried a Dashed Hidden Line render mode with the settings set to "Continuous" and "Dark"?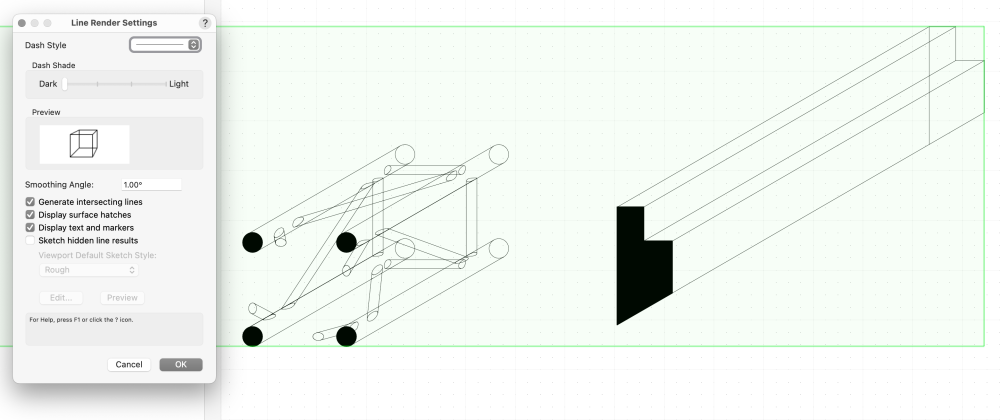
-
You can't unless you can manage to specify particular "genders" for each connecting Truss Object. Then you can specify in the Magent what the magnet connects to. This is a hack though and the Truss Tools are not really designed to do this. You would be better off making two Symbols and using the correct one for each particular Truss that it connects to. If you are worried about inventory counts, then you can set up a worksheet to count by Truss name as opposed to Symbol name.
-
Why don't you just put a single magnet at each location you want to connect to?
-
Line pen attributes custom and "by class"
markdd replied to Cristiano Alves's topic in General Discussion
What is your design Layer Scale? Pen thickness is not scaleable so if your design layer scale is something like 1:10 or lower, then you will barely discern any difference from one thickness to another unless you choose something over 0.5 mm thick. This is particularly so if you have Zoom Line thickness enabled. -
I needed to do this once before and created a data tag to read the Object Name of the Viewport. The Name field is filled in with the View when viewports are created using the Create Multiple Viewport Command. That's the only solution I found.....
-
You should investigate the Publish Command which is in the File menu.
-
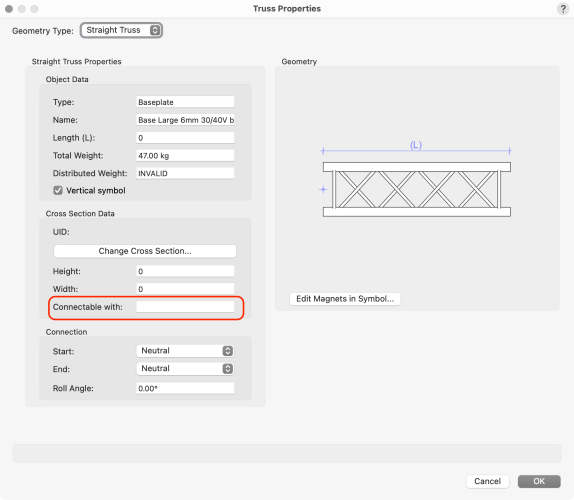
Add a Semi-Colon to the "Connects With" field.
-
It’s really grim. I have turned it off altogether in Vectorworks preferences.
-
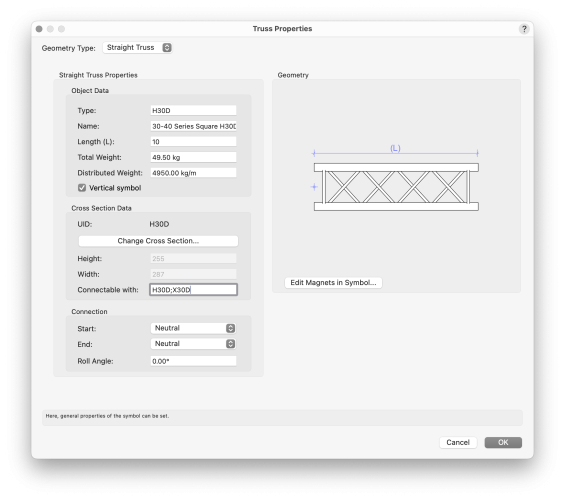
Sorry, yes Customize Truss Symbol Data is correct. You should get this dialog
-
Right-click on the Truss baseplate and select Customize. Fill in the "connectable with" field with the same information as in the Prolyte truss. That should do it. That information is passed to the symbol which will continue to hold that data.
-
Go to Spotlight Preferences and in the Loads sections uncheck the Auto Connect function. - I wish there was a keyboard toggle or a quick preference button for this.
-
Hatching in section views instead of black filling.
markdd replied to Amarin's topic in Architecture
I believe that by default, the cuts are added to a class called Section Style. This is set to have a Black Fill. Look for that class and change it to whatever Fill attribute you want. -
You need to enable “Receive shadows” in the Renderworks background.
-
This Data Visualization changes the foreground color of a Fill. As the symbol only contains one object that has a foreground color (the Hatch) then it is the rectangle that is filled with a Hatch attribute that will change when you vary the data attached to the symbol. There is no secret sauce other than that. Currently, there is no way to vary individual objects (that I know of) within a symbol based on the data that the symbol holds. Data Visualization, although clever and fantastically useful, is quite a blunt instrument.
-
Any place to check where are all fixtures on project?
markdd replied to Cristiano Alves's topic in Entertainment
Removing the records from the Symbols is the only way. Does it matter as these are not going to show up on any paperwork? -
No, its in the object info Palette.


