Tom W.
-
Posts
5,013 -
Joined
-
Last visited
Content Type
Profiles
Forums
Events
Articles
Marionette
Store
Everything posted by Tom W.
-
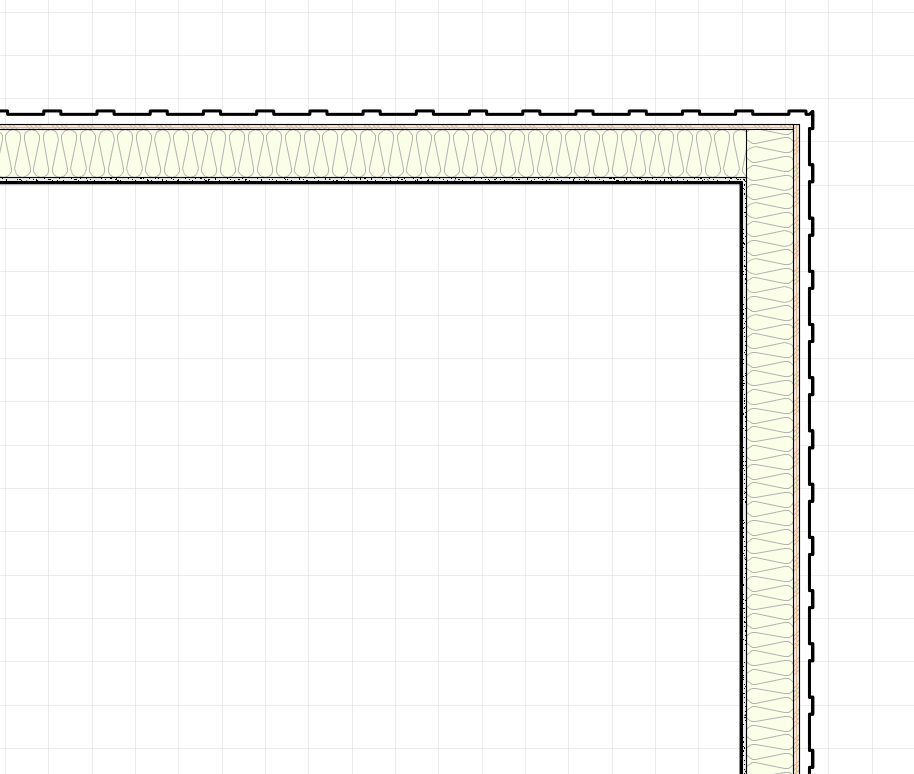
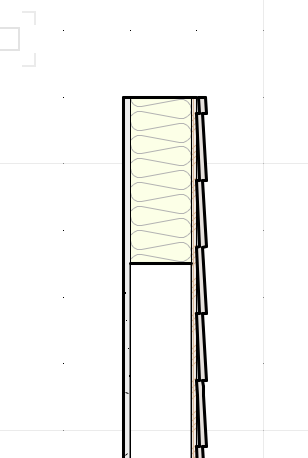
Thanks @Matt Panzer that's really useful to see. I like the shake siding where you've taken the back of the boards off as well that looks great. I also love your fibreglass insulation texture I'm taking that for my libraries! Thanks for taking the time to explain all this it's really interesting
-
Very nice indeed. Do these log-end symbols stay with the walls if you move them?
-
Batten on board version. I love it!

-
Thanks Matt was just trying it out as you posted has worked fine for me in simple test so for now at least I'm v happy to have learnt about this thank you
-
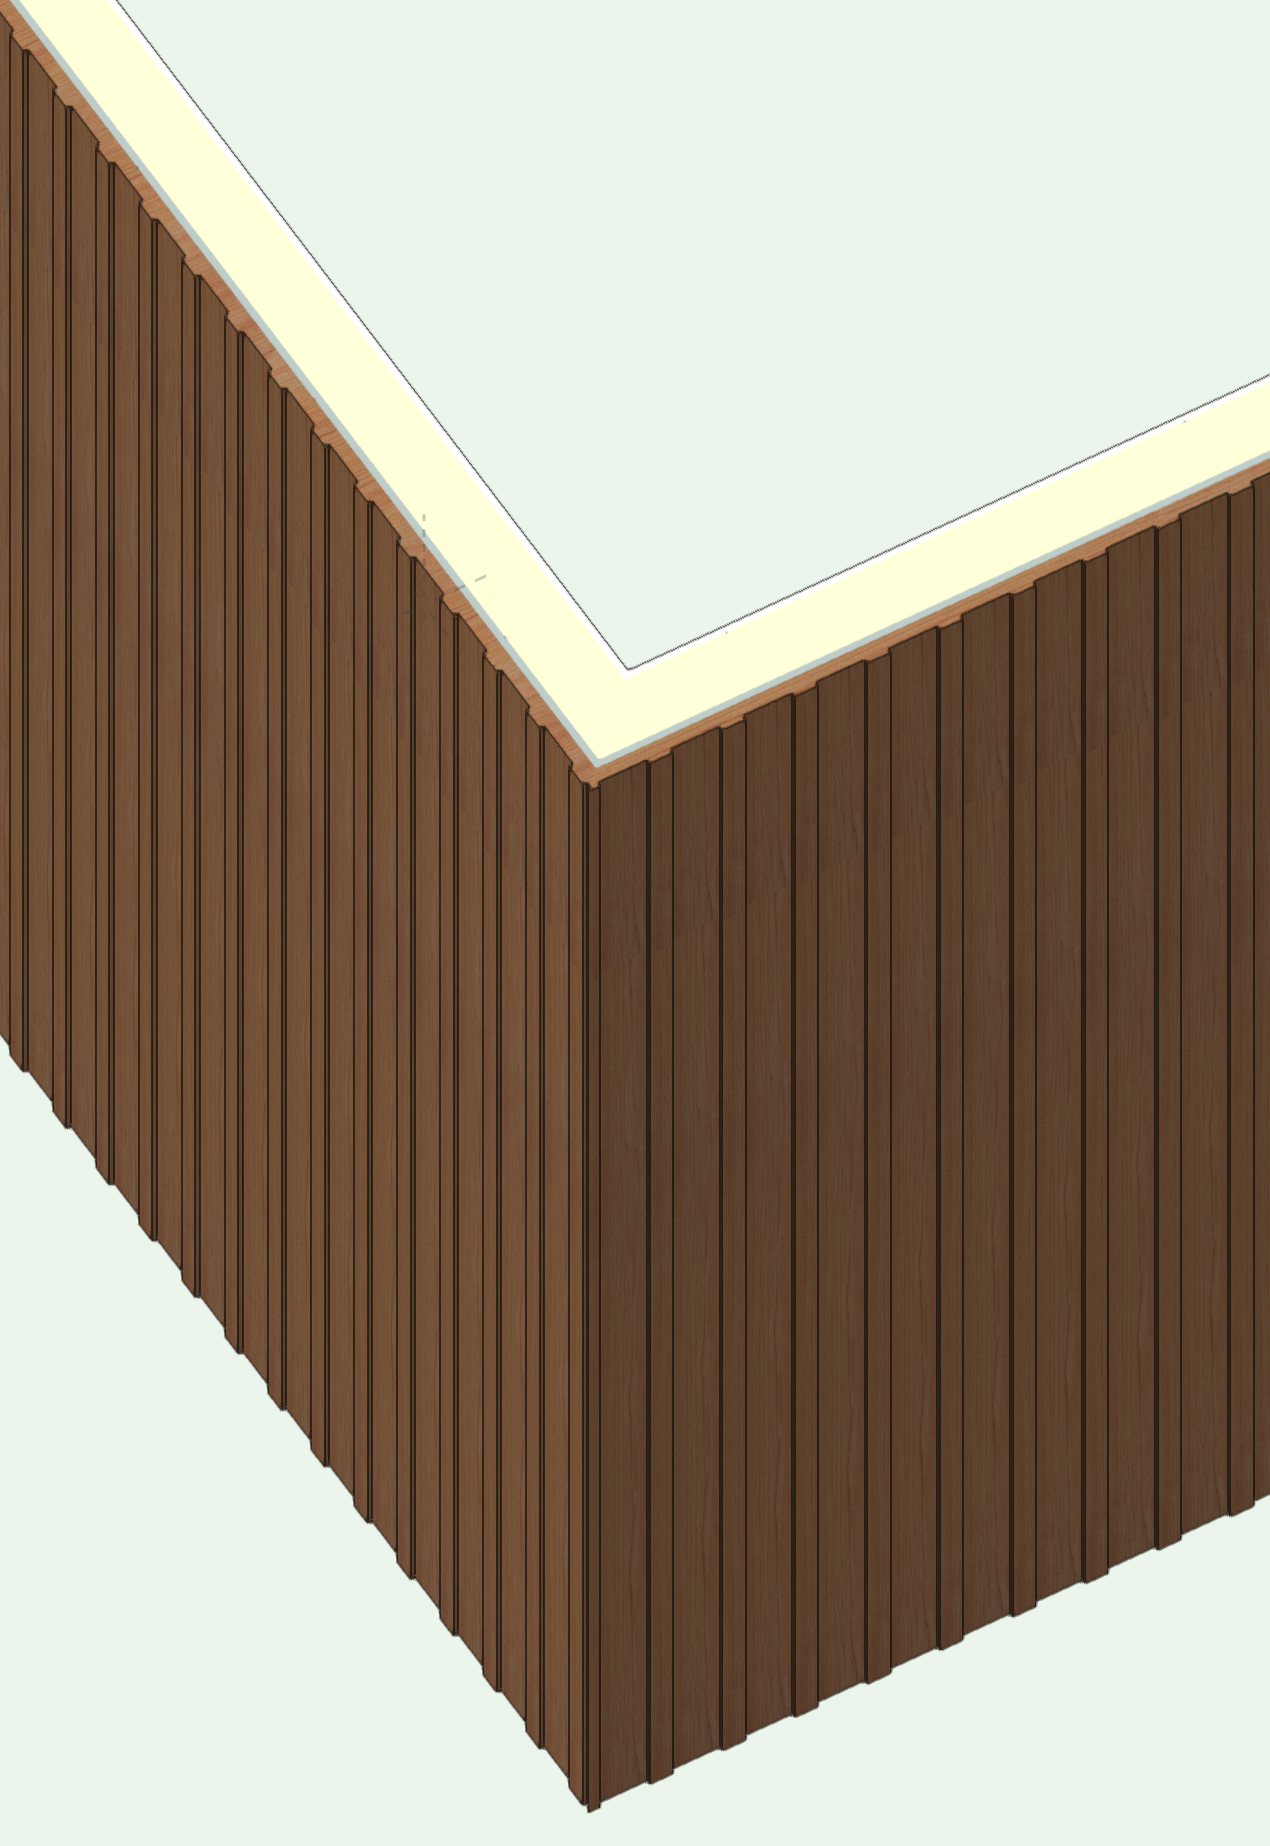
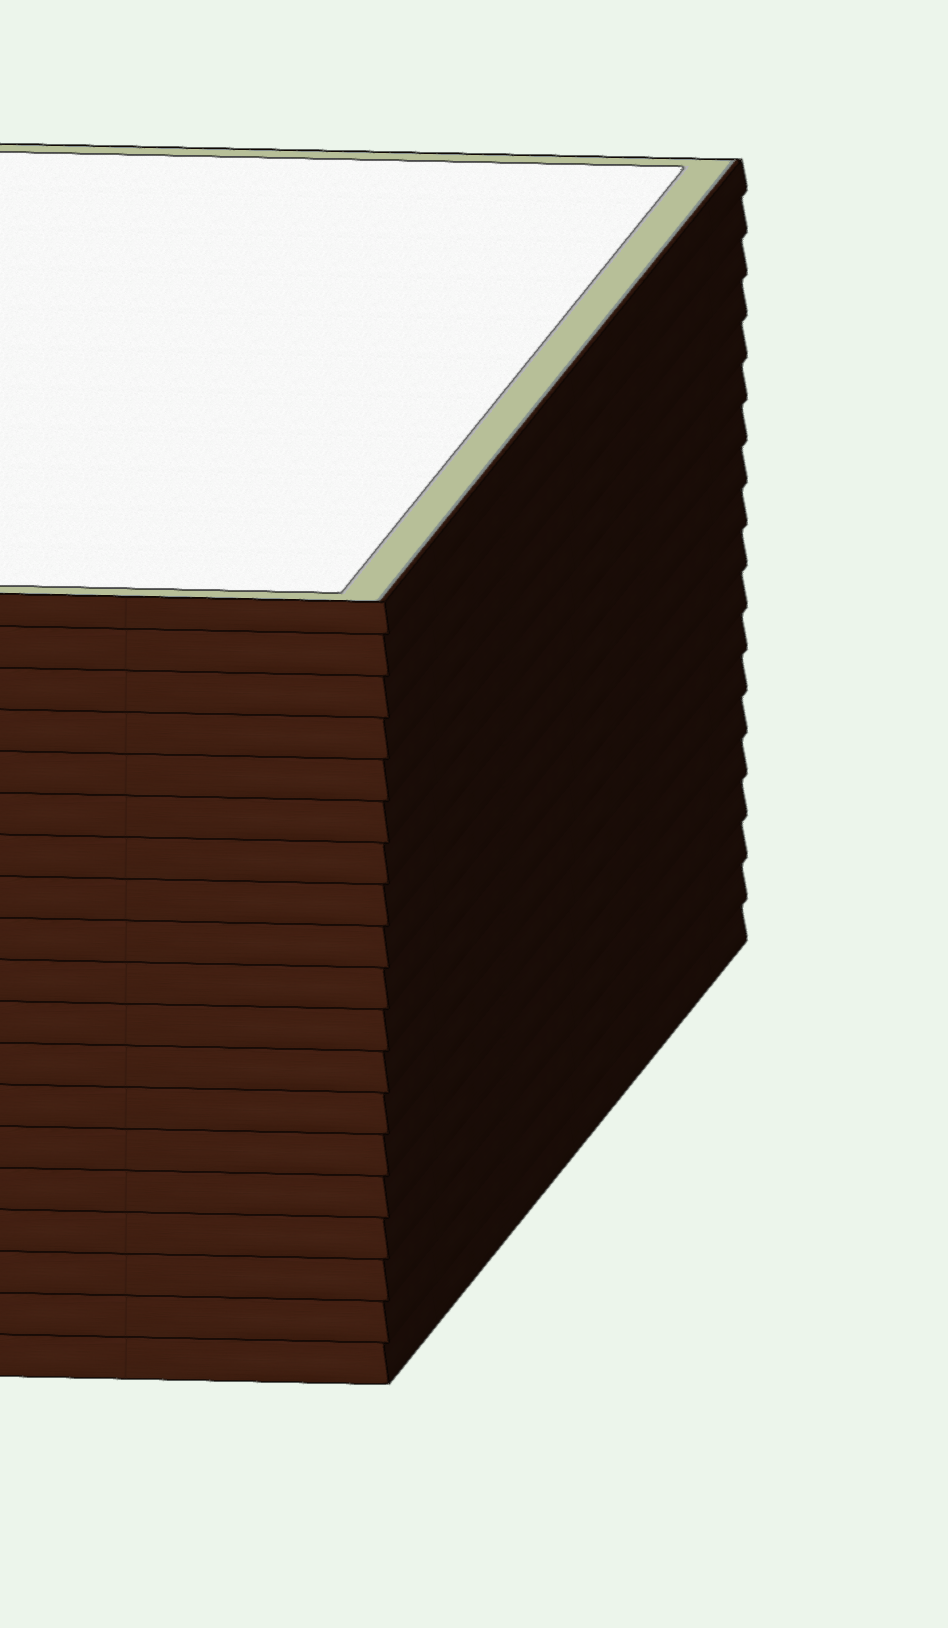
That's a really great video @Matt Panzer thank you. So if I became really obsessed + wanted to depict super-realistic featheredge cladding (bevel siding) or vertical batten on board siding for that matter I could use this technique? To just remove material from the outside face of the wall. And would this give me the correct profile in each case in top/plan + vertical section? Thanks again lots to try out...
-

imported DWG with colour lines ----> B&W?
Tom W. replied to DSmith2300's topic in General Discussion
This may not be appropriate depending on what the DWG is + what you're using it for, but if you have imported it into its own blank file + your design file is a separate file, an alternative is to bring the DWG into the design file as a Referenced Design Layer Viewport. This is advantageous in that you leave all the millions of DWG classes behind in the import file but you can also, because the DWG is a viewport, go to Advanced Properties in O.I.P. + check 'Black + White Only' to get rid of the multicolour look. -
Massing Model ridge height setting
Tom W. posted a question in Wishlist - Feature and Content Requests
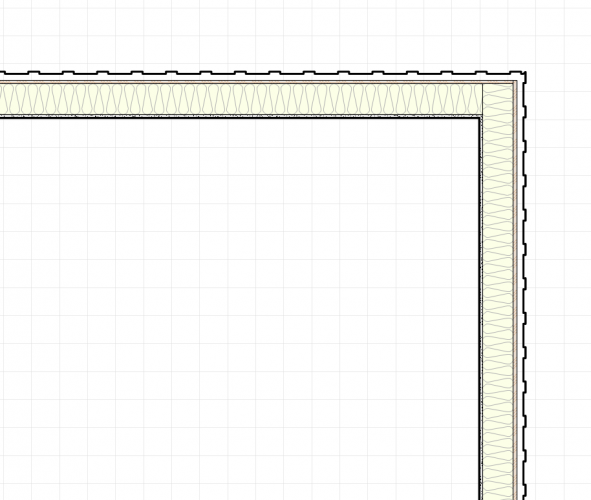
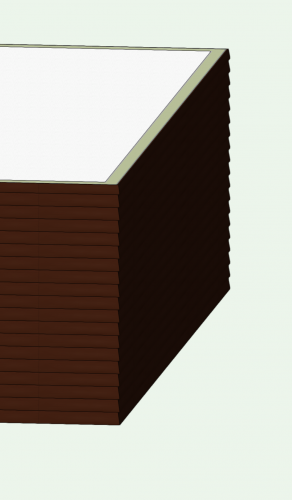
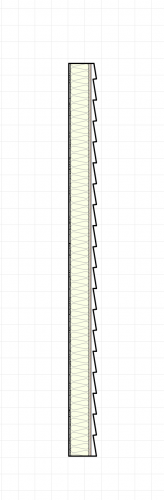
It would be great to have the option of setting a ridge height for the roof when you create a Massing Model. At the moment you enter a height for the eaves + an angle for the roof slope + the height of the ridge is worked out accordingly. I am most often working from site surveys where I have eaves heights + ridge heights but to create massing models of these buildings I have to work out the roof angles manually by sketching the buildings in section. It would be a lot quicker + easier if I could choose to enter the eaves heights + ridge heights + let VW work out what the angle of the roof slope is.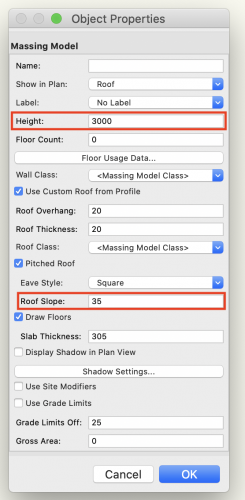
- 1 reply
-
- 2
-

-
VW University Content - Sort by Date + version request
Tom W. replied to E|FA's question in Wishlist - Feature and Content Requests
It would also be great to have a thematically-arranged index of the courses to enable you to more clearly see what there is in total + what areas are covered, rather than having to scroll through them all one by one with little sense of where the end is or what order they are in 👍 There was also a whole load of material on the Service Select website that has now disappeared. Much of it was woefully out of date so no loss there but some of it was good. -
Be great if you did! I get mixed results with site modifiers be glad to hear some tips re practical approaches like above... Thanks
-
Thanks @Art V I didn't know about 3D Viewer. I did a quick test + notice that my shadows don't show up on the PDF. 'Enable Extra Lighting' was set to 'CAD Optimized Lights'. I tried changing to 'Lights From File' + the model went black. Is there a way to display the shadows? Many thanks
-
2021 - Material Control Over Cut
Tom W. replied to Tom Klaber's question in Wishlist - Feature and Content Requests
These are called LPS structures here (UK) + Ronan Point was a 22 storey tower that famously collapsed in 1968 after a small gas explosion in one of the flats… I actually did an art project in another LPS tower several years ago in Liverpool which was due to be demolished. I can remember being quite alarmed at seeing the small steel angle brackets bolting the whole thing together when I pulled up the floors on the 21st story… According to wiki David Chipperfield thinks that the plain appearance of plattenbau discourages gentrification + ‘may be a factor that helps preserve social continuity for local residents + neighbourhoods’... ! -
2021 - Material Control Over Cut
Tom W. replied to Tom Klaber's question in Wishlist - Feature and Content Requests
I have a friend who’s been doing a lot of MEP consultancy in China + says the way they build out there is amazing in that things are incredibly organized + buildings go up incredibly quickly but that the process is systematized to such an extent that the buildings are virtually identical + highly inflexible. They will end up doing things (incorporating features) that are entirely unnecessary just because they come in the ‘kit’ for the type of building being constructed. This is just an anecdote + I'm not an architect but I found the idea of not only aesthetics being compromised by this approach but functionality as well fascinating: ending up for example with a bigger building than you actually needed simply because it was quicker/easier/cheaper to go ahead + build the bigger building than modify the design for what was actually needed. -
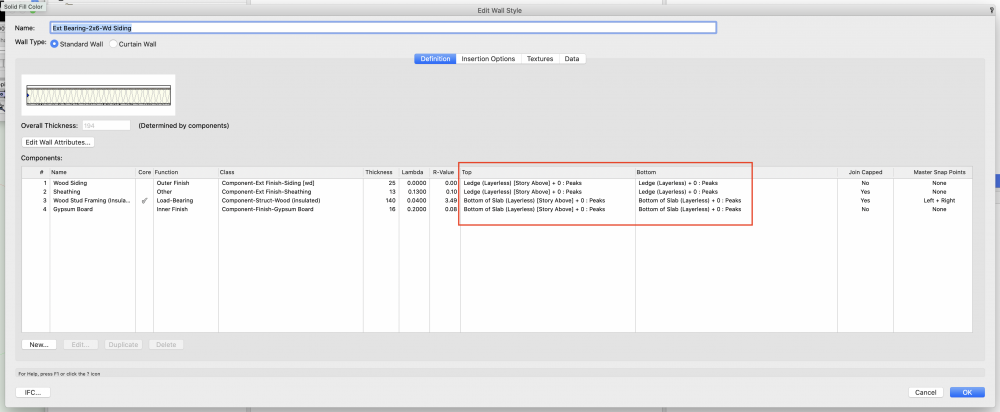
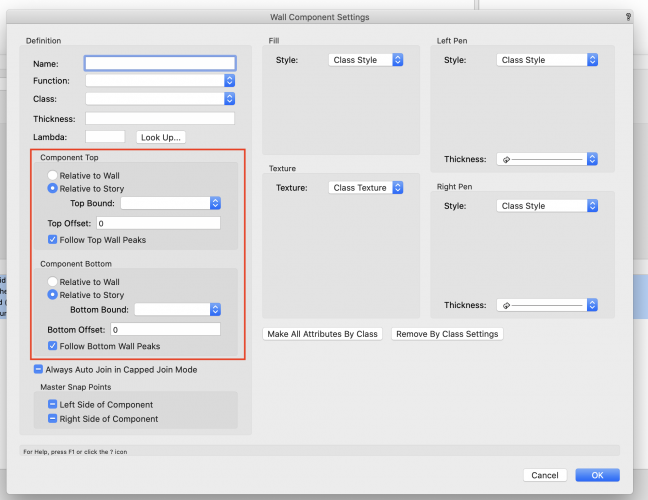
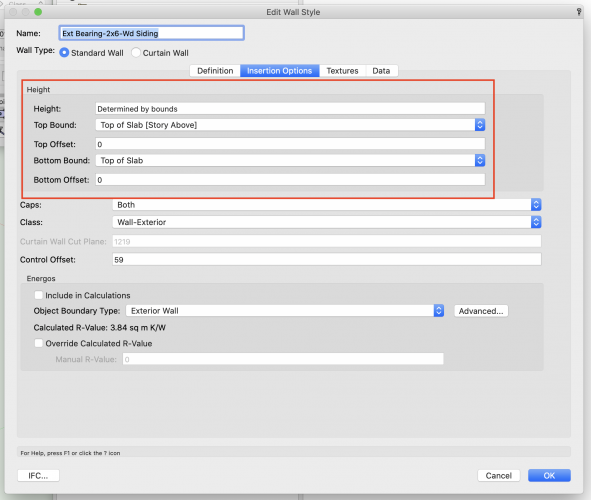
Hi @jcaia to illustrate what Jeff says if you look at the settings for the particular wall style you're using you'll see that its overall height and the heights of its components are set to be bound relative to story. To make this particular wall behave the way you want in the first instance you need to change top bound to 'Layer Wall Height' + bottom bound to 'Layer Elevation'. And in the second instance select all four components + click on Edit... + change 'Relative to Story' to 'Relative to Wall'. Then it will respond to what is shown in the O.I.P. You just happen to have chosen a story-bound wall which is why it's behaving this way. In a way you might be better starting with a blank canvas + creating a wall from scratch, then you can ensure it's set up exactly how you want it rather than editing an existing one which can be confusing. I'd treat the VW walls/slabs/roofs more as samples/examples of what you can do rather than resources you'd actually seek to build a full model from. It all goes back to what @E|FA said earlier about making a decision at the beginning as to how you want to set up your document. The simplest way is to have no wall height at all set on your design layers + to set the top + bottom wall bounding to 'Layer Elevation' + then just control the height by the Top Offset value. This will be a value added to the layer elevation so in effect becomes the height of the wall. The other end of the scale is to use stories which has many advantages but is more complex to set up. It depends on what you're doing + what you need. For example, if you have a single story building + you know what the wall height will be from the outset + it's never going to change, then probably v little advantage to using stories.
-
You want the top offset in the O.I.P. set to zero not 10'. You're in effect adding 10' to the layer wall height hence increasing it from 10' to 20'
-
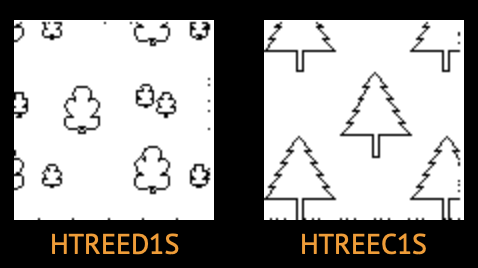
Hi I'm after a hatch to use on mapping to depict woodland/trees. I found a couple on cadhatch.com which looked ok but they are .pat files. I checked some old posts + said you have to first import it into AutoCAD before importing it into VW - I just wondered if anyone had a VW tree hatch they could share or knew where I could get one? I don't have AutoCAD + all sounded a bit long-winded so just thought I'd see if there was an easier option first... Many thanks
-
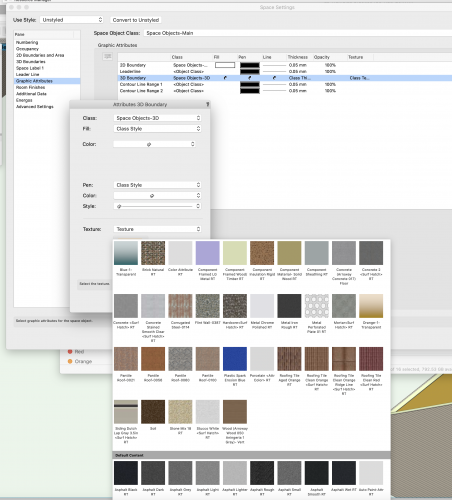
One thing I've noticed is that if you choose to change the texture on a Space in the Space Settings rather than in the Class, you don't get to choose the texture from the Resource Selector like most tools, you instead get a plain looking window of a type I don't think I've seen before with the textures in your active file at the top then below this all the remaining textures in your libraries but without any way to search/filter them to find what you're looking for. So you need to import the texture you want into your active document beforehand in order to then be able to select it from in the 3D attribute settings unless you want to spend a day scrolling through all your textures. Why don't you get the Resource Selector like every other tool?
-
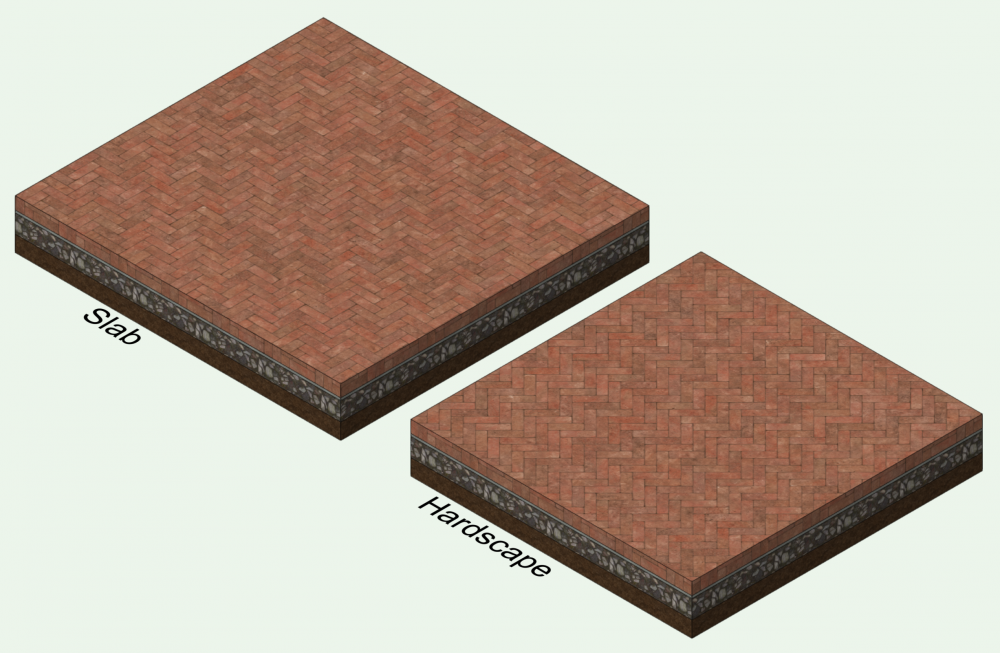
Or slabs and hardscapes
-
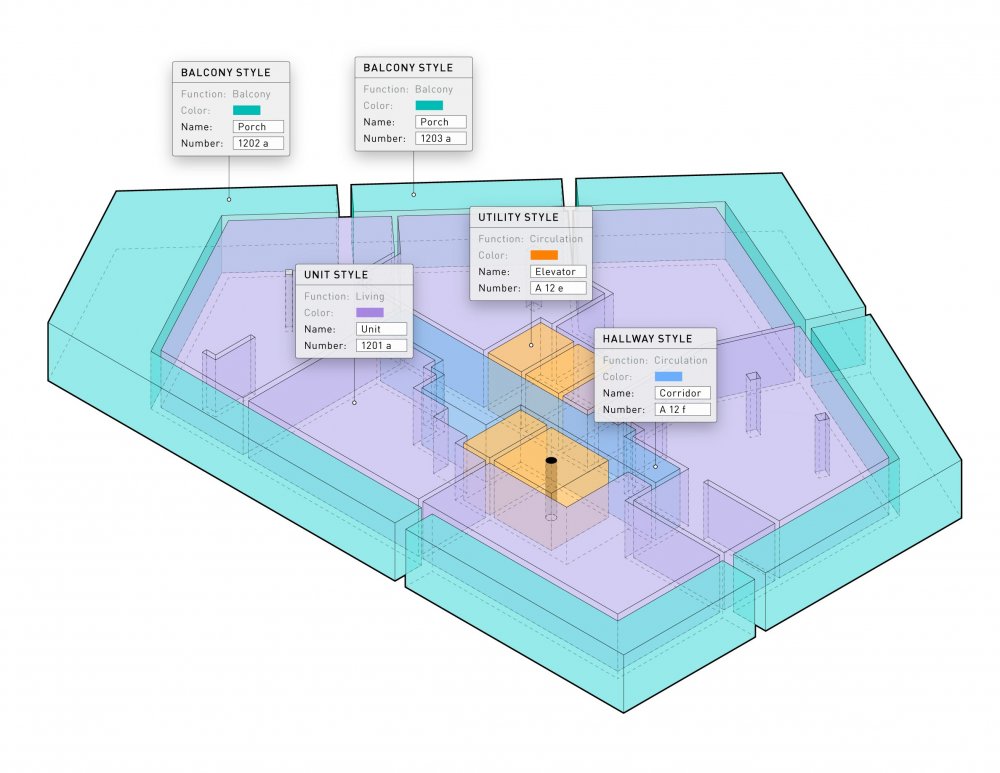
Hi @drelARCH I haven't used the tool much I was just playing around with it. This was on a design layer. I did make a 'Space Object-3D' class + assigned the 3D Boundary to it but I think I only did this because there was no opacity setting on the 3D Boundary attribute settings in the Space Settings whereas there is in class attributes. And I was flailing around trying to make the solid colour transparent. But as Pat pointed out, opacity only applies in 2D which is no doubt why you're not offered it in the 3D Boundary settings. All I did in the end was take a transparent blue plastic texture from the VW libraries + apply it on that class. When the object was still showing up as opaque I edited the texture + changed the transparency from 'glass' to 'plain' + then it worked fine. But I imagine you could apply the same texture directly in the Space object settings + it would work the same. I only ended up doing it by class because I was searching for a way to control opacity. Yes this was all in OpenGL on the design layer with no lighting. I think you need light for 'glass' transparency but not for 'plain'. Make sure if you're setting the attributes by class you set everything to 'by class' in the object settings. I don't believe there are any plain solid fill colour textures in the VW libraries but you can just set image to colour + choose whichever colour you want + set transparency to plain + set whatever opacity you want + get a range of different coloured textures for use in this way. What I haven't checked because I'm at a different computer right now is whether you can do this with Data Visualization or not: can you use textures in data visualization or just colours? Just colours I think so probably not...
-
I find the overlap between Hardscapes + Slabs quite confusing + the fact you can do some things with one + not the other
-
Many thanks Pat I did try a transparent texture previously (or rather a texture that had 'transparent' in its name) but it still looked fully opaque. But following your reply I tried again + changed the transparency to 'plain' + then it looks great. Is that to do with 'glass' transparency requiring light to work? I can see its just a matter of setting Color to 'color' + Transparency to 'Plain' + you can have whatever colour + whatever % opacity you want. Excellent thanks
-
Just wondering how I get my 3D spaces to show up transparent like this? I have my 3D Boundary attributes assigned by class but the fill opacity setting has no effect on the space. If I use a Data Visualization there is no opacity option at all. Many thanks
-
What is the product? An OSB board with membrane ready-attached to it? Would you make it using two components: one for the OSB (textures of which available for free on several sites) + one for the membrane: mtextur do similar-looking ribbed fabric which could be made the right colour in Edit Image Colour dialog
-
Thanks Pat I thought as much but just wanted to check. Still really great to be able to tweak positions of windows etc in the model by editing dimension text in the viewport 👍
-
Thanks @Wes Gardner I didn't know you could move/resize an object this way! In a viewport. @Pat Stanford are you saying I should be able to edit the size of the window this way too? I can use Associative Dimensioning to move the position of the window in the wall + move the wall relative to the window position but not to adjust the size of the window...
-
On importing SketchUp files from 3D Warehouse I found Andy Broomell's guide on his website really useful. He has several other good resources on there too if you're fairly new to 3D like me... H-ImportingSketchUpEntourage.pdf