hollister design Studio
-
Posts
929 -
Joined
-
Last visited
9 Followers

.thumb.jpeg.48a6fdc44e48c98b8e1b507e86e57e95.jpeg)


-
 That would work. I already have quite a few 'mostly off' classes for data. Might be a wish list... It would certainly be cleaner to be able to store images as data directly in a symbol or a record format.
 -
I was wondering if there was a work around to attach a product image to a symbol or to a record format. Would be nice if one could grab an image from data to display in a graphic legend listing hardware etc. - similar to how plant objects can contain images.
-
a couple of door style questions.
hollister design Studio replied to hollister design Studio's topic in General Discussion
I unfortunately already upvoted that one... I wish I could up vote it again! -
a couple of door style questions.
hollister design Studio replied to hollister design Studio's topic in General Discussion
that's what I keep forgetting! ...why all editing options are not available from the OIP is beyond me. So I can't directly edit RO, I have to add up all the parts to make it work. I guess that makes some sense. I hadn't seen this, thank you! -
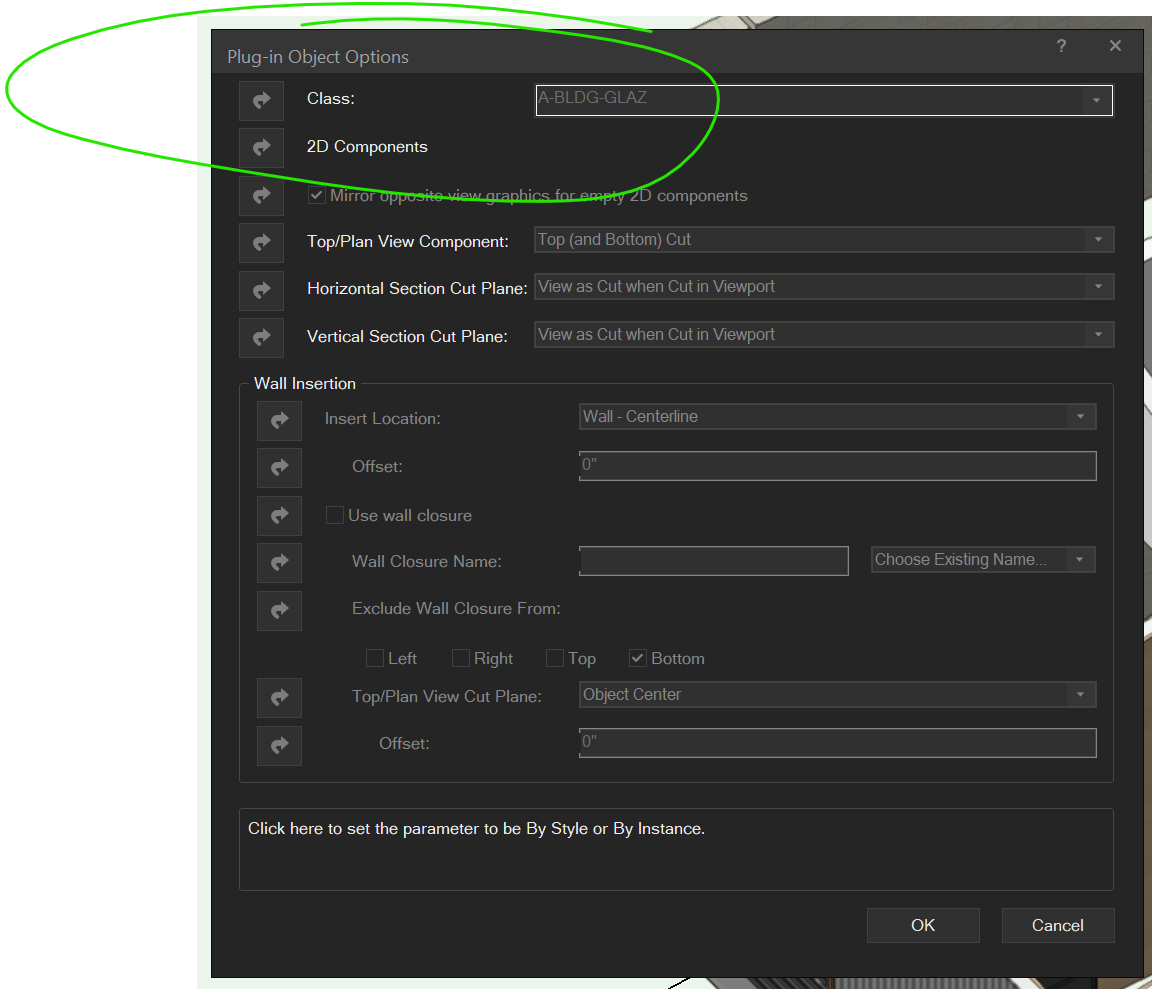
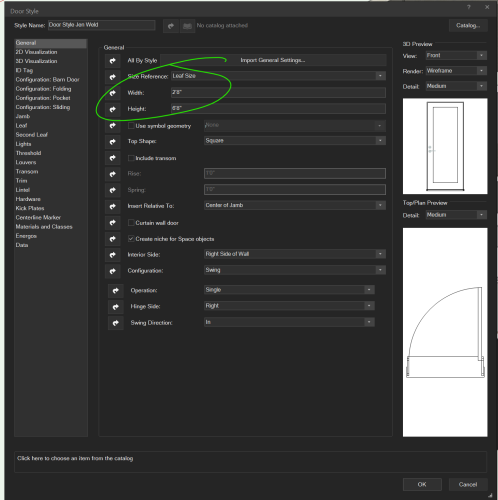
First Question: I've asked this first one before and still can't figure it out. Most of my custom door styles have the "class" greyed out and set to "by style" How do I set this to by instance? I thought I could change it on the 'plug-in object options' menu - but the 'by instance' or 'by style' button is greyed out. Second Question: How do I set the RO dimensions? If I set the 'Leaf size' on the 'General' tab to 2-8 by 80 It automatically sets the RO to 33 1/2" by 80 3/4" But the RO should be 34 x 82 as per the manufacturer. If I change the RO in that drop down, it changes the Leaf Size....
-
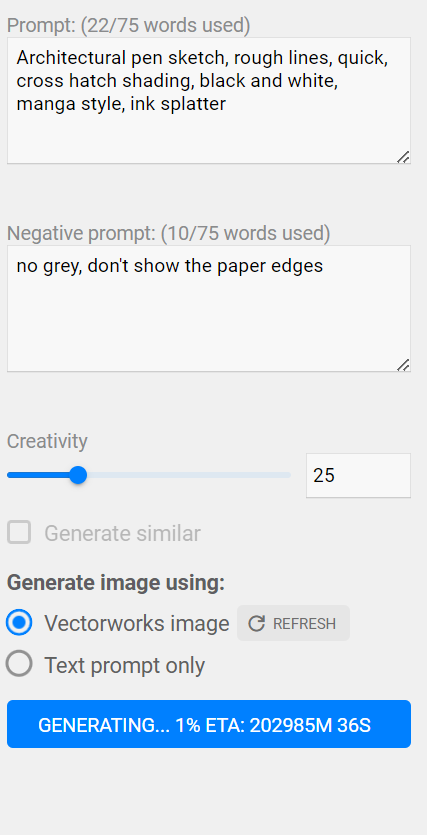
@Pat Stanford yeah, I waited a bit as I've seen these time drop significantly after they get going. ...but it just kept it at 200K hours! So canceled and hit generate again. Work fine the second time. @Elite Exhibitsit's to the left in the AI visualizer. I do think some time you have to pull it out by making the window wider.
-
Obviously, I didn't have 140 days, so I canceled it.
-
List of Key Words-Negative Prompt
hollister design Studio replied to Luis M Ruiz's topic in AI Visualizer
Should negative prompts contain the negative? ie "no bright colors" or "bright colors" -
Thanks @Tom W. ...now that is a very obtuse work around!
-
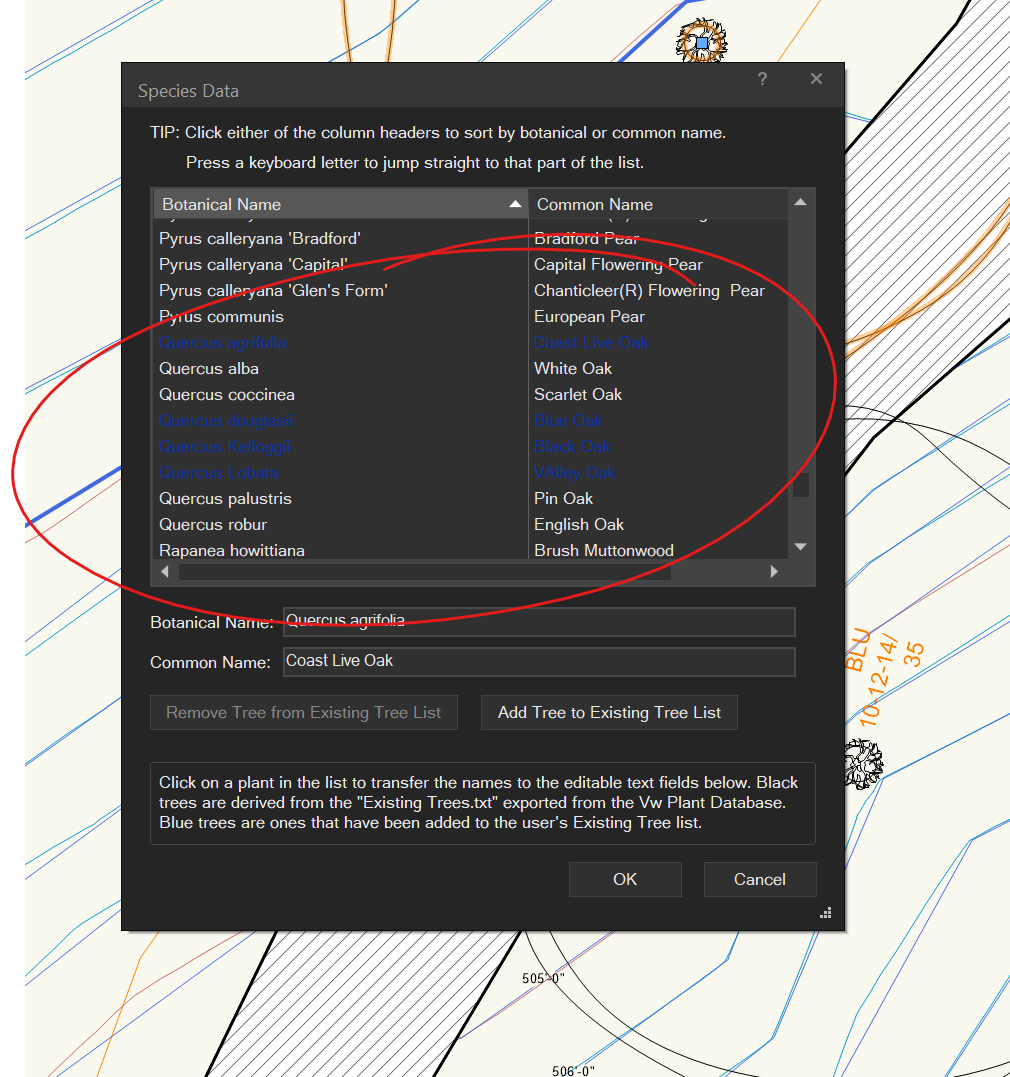
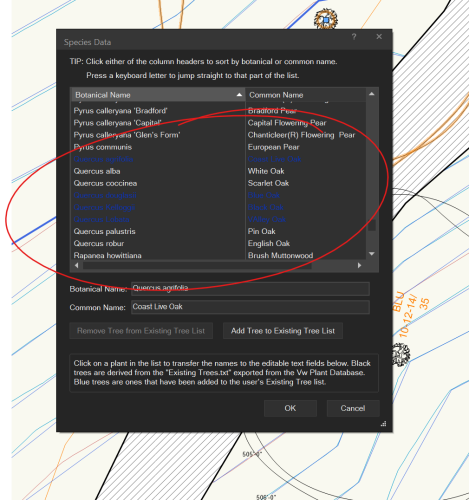
Some of the dialog box font colors are not legible against the Windows dark mode background color. I was informed in another post that this is a coded color, and not adjustable by the user. Please fix this so we can read the text. Here is an example on my computer for the existing tree "Get Species Data" menu The custom tree names are a weird dark blue that is basically illegible against the dark background. Thank you!

-
@Jesse Cogswell well that's awkward! I'll add a wishlist post.
-
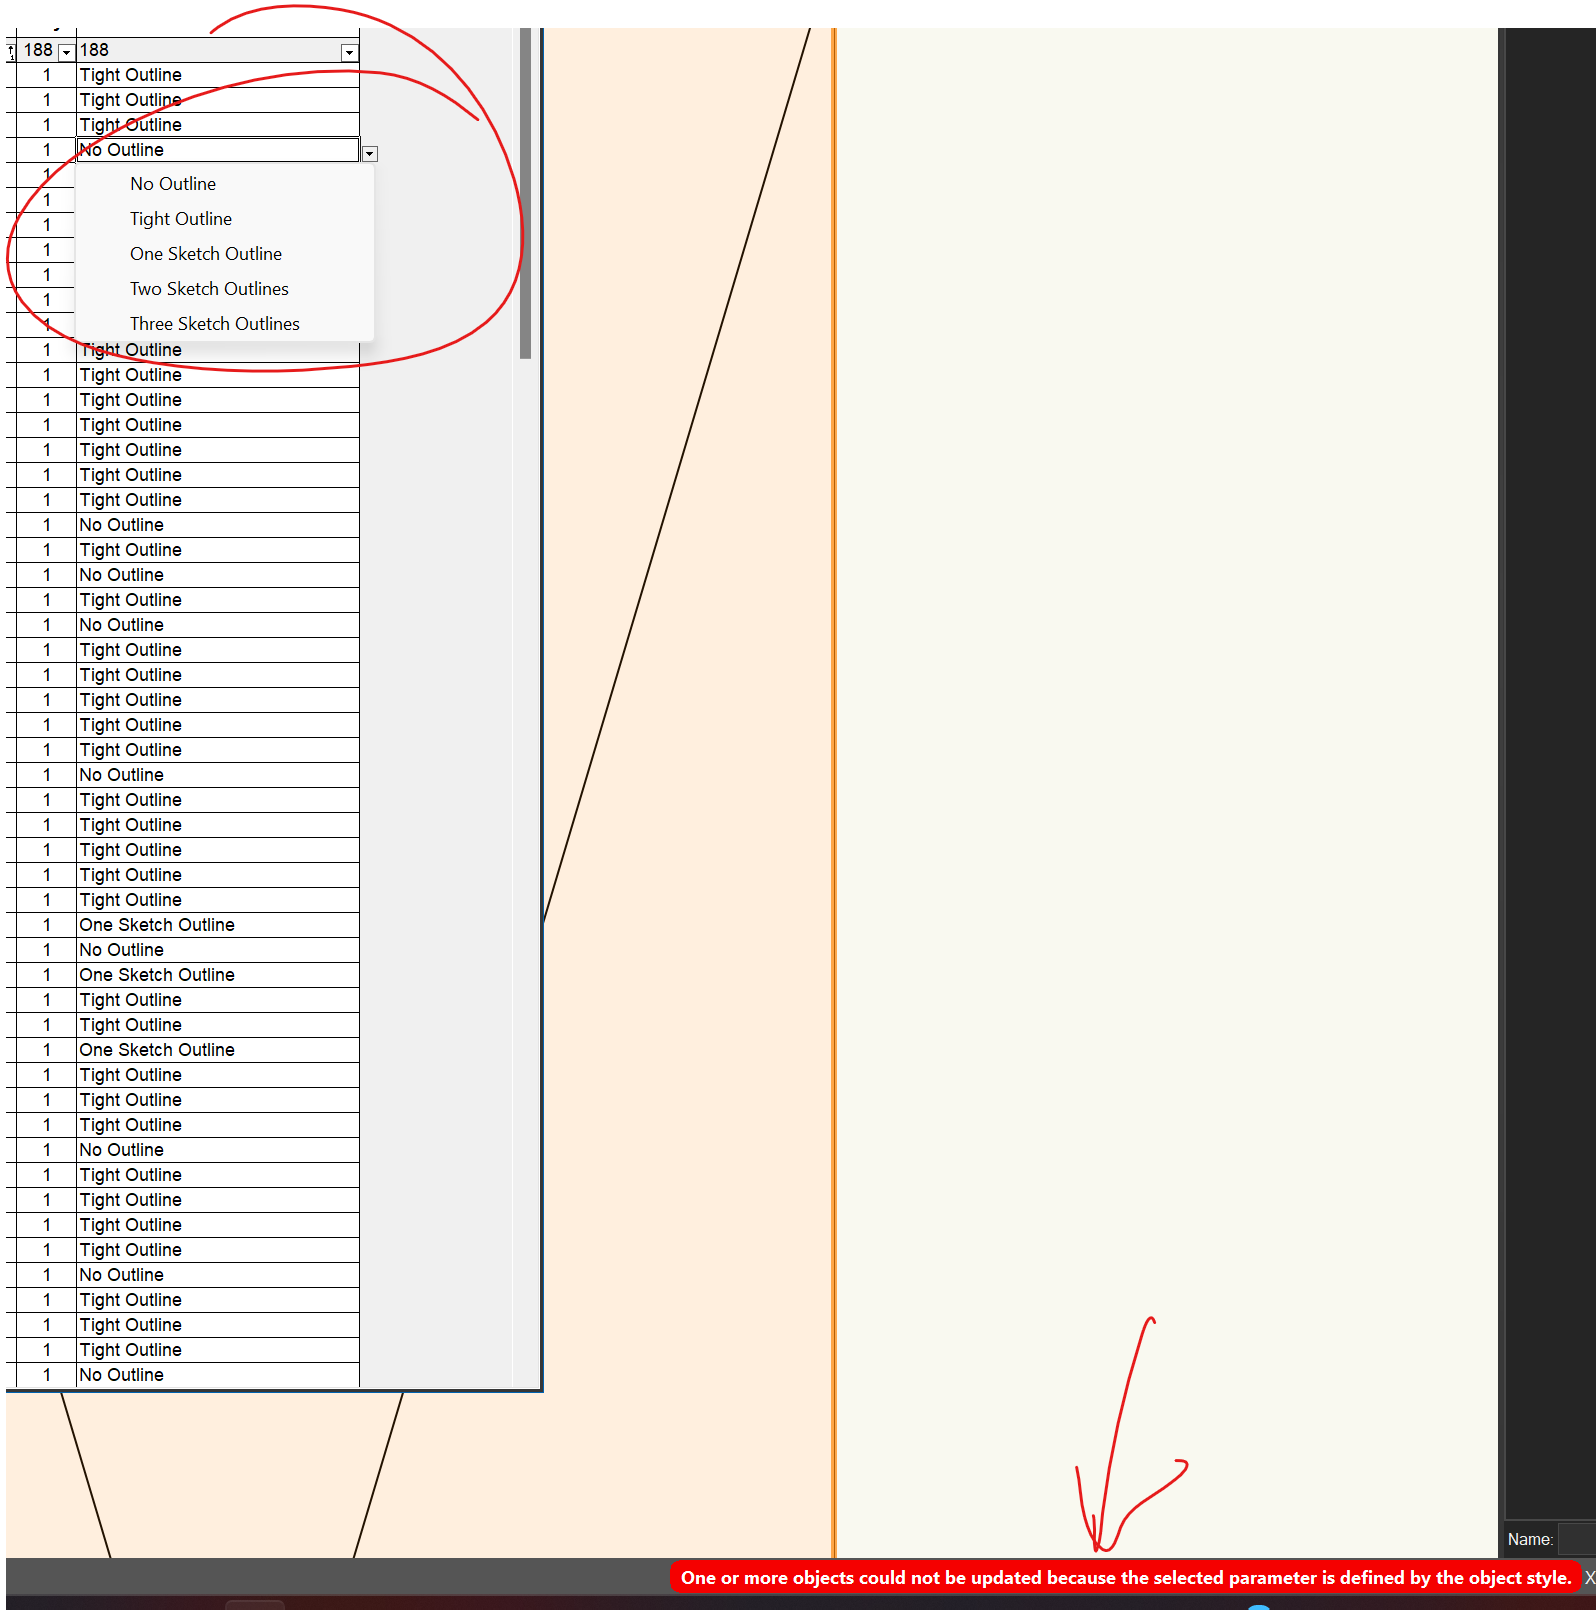
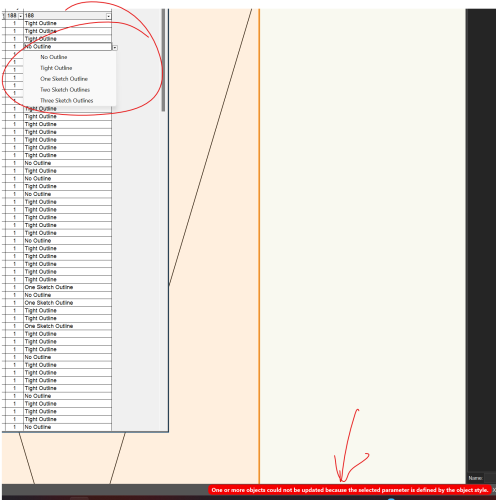
I noticed that some of my plant object have "mass outline" parameter set to none. This messes with their display and I wanted to make sure that all my plant object are set to "tight outline" I added a column to an existing worksheet that list all my custom plant objects and set it to record/plant/mas outline. There is a drop down with all the options, but when I try to change them I get this red warning: "One or more objects could not be updated because the selected parameter is defined by the objects style" Is there a way around this? I thought we had a "two way street" between worksheets and symbols/object allowing group editing? screen grab:
-
Like the title says, my existing tree "Get Species Data" menu has turned all my custom tree names a weird dark blue that is basically illegible. No other menus seem to have this color. Where is the setting for this menu font color? I don't see anything that looks right in the interactive appearance settings
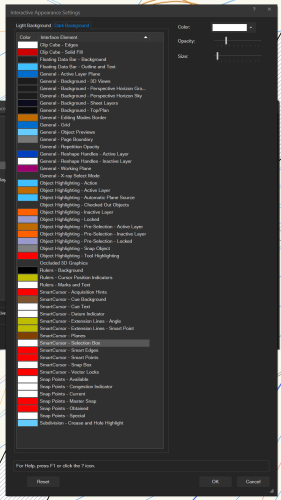
-
@Pat Stanford I tried it in a blank file, and it worked as expected. Went back to the original file and: deleted the reference from the Nav-Ref Restarted VW And tried importing again It worked this time. Not sure what happened before - it was referenced, but not shown on screen or in the resource manager. But it's good now.
-
Odd - Nothing shows up. And no worksheets are italicized. Going to try a restart and see if that fixes it.