


MartinBlomberg
-
Posts
199 -
Joined
-
Last visited
Content Type
Profiles
Forums
Events
Articles
Marionette
Store
Posts posted by MartinBlomberg
-
-
I have a couple of WMS links I want to use in VW. All links and layers show up just fine in QGIS, but VW just won't make it. It's constant problems with errors and just blank views. How on earth do I stack several WMS links in VW23 (Designer) so I can use that as background when I do my drawings?
Many thanks!
-
 1
1
-
-
Hi,
Every time I'm importing stuff from the resource manager they get their default class properties, which is fine in some occasions, but not in some. In this instance I've got a drum kit with several nested objects inside a group, within a group, within a symbol, within.... you get the drift. Now I want to change every single object inside the "Drum kit"-group and turn them into a new class, like "SET-Drum kit".
How do I do this? Thanks!
-
Thanks! I think it answers the question, but do I have to buy a plugin for this specific feature then?
Warm regards, Martin
-
Hi,
I struggle to make an image fit on a wide LED screen. It's a square image and I want it centered on the LED-screen.
Even though I've unchecked "Tile Image" boxes (Horizontal and Vertical) the image tiles. Since the size of the LED most likely will vary I don't want to have different files.
Can someone help me figure this one out? Thanks!
-
On 11/10/2022 at 9:17 AM, Tom W. said:
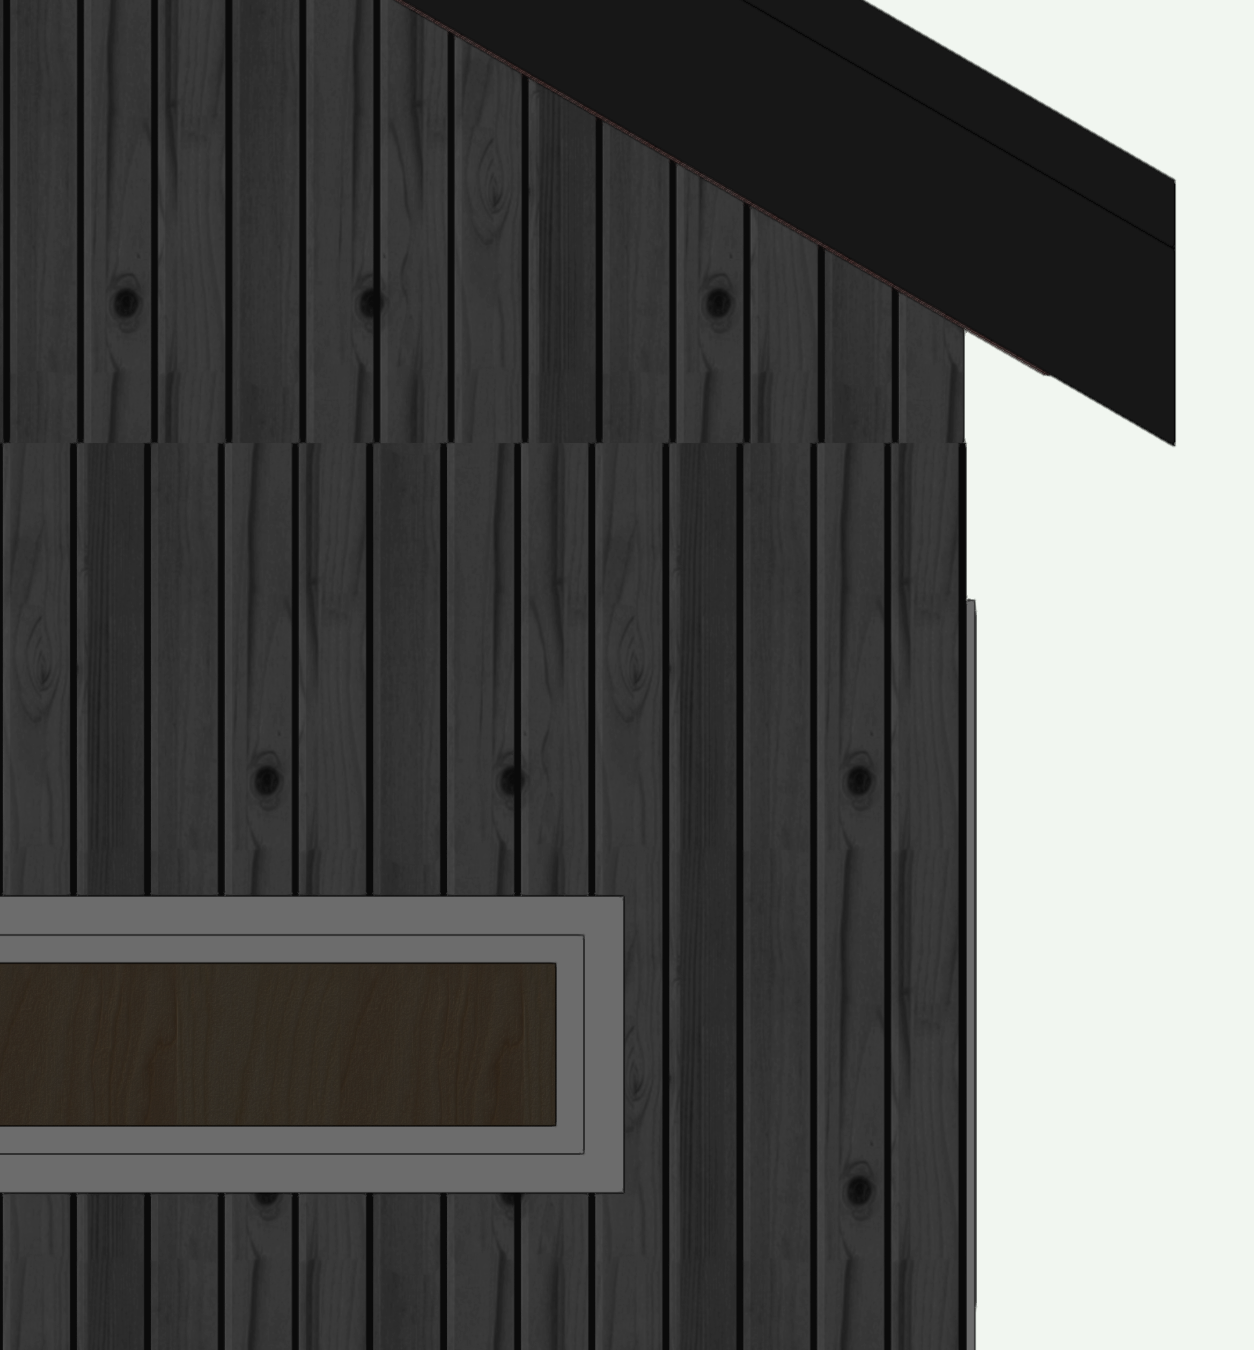
Which class? To me, it looks like the Wall class (the container class that the Wall itself is in) is set to have a grey fill + so what you need to do is override the attributes for that class in the VP + set the fill to black.
Or you could do the same using Data Viz.
The other option, if you didn't want other objects (Doors etc) to be represented in Low Detail, is to leave the detail at medium but turn off the Wall component classes. Setting the detail level to Low is just an automatic way of turning off all the wall components but it obviously affects all other objects as well which you don't always want.
This life of mine is so super weird. After so(oooo) many attempts on trying to change the class setting without no result, today it just worked.
I have no idea why it works now, but it does... I hade the container class set to black without any result for so long time, but today, eureka! 😃
Thanks!
-
Hi,
I want to make all my wall-fills to turn black instead of this grayish fill. How do I do that? I know I've changed it somewhere before but can't figure out where anymore,
This is from a viewport with Detail level: Low. When I change to Medium or High I get the insulation and stuff visible which I don't want. Class is set to black fill and black lines.
Thanks!
-
4 minutes ago, Tom W. said:
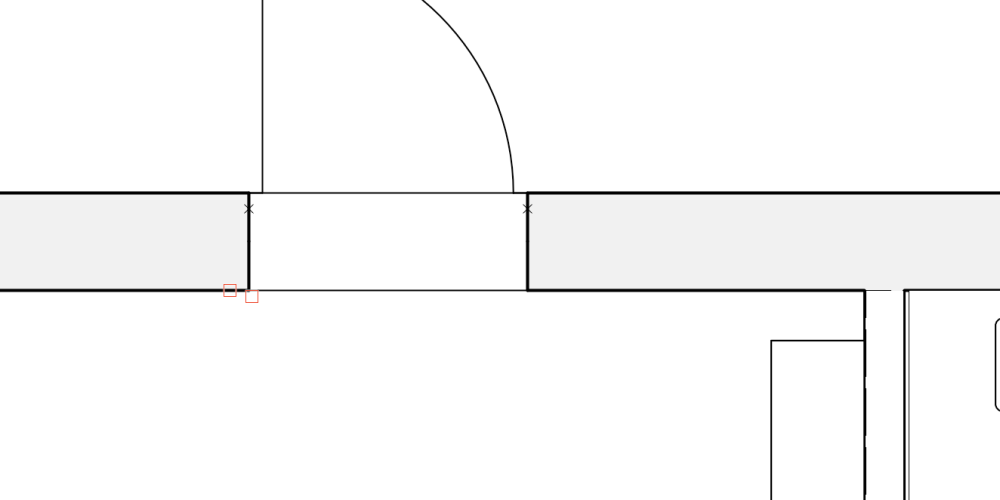
With finite depth enabled you get a dotted line which you can then drag to wherever you want it + the value in the 'Finite Depth' field will update accordingly. So pretty much the same as drawing your own line I'd say...?
AH! Now I see! I didn't realise it appeared when I activated this setting. You're the best! Thank you!!
-
1
-
-
3 minutes ago, Tom W. said:
In the advanced VP properties set the depth to finite:
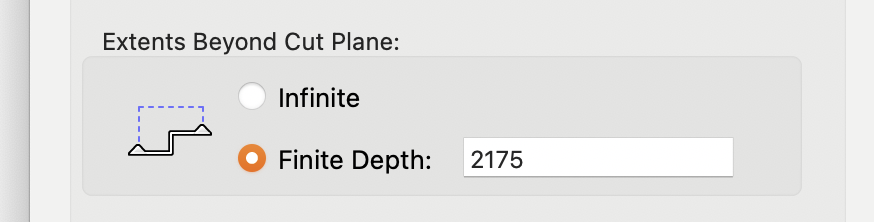
I see. I thought there was a way to visually draw a line to where I want the depth to "end".
-
1
-
-
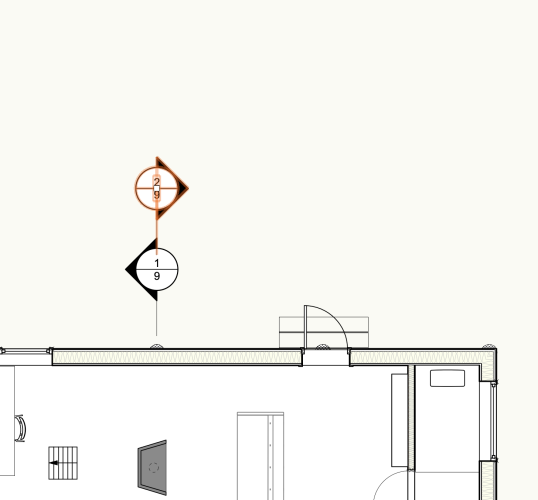
3 minutes ago, Tom W. said:
Do you have the extents beyond the cut plane enabled for the section VP?

Yes!
-
On 10/4/2022 at 7:33 PM, Tom W. said:
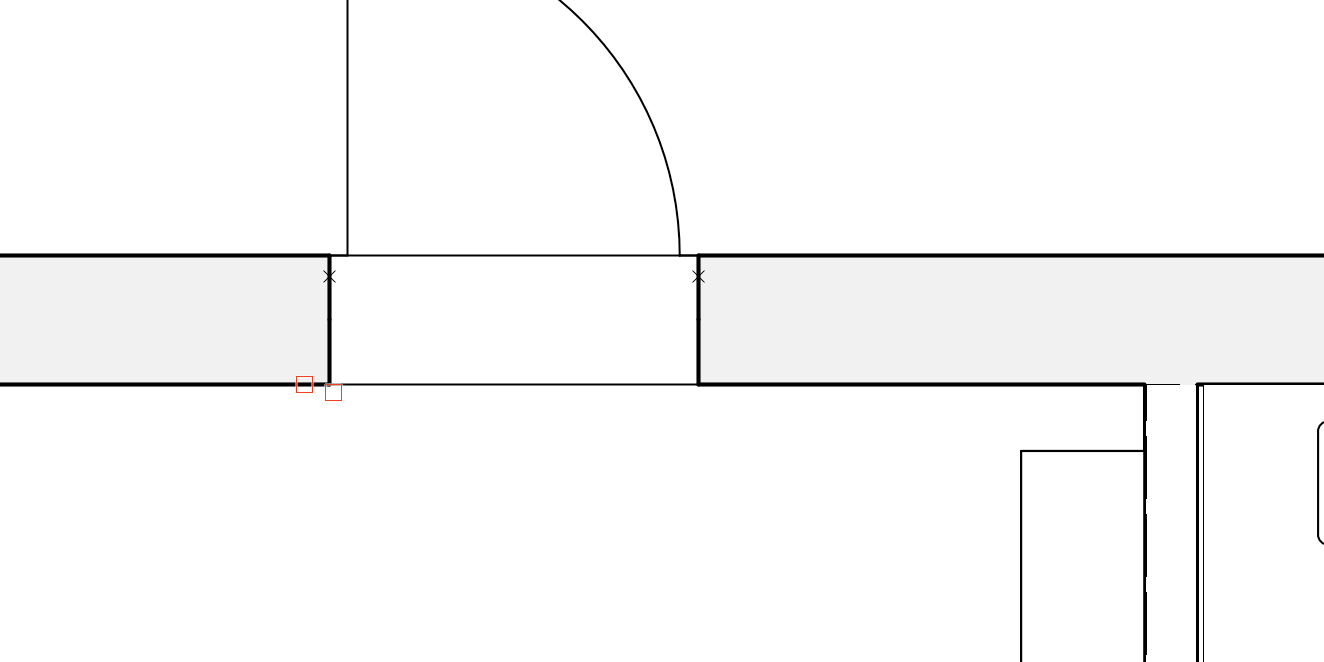
You mean the extents beyond the cut plane? Either in the 'Extents' tab of the Advanced Section Properties or interactively using the section elevation line (drag the dotted line to include the geometry you want to see)
I'm trying like a crazy-one but just can't find the interactive dotted line you're mentioning. Here's what I can edit (as you see, not much more then the actual position of the section cut)
-
On 10/4/2022 at 7:33 PM, Tom W. said:
You mean the extents beyond the cut plane? Either in the 'Extents' tab of the Advanced Section Properties or interactively using the section elevation line (drag the dotted line to include the geometry you want to see)
Sorry for such late reply. I didn't see that I got a reply from you. Many thanks, I'll have a look into this!
-
1
-
-
48 minutes ago, Tom W. said:
In the Advanced Section Properties dialog you have settings for how objects beyond the cut plane are displayed:

Create a 'beyond cut plane class' with the attributes you want + save this in your template file for use in all projects. In my case I have it set to use a 25% grey pen.
Is that what you mean?
Wonderful!!! And, hopefully, last thing: how do I edit where the section depth? 😃
Many, many thanks!
-
On the same note @Tom W., would you know by any chance how to do the same thing, but the other way around, when it comes to section cuts? My end-goal is to have a section with the most up-close objects in more bold lines and fills, and the ones behind the cut plane to be a specific line- and fill color. To create some kind of depth to the drawing but not have to fiddle around with the classes if I change the section cut.
Cheers!
-
On 10/2/2022 at 2:52 PM, Tom W. said:
There is the 'use world Z for origin' setting in the Render tab of the OIP for the Walls plus now in VW2023 the additional 'use world origin' setting (which I haven't used yet - I am holding off moving over to VW2023 until SP1 or 2 this time...!). Or if that fails you can use the 'offset H' setting.
Nice one! the "Z"-command didn't do the trick, but "Use world origin" did. Not sure why, but now I'm good 😃 Many thanks!
-
1
-
-
2 hours ago, Tom W. said:
The way I would do it would be to give your Walls a top offset of 2300 then place a second set of 300 high walls on top. The 2300 high walls would have the doors + windows in + the 300 high walls would just be walls. These upper walls would be on a new layer + would allow you to display a mezzanine plan without any doors + windows showing.
The same goes for the gable ends: divide them into two sets of walls with the door + lower windows in the lower walls + the mezzanine windows in the upper walls. Then you can control what exactly you want to see in your Top/Plan VPs. Always think of layers in terms of what you want to see in plan.
I think I got it! Much easier now to understand what's associated with what floor, thanks! So, a follow-up on that: now when I make two different layers with walls, how do I match the texture on both floors? Now it looks like this:
 2 hours ago, Tom W. said:
I'm not sure I can see what the issue is. Do you mean the walls at the eaves rather than at the gables? To get the walls at the eaves to meet the underside of the roof you need to bound the walls to the roof + tell the roof to clip the walls. Or you can get the walls to clip the roof: it depends on the detail you are trying to achieve. It's a bit fiddly but by editing the top offsets of the individual wall components + the edge condition of the individual roof components + telling one to clip the other you can generally achieve quite good results in section.
This seems a bit tricky to say the least. I'll dig into this and see what I can find. Thank you!
-
1
-
-
Sorry, my file didn't upload correctly until now. It's in my reply earlier from now.
-
Hi again!
Thanks @jeff prince, @E|FA and @Tom W.for getting back to me, and sorry for a bit late reply.
1. Since the walls are inserted in windows it automatically connects to the wall layer, which in this case is Floor 1. So when I look on a Top/Plan view the windows show up even if I chose only to view floor 2 or floor 1. The solution might be to use only Top view, but then all 2D objects turn into rendered items instead of 2D objects. Is there a way to fix this or do I need to use only Top view?
2. The walls are their own wall style with different components. I managed (sometime in the past) to change the color to gray on outer walls, but on inner walls, I just can’t remember how I did it.
3. The Z elevation is fine and looks good in the rendering. But, when looking from above on Top-view, it’s messed up. But, I’ll have a look at the link that Tom W sent. 😃
4. The fit to object is what I used to make the walls fit the roof. But, it’s quite hard to explain in words, so please see the attached drawing.
I’ve attached the drawing here, with flaws and all. Since I’m not sure how “real” drawings are made, since I’m self-taught, I’m looking for general improvements for more or less everything. Please let me know your thoughts if someone would have the time and effort to look at the drawing.
Many thanks again! Martin
(Also, the drawing is unfortunately in Swedish, please let me know if there's anything specific that need translation and I'll get to it)
-
1
-
-
Hi,
I've been struggling with some features in VW that I just can't find out a way to solve. Can someone guide me how to...
- Make a cut plane in Top/Plan so I can view, i.e, only the first floor in top/plan-view. I don't want to show holes in the wall for windows placed on floor 2 when I only want to show floor 1.
- Make dashed lines for certain stuff that is above an object, for instance, the kitchen shelves above the sink should be dashed, but not the sink.
- Change the color of the wall fills, am I stupid here? I want a single color fill, not all the components (I use the Low quality view, but want to change the color inside the walls)
- In hidden line, why does some of my object, in this case chairs, show above another object, the table top, but not in Top/Plan? I've used stock stuff from VW library
- How on earth to you make the roof and walls meet nicely when I have a gable roof? The walls won't snap to the roof, neither on the inside nor the outside wall.
That's some of the things I'm fighting with now, hope you can help a non-educated architect-wannabe like me! 😃
Thanks all!
Martin
-
I can't really understand why they don't stick to the Excel standard, I need to google this all the time.
-
2
-
-
@mjm, sorry for late reply, totally missed that I got an answer.
Yeah, that's kinda right, but still, isn't there a way to just hover around without having to activate a tool?
Other softwares, like Fusion 360, I just hold down Shift-key and I can hover around freely.
No way in VW? If not, that shouldn't be too much work to fix?
Thanks!
-
3
-
-
I want to orbit around my drawing using only my trackpad, like I can do in probably all other CAD-software.
I'm am one of the following:
1. Stupid, since I can't find the solution. Or
2. Frustrated, since the function is not implemented.
If 1, please let me understand how I can orbit around with my trackpad (no external stuff what so ever), without having to use the actual tool, I want something like two finger+command-kinda solution.
If 2, how come such an easy thing isn't implemented?
Many thanks!
martin
-
Thanks! I don't have VW21 anymore actually.
I reached out to the local distributor in Sweden to report this as a bug, which I guess it is.
It works when I right click the object, but then the point of having a shortcut is kinda gone.
Thanks anyway! 😃
-
Thanks for the reply @Pat Stanford
Unfortunately, neither of these options work.
Not sure why this is, it worked out fine some time ago.
Any other suggestions would be much appreciated 😃 Thanks!!
-
Hi,
I've assigned ⌘+Shift+1 to "Activate layer". All of a sudden nothing happens when I press that command.
The class gets activated when I right-click on an object and then click "Activate class", but when I use the key command it doesn't.
This also goes for a number of other commands that I try running. Why is this?
Thanks!
I'm on VW2022 and on a brand spanking new MBP M1 Max, 64GB Ram, 24 core GPU.

worksheet sum
in General Discussion
Posted · Edited by MartinBlomberg
Had no clue, nice to know 😃
So, how do I make these numbers add upp? All I get is "12". The line names are "2.1, 2.2, 2.3" and so on....
Thanks!