Mat Caird
-
Posts
313 -
Joined
-
Last visited
-
I think because you are using a style. Pull the dropdown beside “storefront window style” and choose edit style, or convert to unstyled.
-
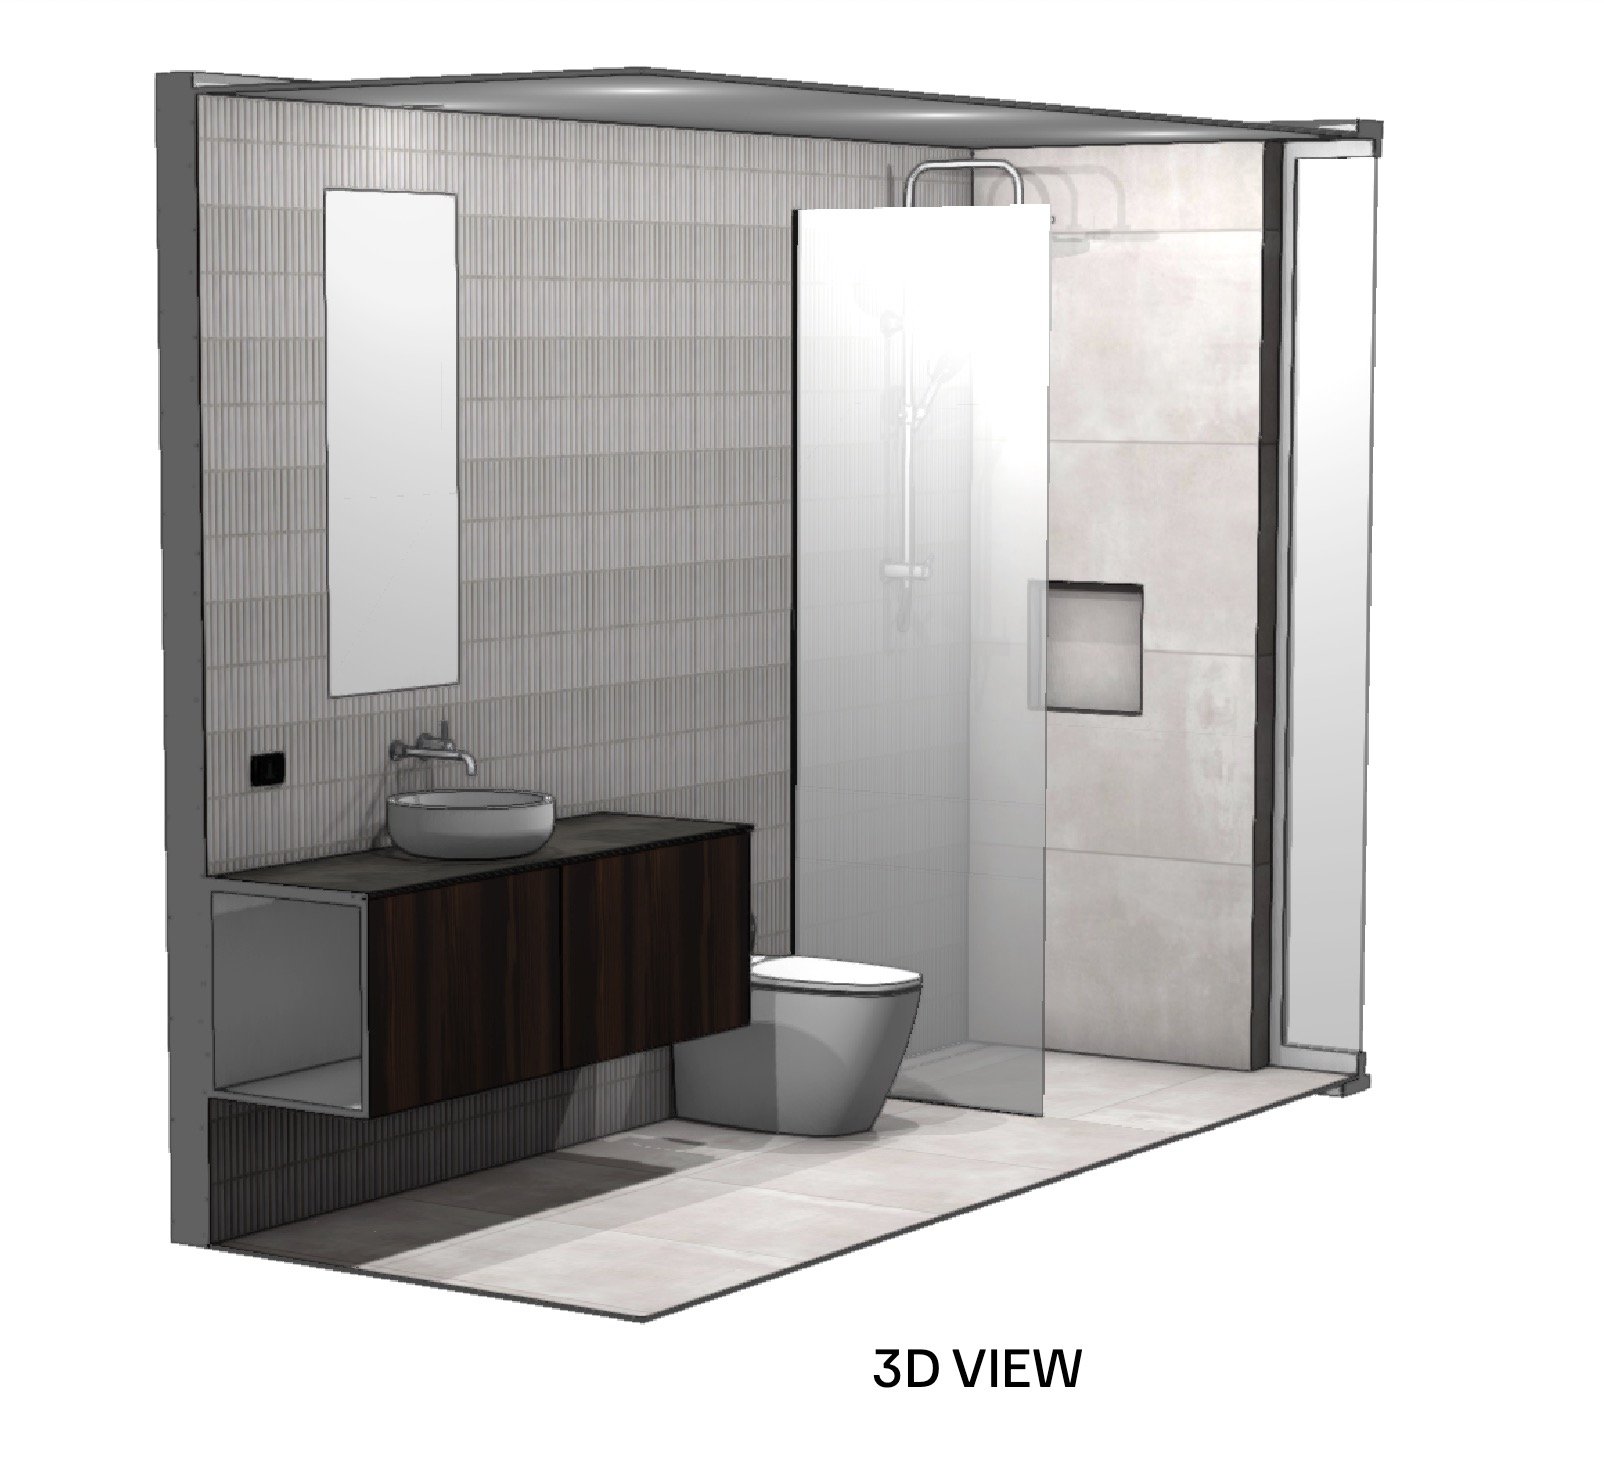
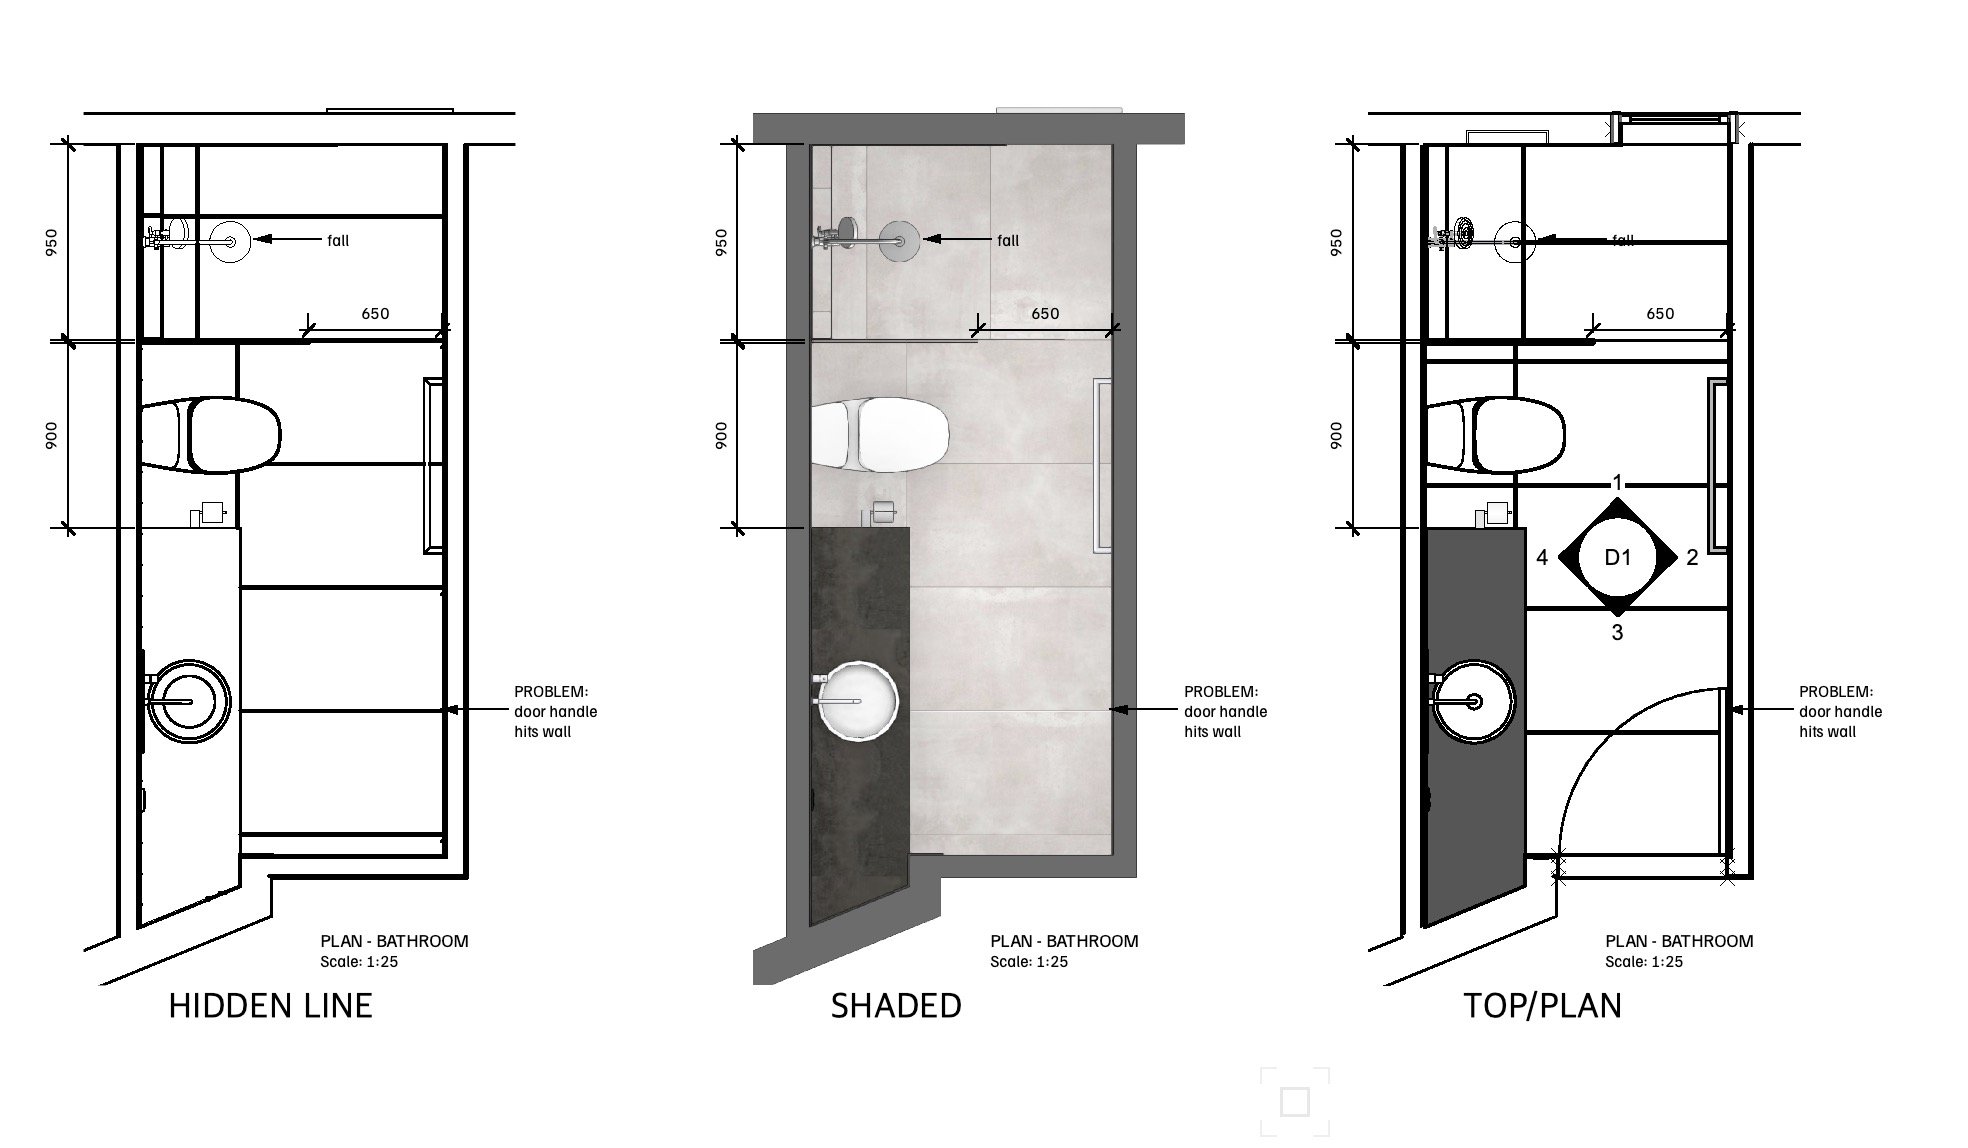
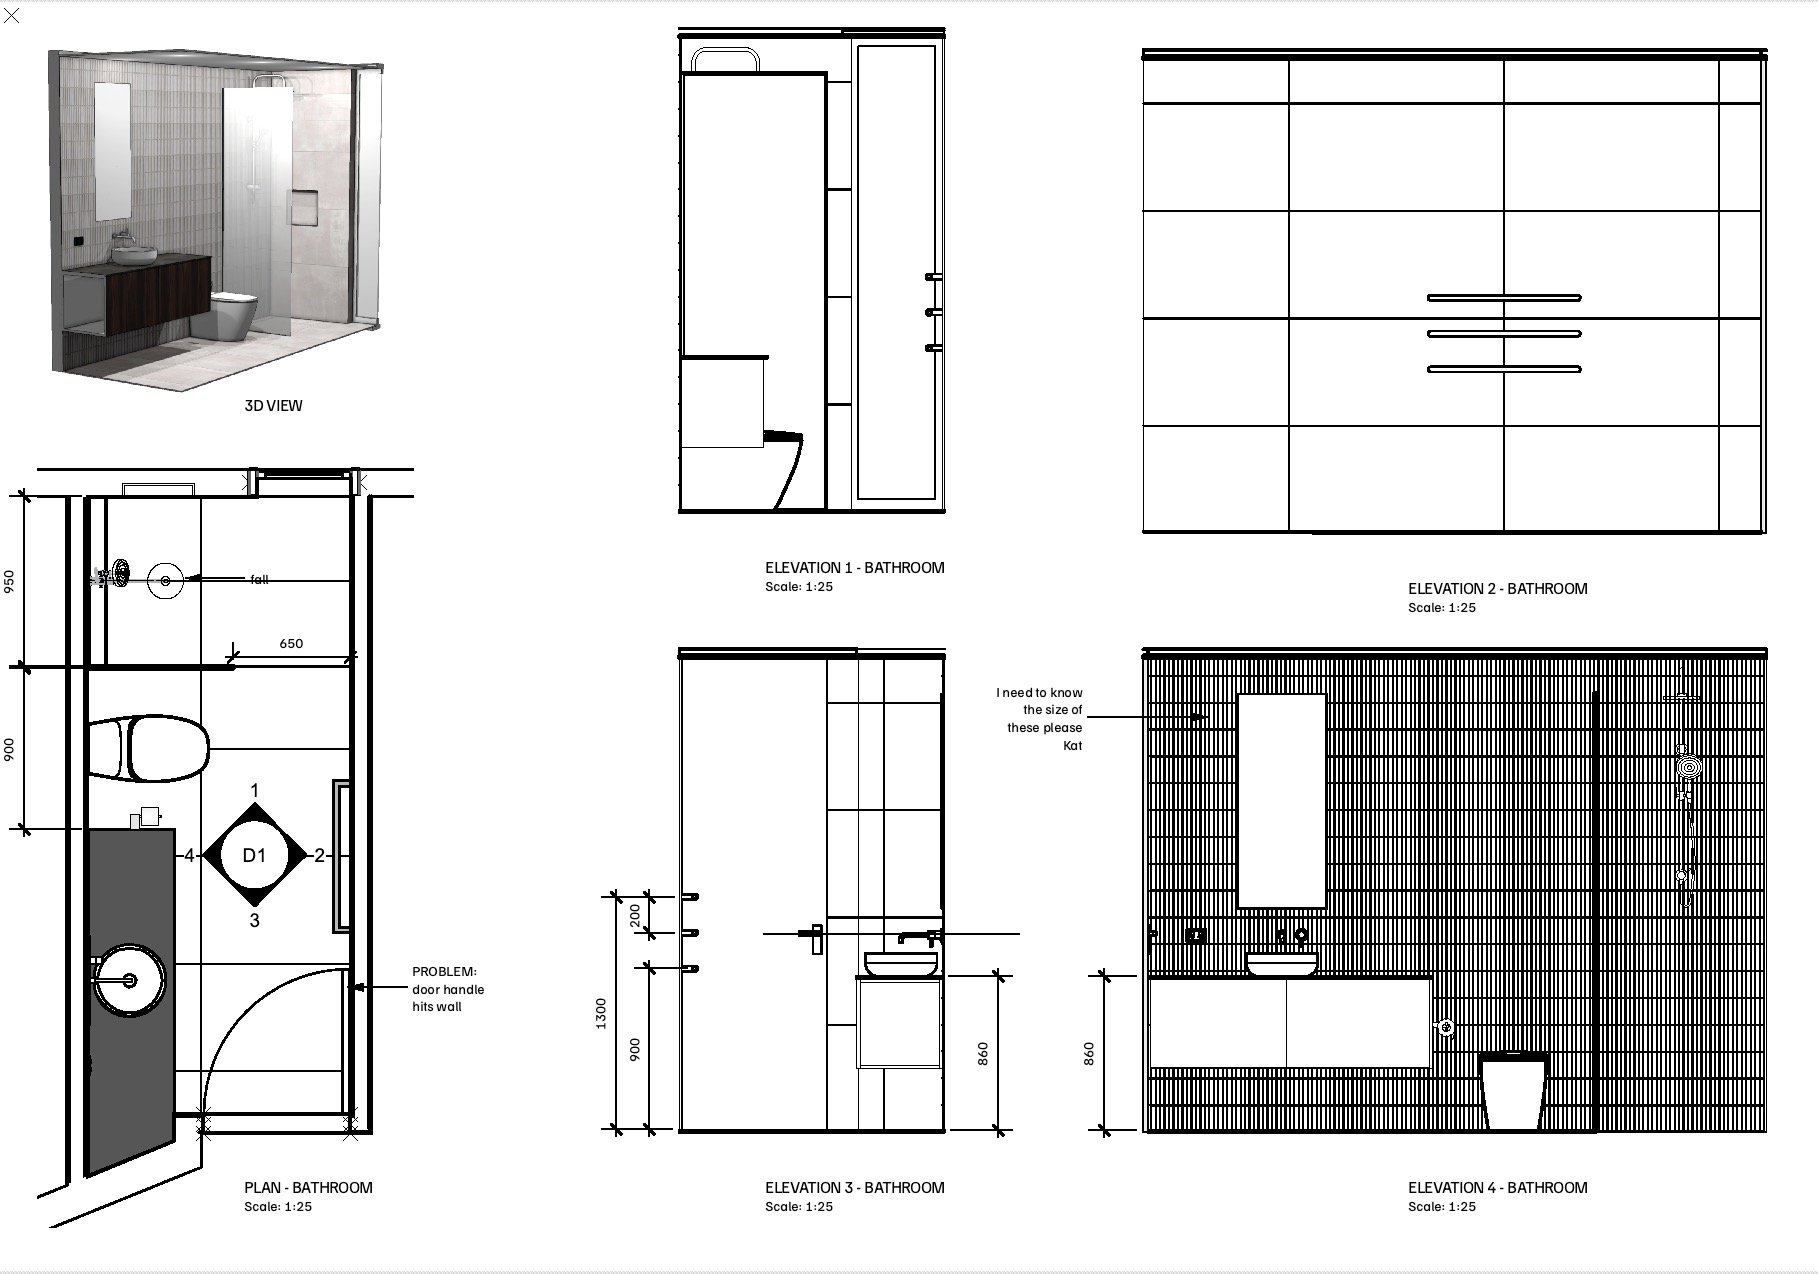
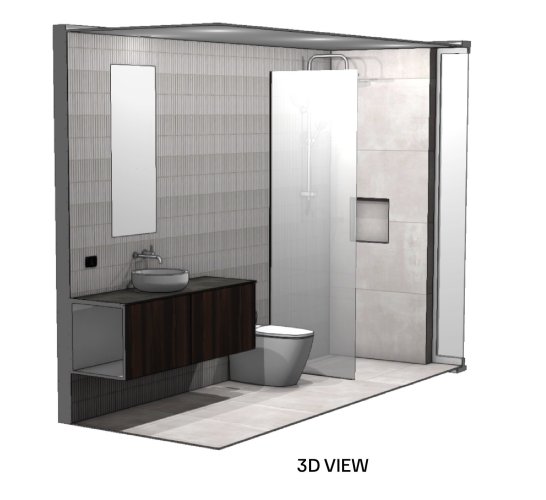
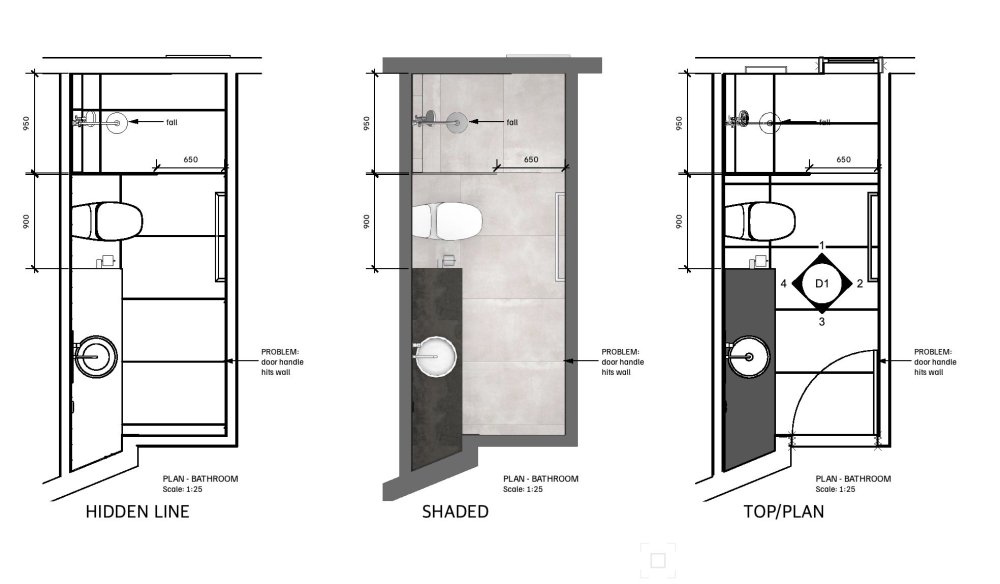
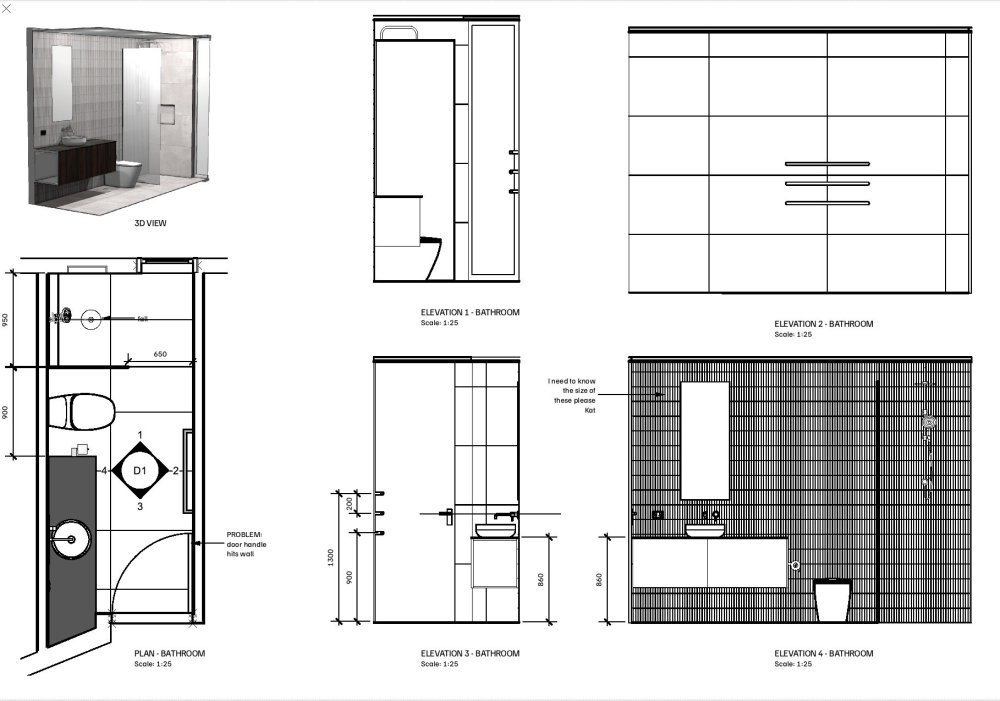
Hi All, after writing out this long and boring question, I've sorted it out for myself - I'll leave it up, maybe someone can use it; I'm trying to produce some internal bathroom drawings. I would like to render a 3d perspective view in Shaded mode, render the 4 walls as internal elevations in Hidden Line mode, and present the plan in Top/Plan (ie typical 2d mode). I have created a Renderworks Texture for the floor and wall tiles, and a hatch of the same tiles. I have assigned the hatch to the Surface Hatch in the Renderworks texture, and now I can successfully align the floor tiles so that the Shaded mode and Hidden Line modes match one-another. I assign the hatch to the Floor object so it shows in Top/Plan view, and all three are aligned. However, I then need to move the Renderworks texture so the proposed grout lines are where I would like them. Shaded mode and Hidden Line modes match, but the position of the Top/Plan hatch does not agree with the Renderworks texture. So I need to use the attribute mapping tool to move the Top/Plan hatch to agree with the Hidden Line Surface Hatch. And after writing out this long and boring question, I think I've sorted it out for myself - position the Renderworks Texture in Shaded mode, using the Attributes Mapping Tool. Check that the alignment is correct in Hidden Line (even though I won't be presenting the plan drawing in Hidden Line). Switch to Top/Plan and use the Attributes Mapping Tool to align the hatch with the render work texture (it may help to draw some construction lines in shade mode first so I have something to snap to).
-
Try changing the mapping type. I’ve been able to adjust the alignment in VW 2024
-
referenced layers spontaneously move origin
Mat Caird replied to JoshW's topic in General Discussion
I'm having the same problem, every time I update my reference, it moves... -
New blank file, create new render works texture, set transparency to Shadowcatcher, VW2024 hangs. Bug? How do I file the bug to bug submit? Regards, you all 🙂
- 1 reply
-
- 1
-

-
Thanks guys.
-
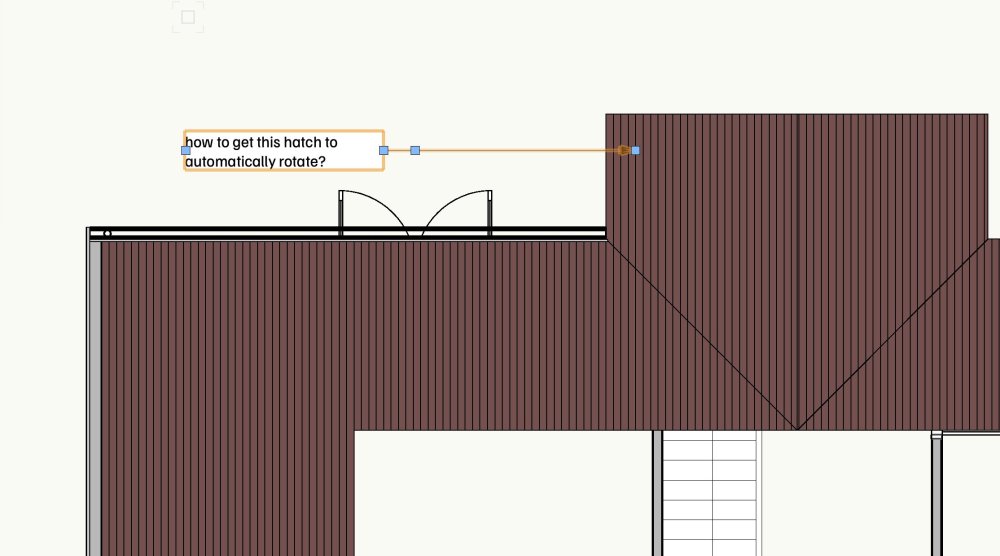
Hi All How to display a roof hatch in top/plan view, with the hatch correctly aligned with the roof plan? Using the roof tool, not the roof face tool. I have the class options set to use at creation, with the fill set as the hatch, and the render texture surface hatch set to the same. If I render the top view in hidden line, the hatch displays correctly as expected, so it's only top/plan view giving me grief. Thanks,
-
Edit the viewport annotation and delete it. I’m guessing it’s a drawing label with some classes turned off, or maybe edited incorrectly.
-
How can carpentry appear with more details?
Mat Caird replied to Matharchi's topic in General Discussion
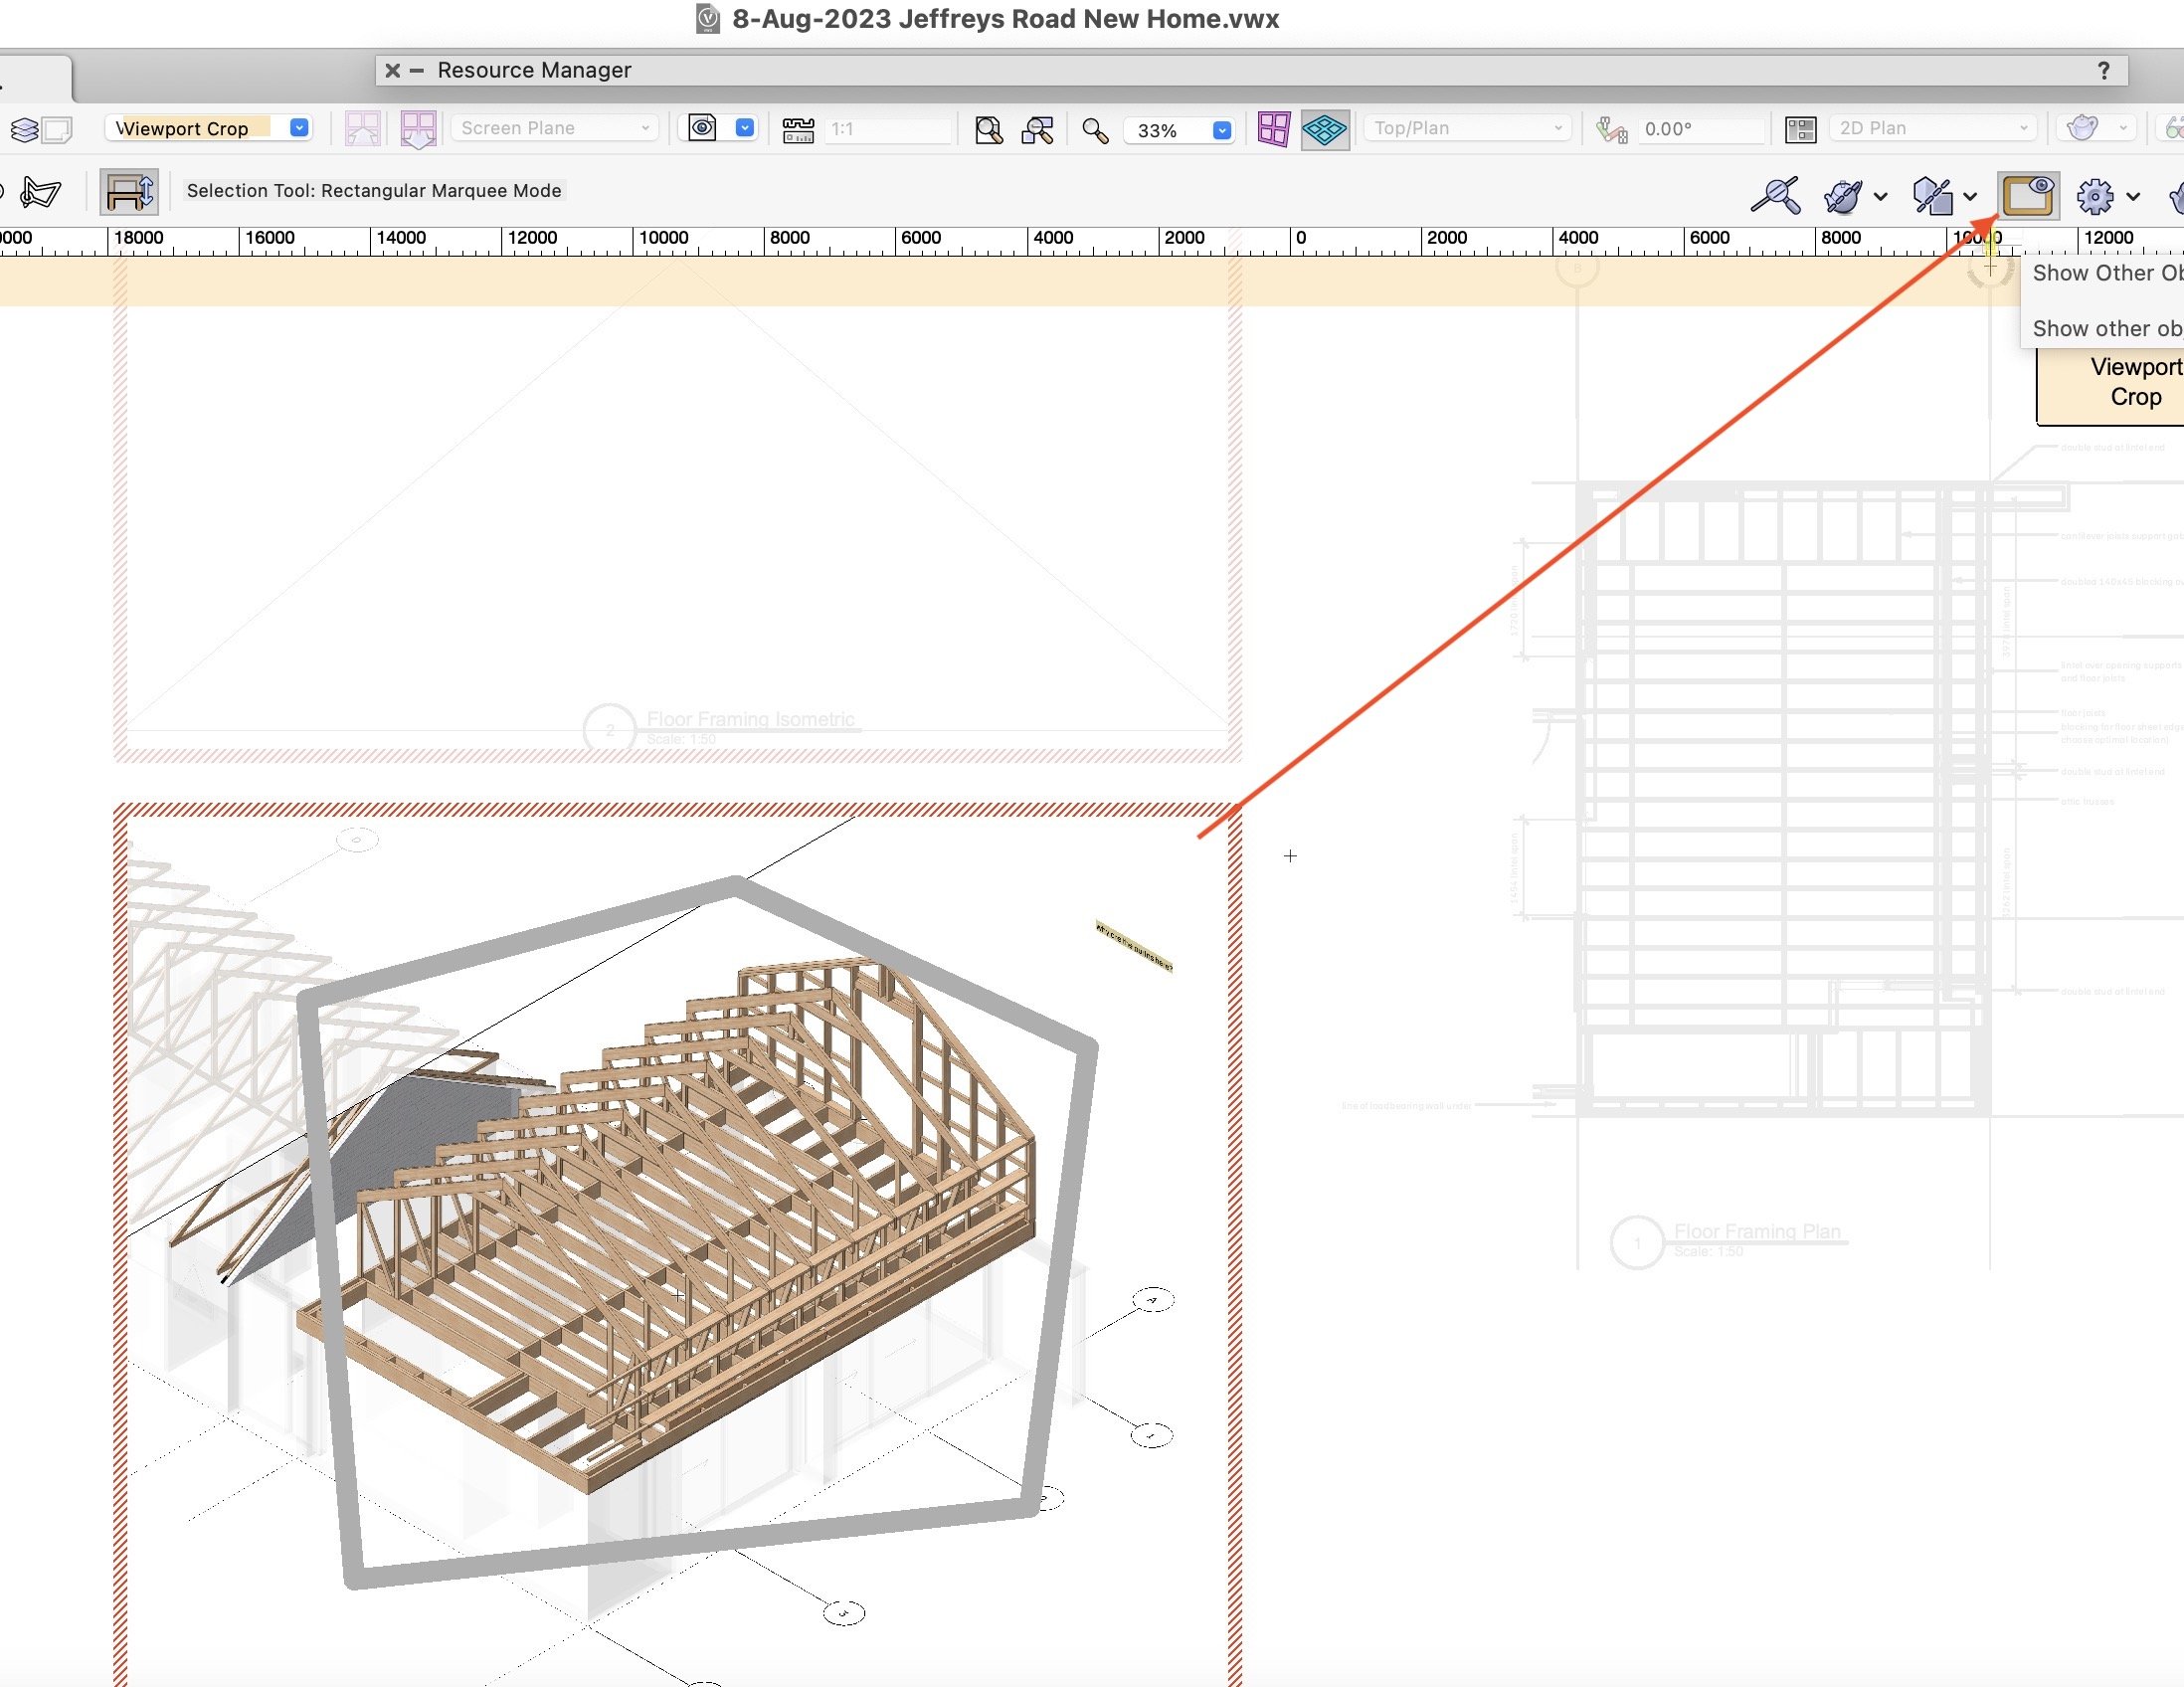
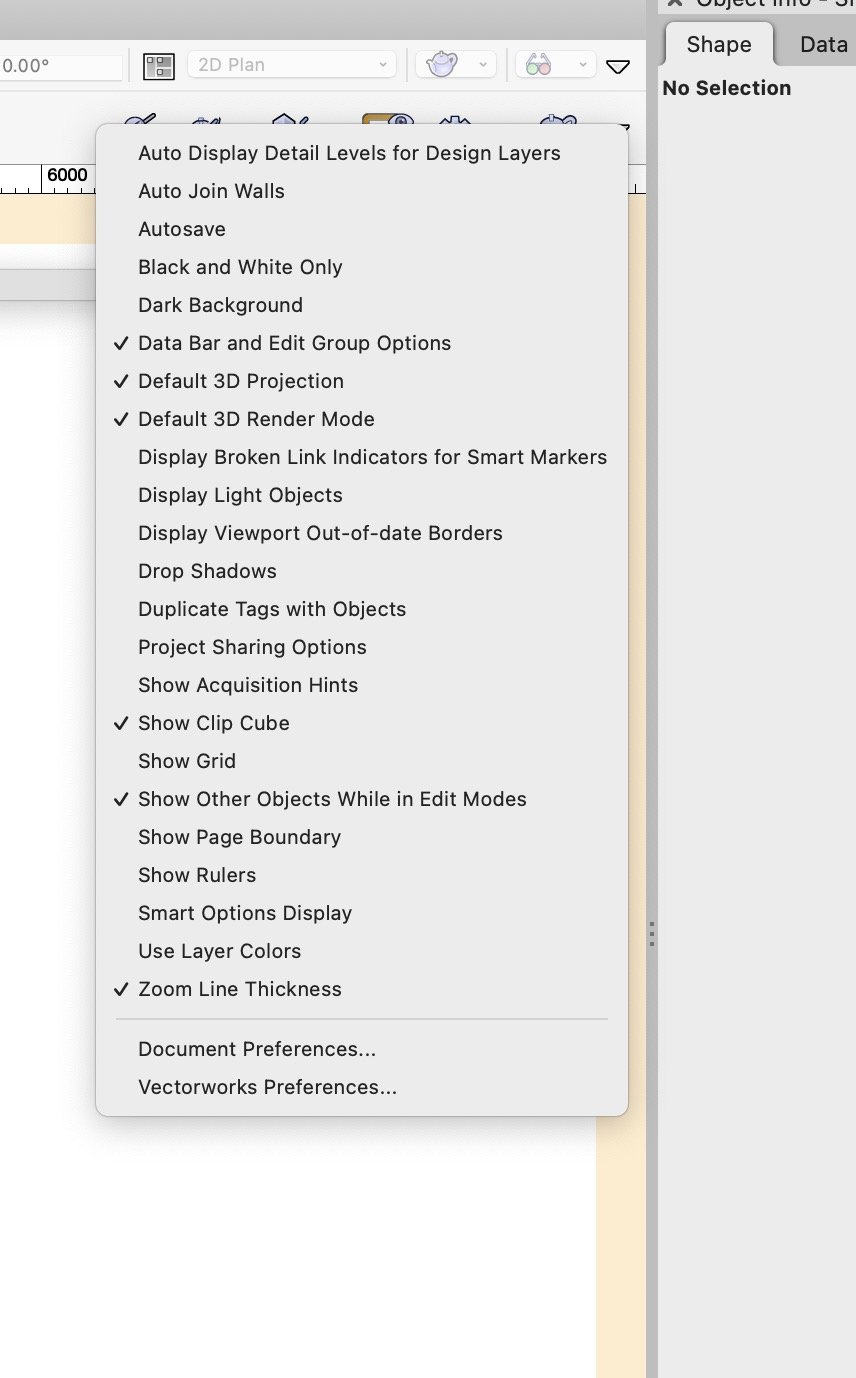
I think you're saying you've drawn a polyline on a sheet, over the top of a viewport. When you edit the viewport crop, the polyline disappears. There's a button on the menu bar called "Show other objects while in edit modes". If you click that button, you should be able to see the polyline. It's a useful feature when editing groups and symbols, but doesn't always work for some reason, if you have flipped symbols etc. If it's not showing on your menu bar, there's a down arrow you can click on the far right, and choose it. See second screenshot. Hope that helps, Mat
-
Why can I not draw a 2D object in any orthographic view?
Mat Caird replied to MGuilfoile's question in Troubleshooting
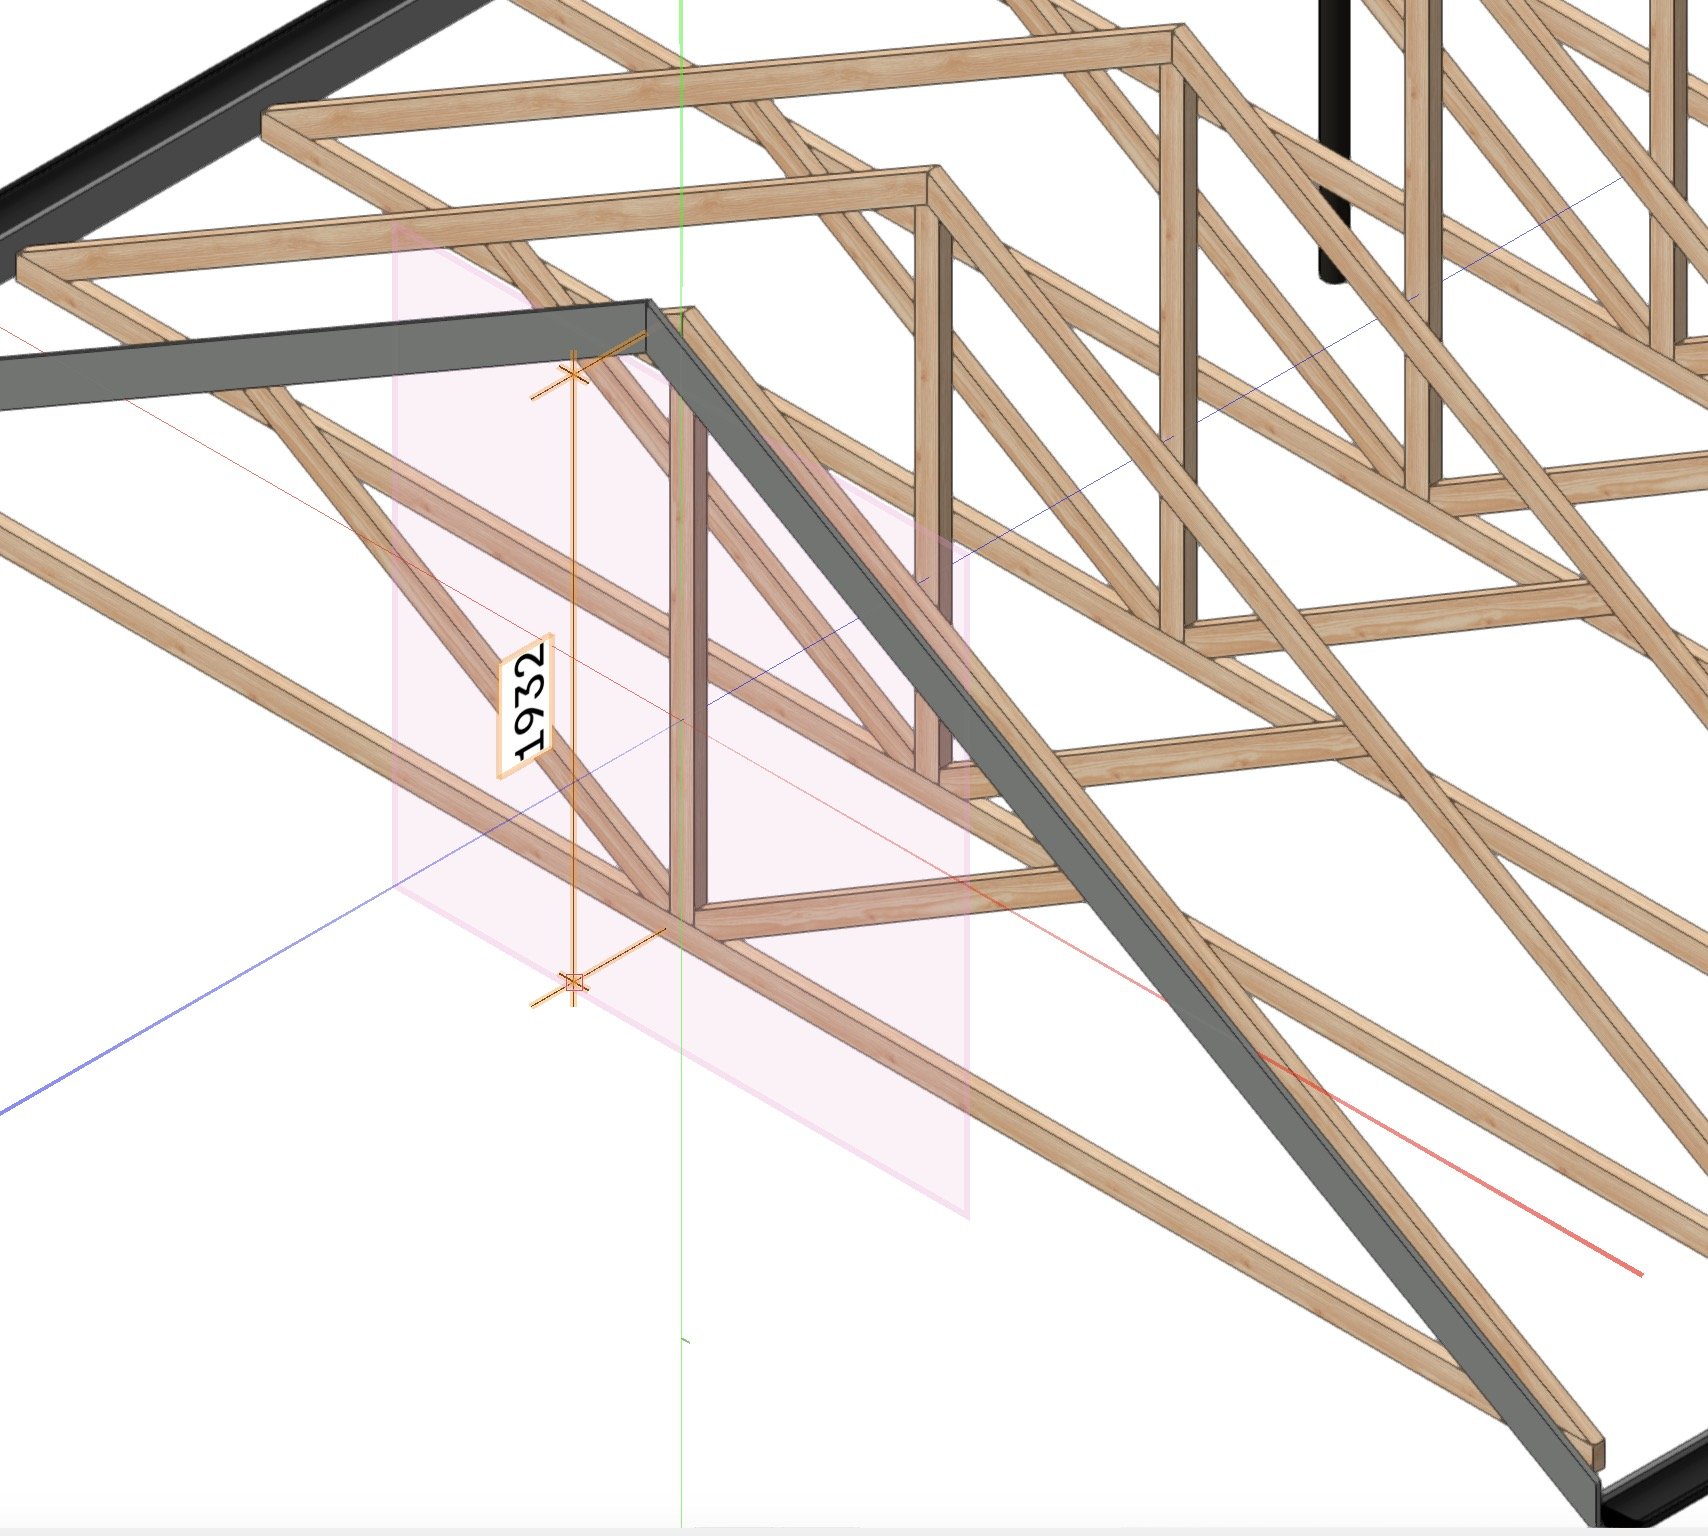
If you use the "set working plane" tool, click on the face of power socket, then it will draw the dimension aligned on that face. The dimension will be in 3d, as per my screenshot below. I set the working plane to the face of the king post. You may need to change to one of the other orthographic views to find the snap points. I find the snap points are more reliable in wireframe. If you go back to top/plan view, it resets the working plane to top/plan, which is the same as Layer aligned. This won't affect the dimension you drew, but will for future, so you have to Set Working Plane once again. HTH, Mat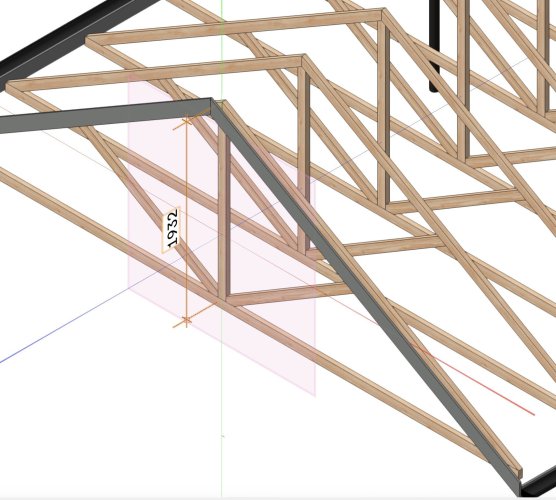
-
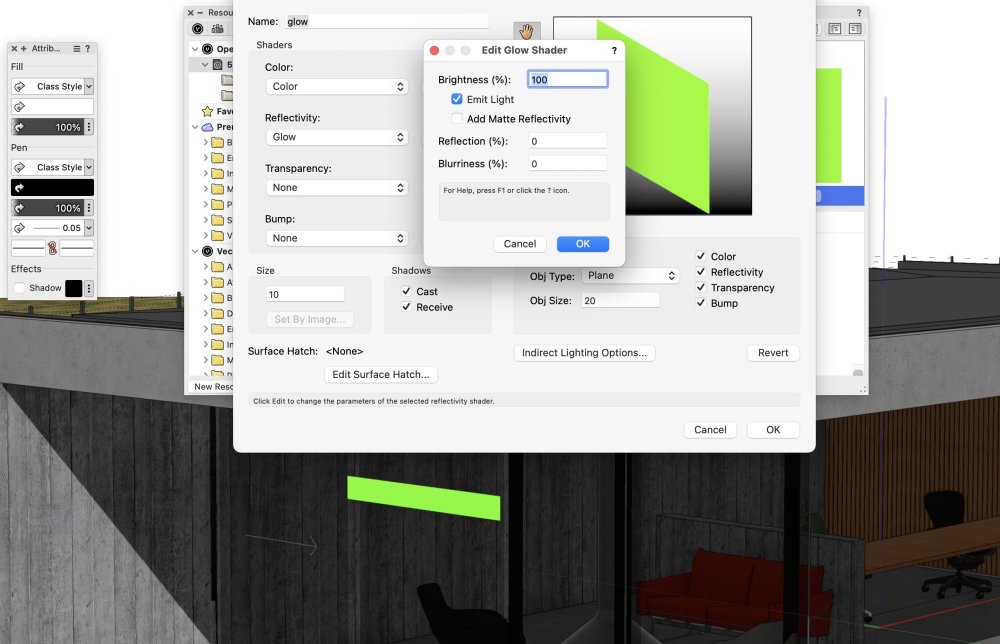
I got glow to work using shaded render mode - the effect was only obvious when I placed the object in the shadow. So that may be your problem. You could try View | Set Lighting options | and turn off Ambient Info (or turn the brightness down). Another option will be to try selecting the line, then Modify | Convert | Convert to line light, or convert to area light and play around with that. I couldn't get this to work with shaded rendering so I had to use fast renderworks. It wasn't very convincing. Maybe photoshop it....
-
Have the walls got height? Are the wall components classes turned off? Do they render in shaded mode?
-
If your class options are set to display 'active only', and you create your viewport, the viewport will be created in the None class, but you may not be able to see it if None is not the active class, hence it will appear to you as if nothing has happened. When I tried this, I could still see an orange bounding box, so it doesn't completely explain your problem.
-
Read this, it may help
-
Too Easy - thank you Pat Regards, Mat