

zeno
-
Posts
975 -
Joined
-
Last visited
Content Type
Profiles
Forums
Events
Articles
Marionette
Store
Posts posted by zeno
-
-
WORKAROUND For using Space Styles you can create a new object from pre-createt style, than you can modify the style into resource manager.
-
On 12/18/2018 at 4:10 PM, Jim Wilson said:
Let me double check, there are 86 bugs fixed in SP3 related to Spaces alone so I'll verify if that issue is on the list.
Sorry Jim, but if you have 86 bugs fixed related to Space Objects, why do not you release them now without waiting for sp3?
-
On 12/6/2018 at 10:03 PM, Liene Cikanovica said:
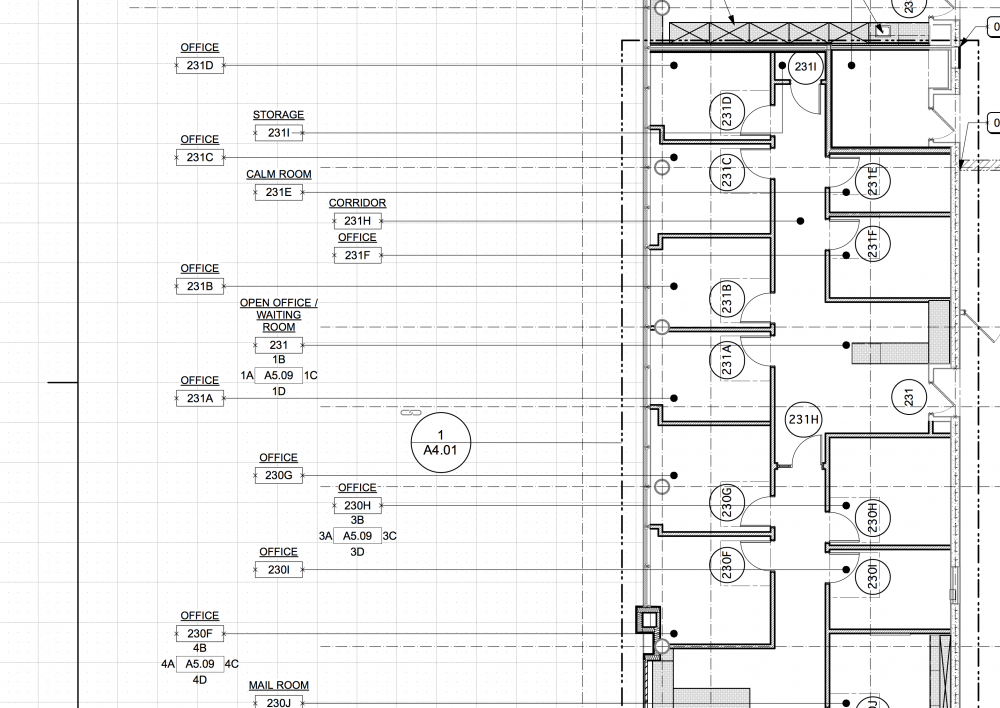
I have been using multiple space tags in my 2018 file. All space tags and their tag symbols where in different classes and visibilities were controlled in viewports.
I just converted my file to 2019 and it shows all space tags even the class is turned off.
This is how it should look like:
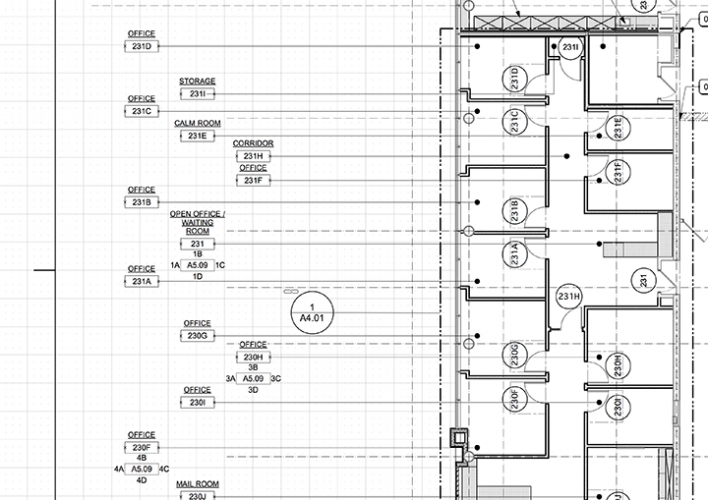
This is how it looks in 2019 with 2nd tags showing (though the class is off):
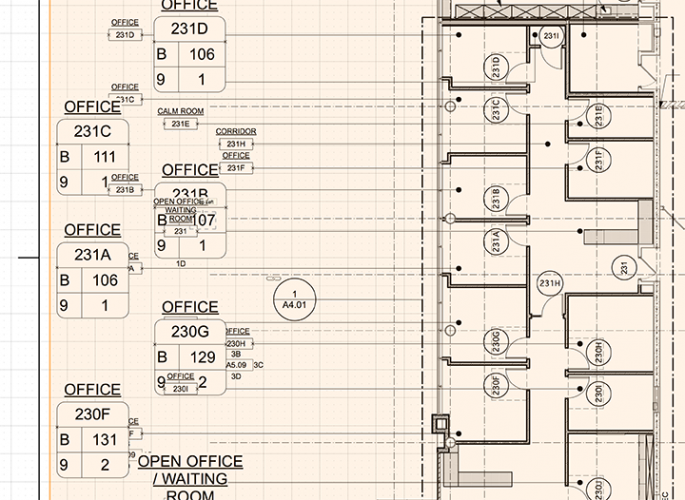
I know that the space tag tool is remade, but this bug doesn't help in smooth conversion of existing files. I would like to keep some of old system in place till we have time to update drawings with ID Tags.
Plus other things:
- Using Space Styles crash the file.
- Applying Space Style to an existing space it change all space info (Space ID, Occupancy etc) to default Space Style info, though the parameters in those fields are set By Instance. Besides it changes Space class to 2D Boundary Class not to Space Object Class which is set in Space Style.
- Space tags Data Tag doesn't allow to change space name with a drop down list offering just Custom or Edit List
- Space name or other dropdown lists of Occupancy info in Schedules doesn't work either.
Hi.I confirm all the bugs, problems, questions you wrot on this post. And i want to say "thank you" for the clarity and patience you used to describe all this questions. Around space object is playing a deep role for the BIM process and work process during a VW work.
Z
-
Look this side for instance

-
Hi STR
Thank you but i think that between add to every windows a data tag and live better, i'll choose live better. I think it could be a basic setting for a window
-
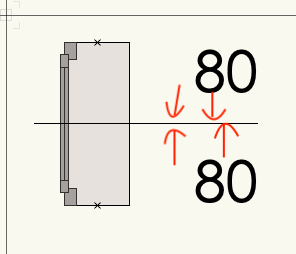
Hello everyone
a old question. Maybe a enhanment request, but..
it's possibile to set the dimension distance on a Window? See the arrows
Thank you

-
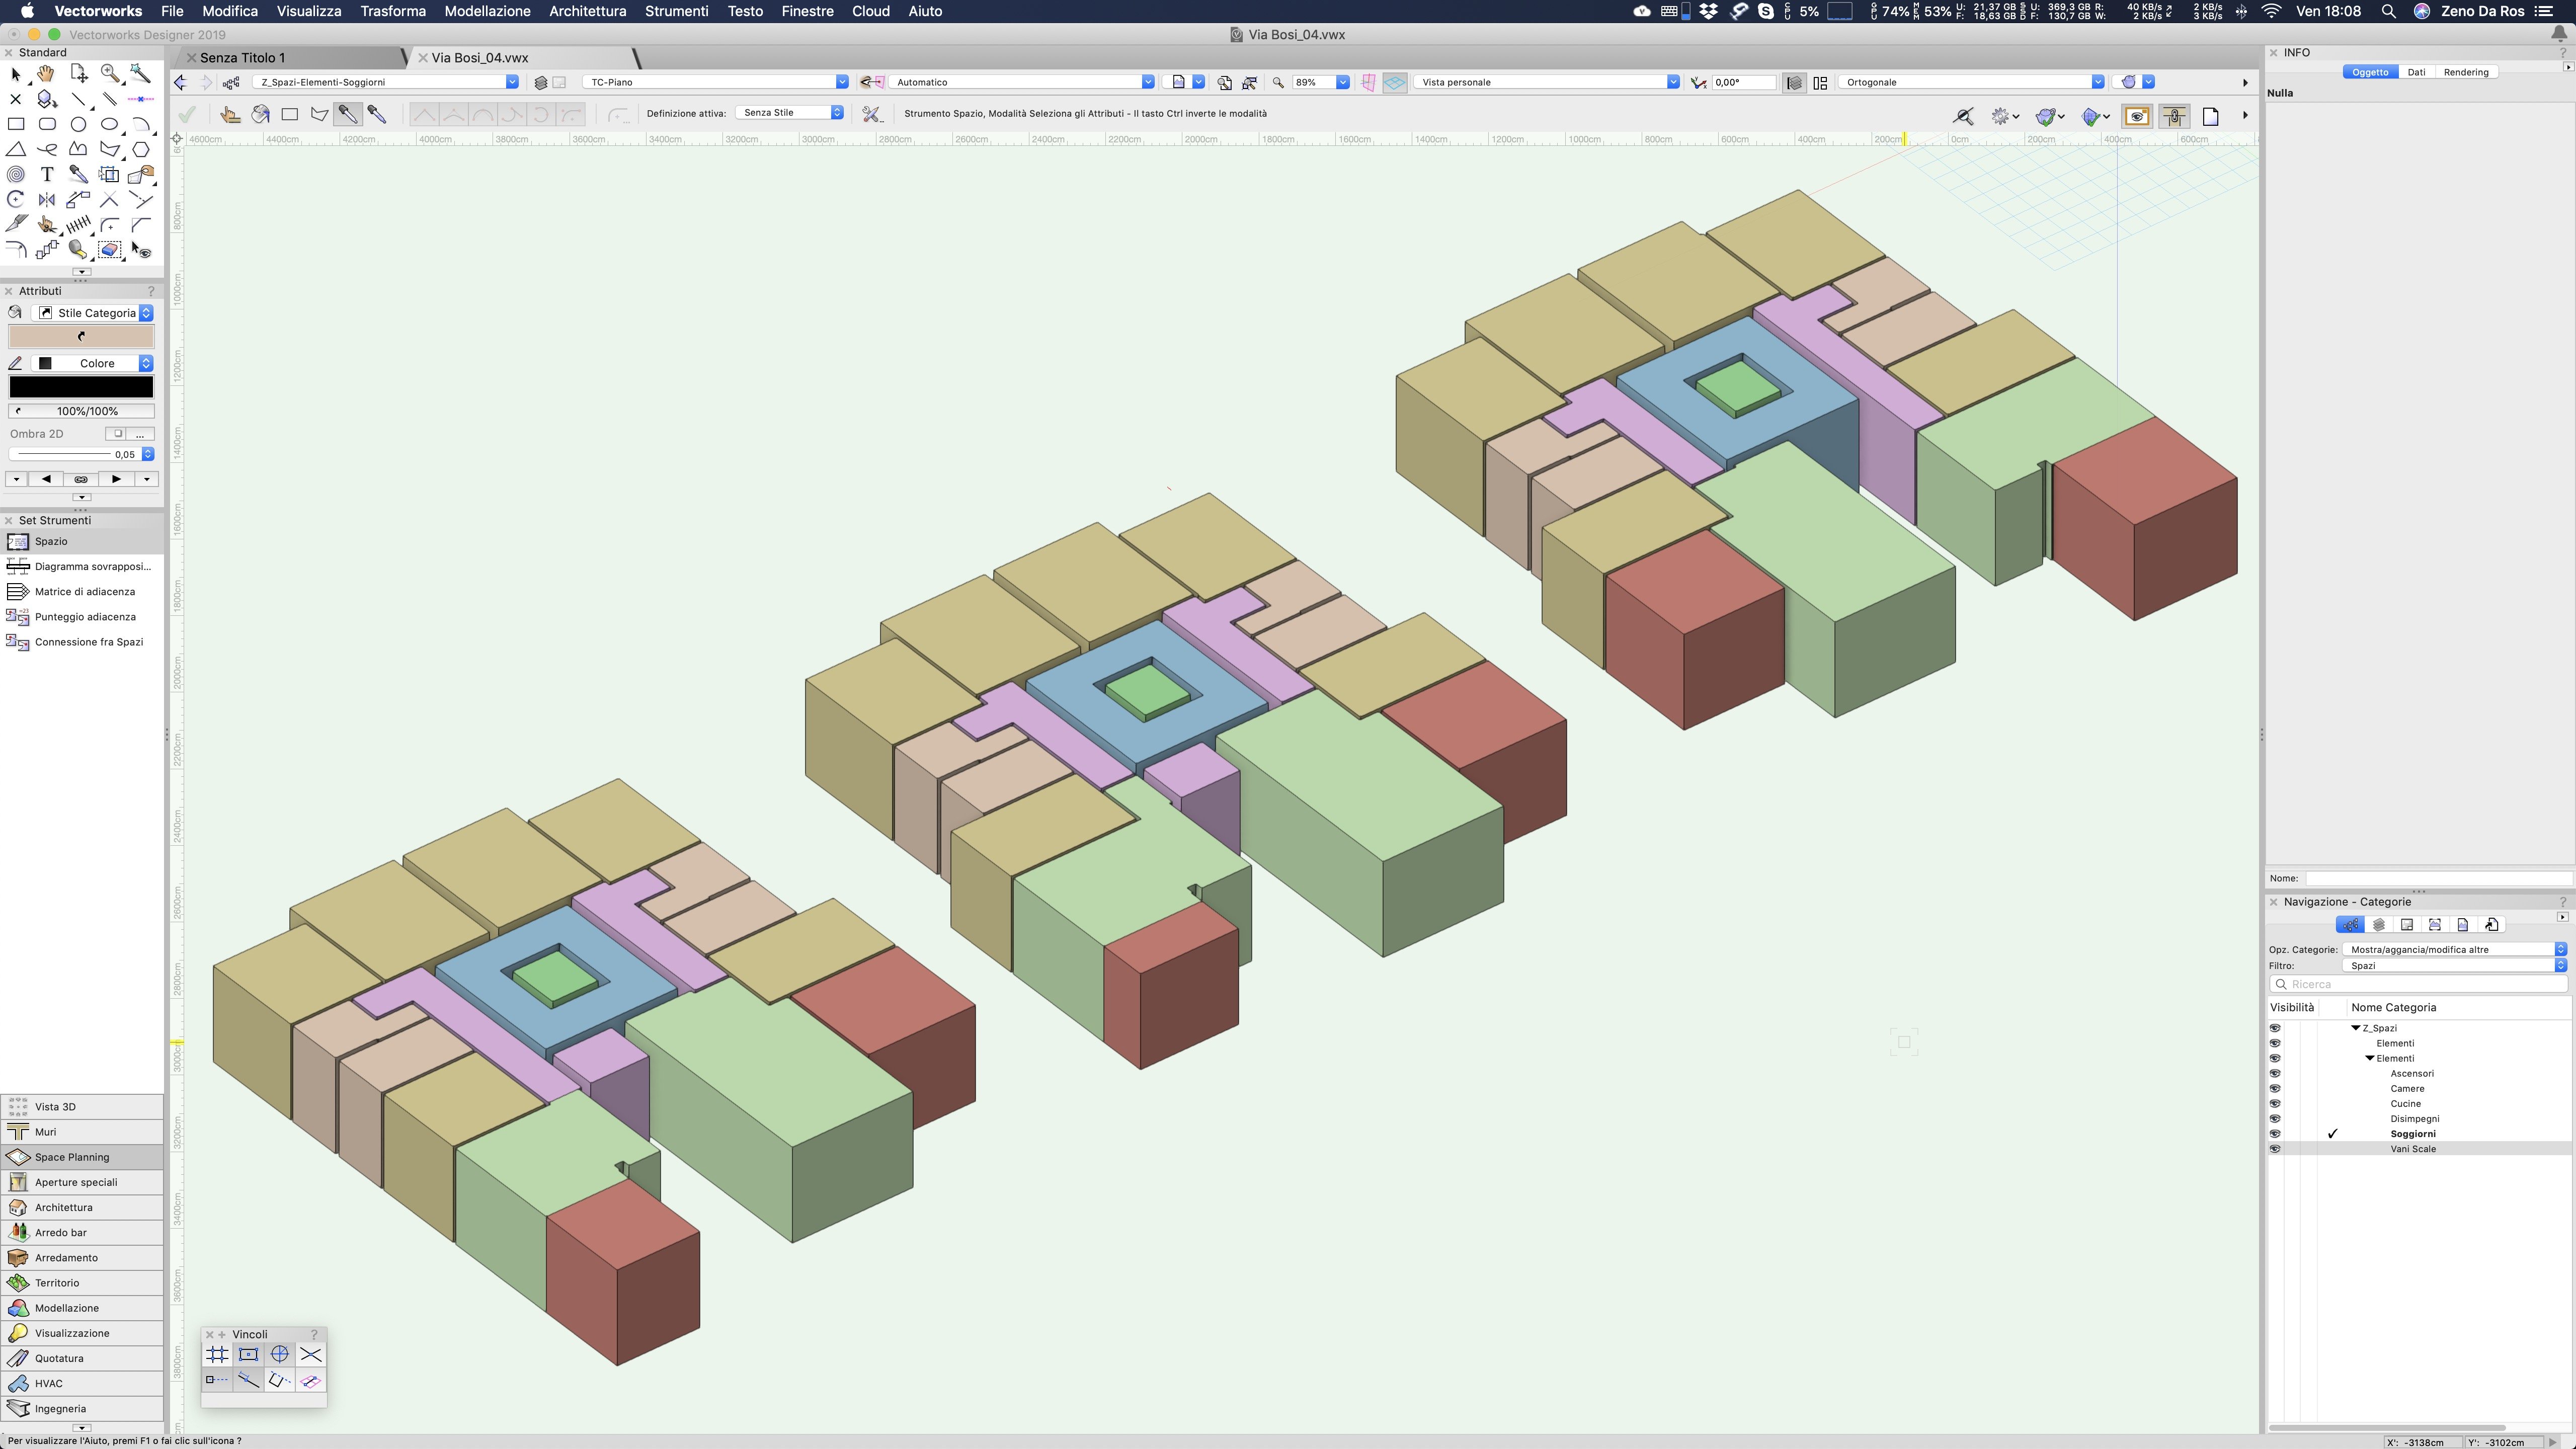
Hello everyone,
i'd like to know, how can I keep the original class on Space Object if I desire convert it into a Space Object whin a Style. In fact, if i assign it to a Style, even if i leave free class definition or attributes, every object going into the class defined into the space object settings.
There is other ways for istance into the windows or doors style. If i convert a no-style windows with 80 cm weight into a window style with 100 cm weight, but whit the weight style parameter is set to free, the windows becomes all the other style parameters setted by style, and the windows will be 80 cm wheight. That's not what appened with space style, where i can't maintain different classes into the same style.
Or have i missed something?
Thanks
Z

-
36 minutes ago, DA FIENO Alessandra said:
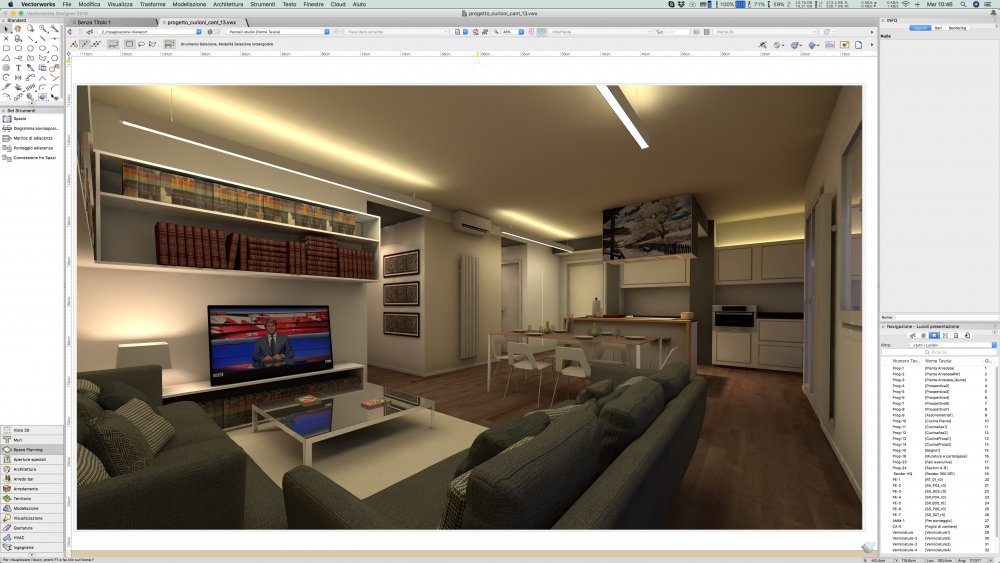
Hello, I just reloaded my vectorworks on a new computer and cannot seem to render. Everything renders in wiremesh as if walls or elements had no solid volume. Have I changed my setup? Cannot seem to find out where to fix this. please help!
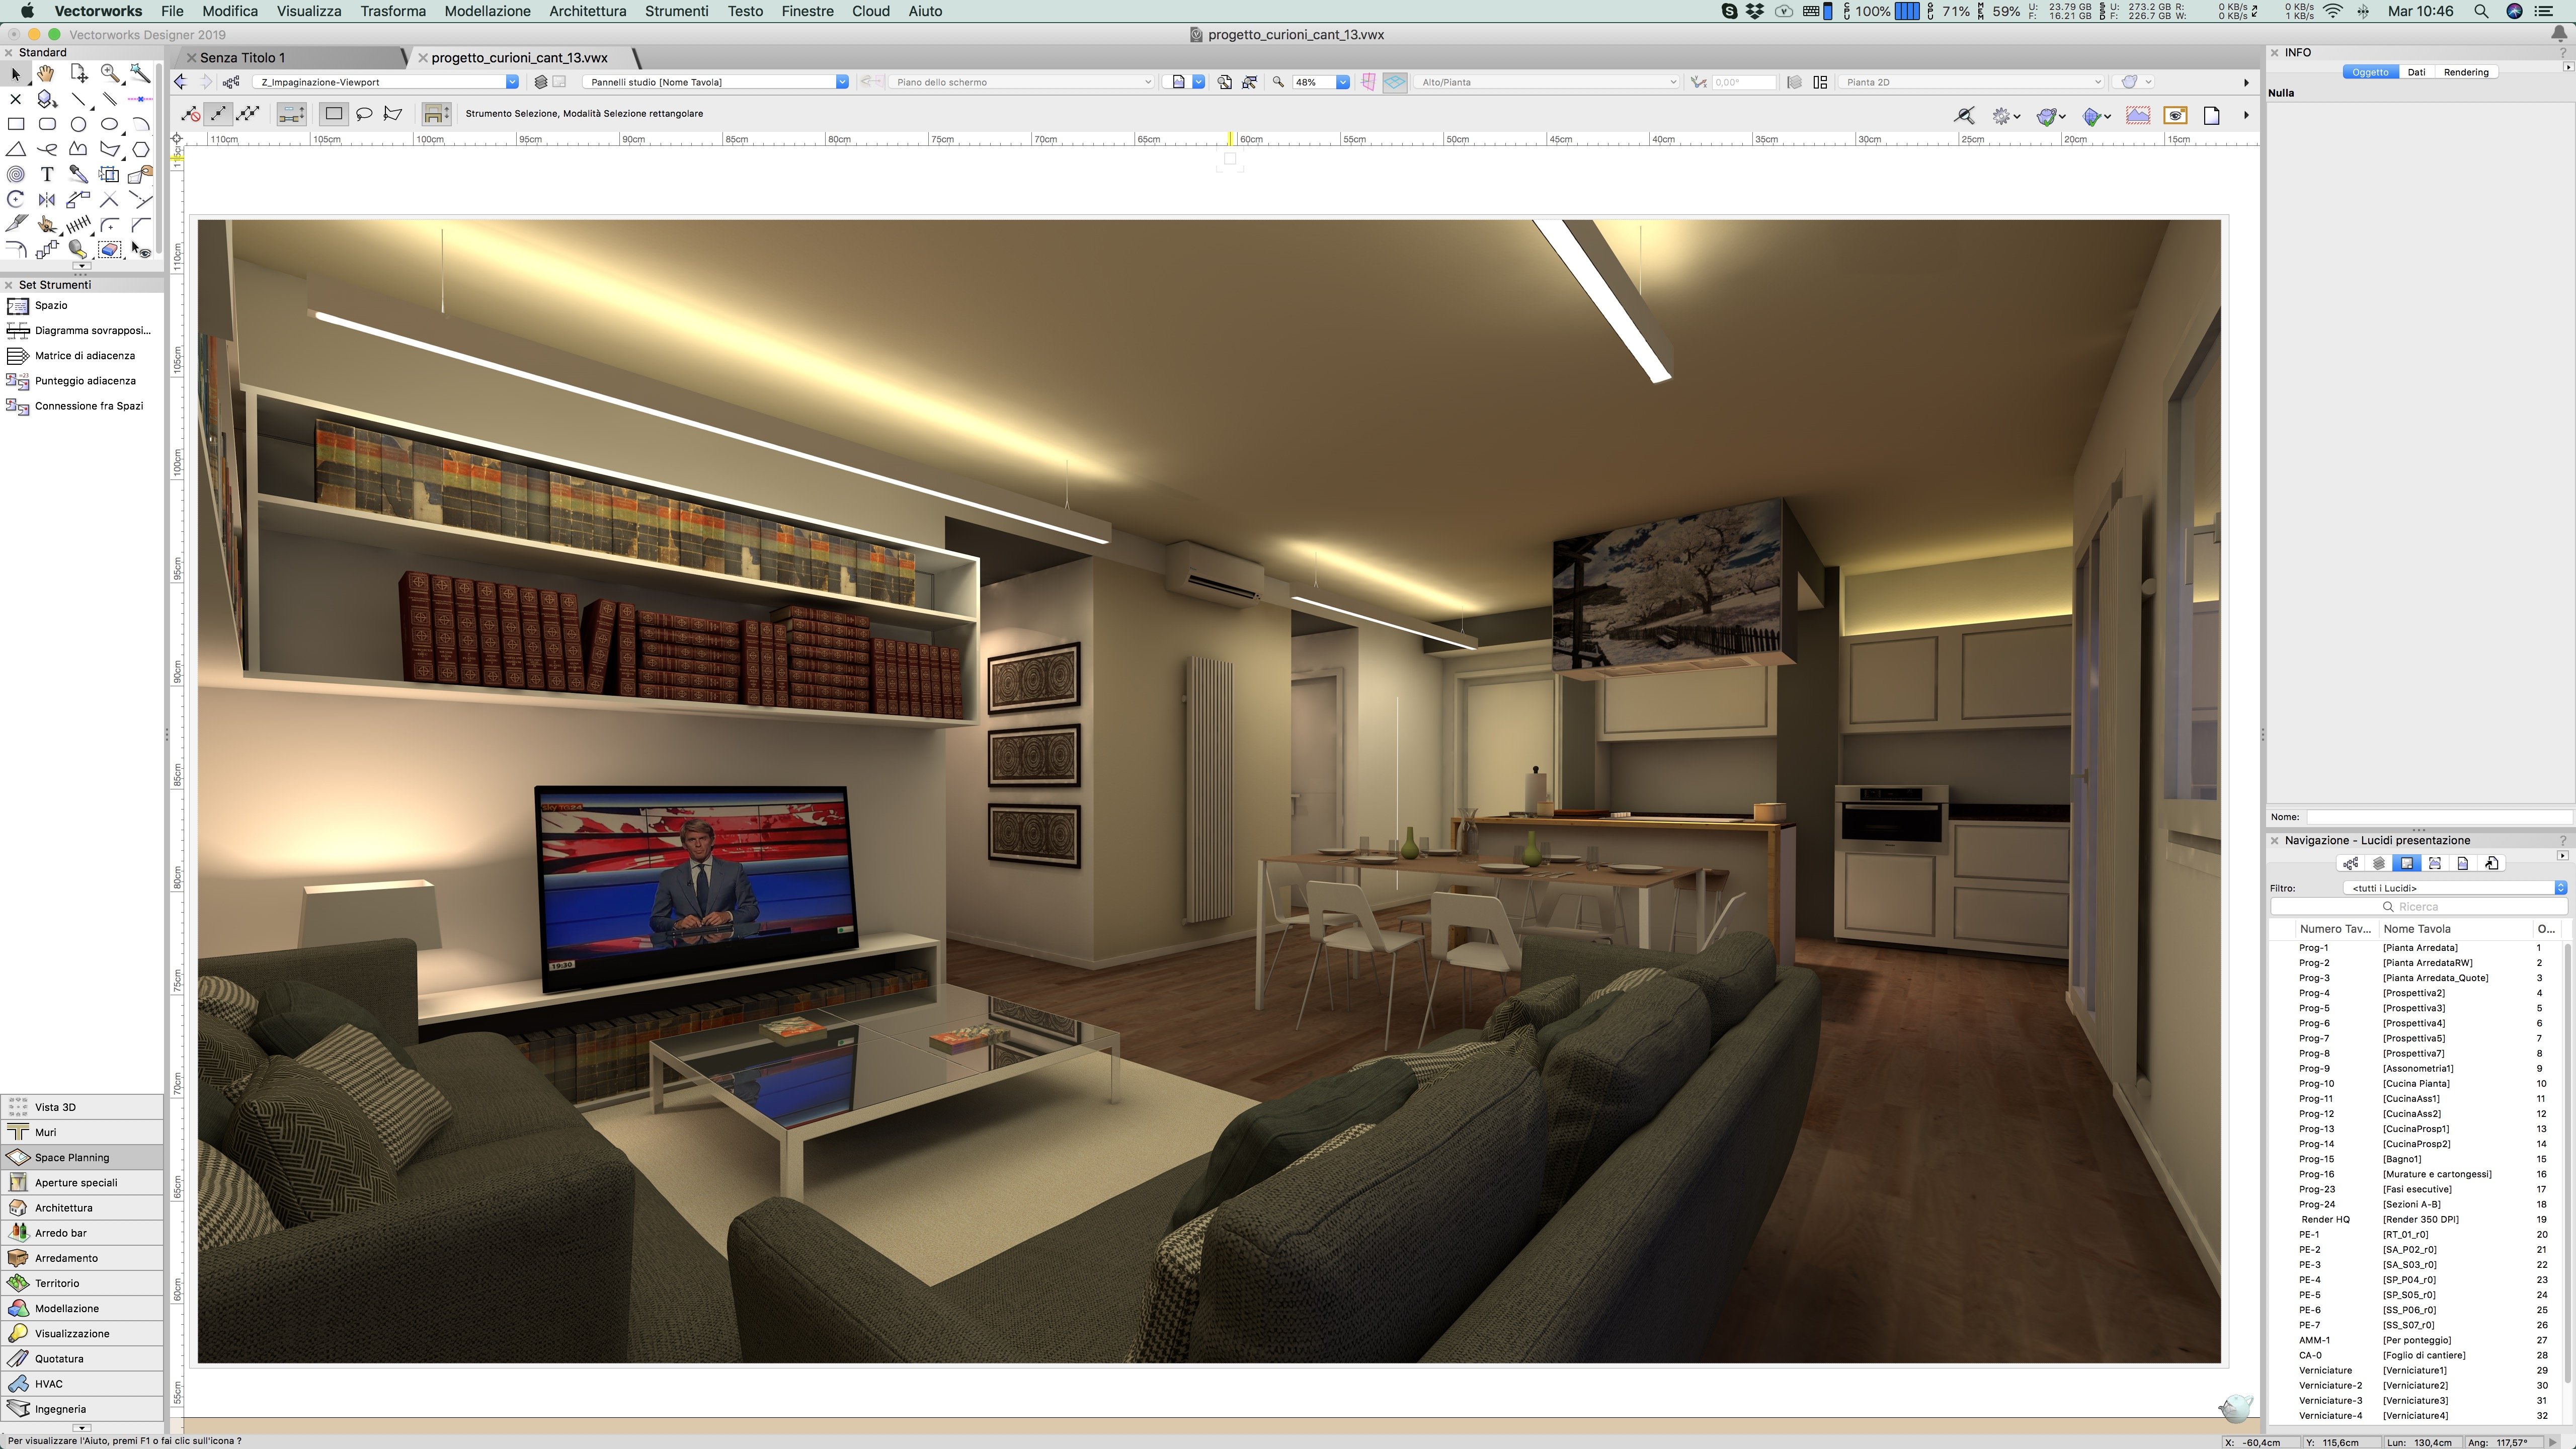
Post a screenshot of rendering process and tell us how are you rendering (viewport? render style?) tell us something more..
-
How can it be useful for vw?
-
Ok Luis. I’ll post the box, promise!
-
1 hour ago, Luis M Ruiz said:
@Zeno Here is a little trick I found from several files users sent. For interior renderings and interior elevations models, instead of just leaving the 3d model seating empty on a surface, how about placing it inside a box? this will contain all bounces of lights.
Finally, once you get the viewports ready, crop them as needed and adjust the contrast and brightness using image effects.
Here is an interior rendering for a virtual model, I used to have plenty of those spots and after testing this new technique, seems like light can be controlled better.
Tell us later if this suggestion makes any difference for you.

Luis. Your works looking f**king awesome. Really. I love it.
I'm not sure to understand what you mean. The model in a Box? Like Jack? 🙂 How can i add natural light in my appartment in a.. box?
-
 1
1
-
-
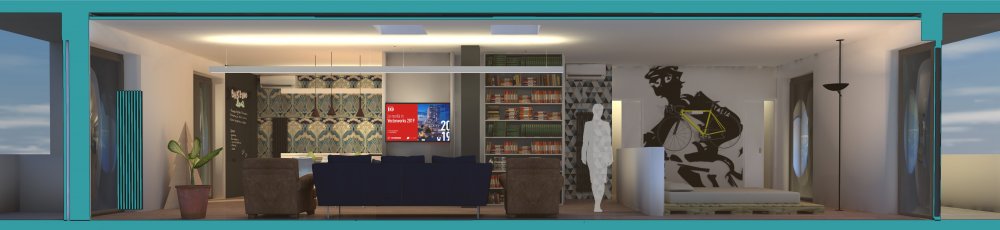
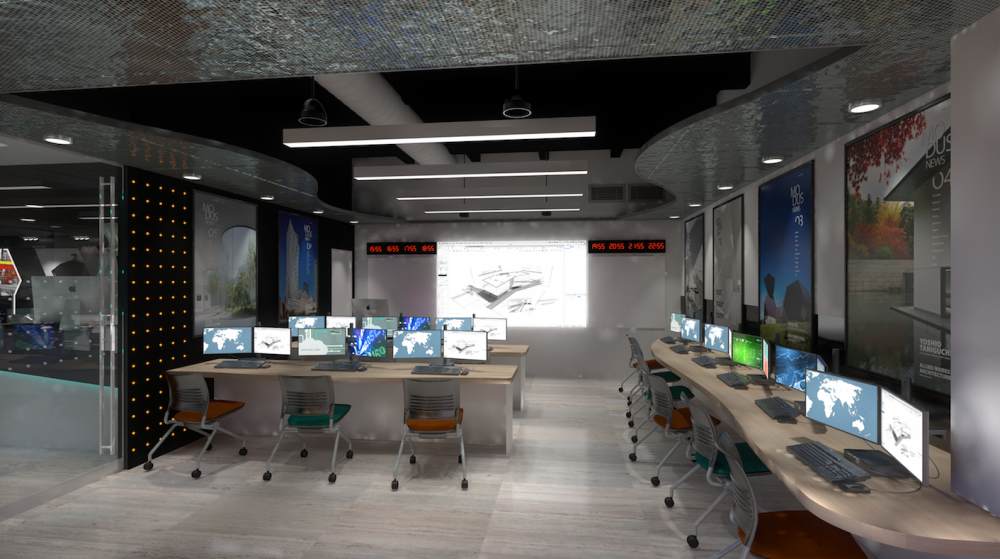
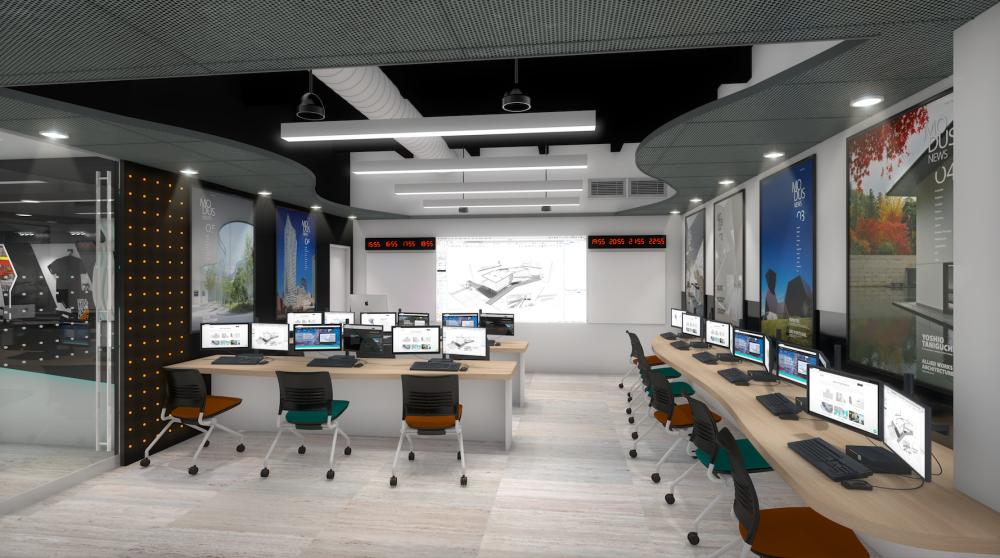
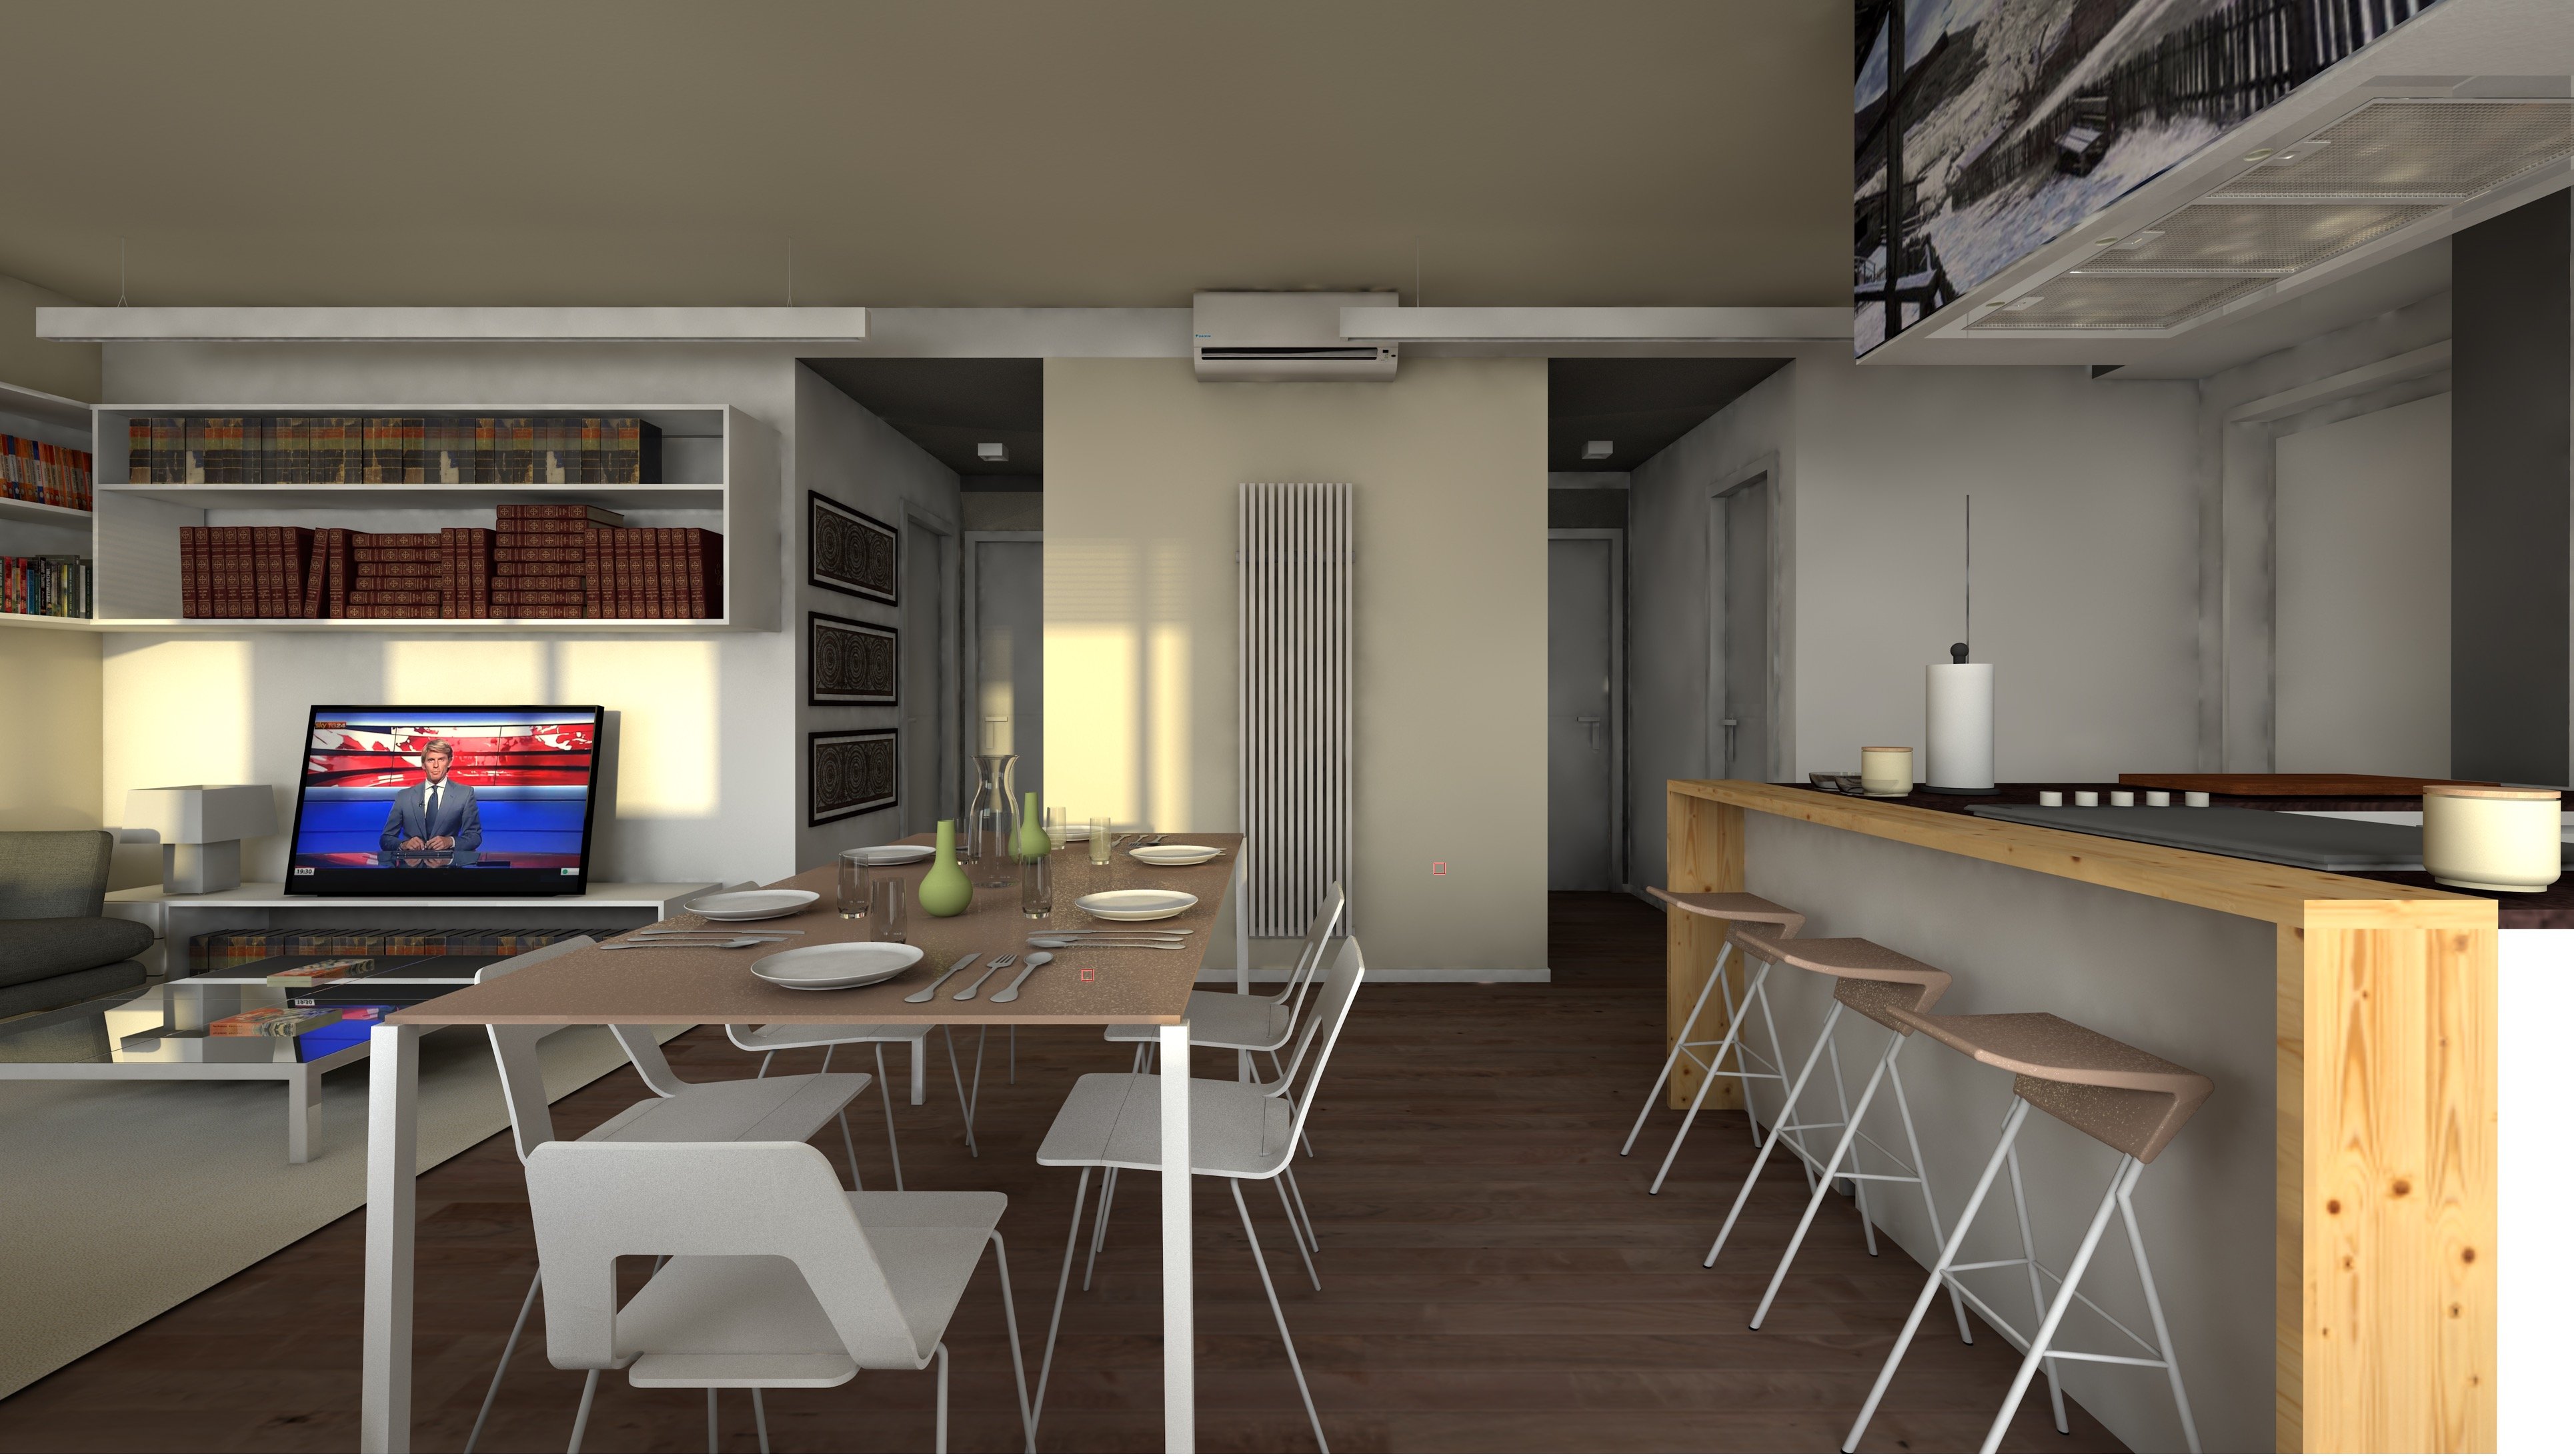
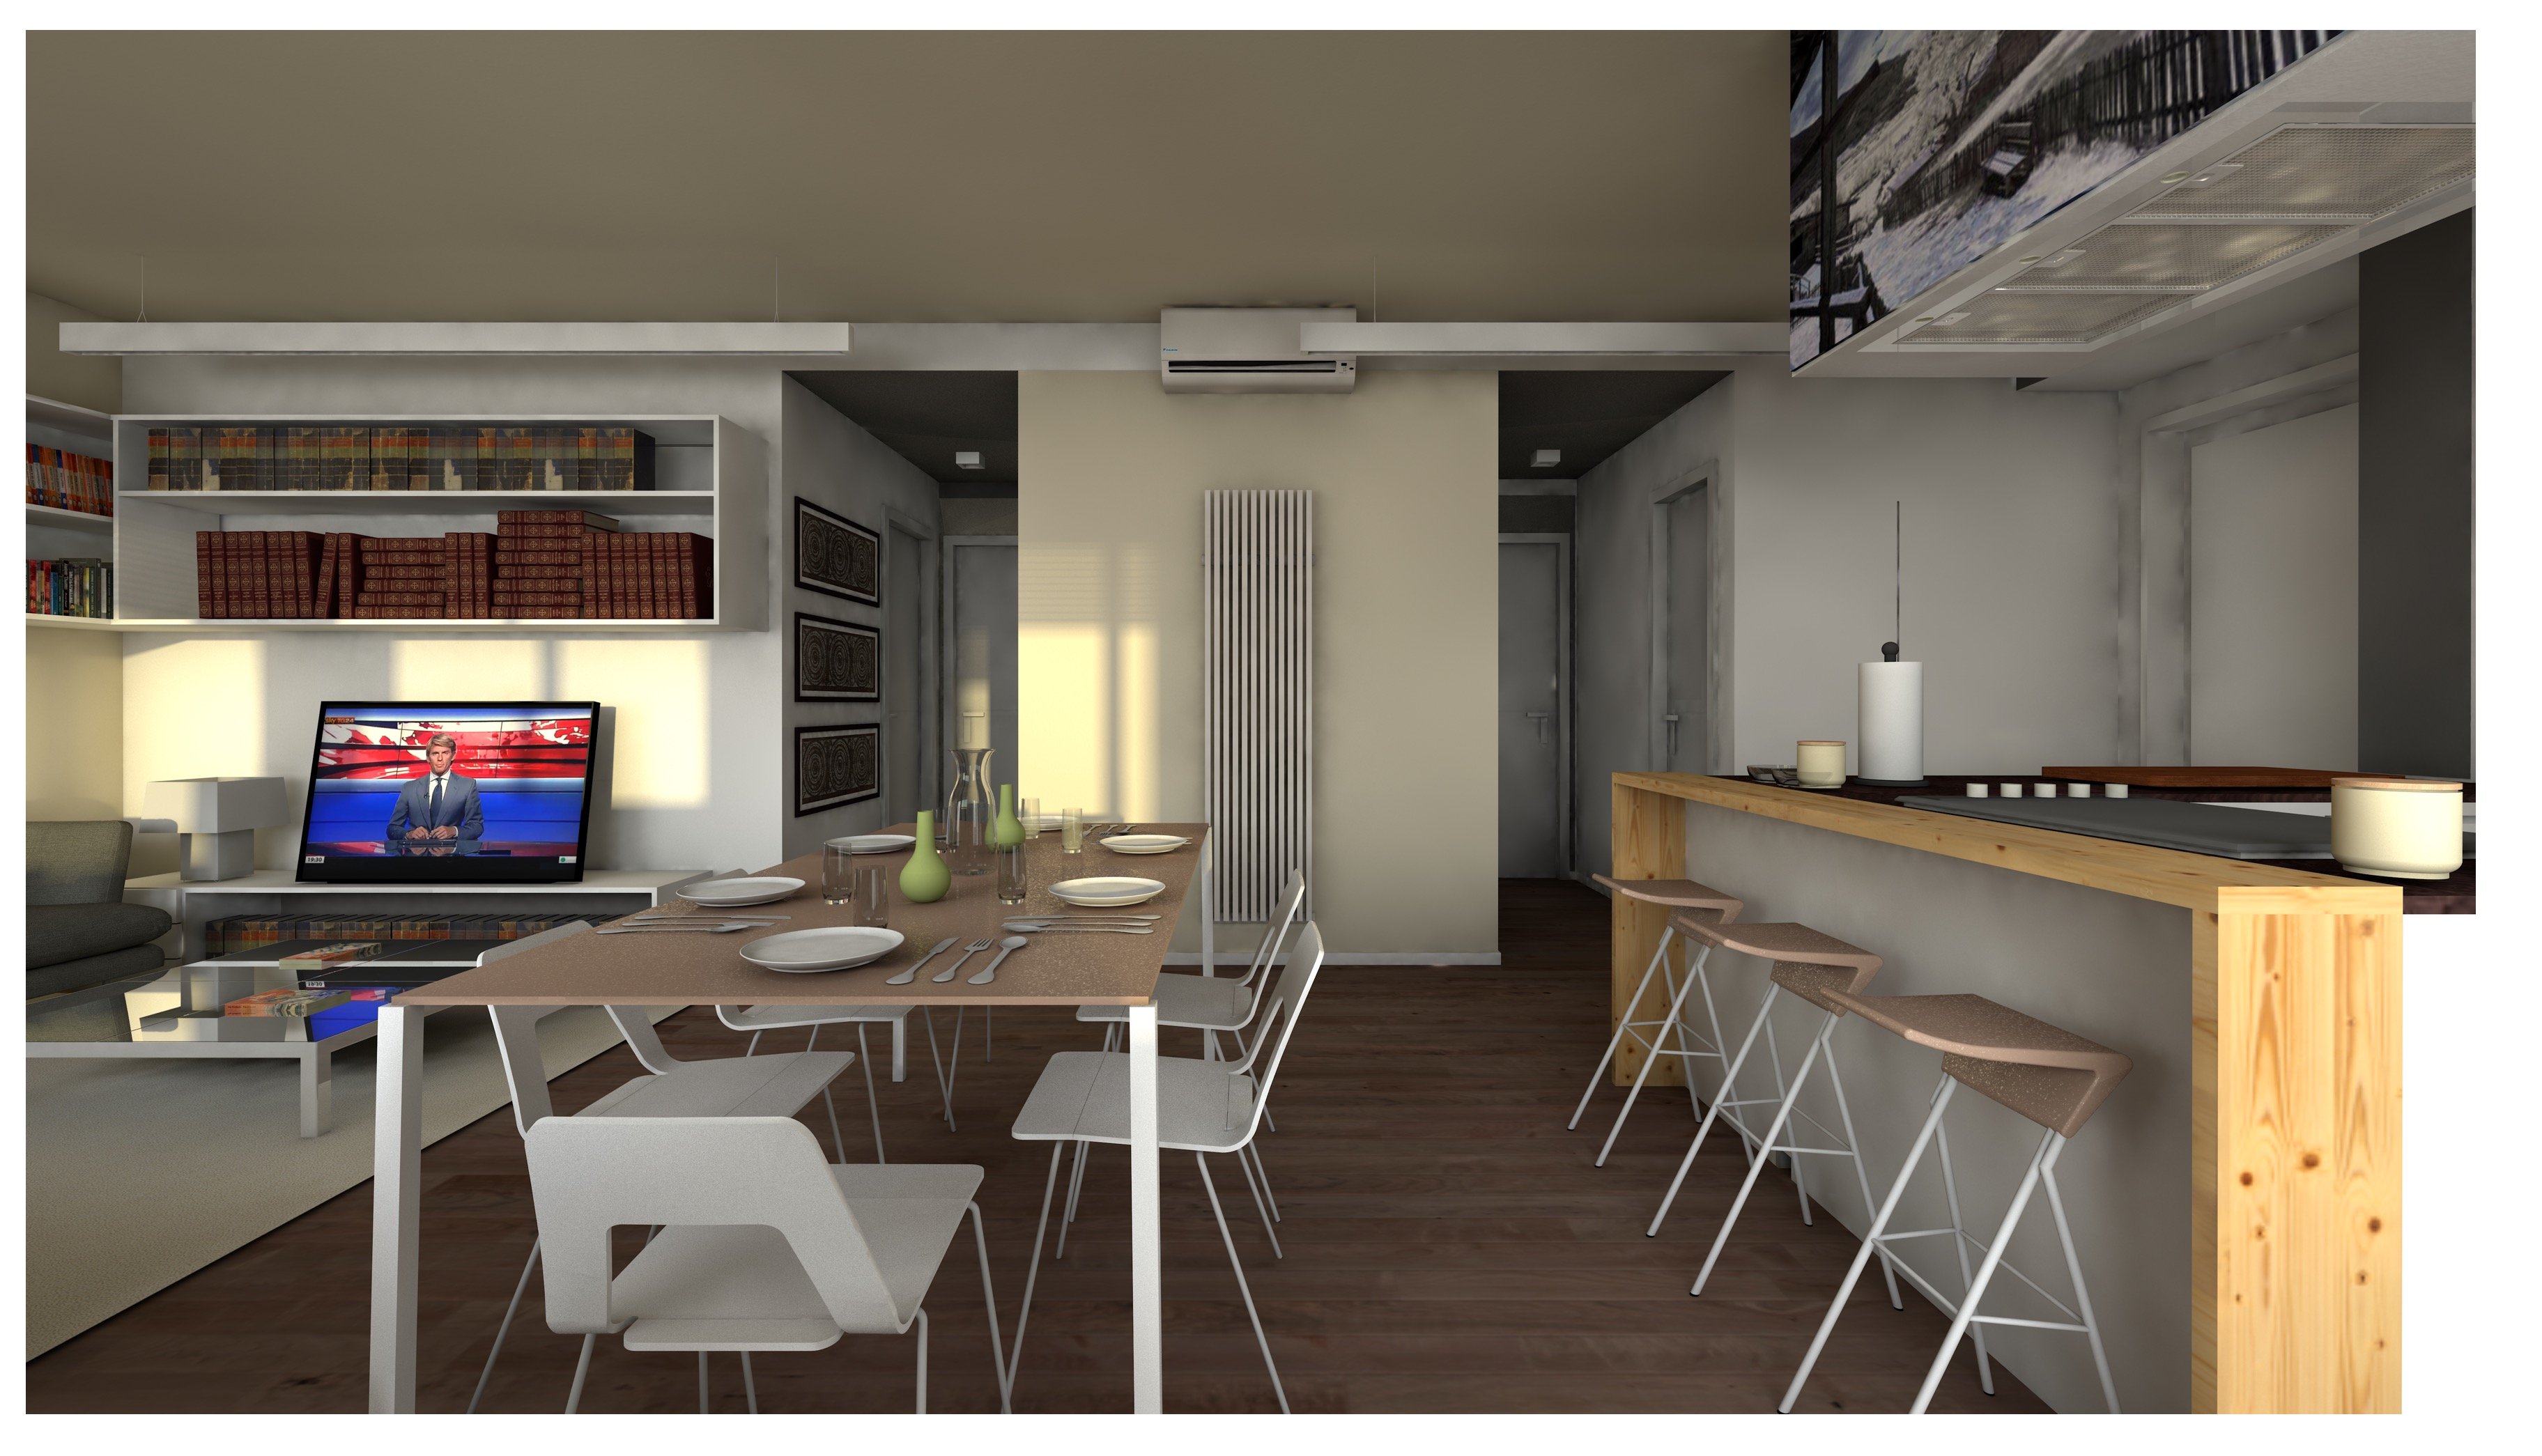
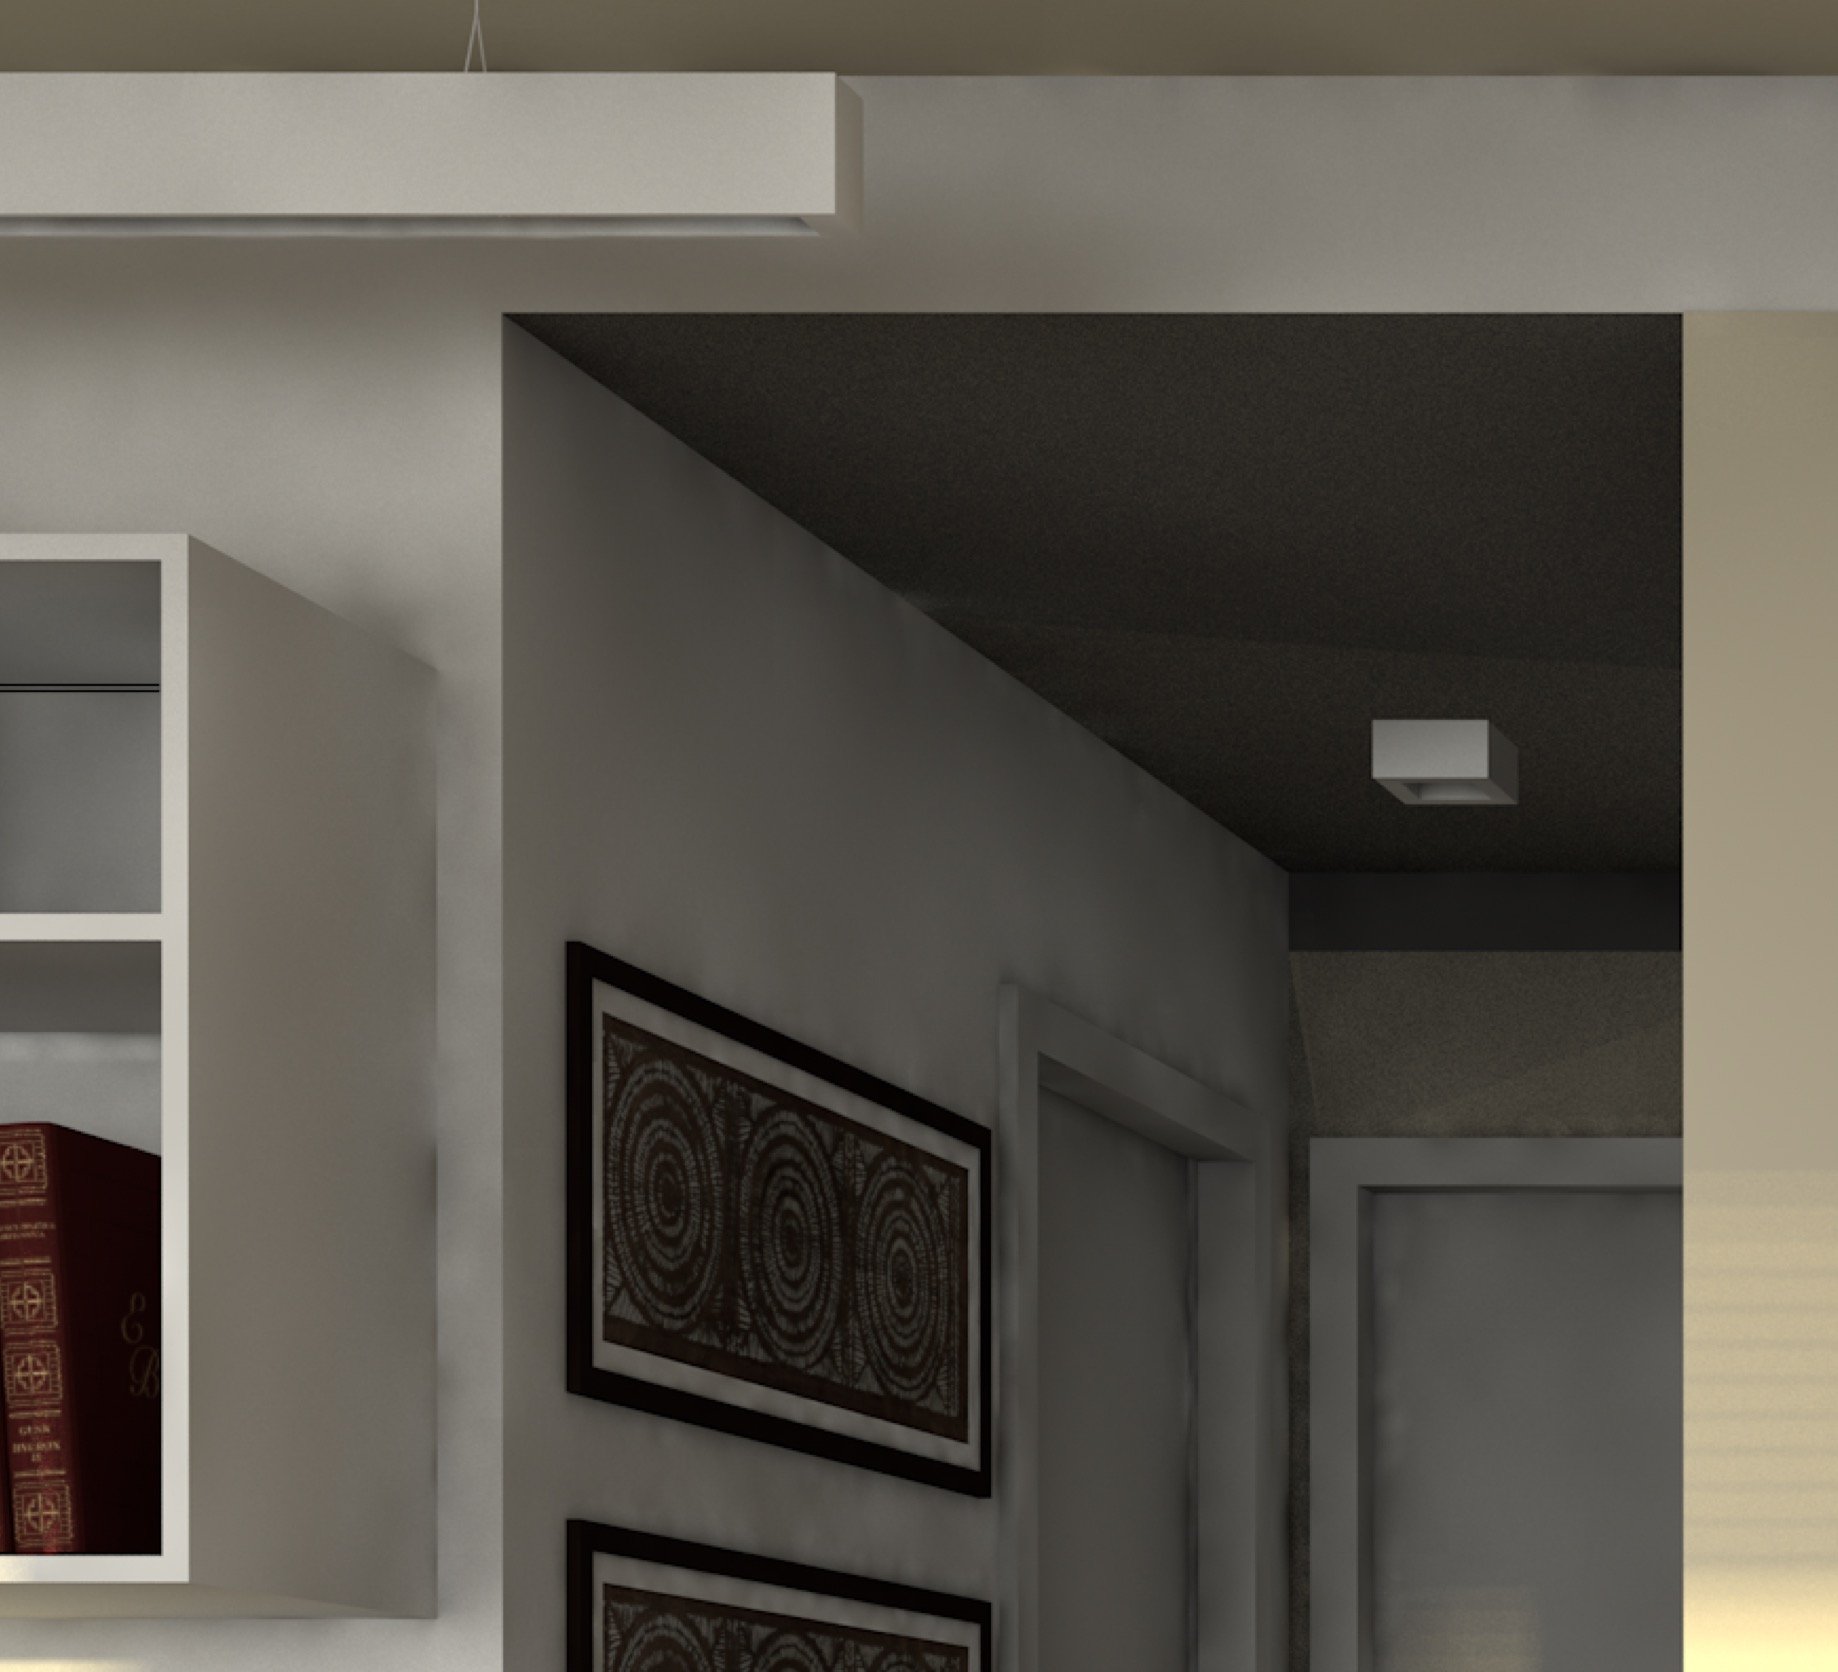
Hello everyone. There is others spot on the corner.. but no metal texture. If someone can have ad idea..
thanks
-
1 minute ago, mjm said:
As my kids would say: Srsly? You get to have that candy and we don't? Hey there Nemetschek, what gives??
I don't like candies, I like a FERRARI 🤣
-
Ehm sorry.. it is in Italian Version... ¯\_(ツ)_/¯
-
3
-
-
Choose .SVG flies. 2019 works very well
-
Please can anyone post the number release of 2019 SP 1.1? Thank you
-
9 minutes ago, Jim Wilson said:
The only "bad" news about Lumion is that it's Windows only, Twinmotion however is Mac/Windows.
However, they are both very similar tools, and I would suspect that establishing a workflow and/or plugin with one would benefit the others directly.
For this reason i think that twinmotion could be a good choice for VW users
-
1
-
-
On 10/16/2018 at 6:09 PM, Dave Donley said:
Are you using exposure to brighten up the scene, or is it this level without exposure?
Hello @Dave Donley. Thank you so much for your response. I confirm that I use camera with exposition only for time and ISO settings, to set the brightness.
On 10/16/2018 at 6:09 PM, Dave Donley said:make sure that the Indirect Lighting options for that texture have "Portal" turned on.
Done, see the results here.
On 10/16/2018 at 6:09 PM, Dave Donley said:not having breaks in them where the trim piece meet the wall surfaces
No breaks in the model, I'm sure
On 10/16/2018 at 6:09 PM, Dave Donley said:very small very bright surface somewhere in the model
Yes, in fact after your and mr @Luis M Ruiz's suggests I checked all the textures in my file, specifically the old metal texture
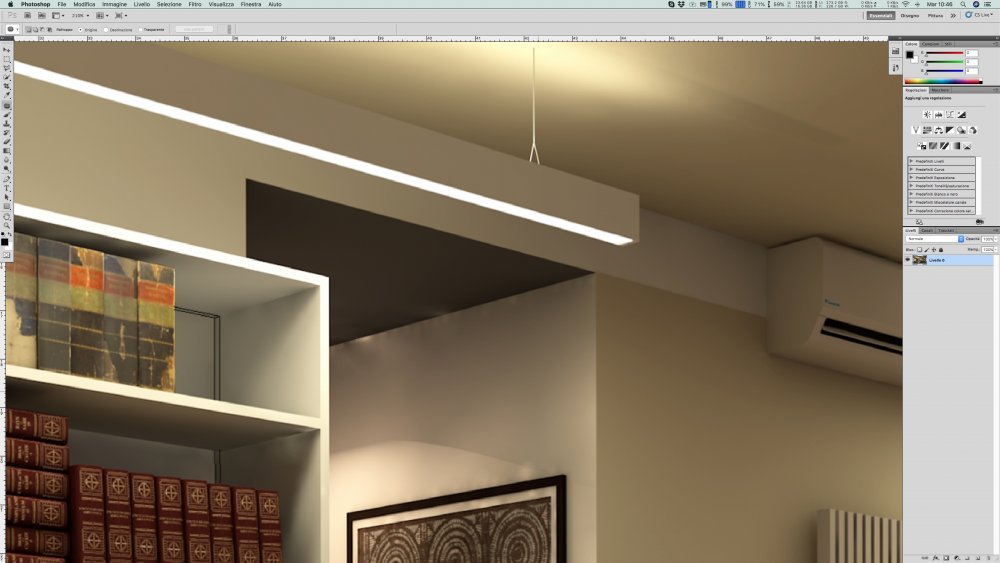
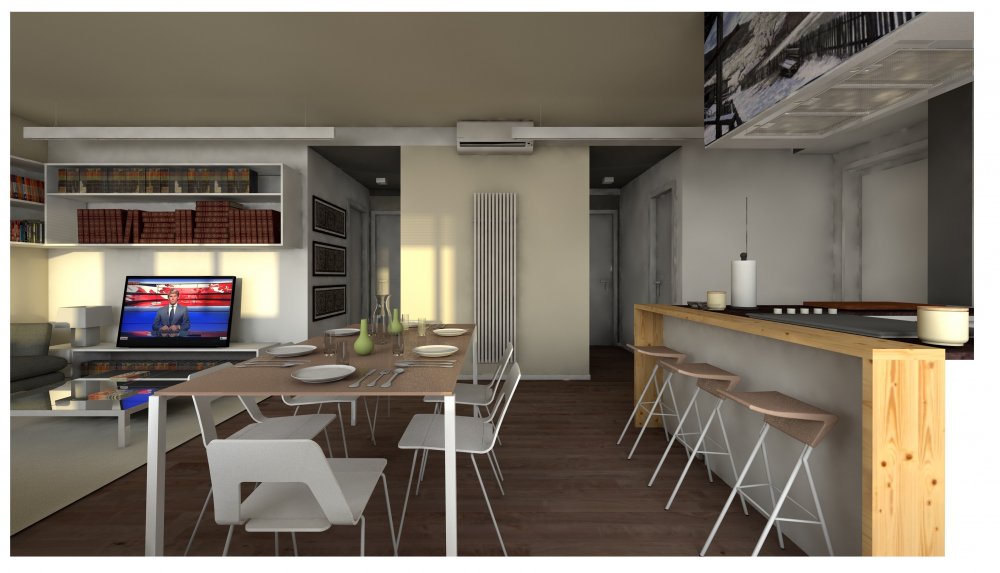
Here is the first and second step. All windows glasses are portal texture. I reduced drastically all reflection in metal texture. It is very better but not perfect. Maybe can I do another texture check? After that, I think that render works has a big problem with reflection and low light scene.
Thank you all for your help. It is very useful.


-
3
-
-
My vectorworks 2019 software is old from this evening. Please do it. Please now.
Amazing work @Stephan Moenninghoff and please let us know if we can share this videos!
Danke Stephan! Gib uns meherere Nachricten! Toll!
-
3 minutes ago, Luis M Ruiz said:
Recently I went from this (see attachment with spots) to this (see the latest rendering). Solution? My materials were too reflective and competed with each other. By reducing the unnecessary 40% reflection to just 5% at most and I achieved the look I wanted.
Very nice work. An thanks for the suggest! I will post my example after the reflection settings! Thanks a lot!
-
The problem aren't located only in dark portion models, even under a powerful light area
-
34 minutes ago, zoomer said:
Relating to Render Settings, you can just increase to maximum
GI Bounces and GI Quality.
Actually this result is coming from all VERY HIGH settings. Including GI
34 minutes ago, zoomer said:The rest is related to having correct Model Scale, physical correct Material
and light settings - and maybe even post processing in PS.
What do you mean precisely with "correct model scale" "Physical correct material" and "light setting"?
-
Hello everyone..
a few months ago there was a thread about this problem. In 2019 version there is the same situation. Nothing is happened.
I'd like to start a constructive discussion about this (I have also posted a BUG in the beta lists but I'd like to talk with you here in public)
There is always the same scene.. I know and I'm sorry for that.. but I use it for testing new features and actually I need to work in PS to fix all this problems because I'm proaching to print this in a large format.
Honestly I'm started to hate this problem and I'd like understand how can I fix it. I would like to no longer see those points of light put at random.
And: something like "add a fake light there and there" I don't consider it a solution. If I need a dark scene, i aspect to have a dark scene.
Thank you for you further suggestions, guys.
Z


-
1
-
-
If you do something voluntarily you do not expect anything in return. If you stop believing, stop doing it. Is simple
-
2
-


Problems with Space Tool - Multiple Space tags showing & problems with Space Styles
in Troubleshooting
Posted
Ok thanks