Search the Community
Showing results for tags 'window sills'.
-
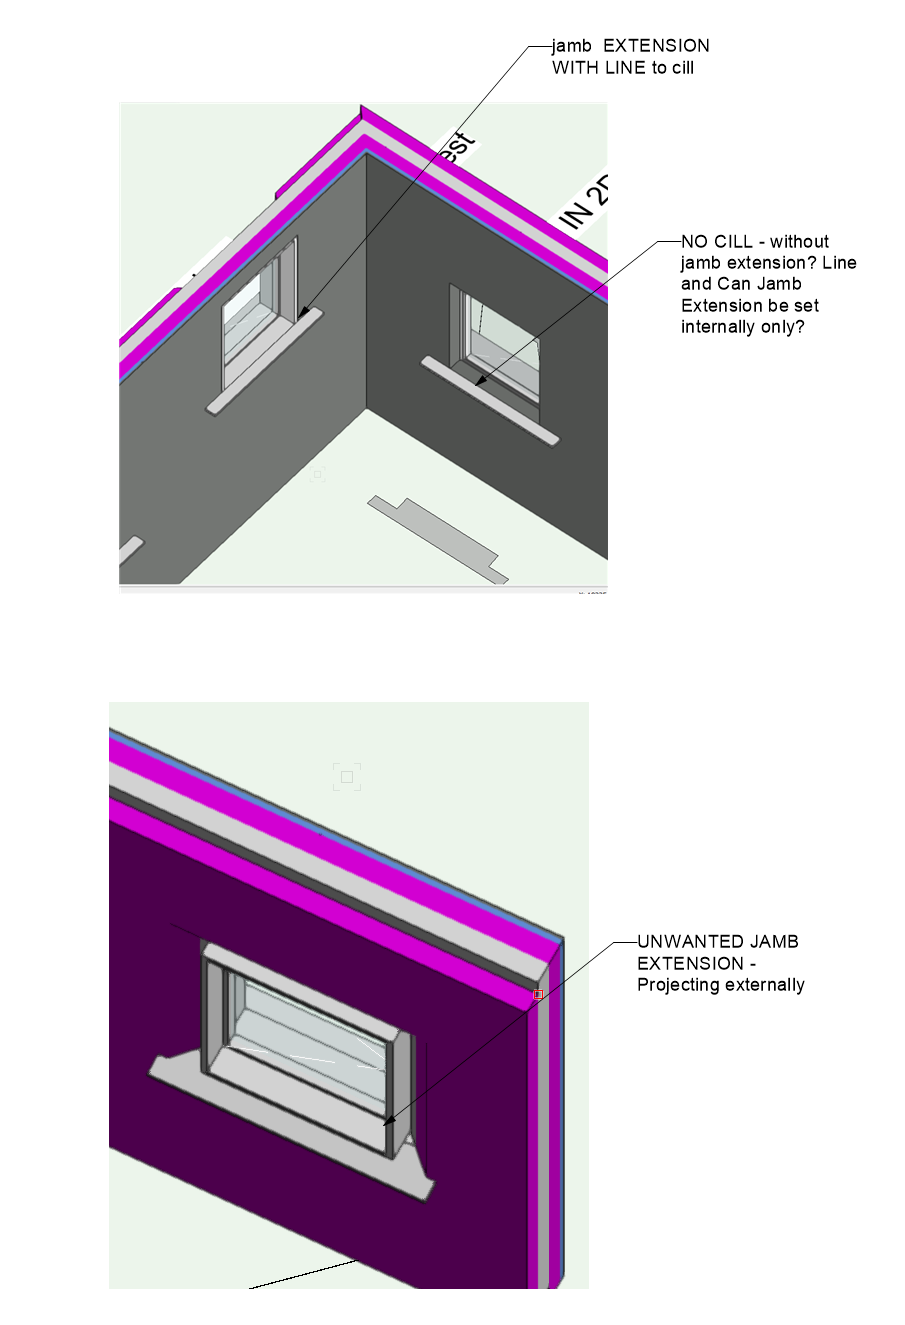
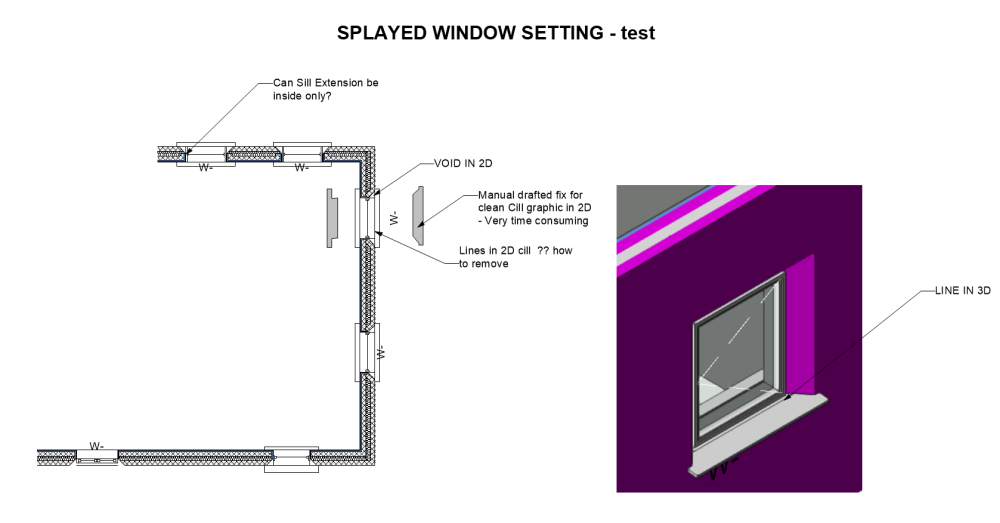
HI, Does anybody know how to solve this SILL Problem in VWX 2023 ? Trying to move from 2D to 3D and encountering the following problems with Sills. Am testing V 2023 and Window Sills within Splayed Wall. IN 2D 1. Unwanted Lines from external wall across sill EXTERNALLY 2. Unwanted Lines across Sill INTERNALLY 3. Cannot Control Internal Sill shape or dims - Length is exactly the same as external sill offsets 4. Void in 2D between Splayed Wall and Cill. IN 3D 1. Unwanted Lines to sill Externally 2. NO sill INTERNALLY unless Jamb extension used 3. If Jamb Extension used it extends externally into void 4. Cannot see anywhere to control the Shape, Dims, extend of Sills independently. - for Inside and Outside or remove unwanted lines. The only way I can see to do this is for 2D graphic to draw polygons internally and externally for EACH WINDOW , but this won't read using Clip Cube so the manual process needs to be repeated in all sections. Surely this laborious workflow ( if only option) goes against what they're trying to achieve with more interactive, time efficient design workflow ? - Any assistance gratefully accepted . Frank
-
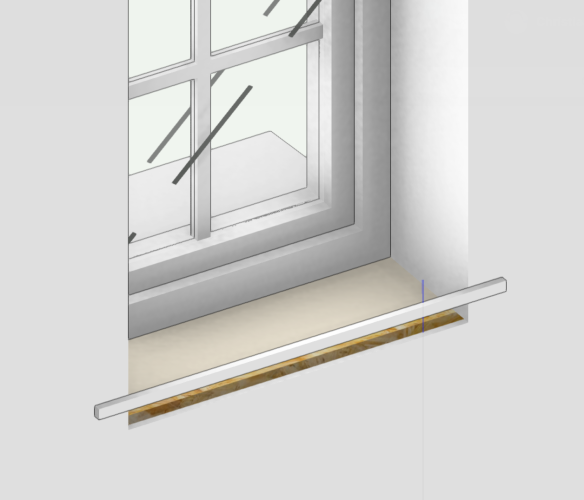
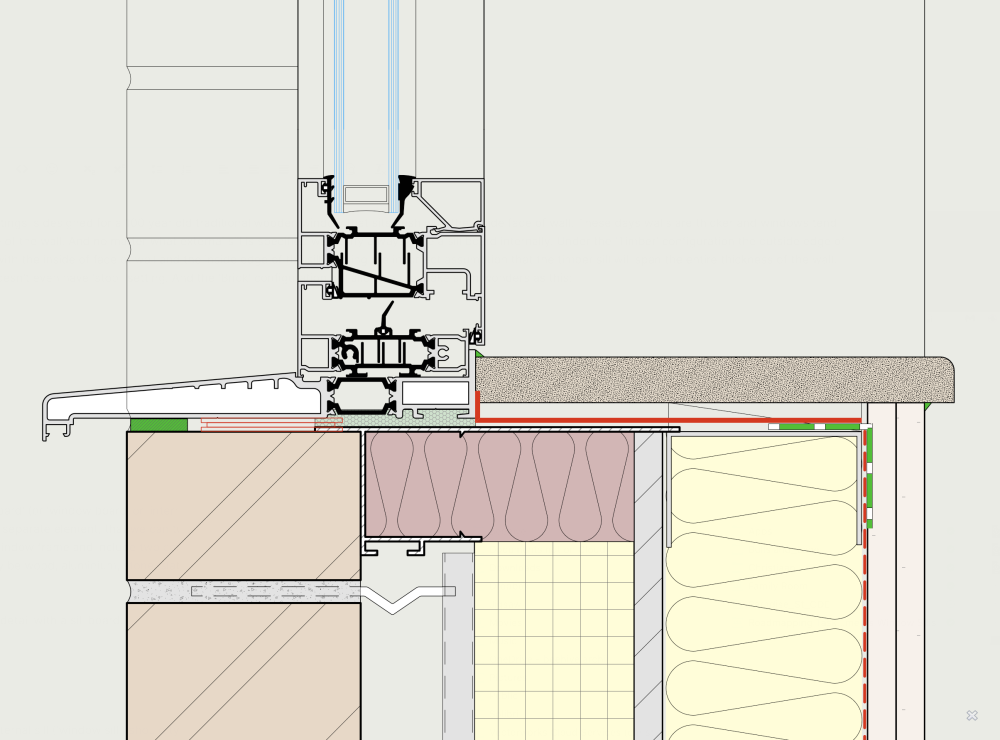
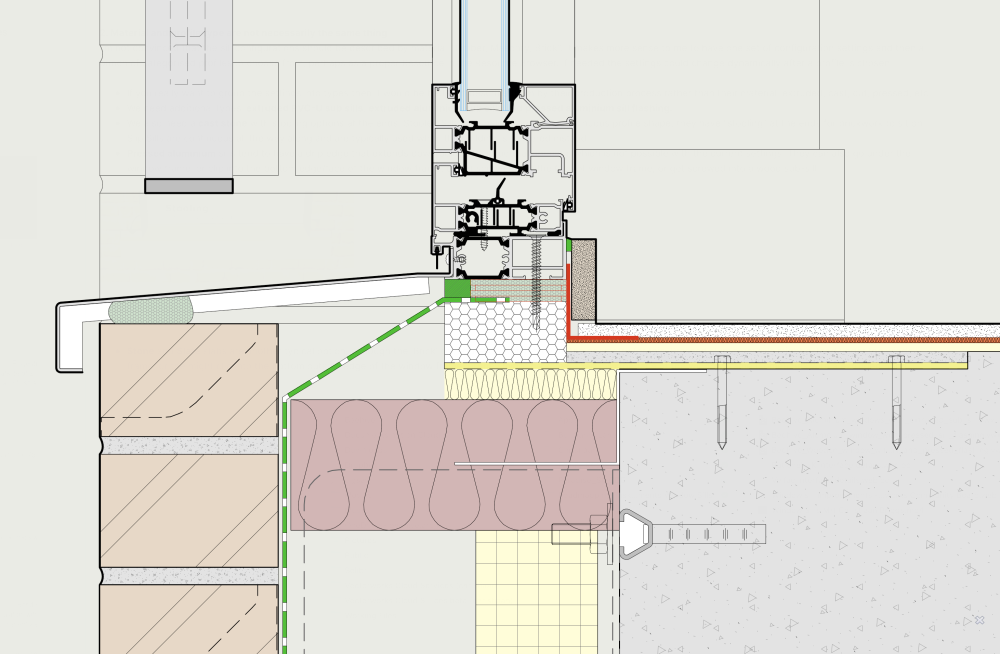
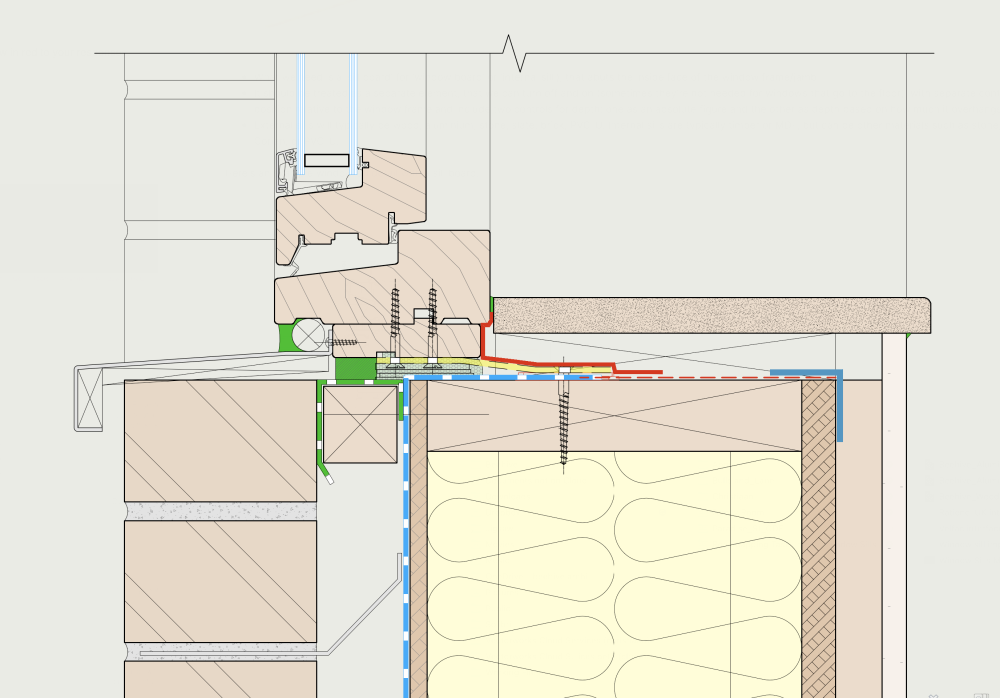
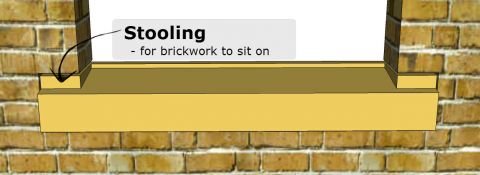
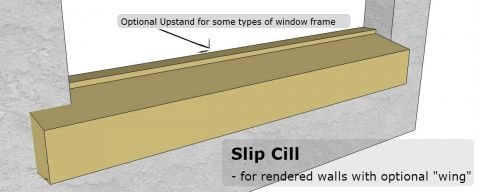
This is part of my Window and Door Tool Maturity request: https://forum.vectorworks.net/index.php?/topic/64381-window-and-door-tool-maturity/ 1. We need a sill board The 'stool' object of the sill settings is designed for a 100 year old traditional wooden window that sits flush with the inside face of wall. These days walls are thicker and windows tend to sit somewhere in the middle of the wall. And no matter what external sill is specified we nearly always have a sill board internally. Under the 'Timber' configuration the outside edge of the 'stool' is eternally aligned with the inside of face of wall and the inside edge of the sill, making the incorrect assumption that the timber sill should always span the entire thickness of the wall. The 'Masonry' configuration doesn't have a 'stool' setting. And the 'Brick' configuration will allow you to make such wonders as this: What we need is a 'sill board' (or 'window board' or 'internal sill'), that abuts the inside face of the window frame/jamb/subsill. The internal finish wall component needs to be able to extend up and abut the underside of of the board. The sill board should be treated as a separate element to the external sill, that we can turn off and on (sometimes they're not needed for windows that go to the floor) The sill board needs a control for its vertical position relative to the window frame and two controls for depth: one as an absolute figure and the other based on how much it overhangs the inside face of wall. Here's an example window sill detail with a sill board: 2. Materials should be decoupled from profile shapes and we should have far more control over profile shapes I'm not convinced that the sill configurations should be based on material: "Timber, Masonry, Brick". External sills will typically be wood, aluminium, stone, slate, brick, PVC-U. Internal sills are typically timber or MDF, but can be other materials such as stone, ceramic, marble, Corian, or PVC-U. It makes more sense to me to have one set of configuration settings and then a bunch of profiles to choose from. Profiles should probably be a Resource that we can create and edit ourselves. Perhaps different categories of profiles with different configuration settings. If you really want to group the settings into types then it would be better to describe them by their production process rather than their material: extruded, cast, cut, pressed, etc. We need additional types, for instance: extruded PVC-U sub sills, extruded aluminium sub sills and pressed aluminium sill flashing. Pressed aluminium sill flashings tend to have a drip edge that extends down below the structural opening of the window, which is not possible with the current sill settings. Not necessarily important for 3D modelling, but how it interfaces with the window frame can be quite varied; they can go under the window frame, or clip into the bottom edge/face of the window frame, or get screwed into the face of window frame, or get screwed into a hidden packer/sub-sill. We also need a cast/stone option with stooling options at the ends. This is one of the few sills that isn't the same shape for its entire length. Stooled Sills (see below) are not a continuous profile shape, they have "stooling" at the ends for brickwork to sit on. Slip Sills are continuous all the way along and are typically used when the building is rendered instead. Here's an example of pressed aluminium sill flashing, with the drip edge extending below the opening, and screw-fixed onto the bottom edge of the window frame. It's also a full-height window example with no sill board: Here's an example of a timber window with a pressed aluminium sill flashing screw fixed into an additional element, a hidden timber sub-sill (or packer). So this window sill has three elements: pressed aluminium external sill, internal sill board and the timber sub-sill packer element: Here's what a Stooled Sill looks like: And a Slip Sill in comparison: 3. Sill depth control As above in regard to the internal sill board, we should be able to control the depth of a sill (external sill) as follows: 1. By specifying the back edge of the external sill as an offset from the inside face of window frame/jamb 2. And by controlling the outside edge of the sill by either specifying the actual depth of the sill or by specifying how much it overhangs the outside face of wall (i.e. the outside edge of the sill relative to outside face of wall) If we're using standard sized sub sills (such as extruded aluminium or PVC-U) we might typically want to specify the depth of the sub sill. But for, say, pressed aluminium sill flashings we might want to specify the overhang. So both options would be good. 4. The window sill currently obscures wrapped wall components (VB-188272) 5. Make window sill a separate tool/object In the real world sills are mostly separate objects to the windows, and installed separately. Except for some types of sub-sill arrangements. The sill object is probably better off as a separate tool, but that can be linked to a window in some fashion, so that if the window width changes, so does the sill.
-
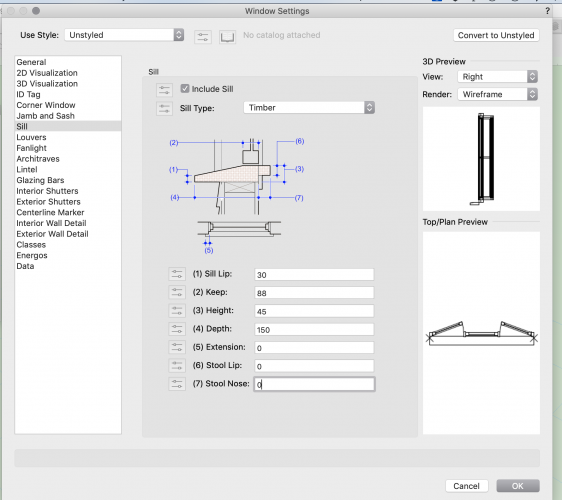
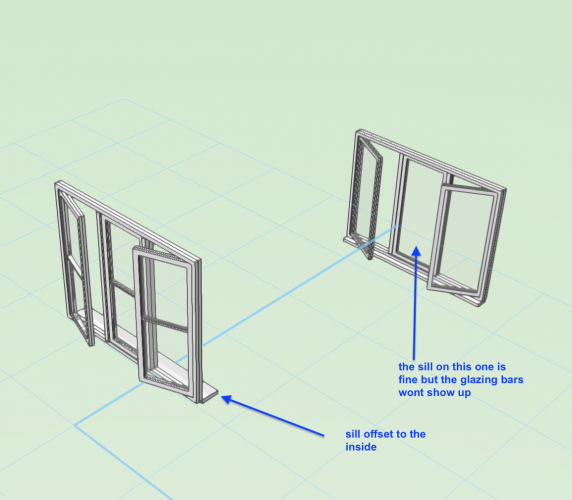
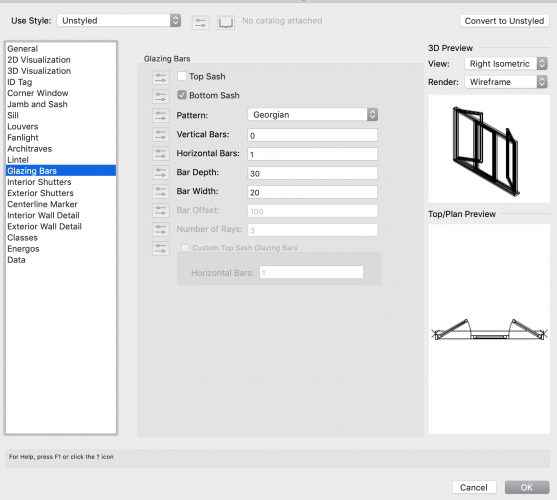
I'm in VW2019, I've modelled a nice window but can't get the sill to sit underneath it. I've even taken the settings off a window with a perfect sill but it doesn't work on teh new window as the sill is offset to one side. I tried modifying a copy of the good window but then the glazing bars don't show up. I've tried restarting Vectorworks but it doesn't help. Does anyone know what is going on here?

