


Peter Neufeld
-
Posts
722 -
Joined
Content Type
Profiles
Forums
Events
Articles
Marionette
Store
Posts posted by Peter Neufeld
-
-
Hello,
It works fine here. Make sure you're on SP4 and if on Windows that you have the latest graphics driver installed.
Cheers,
Peter
-
 1
1
-
-
That's great thanks for sharing this Michael.
Cheers,
Peter
-
Reset your Preferences perhaps? Or failing that the settings folder in your user folder.
Cheers,
Peter
-
Are you Mac or Windows?
Cheers,
Peter
-
Dear Michael,
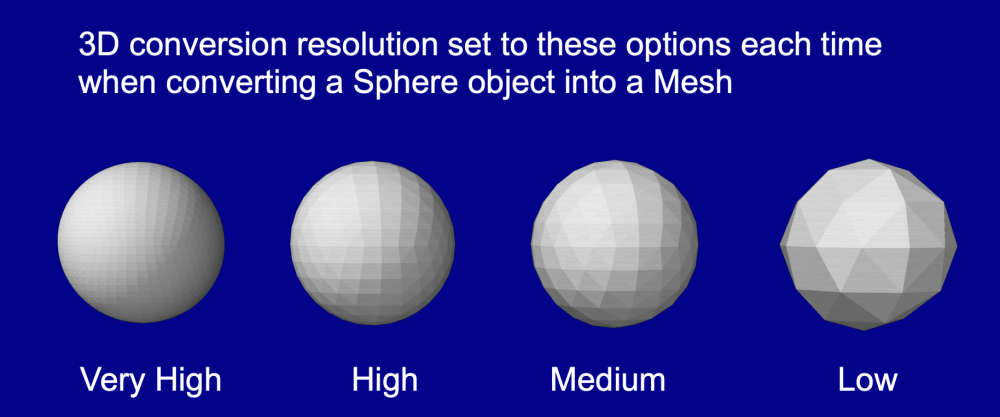
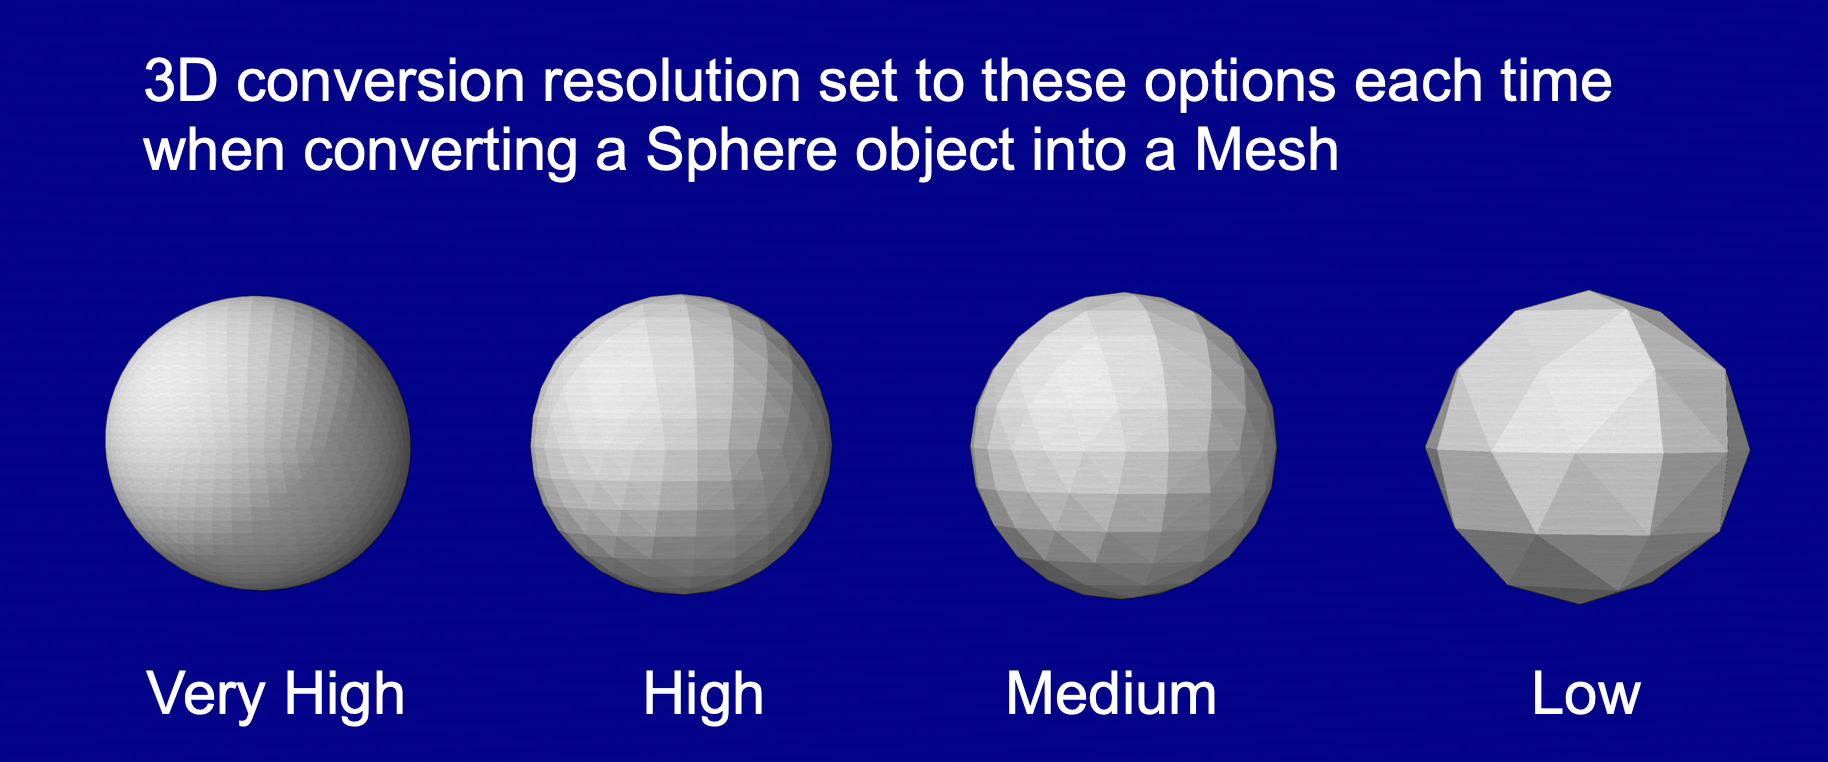
My understanding is that it is particularly important at the 'moment of creation' of 3D objects.. Such as in the screenshot of converting a Sphere into a Mesh. From the Help: "Sets the segmentation resolution used to display curved 3D objects; affects extruded and swept polylines, circles, and arcs".
In my example once the objects have been converted no matter what the 3D conversion resolution is set to afterwards, the segmentation for each object stays as it was at the time of conversion.
Cheers,
Peter
-
3
-
-
Hello,
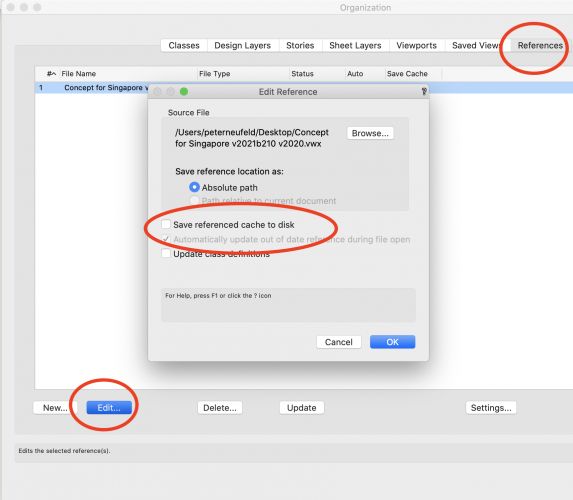
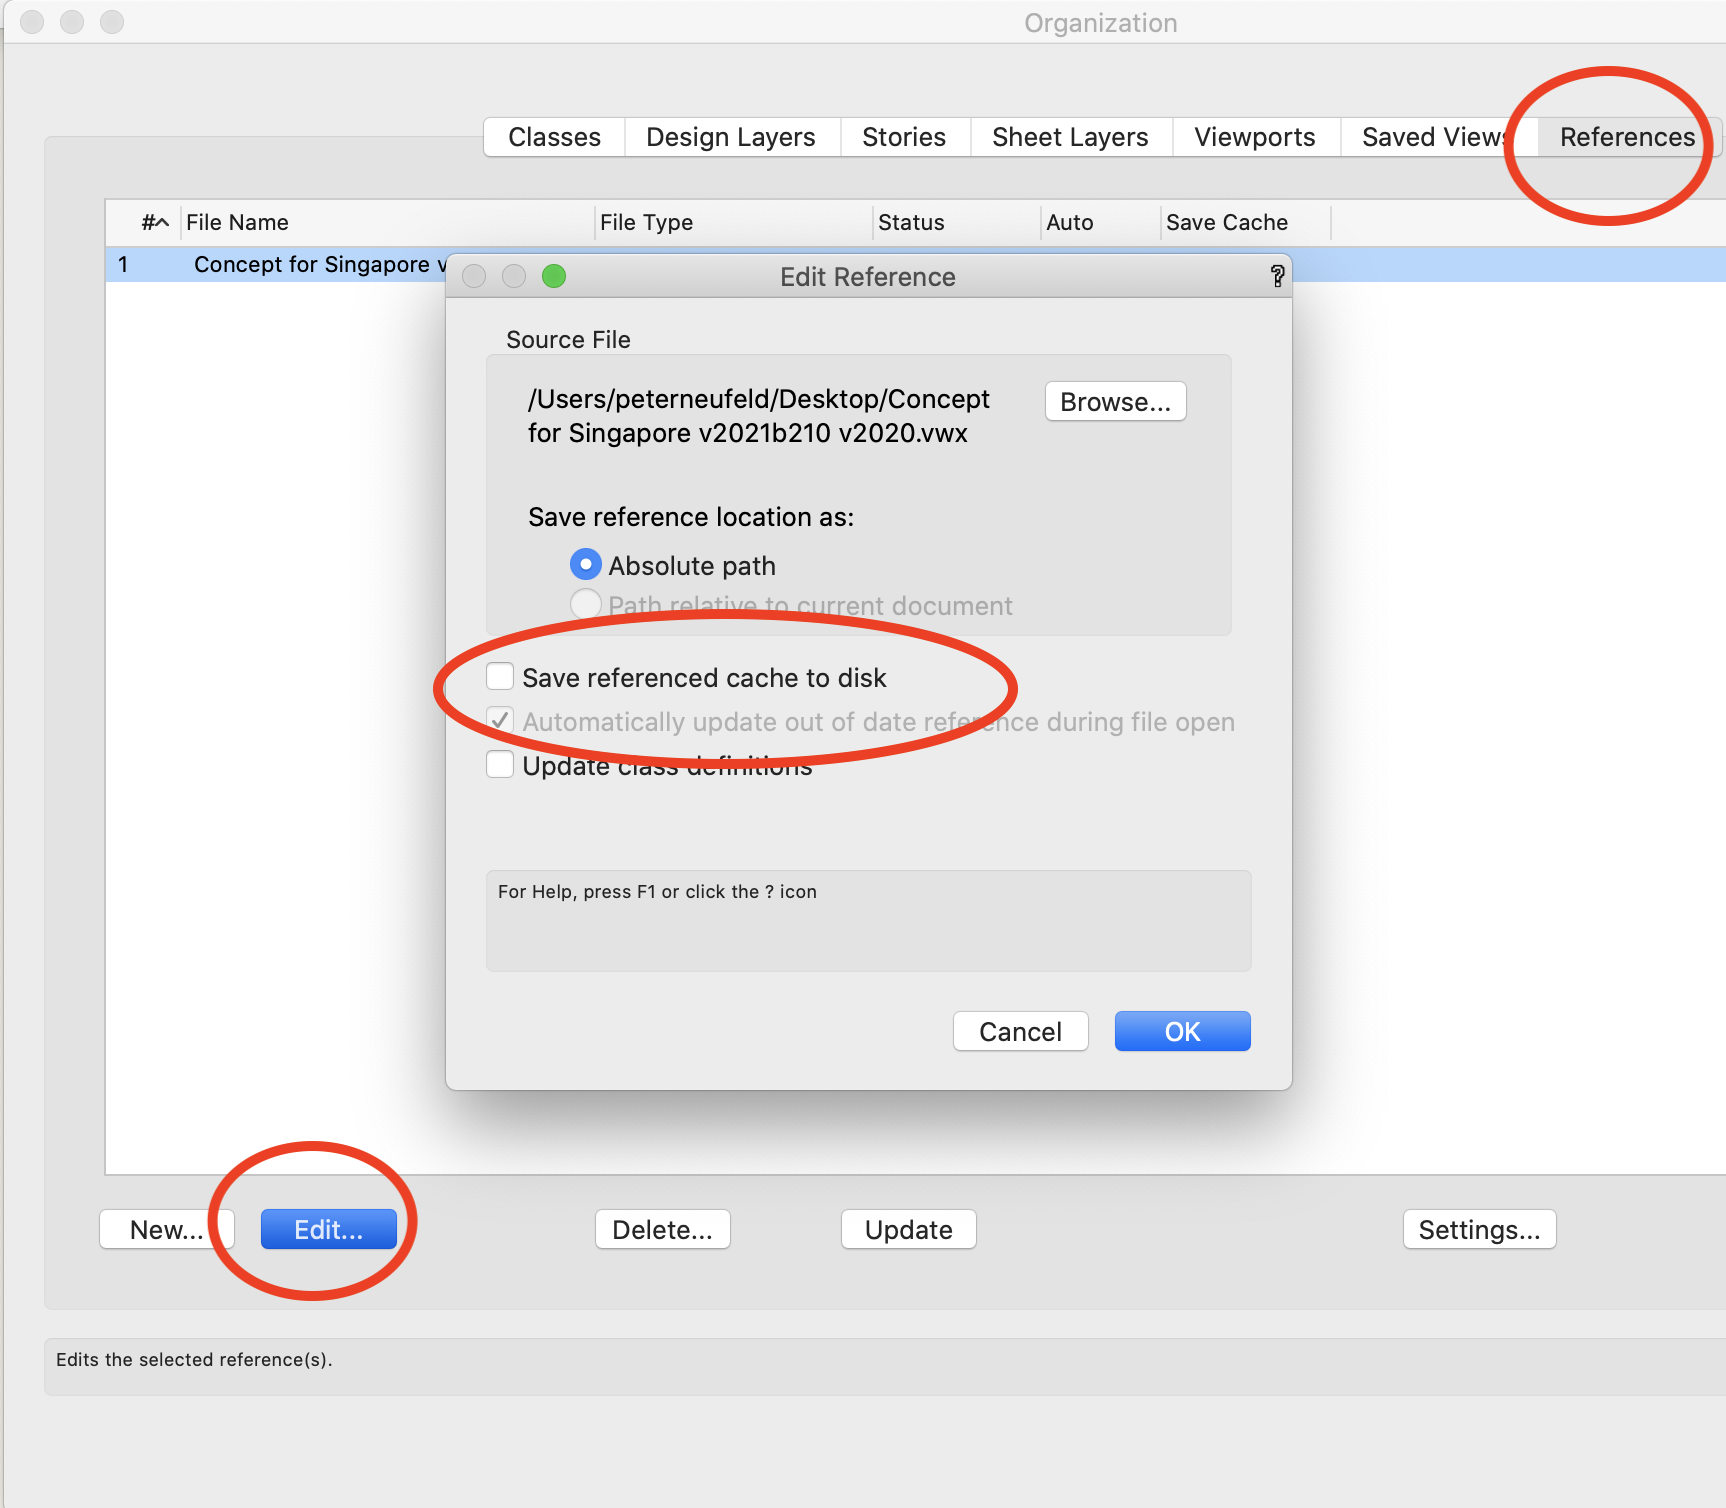
Re #3: Try unchecking save viewport cache in the Tools>Organisation>References tab.
Cheers,
Peter
-
1
-
-
Hello,
Also in the Vectorworks Preferences > 3D>3D Conversion Resolution has a huge impact on file size. It roughly doubles each time from Low>Medium>High>Very High.
Cheers,
Peter
-
2
-
-
Also if it doesn't work, in the OIP turn on the 'Show Direction' button. They need to be going in the same direction and if not click the 'Reverse Direction' option.
Cheers,
Peter
-
1
-
-
On 5/13/2020 at 12:49 AM, trashcan said:
Workaround: different classed lights for different viewports?
Dear Trashcan,
I just came across this post - classes are not the go.
The Window>Palettes>Visualisation Palette is the place to control all lighting including viewports. Have a look here.
Also don't forget that you can apply Image Effects to viewports meaning among other things you can control the exposure after a render.
Cheers,
Peter
-
Hello,
Surely a Loft with one rail?
Cheers,
Peter
-
1
-
-
Hello,
Heliodons brightness can be controlled in the OIP. If using Custom Renderworks or a Renderworks Style in order for the camera's exposure to take effect you must have 'Camera Effects' checked.
Also if you right click a light in the Vis Palette in a viewport you can edit that light just for that viewport. Also, don't forget for easy editing, once a viewport has rendered or when you have exported one as an image, click the 'image Effects' in the OIP. There you will be able to adjust the exposure, saturation and so on.
Cheers,
Peter
-
Hello,
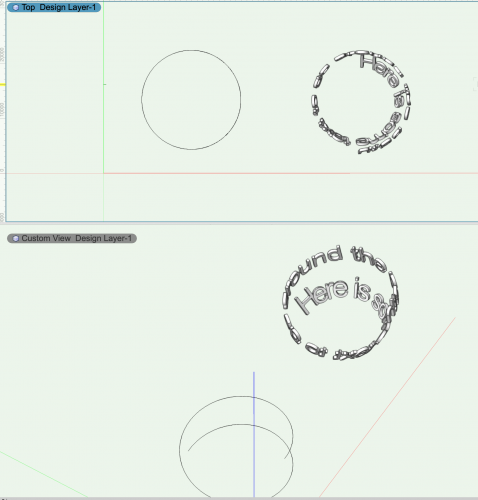
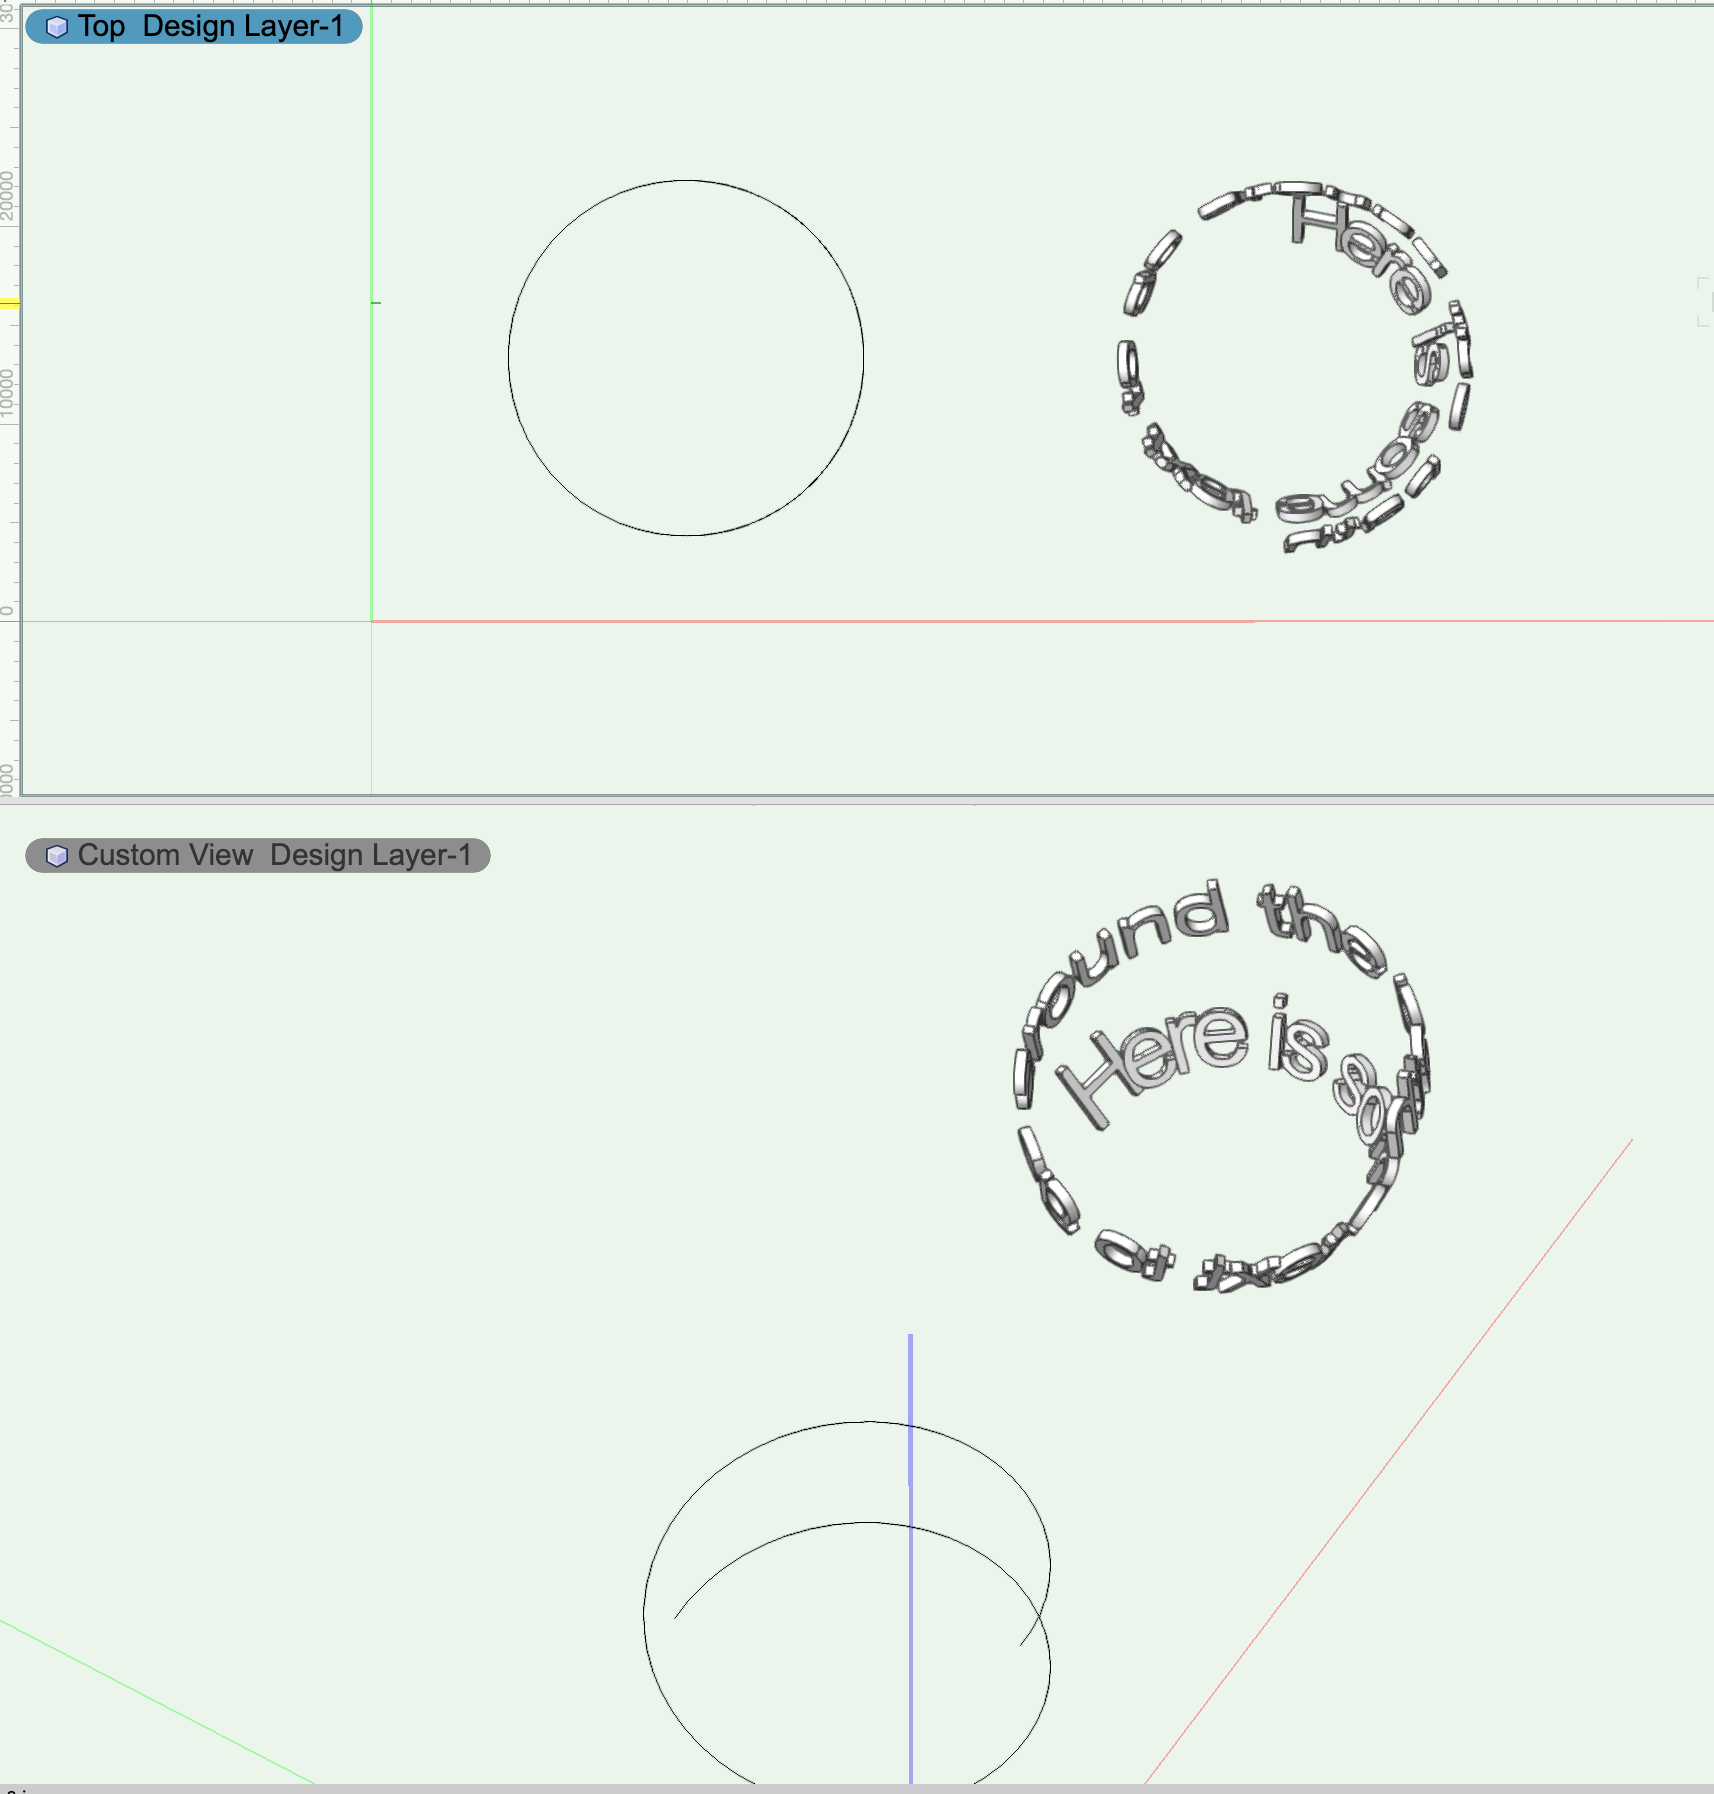
I don't know why you're not using the Model>Create Helix Spiral Command? Much more controllable and can be any shape. I have the Rotation field in the OIP set to 50º for the Text along Path object. However as you can see from the screenshot even in an orthogonal Top view you'll never get all the letters vertical. This must be a limitation of the command with that particular shape of path. In which case you'd be better off breaking it down to smaller sections of individual Text along Path objects.
Cheers,
Peter
-
1
-
-
Oh yes your seating tool is very nifty.Can you post some pics/examples for people to see?
Thanks,
Peter
-
That's great Michael. Best of both worlds!
Cheers,
Peter
-
I agree I don't like anything being imposed but they don't come into the drawing until/unless users click the 'Use Standard Classes' button in the classes layout dialogue having clicked the 'Classes' button at the bottom of the OIP.
Cheers,
Peter
-
Dear Michael,
I think it saves the user from having to think about and then create each and every class if they were pre-populated. That way the user gets the best of both worlds which is the choice to use those or make their own. Currently it's just more work IMO. It would also make it similar to the rest of the PIO's in the staging toolset.
I haven't investigated the texture side of things but personally having the already aptly described classes pre-filled allows me to get to the texture settings straight away knowing what's what and then suss it from there. Not everything will have a grain or even be seen so close...
Cheers,
Peter
-
1
-
-
Thanks Michael that's great. Any chance the classes could be pre-filled like the other Spotlight PIO's? It would be great to have them self contained with the object. Click the Classes button in the OIP and choose Standard Classes...
Cheers,
Peter
-
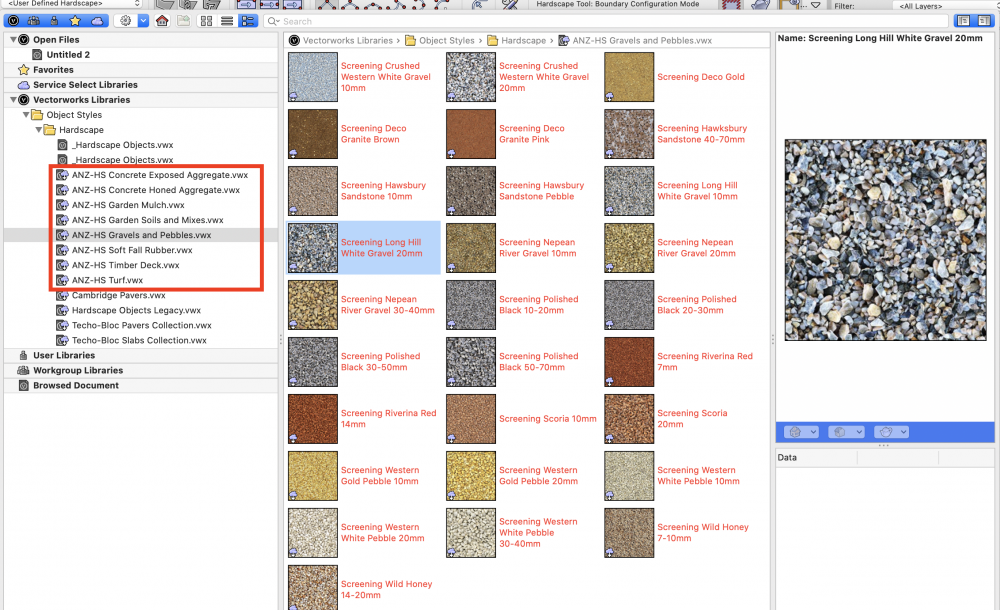
For anyone in Australia make sure you check out the new v2020 built in ANZ hardscape libraries, they're very extensive.
Cheers,
Peter
-
Dear Frank,
Thanks very much for trying but Styled objects such as Plants don't have this option. The option to edit the PIO options only applies to those PIOs not governed by styles as far as I can tell.
Cheers,
Peter
-
Dear James,
Frank's suggestion is a great one but alas you're right it doesn't work for Plants if Convert to Plug in Objects is checked. I'll report it.
Cheers,
Peter
-
1
-
-
Hello,
Group all the things on the sheet layer viewport and copy.
Paste into new document and ungroup.
Go to the Eyedropper tool and click on the settings button.
Choose 'Viewport Attributes' and tick everything apart from 'Other Properties' as this will transfer views, projection etc.
Then click on the original viewport and go to the new document and set the tool to put down mode (bucket). Find the viewport (which most likely will be blank) and click with the tool. The viewport should come back to life. This might not always work and I'm not sure about section viewports.
I agree it would be great for Vectorworks to be able to do this but I suspect there are significant technical reasons why for the moment at least, it can't be automated.
Cheers,
Peter
-
On 2/7/2020 at 8:33 AM, jcogdell said:
first you can rename a truss system to whatever you like using the rename system name command in the OIP, this will automatically rename all the elements of the system
Dear Jesse,
I've been pondering this but how can users easily populate the truss/rigging ID into the position field for the lighting device or any other Spotlight object that hangs for that matter?.
For Lighting Pipes and Ladders there's a position field which transfers to the Position name automatically for Lighting Devices but not for trusses. So it seems a bit inconsistent:
Truss Objects: Field called 'ID'> Does not go into position name for a Lighting Device.
Straight Truss: Field called 'Name' > Does not go into position name for a Lighting Device.
Lighting Pipe: Field Called 'Position Name'> Does populate Position field of the Lighting Device
Lighting Ladder: Field Called 'Position Name'> Does populate Position field of the Lighting Device
So users have no choice other than to convert the trusses to Hanging Positions in order to populate the Position Name into the Lighting Devices. Also do you think it would be good if Spotlight shipped with some predefined Data Tags as that would help users?
Cheers,
Peter
-
2
-
-
Thank you both for your advice and efforts. It is greatly appreciated.
Cheers,
Peter
-
Dear Josh,
A revelation!
I never knew that the Data Manager could be used like this. Fantastic! I've enclosed snapshots for those who like me (thanks again Josh!) couldn't figure this out at first.
Cheers,
Peter


-
1
-
 1
1
-


Clip cube visual bug
in Solids Modeling
Posted
I see now. Try going the Advanced Properties in the OIP and use the attributes of the original objects not the section class you have. Also, most importantly change the properties to infinite not finite.
Cheers,
Peter