JB_Tech3
-
Posts
10 -
Joined
-
Last visited
Recent Profile Visitors
623 profile views

-
Wow! This is definitely something I would not have thought of. There are other symbols in the file that do this and I'm guessing its due to to same problem, or something similar. Just goes to show, pay attention and make sure classes are set correctly from the start. This community is truly unparalleled. Everyone, thank you so much for helping resolve this! Time to get to work on the other symbols!
-
Here's the new file with only the symbol imported. WrongClass = Building-Doors-***Stage Access Along with the class, a texture named Metal Doors is imported as well, but only because it is the default texture for the ***Stage Access class. It is otherwise not used. ClassAssignmentIssue.vwx
-
I feel like there is either some concept about classes/symbols that I'm just not getting or this is a bug, but here's what I've got going: I found one symbol using @michaelk's import to new file method that was adding an unintended class, which I'll call 'WrongClass.' The symbol itself is set to <active class>. The objects in the Edit 2D/3D Components are set to their correct classes. The issue was the 3D Hole Cut... an extruded rectangle assigned to WrongClass! I re-assigned it to the None class and thought that would take care of it, but no. Unable to find anything else within the symbol that was assigned to WrongClass, I deleted all objects from 2D, 3D, and 3D Hole Cut using Select All (to avoid missing anything). All classes were set to visible and the drawing had only one layer. I added a simple line to the 2D component using the None class just so the symbol would not be empty. At this point, the only thing in the symbol is a line set to the None class. The symbol itself was set to <active class> and the current active class was None. Other than the single imported symbol, the document is brand new, completely empty. I still am unable to simply delete WrongClass and Vectorworks asks where I would like the object reassigned. Unfortunately, the script @michaelk put together (which is awesome) seems to only list the class assignments for the symbol itself, not for any sub-objects. So running that just shows no default class. If I take the symbol after having it contain only the line and import it into a new file, WrongClass still shows up. Am I just completely missing something?
-
Firstly, thank you so much for all the effort you've put into helping figure this out. Very much appreciated. I was out of the office yesterday when you made these suggestions, but I will be trying them out today. I'll let you know how it goes.
-
Thanks. Yes, I actually use this idea for other classes. I come from a sort of coding/programming mindset and it really just drives me nuts to have classes in there that serve no purpose other than to be unnecessary... kind of just feels sloppy. Especially since I use z- prefixes for my own class naming purposes. I'll look into this. Not something I typically utilize. Thanks. Sure seems to be, but usually they will show up in a report worksheet if this is the case. That doesn't really rule out the possibility though. Nice strategy for isolating the problematic symbol, hadn't thought of it. Thanks for the tip.
-
Did this ever get resolved? Curious, because I am having the same problem. However, no objects are found using the custom selection tool even with all three components checkboxes checked. No objects are found if I set the class in a worksheet criteria. For all purposes, Vectorworks cannot find any objects using the class, however when trying to delete the class it says there are objects that use it. Is there any way to simply "show objects using class" other than making a worksheet? It would be great if the message also had a button for "click here to view objects assigned to this class."
-

Identical fixtures, positions, focuses--different beam angles
JB_Tech3 replied to JB_Tech3's question in Troubleshooting
Wow. And just like that, it works. Would love to see this fixed, but at least its a simple workaround. Thank you! -
Identical fixtures, positions, focuses--different beam angles
JB_Tech3 posted a question in Troubleshooting
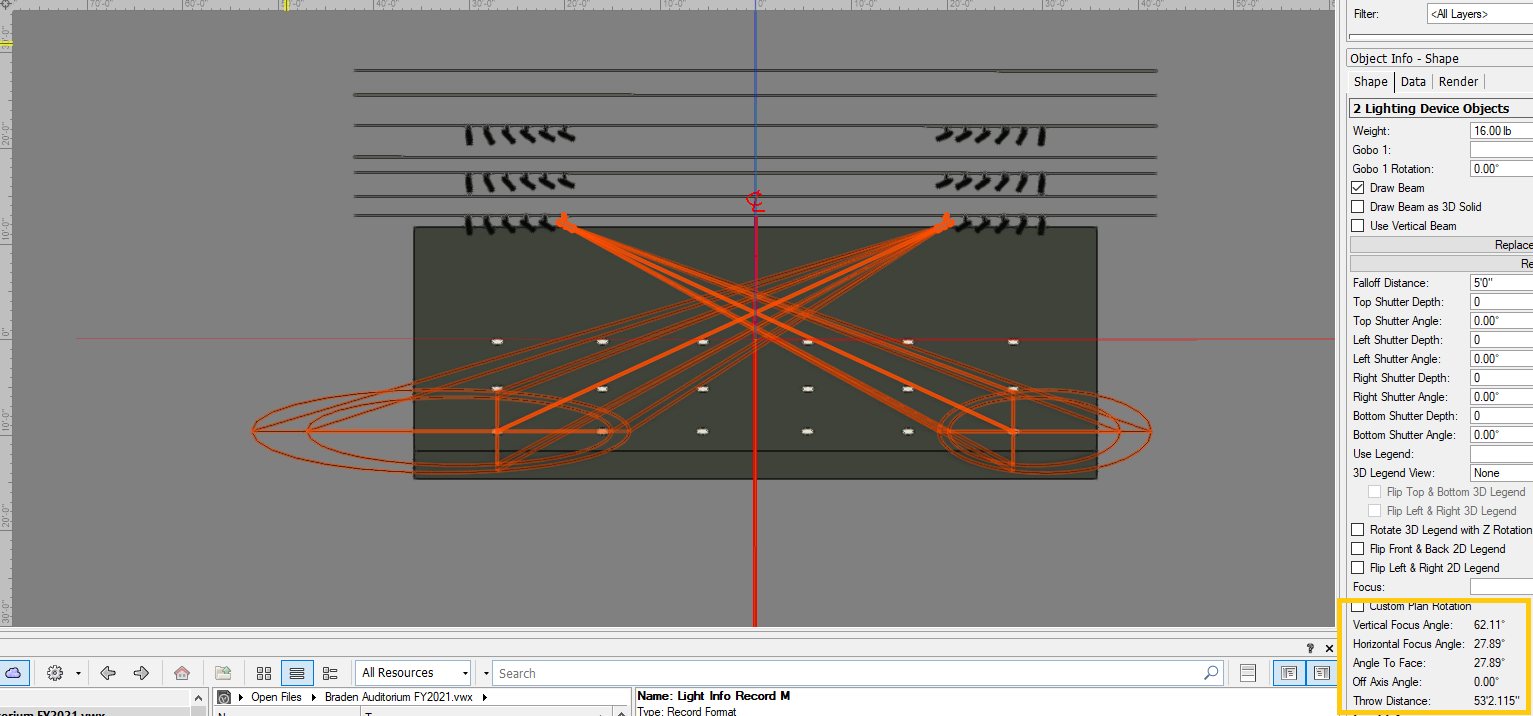
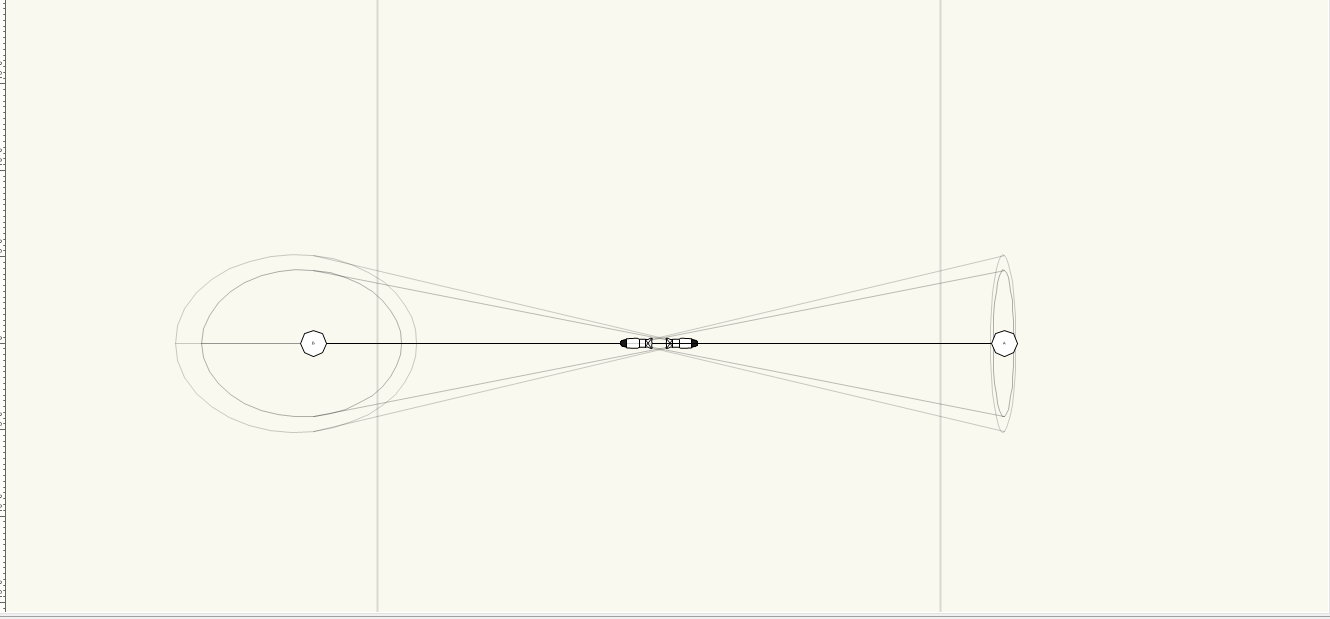
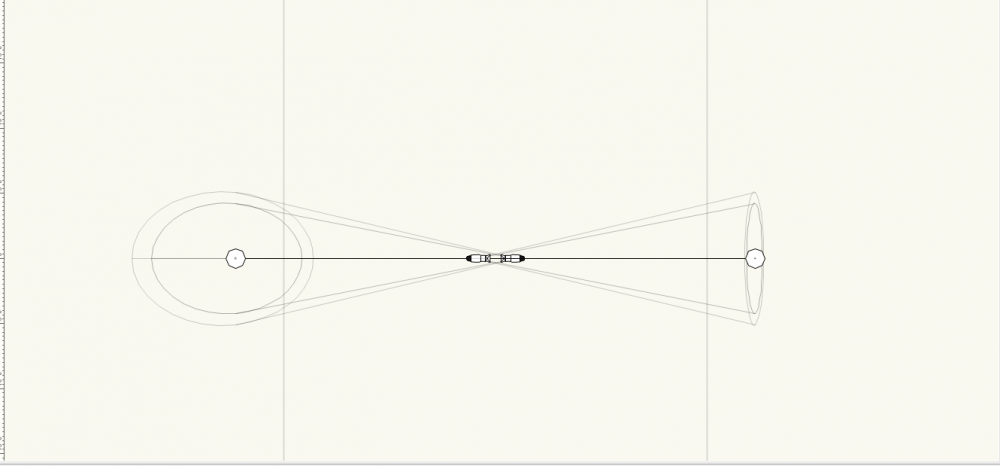
I'm hoping this is a simple user error and easily fixed, but I'm having issues getting the beam angles of my fixtures to match. The issue is happening with almost all the fixtures shown in the first screenshot, but I've selected just two for clarity. I'm currently running VW2020 SP6 on Windows 10. Basically, I have these two fixtures which are both using the same symbol, are placed perfectly symmetrical from center, have the same y and z positions, and are focused on two points which are also placed perfectly symmetrical from center. Both fixtures have the same beam and field angles, and the throw calculations are 100% identical. However, when draw beam is enabled, it is clear that Vectorworks is drawing the two beams very differently. I've re-entered numbers, refreshed the symbols, verified everything matches, but they still are drawn differently. I replaced the symbols with various other ones throughout the Vectorworks library and the problem persists regardless of which symbols are used. To rule out the possibility that the project file is screwed up somehow, I decided to start from a new file, which I've attached. In the new file, I used symbols taken directly from the Vectorworks library, set them up symmetrically and focused them each on symmetrically placed focus points. They are 100% mirrored from each other. Still, the beam angles are not the same. I first noticed this on SP5 and have since updated to SP6 hoping it would kind of fix itself--but no luck. Any help or suggestions on this would be greatly appreciated. I feel like I've run out of ideas on how this could be fixed, but hopefully I've just overlooked something. Thanks in advance. Beam Angle Issue.vwx
-
Replacing truss type did not work, but I think I have found a workaround. Select the problematic truss and ungroup. Confirm to ungroup high level objects. Find the truss object in resource manager. Edit the symbol options. Select Assign to: <Active Class> Verify desired class is set to Active. Convert the Hybrid Symbol back to Truss. Confirm to convert all symbols with the same symbol definition. Select truss object and set to desired class. Truss now conforms to only the desired class. It also seems that after going through this process I can now reassign the truss to another class through the normal means. This seems to only be true if the symbol settings for class assignment are set to <active class>. If any other classes are selected, I run into the same problem. Can you confirm that this works on your end as well?
-
JB_Tech3 changed their profile photo
-
What seems to be happening is this: Activate truss section from resource manager (symbol options class assignment set to "None") Insert truss into drawing Truss automatically gets assigned to "none" class Reassign truss to new class Changing visibility for "none" class and new class both affects the truss What I'm looking for is to be able to reassign any section of truss to a new class and have full control of those sections using the new class. It seems that when reassigning, certain parts of the objects are still assigned to the original class, making the truss controlled by more than one class. I'm figuring this is either user error or a bug in the software, most likely the former. I've attached a .vwx file demonstrating what is happening. Any recommendation is greatly appreciated. Thank you! System specs: Vectorworks 2020 SP2.2 (Build 530873) 64-bit Windows 10 Enterprise (10.0.17763) 64-bit Intel i7-9850 16GB RAM truss class issue.vwx