


zeno
-
Posts
973 -
Joined
-
Last visited
Content Type
Profiles
Forums
Events
Articles
Marionette
Store
Posts posted by zeno
-
-
5 hours ago, Luis M Ruiz said:
My recommendation for avoiding those spots on textures:
Even if you have 16 bounces you still need to increase your rendering settings to high.
Yes.
In this case (a file coming from 2017 version) some lights needs to be replaced on the new version. Now I’ve reached a better result (even with a low light in the scene) about thr spot on textures. I hade some problems to have good results only with a daylight from background or/with a heliodon light. I continue to work with camera exposure set to active but the scene is always dark. I will post the results soon. Thank you for your help. Ps: i don’t like to use a “fake point light” or ambient light, but i’m starting to think that i will need to use them with a camera exposure.
-
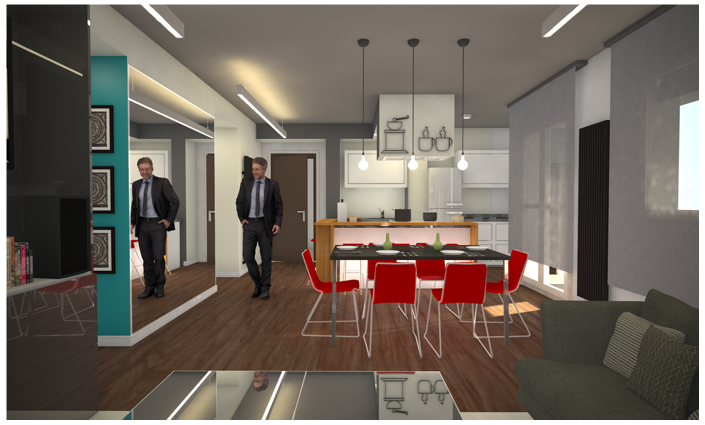
Ok, at the moment I have these 2 results:
(150 DPI 35cm*21cm viewport 16 rebounds)
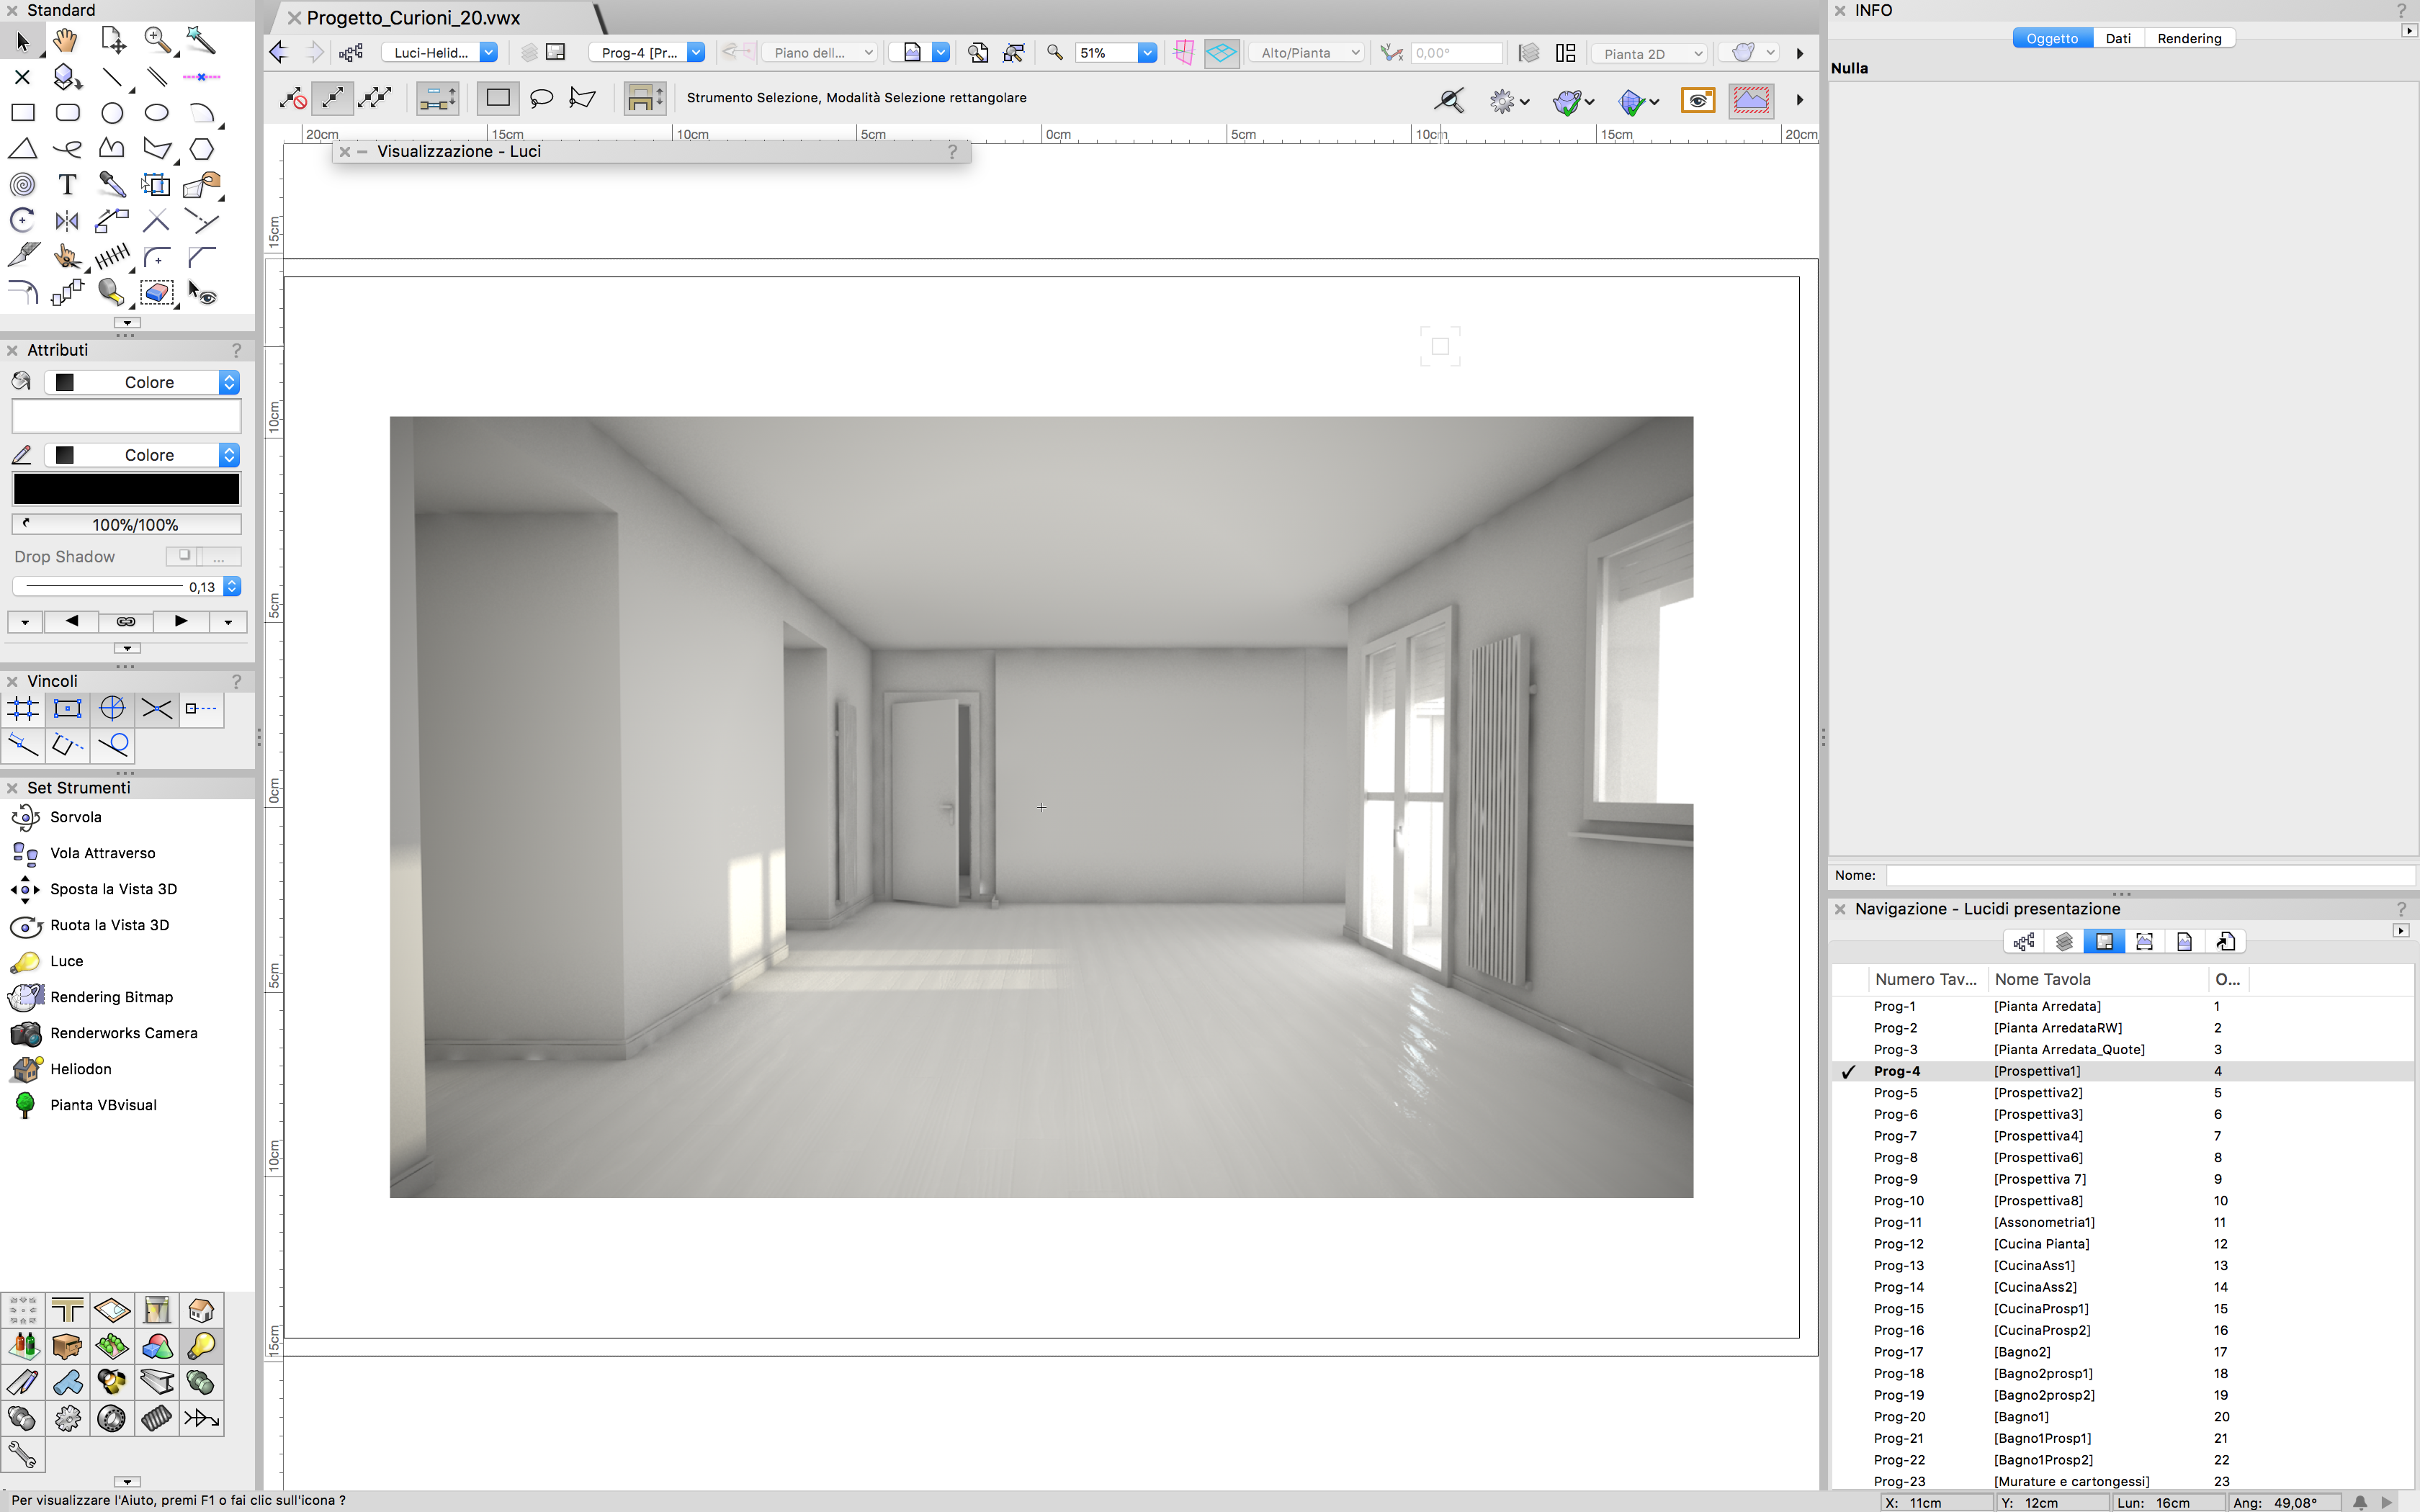
- The first one without ambient light, only indirect light: the scene is more realistic (too dark I think) but the odd splotchiness are there.. 10 minute render time
- The second one had the ambient light set to ON, the scene is cleaner but too fake...
I prefer to set the ambient light to OFF, but really need I to use another light or could be better if I increase the existing light power? Off course I prefer to have brighter scene, but is more important at the moment to delete the splotchiness (what appened if i will really need a dark scene? )
I really hate these spots! :-)
Thank to all
PS: another question
during the calculation time, sometimes the WIP render picture, that normally starts in black and going to the final results like in a Matrix view, is totally white up to the final results... someone knows why?

-
15 hours ago, JoshP said:
I have attached my own approach to lighting along with the renders, explanations, and project file.
There are many different ways to get lighting just the way you want. My example only illustrates my own method.
Can i ask you if is necessary to turn ON the blurriness option? Does it increase drastically the render time?
-
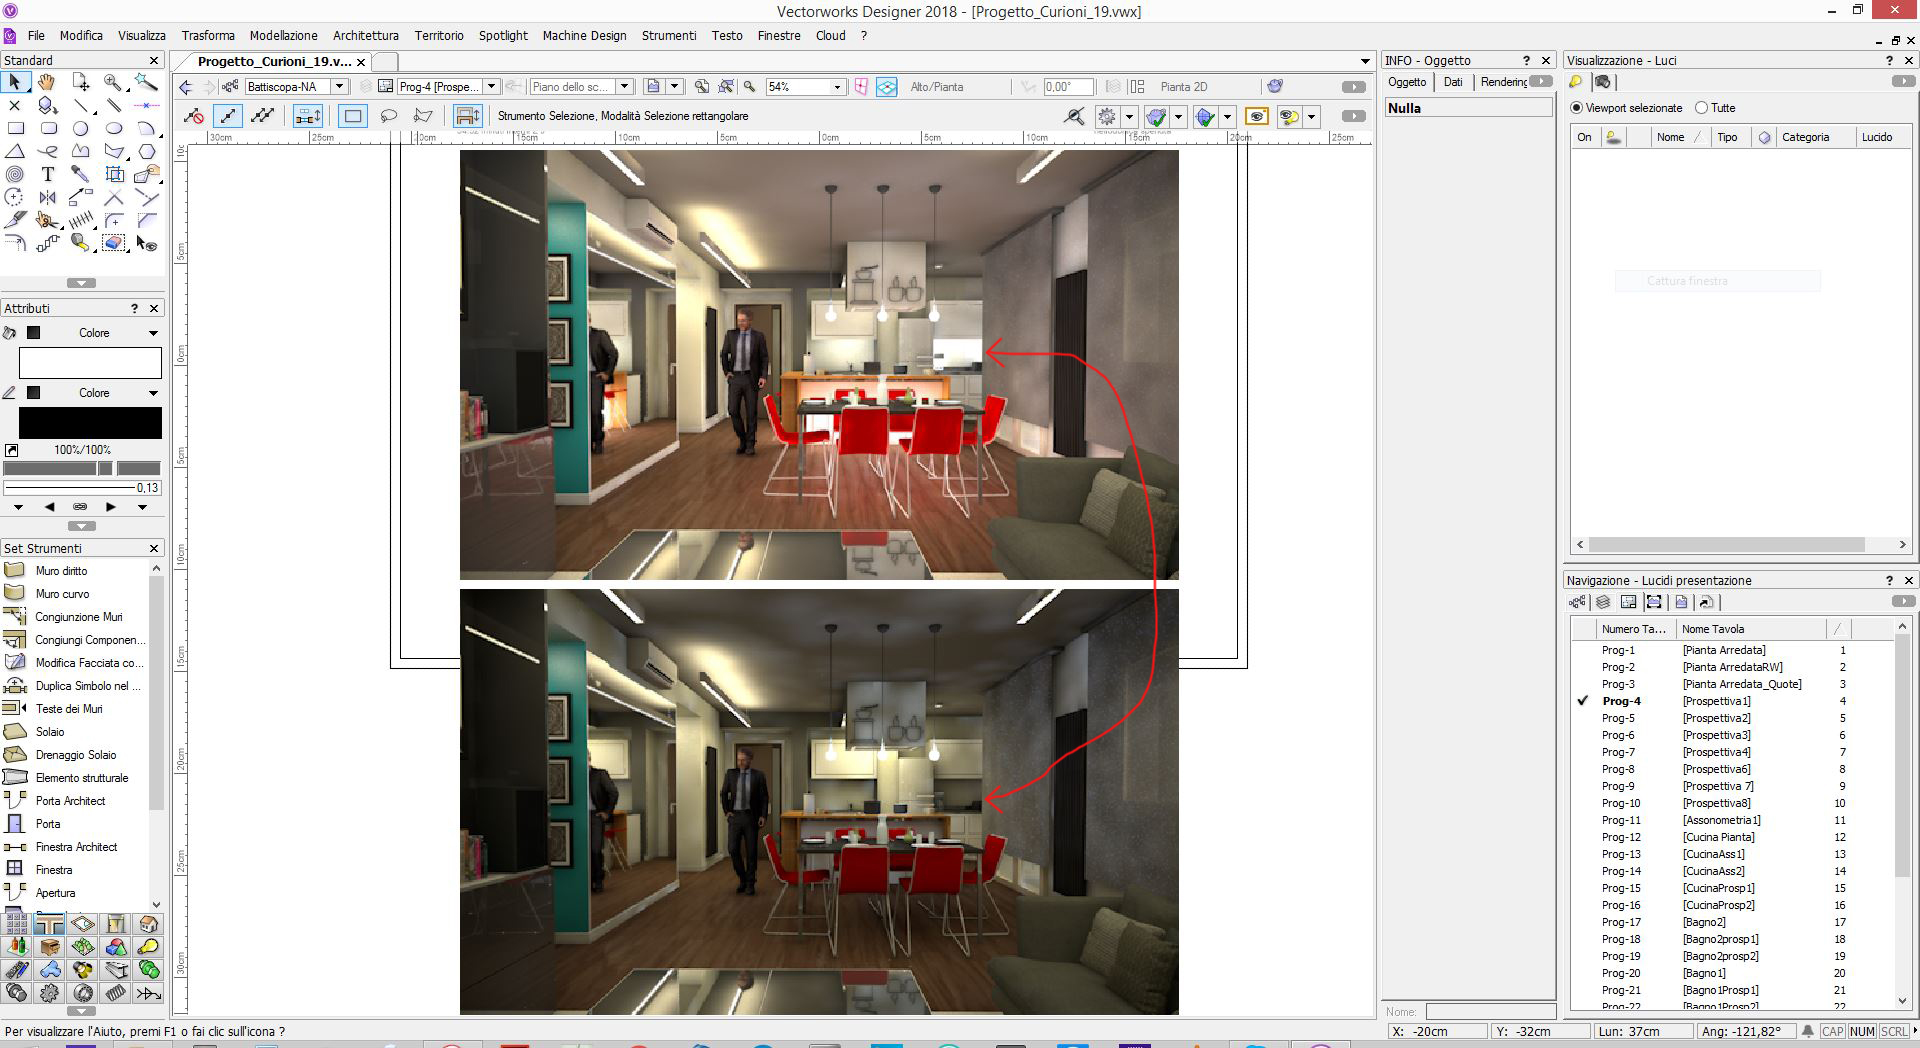
To better explain what i mean:
the 2 viewports have the same settings, only a heliodon light (power 100%) and a HDRI day background (power 100%). The second one had the camera exposures set to ON and 1/100 s + 400 ISO parameters.
How could I have a correct light power control without the camera settings (like the viewport 1?) ? I think that the only way is without using Heliodon light.
What do you think about it?

-
Thank you for the answer
5 hours ago, Dave Donley said:If you are rendering an interior use the interior indirect lighting setting.
i just tried to follow the JoshP steps and on the first step (OMG.. never stop learning :-D ) i
had some problems because i had see that on step 2 will I turn on the indirect light so I tried to do the step one without indirect light
The problem with the solar power disappear if i use indirect light and i can set the parameters and see the differences. But i don't understand why if I set the indirect light to OFF and i use a Heliodon i can't set the differences between power 10 or 300 on OIP, but is not important at this point.
I will go to see into the file the render style settings to better understand
-
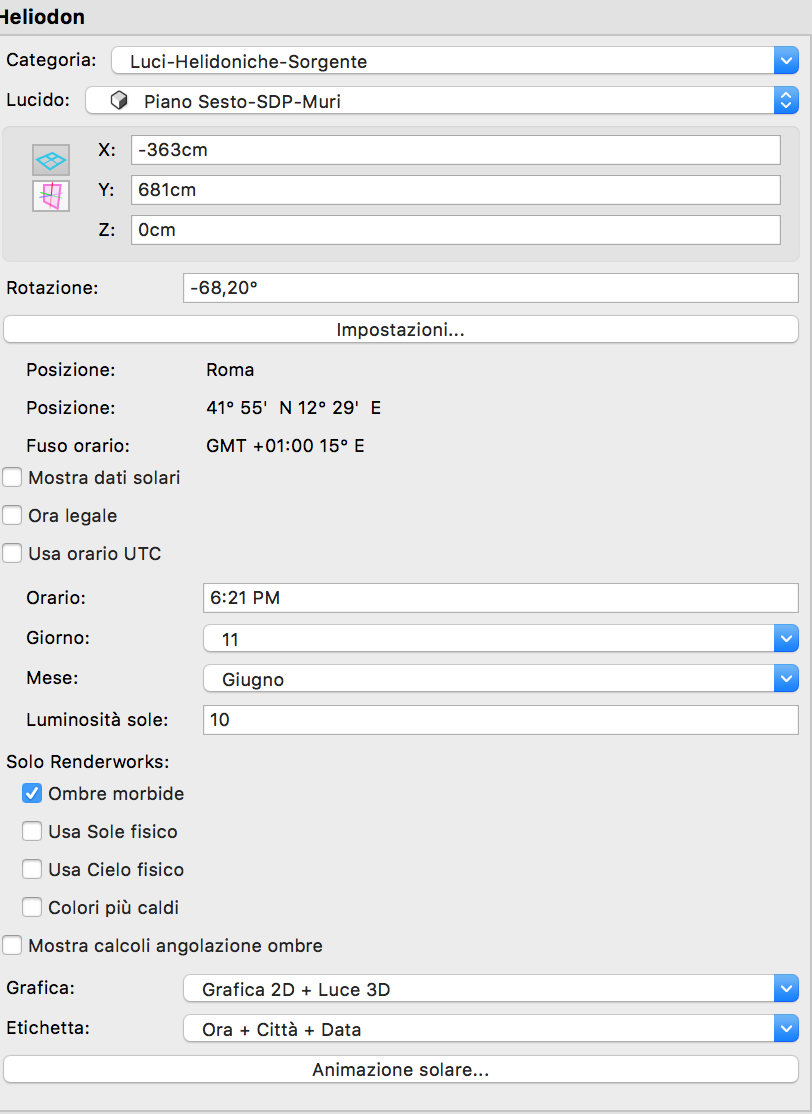
So i started from step one.. but
i had some problems to set
1) heliodon power (between 10 and 300 are no differences, in spite of openGL effect... i don't understand why)
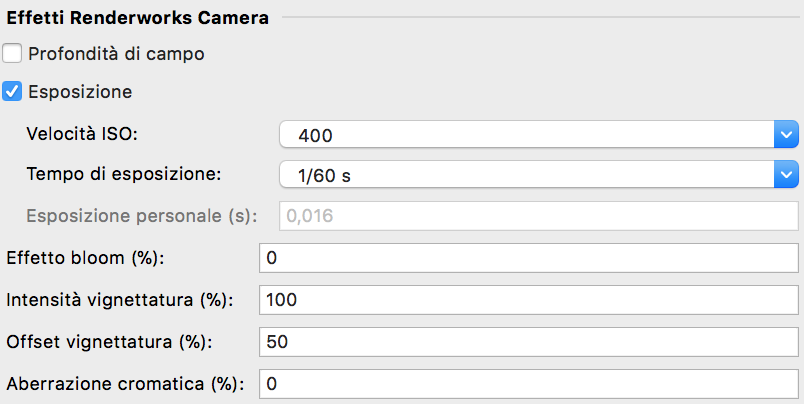
2) camera time exposure and ISO (400 ISO and 1/60s exposure time)
3) HDRI panoramic image's brightness (i need to set it very very low to have a balanced image, only 5%)
here is the result of step one.. are the settings correct?

-
23 minutes ago, JoshP said:
I have attached my own approach to lighting along with the renders, explanations, and project file.
There are many different ways to get lighting just the way you want. My example only illustrates my own method.
Very important information. Very grateful JoshP! I will learn and thoroughly on my work and I will repost my implementation. Thanks a lot one more time :-)
-
Thank you all for the answers,
before continuing to changes I have another question if I can.
I like to use camera effects (exposure and depth of field) mainly for a reason: I like to have the scene's brightness control with some realistic settings.
But I understand that if I I use 4 or 16 rebounds, the entire scene changes drastically.
I would like to understand if theoretically is better to work with 4 or 16 rebounds, to leave this setting fixed and work to others parameters (light power, camera exposition, background, texture's quality and so..). Without this certainty, there are too many changes to think about.
Can I continue with this belief or is better to change my working method?
-
hello everyone,
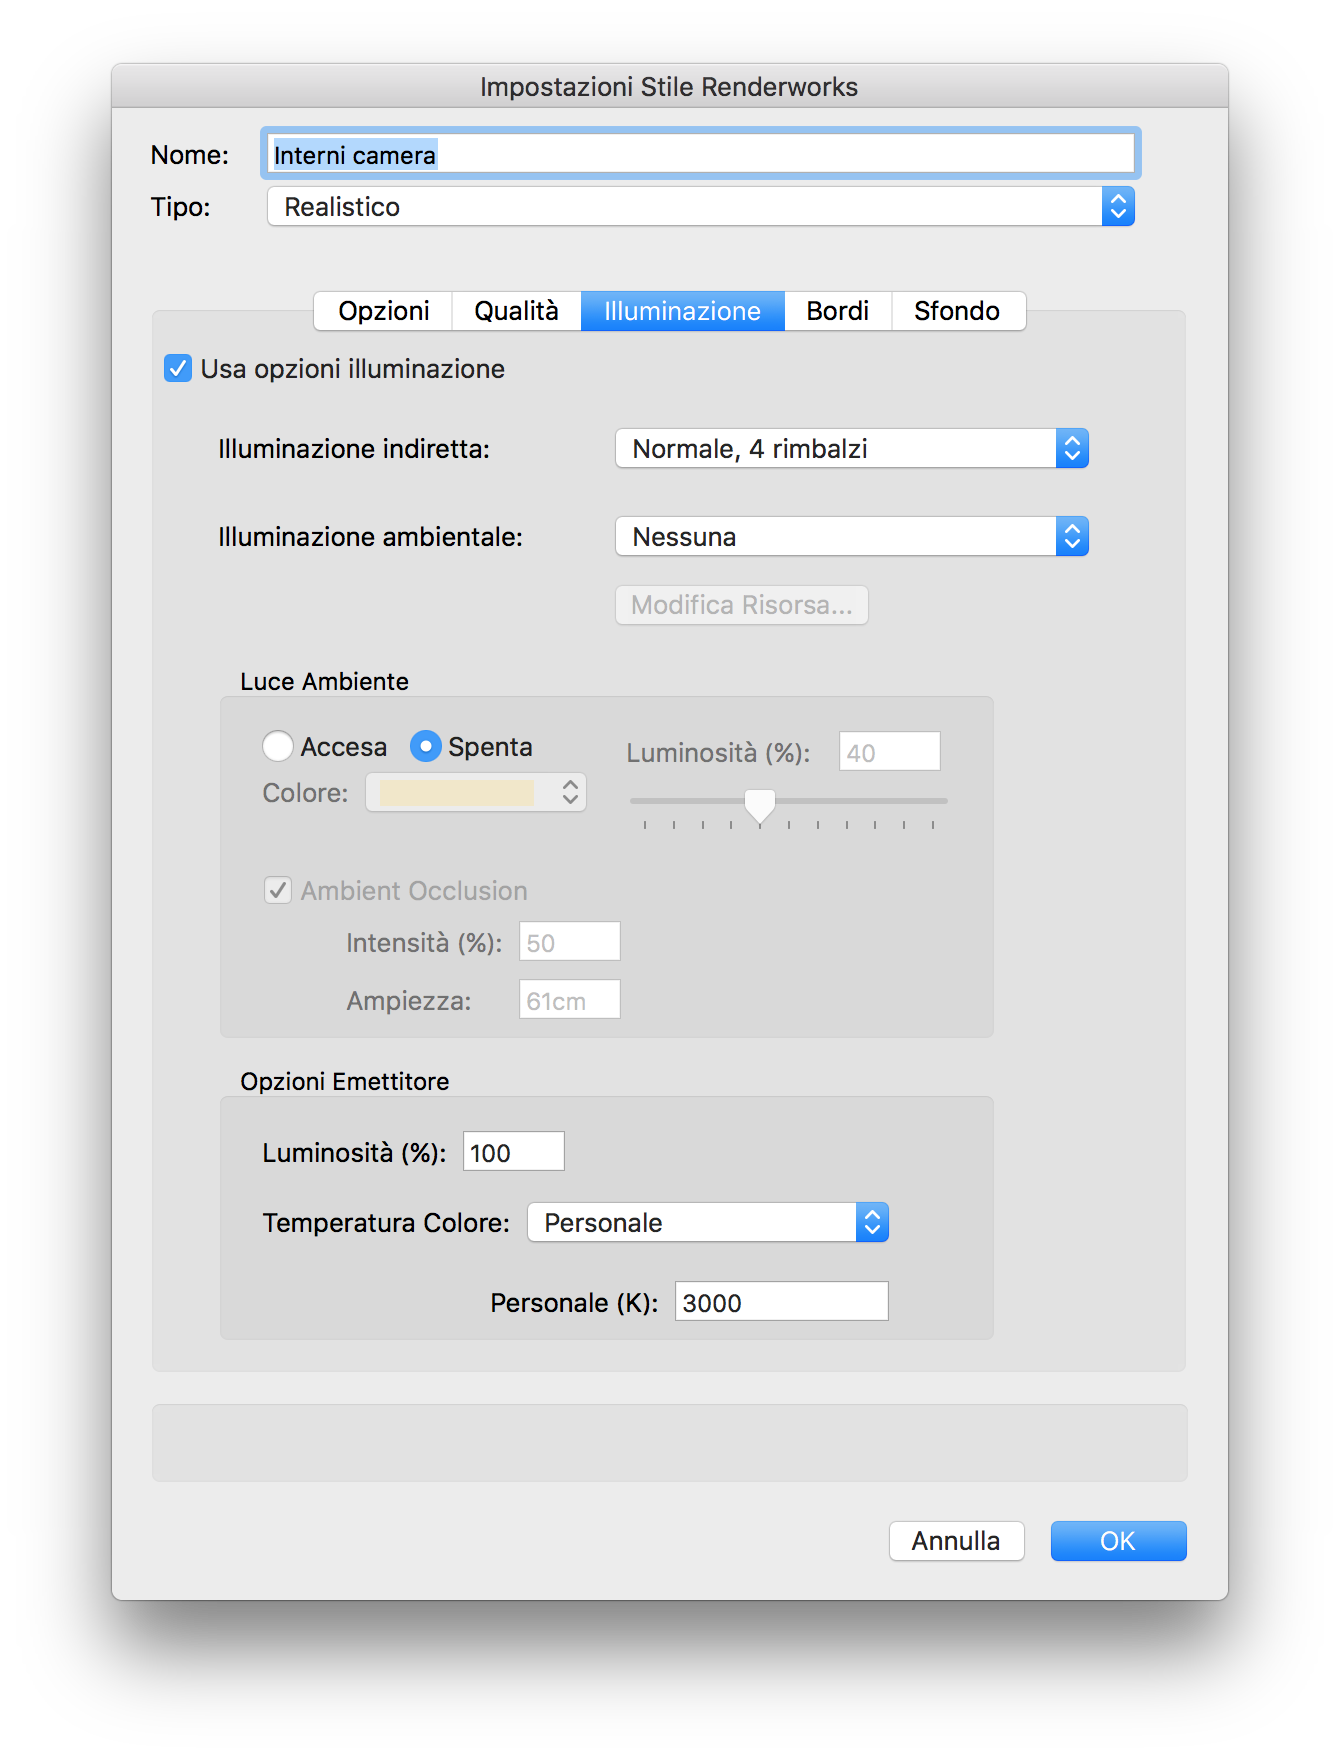
I have already tried to see in a test render file how the new 2018 renderworks engine work. I also noticed that in the Indirect Light options Vectorworks now allows setting16 rebounds. But not 8.
So I'm in a little Trouble, because:
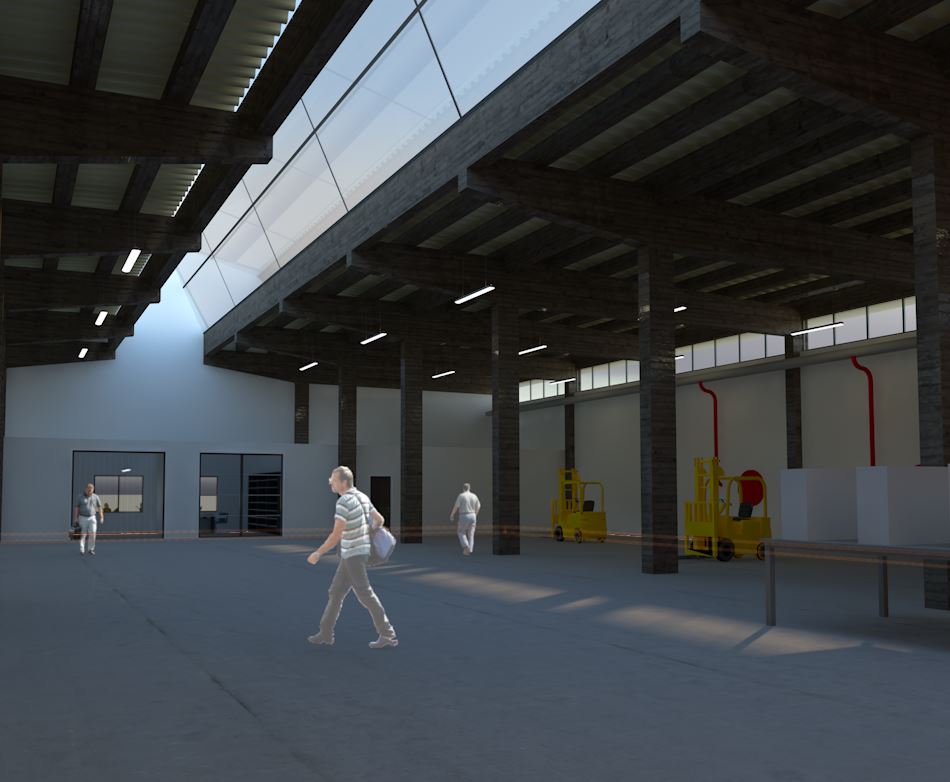
-with 4 rebounds I see some circle on textures (not very good to see)
- with 16 rebounds there are too many reflections and the results are not how I expect. Here is an area with no light or similar, but it looks in 16 rebounds mode like an overpowered light (see the arrows)
Can I fix this?
PS: the pictures are in low res (50 dpi)
-
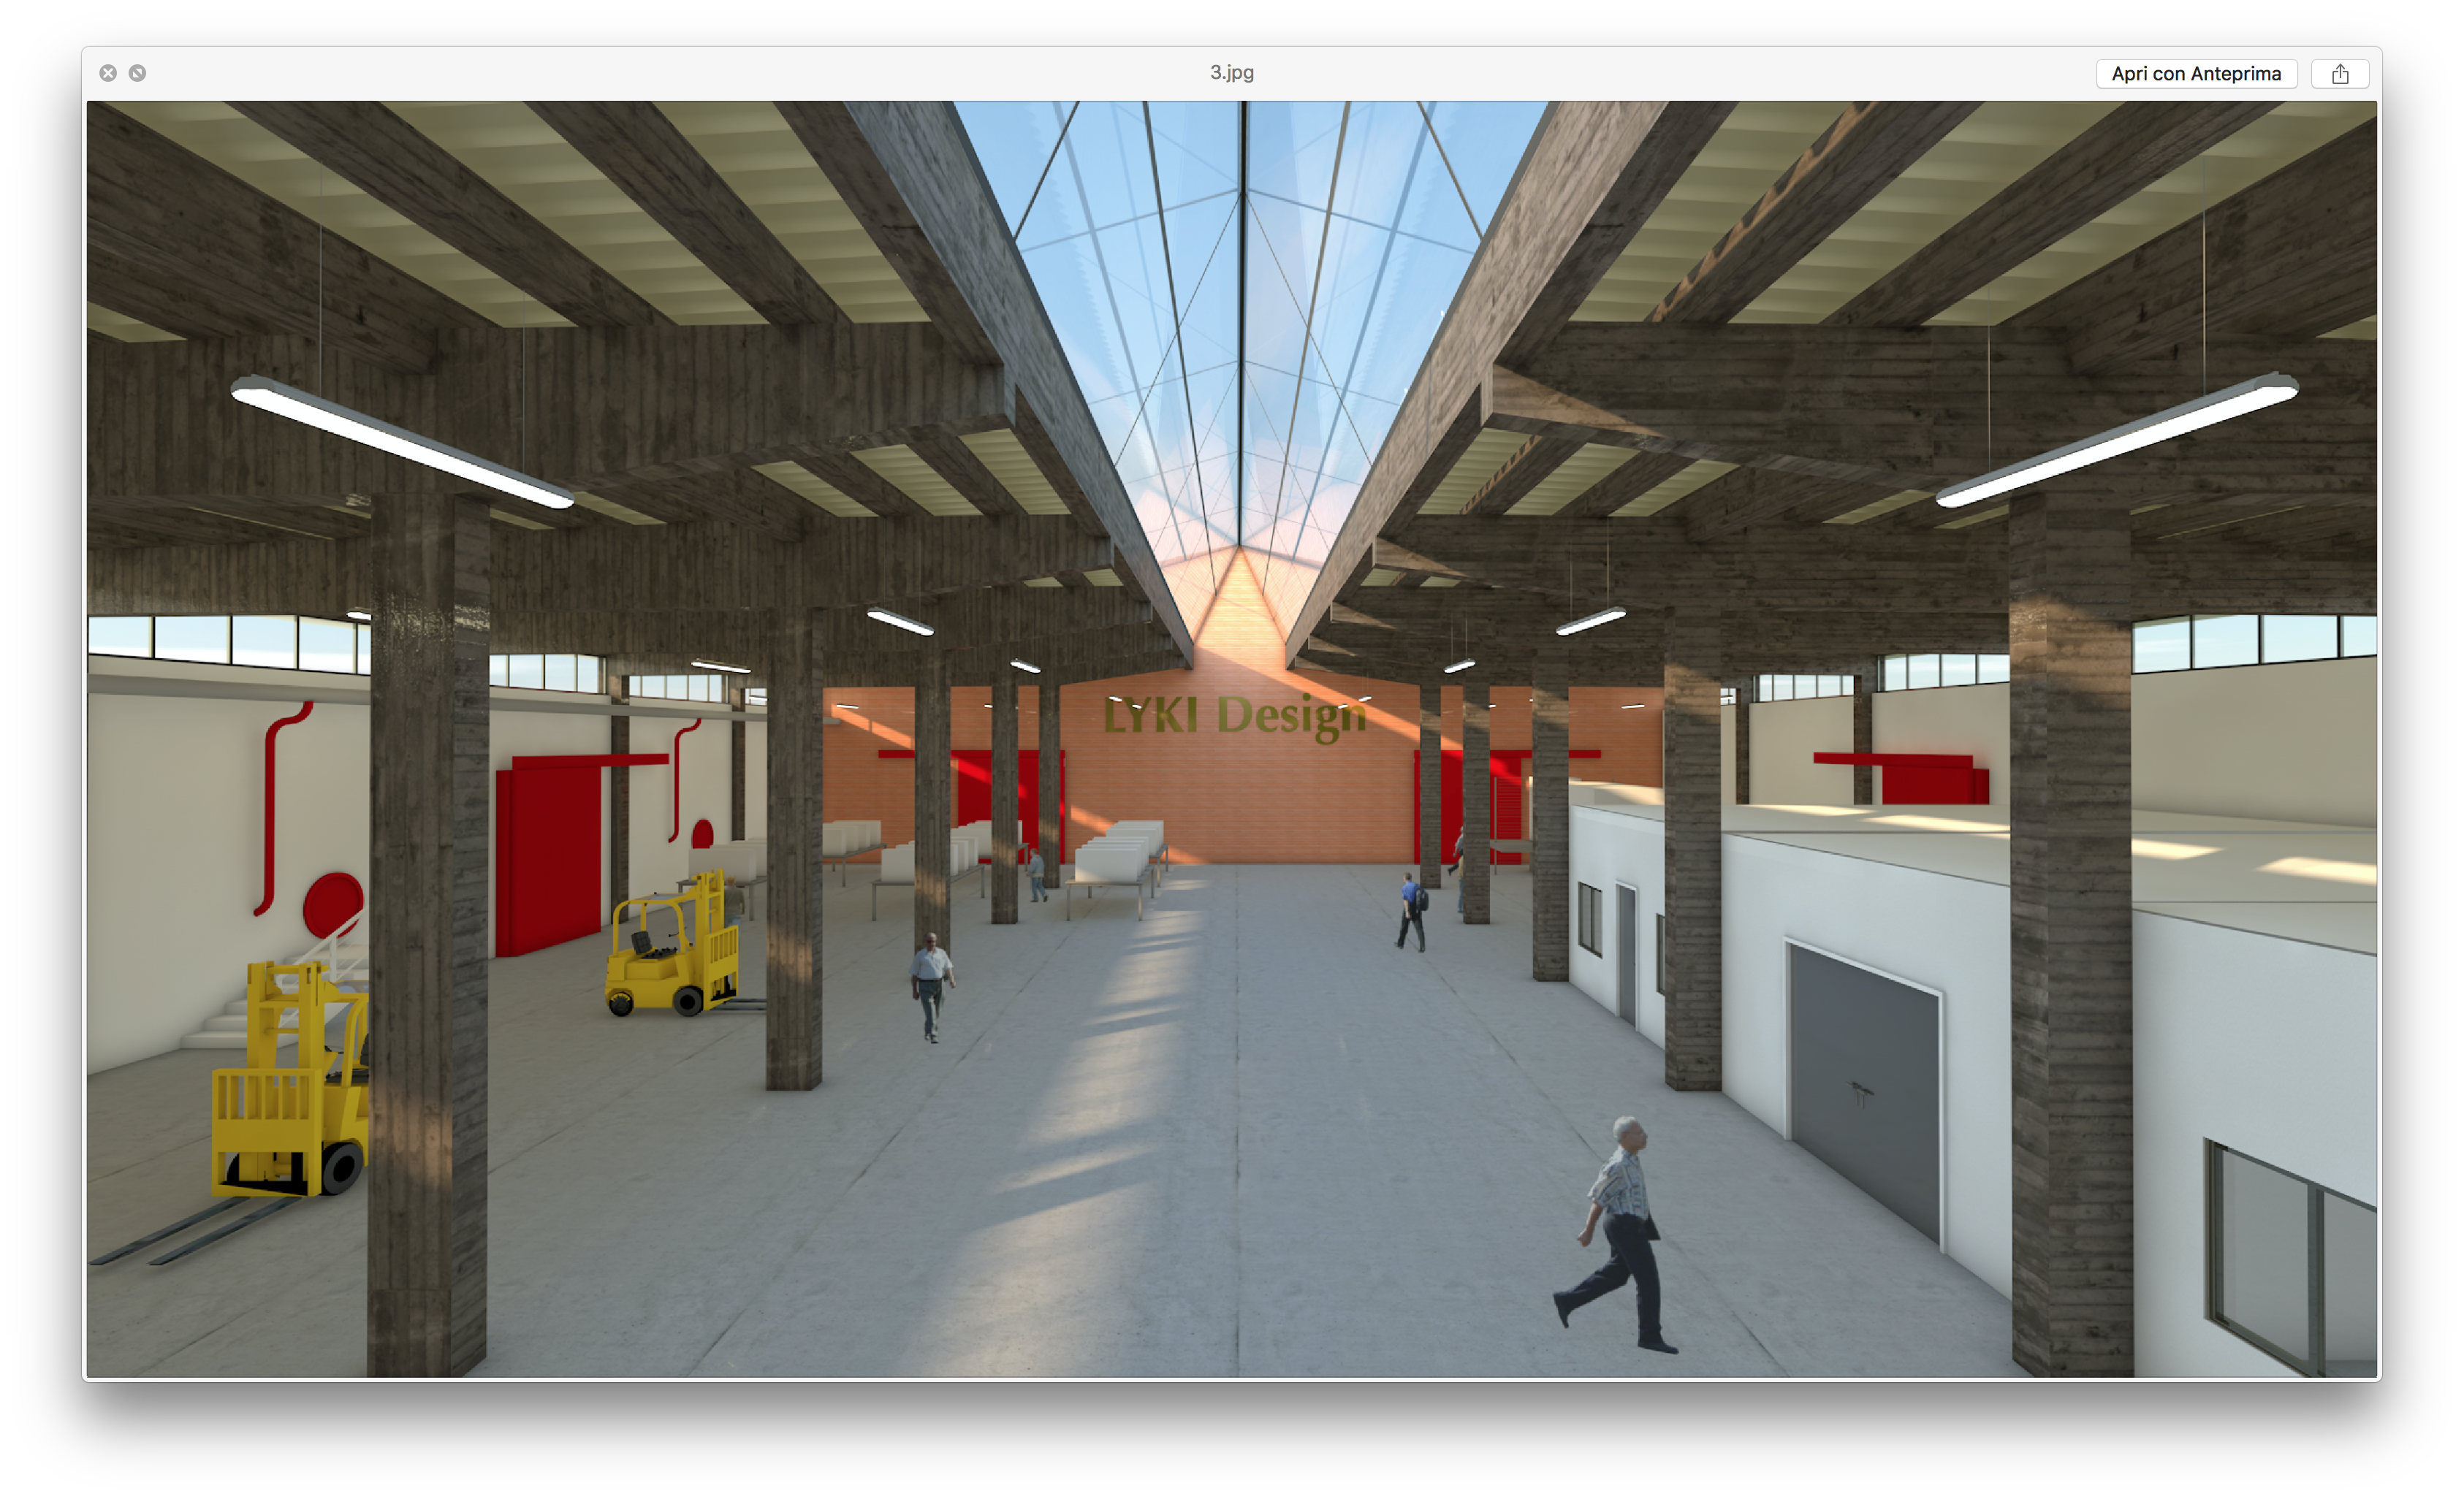
Hello everyone,
i'm trying to resolve an issue. In a previous render without camera settings i could to see the sky on the scene. After that i tried to set the rendering style with this setting
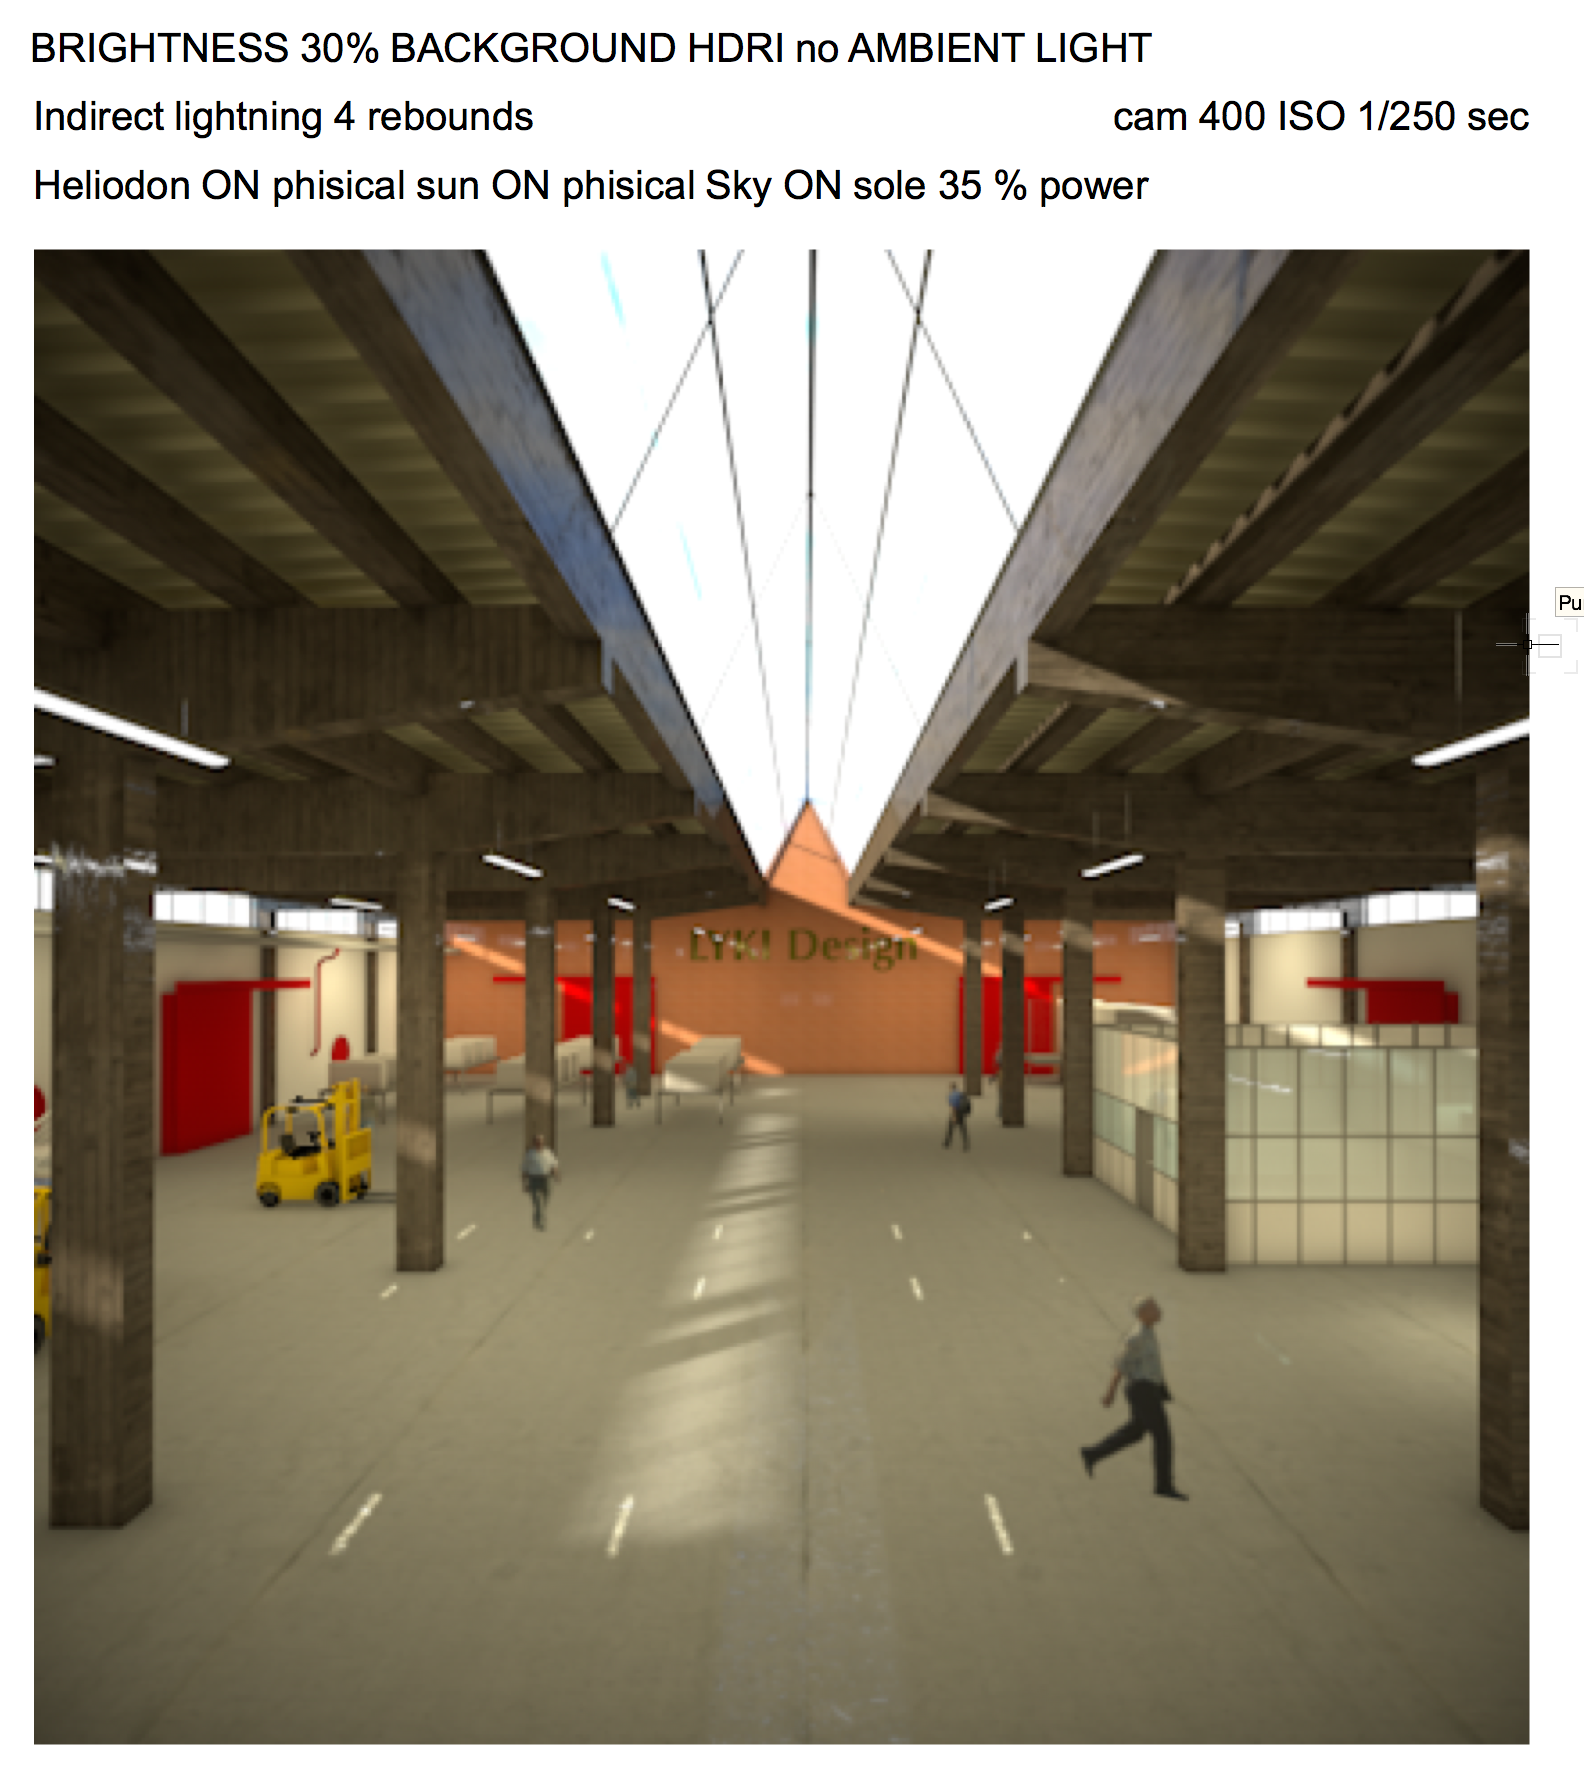
BRIGHTNESS 30% BACKGROUND HDRI
no AMBIENT LIGHT
Indirect lightning 4 rebounds
Heliodon ON phisical sun ON phisical Sky ON sole 35 % power
cam 400 ISO 1/250 sec exposure
but.. i can't see the clouds and the sky like the previous render
could anyone show me the clouds? ;-)
thank you and have a good work
Z
-
Thank you so much Jim. I did not think about it.
-
Hello everyone,
i just have a simple question. I would like to improve the render scene with some 3d support images.. but: could i set the light settings about these objects? they appear all time too bright.
I attach a screenshot: there is a dark scene made deliberately
thank you
-
Try this: double click on viewport, go inside the “camera” mode, render the view in a quick mode, then come back to the viewport and retry to update it. i had the same problem and it works
-
I thing this is not possible at the moment..
-
Ok.. just the fill color....

-
I'm trying to set different setting
I can not understand why the light that comes to the bottom wall does not becomes red or orange (like a evening light). I can not change the color of sunlight.

-
What do you mean exactly? To import a large number of resources in one action?
-
23 minutes ago, markdd said:
In the renderworks background you will need to check receive shadows in the lit fog section
Thank you!

-
Hi,
I'm trying to create a light coming from the outside, but i have some problems.
First of all, i don't understand why a spot light cross the slab even though the option "create shadow" has activated on the OIP


-
Dreaming is free .. who knows if one day VW will come to this (from minute 2:00)
-
 1
1
-
-
42 minutes ago, JimW said:
I want this AND Render History! The two sort of tie together.
Forgive me if I use the wrong terms, I'm still learning C4D, but the Picture Viewer has functionality that I would absolutely want, maybe even embedded in Viewports. It will give a list of previous renders for a given file or scene, show how long the render took and (I think) show you the settings that were changed between versions. It also consequently lets you click back in your history and see previous renders and allows you to extract/export the image in any of the saved states.It could stop the infinity-loop-copy-viewport-and-retry-one-more-time-with-other-setting session
-
1
-
-
Add the option to set and unset to view 2D element without re-elaborate the render...
-
1 hour ago, Markvl said:
@zeno. Excellent work sir. Looks like the tips are working for ya. Your texturing is great on all objects (the sofa is excellent) except the floor...your last pic makes the floor look like its got water on it. To much reflection and what I'm guessing is bump. Otherwise, again really great work.
Thank you, Markvl
I know about the sofa.. it is a payment model available on a very good site (it's my home's sofa :-) )
For the floor: I know, it's bad. But it's for extremely hurry!
Next time I will learn how to set a correct personalized texture and how to have volumetric light from heliodon.
Bye! :-)
-
I have too, but I think that the operation could be dedicated just to rendering comparison. I'm happy to know that I'm not the only user with that problem.
7 and more hour render
in Rendering
Posted
Hello Stephan! Thank you so much for you help. Off course i will reply this renderings with the 2018 version as soon as possibile!