In Vectorworks 2024, the Cabinet tool has changed to allow for more customization.
After placing a Cabinet on the design layer, you can choose whether it is a Base Cabinet, a Wall Cabinet, or a Tall Cabinet. In this example, a Base Cabinet will be used.
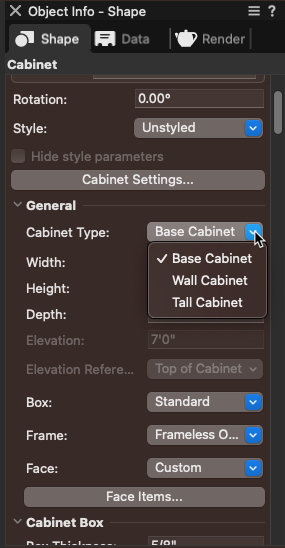
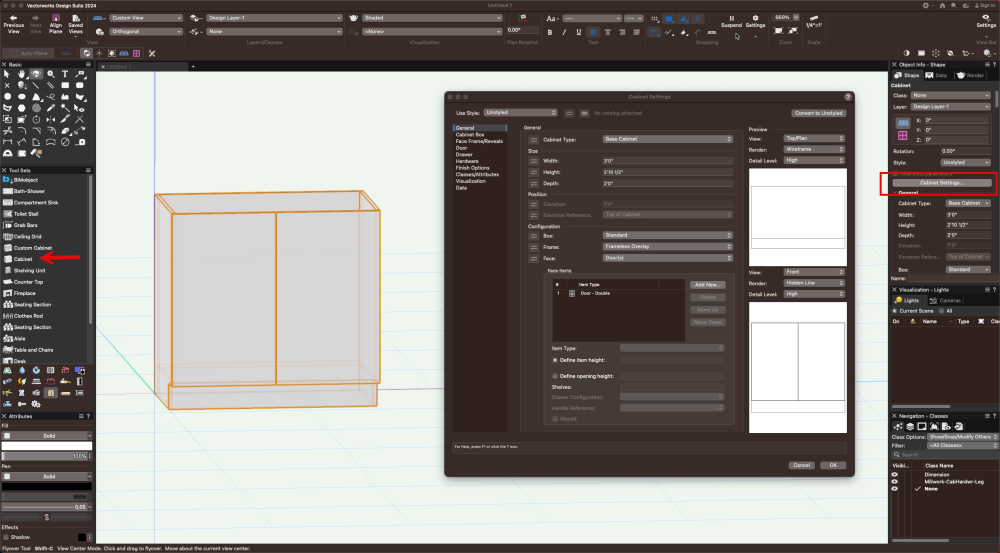
With the base cabinet selected on the design layer, looking in the Object Info Palette, there is the Cabinet Settings button.
Clicking on this button will bring up the Cabinet Settings Dialog box. To get to the parts we wish to adjust in this example, we will click on the General tab.
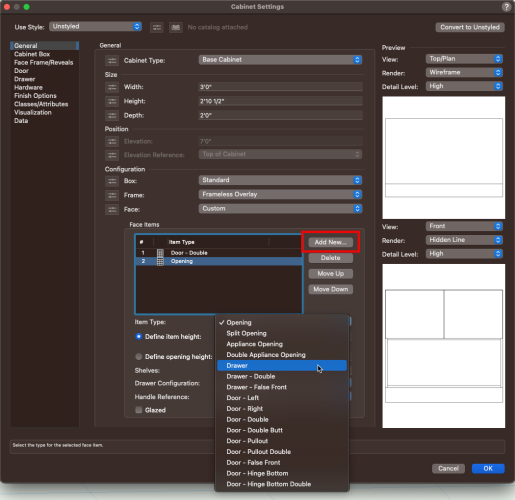
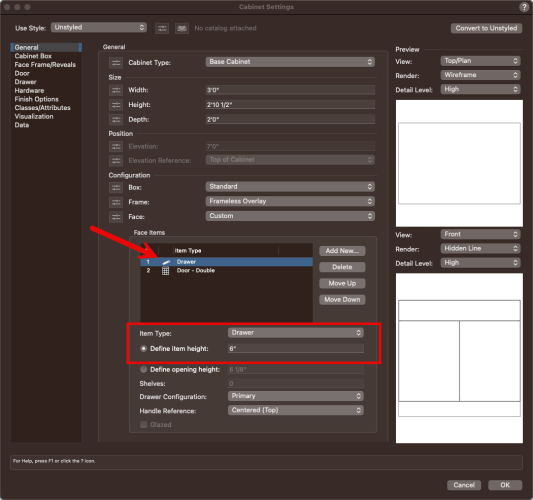
In this example we want to add a drawer to this cabinet. Click on Add New in the Configuration section of the dialog. By default this will create an opening. Select that Opening to be able to configure what the new item will be. In this example, we are choosing a drawer.
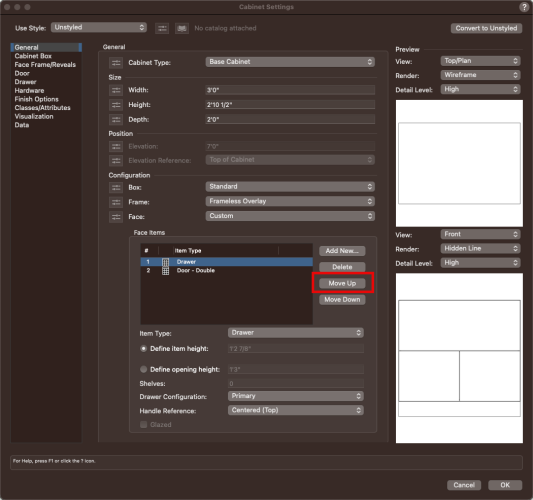
By default, the Add New will place the new item at the bottom of the list. With the newly created drawer selected, choose Move Up to bump this to the top of the configuration. This now places the drawer above the Doors.
Now that the drawer and doors are now located where we want them, we now wish to adjust the size. By default, the Add New will split the face into equal number of parts, but we want the drawer to be not as tall as the doors. Click on the Calculator icon to change it to a ruler. This will allow you to customize the size of the drawer.
You will notice that the Define Item Height is no longer locked out, and you can now type in the height of the drawer. In this example, 6". The Doors will then adjust to fit this new drawer height.
You can add more new items to the cabinet and tweak each item's size independently using the above steps.
-
 2
2
Report Article


Join the conversation
You can post now and register later. If you have an account, sign in now to post with your account.
Note: Your post will require moderator approval before it will be visible.