jarjones
-
Posts
59 -
Joined
-
Last visited
-
I'm nearing the end of a project. After making all my Sheet Layers, I went down the Sheet Layer Navigation Pane and cleaned up the names and sheet numbers. Super easy, click on the edit pencil and run down the list. But when I went to publish, all the files came out with the incorrect numbers/names from before the cleanup. When I double clicked on the the title block, I discovered that the changes had not carried over to the Sheet Layer settings. When I opened them, they reverted the names/numbers back to the old versions that I had fixed. Making changes in the Sheet Layer list in the Navigation Pane didn't actually change anything. Is this a bug or is there some setting that links the list to the setting? Having to go into each sheet, then go into each title block, click on the setting you want, then click on the field you're changing is a time-consuming bore.
-
I feel like this is a dumb question, but I've been searching for an hour now and I can't figure it out. The file I'm working on suddenly stopped keeping layer views consistent. If I change one layer to a top view, the other layers stay in the view they were in, so I get a top view over a front view instead of all the layers changing to a top view. Last week they all worked together, so I must have accidentally changed something, but I can't figure out what. It fixes when I hit Align Layer Views, but that's a pain every time I want to check something from another angle. I recently upgraded to VW 2022. Thanks, Jeff
-
I tried that, and in earlier versions, I'd get control dots for each of these axes, but in the version when I click on the axis lines, nothing happens. Will have to look at that more closely. I started there, but because the face overrides were so complicated and some really hard to get to (basically a bunch of little planes making up the curves and interior cutout curves), the faster/better way seemed to be to apply that side texture overall, then deal with just the 2 faces. In my semi-attentive observations over the years, I think the mirroring/rotation goes back to how the item was created? If I draw a rectangle from the top down (negative direction of the Y axis), then extrude it and leave it as is, the texture will be rights side up (I think). If I do the same but draw the rectangle from the bottom up (positive direction of the Y axis), I think VW considers that first point the "top" and the texture is upside down. If I then add surfaces, clip surfaces, extrude, then add and subtract other extrudes, then rotate it on the x and/or y and z axis, then view it from the left or right, VW seems to have made a determination about what "top" is that rarely coincides with my perception. I did not do well with the previous texture mapping that let you designate sides vs top, since my sides were almost always the top for VW. I still don't get the texture not marrying to the object once set. If I mirror the object, the texture stays in its original orientation, which is now reverse on the object, but even that seems inconsistent. I did get the results I was after for the object above, it was just harder than I wanted it to be and some features didn't seem to work as I thought. Thanks for all your insight.
-
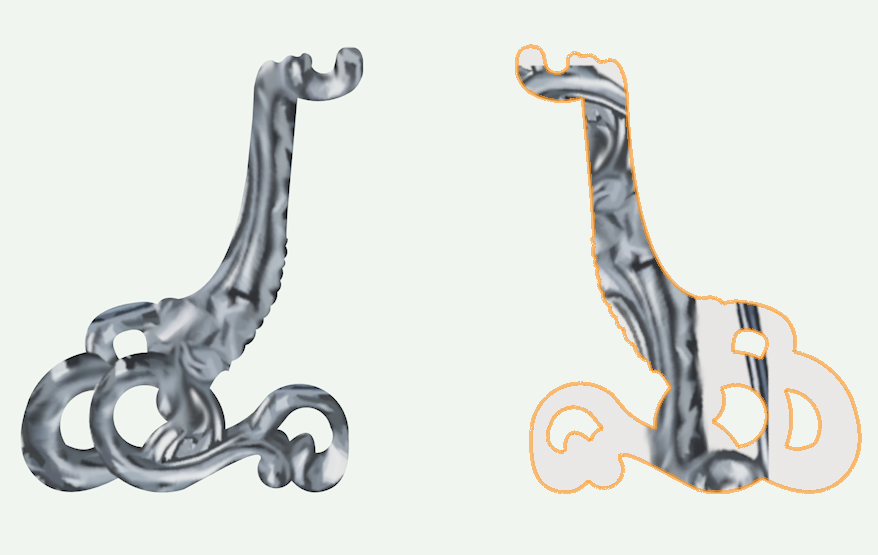
I was having a texture mapping problem. I eventually made it work, although I'm not exactly sure how, but I was wondering what I was doing wrong. I do lots of texture mapping, and the 2022 interface for that seems like a step backwards (although the ability to apply textures directly to a face through drag and drop is amazing). I wanted to ask, since I'm sure this will come up again for me. I was trying to map a texture to complex shaped but flat extrude. Just applying the texture to a face did not get the results I want. I used the attribute mapping tool on 1 side and it worked. When I tried to use it on the other side, I got a flipped version of the texture, so I made a flipped copy of the texture, but this also came in the reverse orientation for the object. Is there a way in the mapping tool to flip the texture horizontally? I thought about turning it 180 in 3D, but I can't seem to access the handles for 3D mode for some reason. (I can see the axes, I just can't control them.) Is it because it's being mapped to a face that's a plane rather than something 3D curved like a hemisphere? Also, when I made a mirror copy of the object, it completely changed the applied texture back to the flipped and unmapped version. Duplicating and rotating the object did not cause this to happen, but it the object flipped, so did the texture. Thanks for any assistance. Jeff
-
I have a group of 2D polygons that have been extruded. The extrudes were then added together and pushed and pulled and rotated to make it fit another 3D shape. Now I need a 2D shape of the extrude. My thought was to go back into the groupings of added extrudes until I got to the original polygons for the extrudes and copy those out and paste them back together and add the surfaces, but when I try that, they lose any rotations or scaling that I had to apply while in 3D mode. Is there a way to get the 2d shape easily? I'd rather not try to rebuild the shape in 2D. Thanks, Jeff brace leg.vwx
-
Just got started on VW 2022 and I have a kinda trivial question: Is it possible to make the symbols (particularly the X) filled-in rather than outline, especially in the classes palette? (I'm finding it really hard to see at a glance what's on and off). If not, could that be an option for an update? All those outlined icons are reading as visual noise to me and it takes longer to actually identify the tool I need. Thanks, Jeff
-
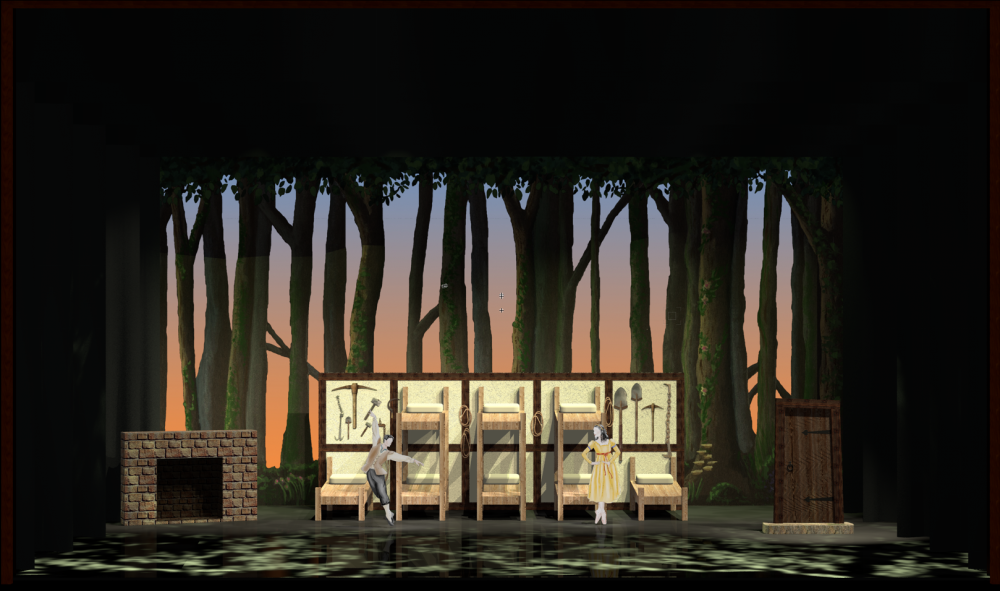
Apologies if the class setup seems chaotic. It's what I've found works best for me with these kind of modular sets. Snow White-AJF-10-19-21.vwx
-
I have a scene that I have rendered that looks how I want it. I want to do anther render of the same scene with different furniture, so I duplicate the sheet layer and turn off the class that has the bunkbeds. The lighting is now totally messed up, despite making no changes to the lighting classes. All the instruments with gobos are set to cast shadows, etc. When I turn the bunkbed class back on, which should revert it to its former render, the lighting is still blown out. I can re-render the original viewport and get a consistent result, but any changes I make to the duplicated viewport cause messed up lighting. What's going on?
-
The only files that can be chosen are .vwx and one other. I guess I could open the target file, re-save it as .vwx, then re-link it, but really, I'd just like to break the links so it's not reliant on that old file.
-
Starting back to working after the long hiatus and wanted to clean up a theatre file. Every time I open it, a broken link warning comes up. I can find the file it says it wants to open, but it is greyed out so I can't select it. I have no idea what it's referencing. It's been doing this for probably years and I've just ignored it. Is there a way to force it to link, or is there a way to figure out what it's trying to link to so I can delete what's looking for the reference? I'm on VW 2019.

-
Camera view to accurately determine projection mapping?
jarjones replied to jarjones's topic in Entertainment
Excellent! Just purchased. -
I've designed a show in VW that will have many projections on multiple projection surfaces that change location. We're running through Q lab and I was wondering if there's a way to use a camera placed at the location of the projector to create the projection surface masks. It seems like there could be, but I know there are so many camera variables, that I could see it being completely wrong. Is there a way to get an accurate POV from a projection standpoint?
-
In my case, it wasn't working because the chamfer was too big for the item. The fillet value was reverting to a previously typed size when I switched tools and I wasn't catching that. When I'm working with fillets and chamfers, the OIP still says they're locked, but they work fine unless the values can't be computed fos some reason (tight curves, multiple intersections, etc.) I also updated to 2019, which has run better than any version to date.
-
Thanks! I tried that and got the results I was looking for. These forums are great! Jeff
-
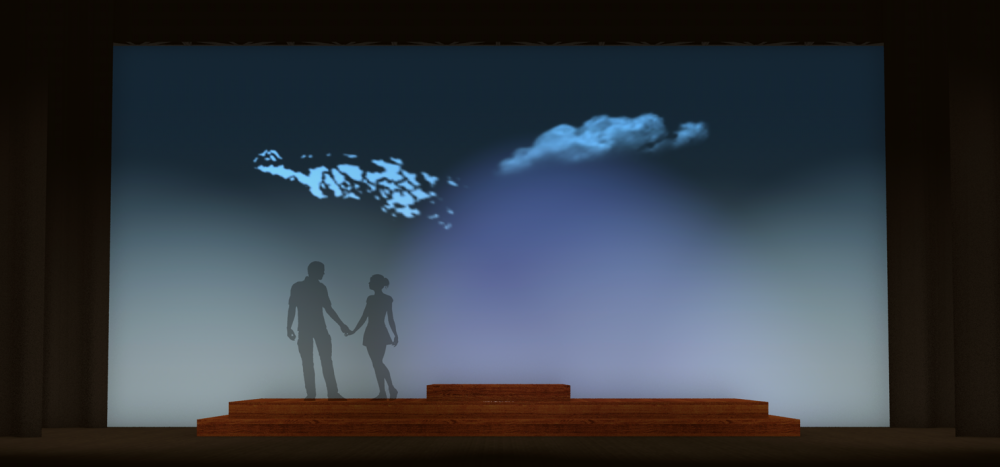
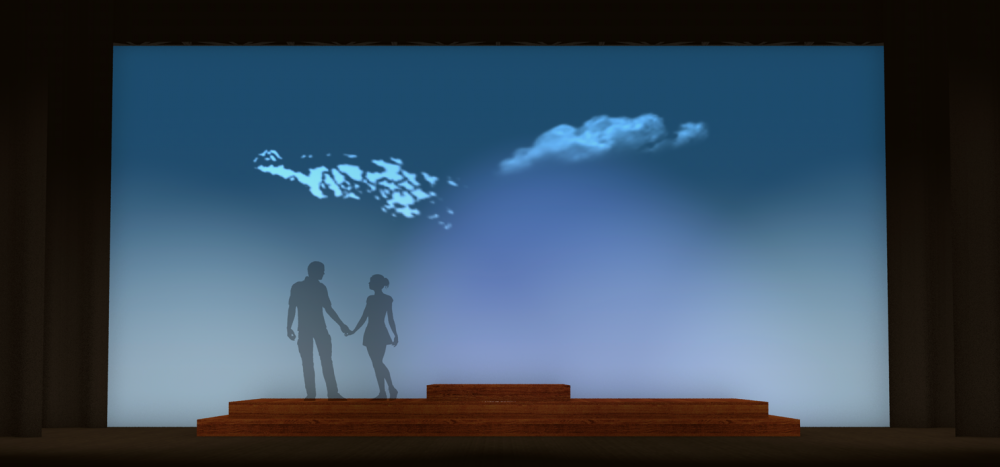
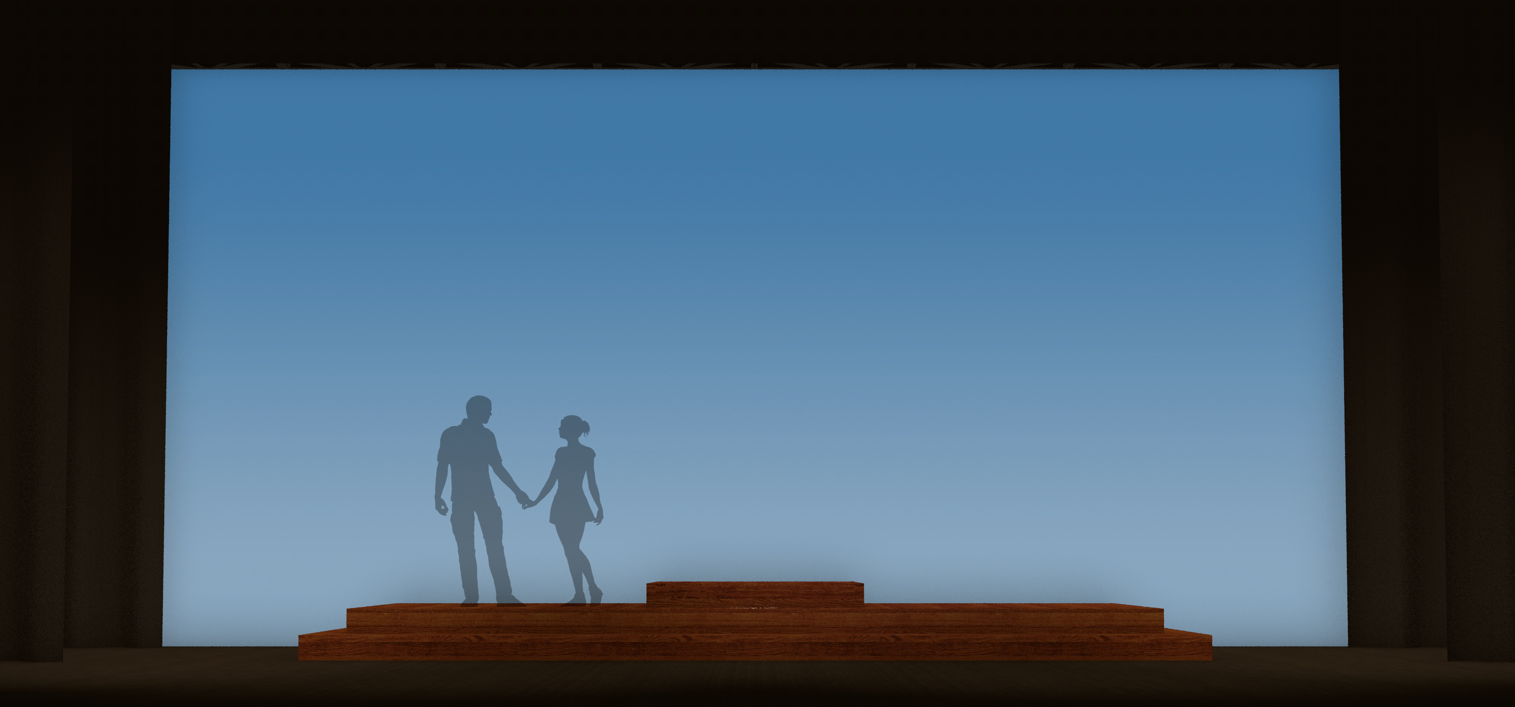
Is there a trick to projecting gobos onto a surface that has a glow reflectivity setting? To simulate a basic background cyc effect, I have an image of a gradient applied to a flat object behind the scenery usually set to around 80% glow. I think it works very well for rendering scenes with a background cyc. Today, however, I'm trying to project a cloud gobo on a cyc. If I have the glow turn on, even if it set low, the lights and gobos do not appear on it. If I turn off the glow, the gobos show up, but the cyc doesn't look as good with spotlights lighting it. The best compromise seems to be Using the Backlight setting, but it's still not as good as what happens in the space. Any tricks to make this work? As a scenic designer, I'm also curious how you lighting designers visualize a lit cyc in VW. Thanks, Jeff Glow texture cyc: Just the texture, no glow: Backlight: