Search the Community
Showing results for tags 'sills'.
-
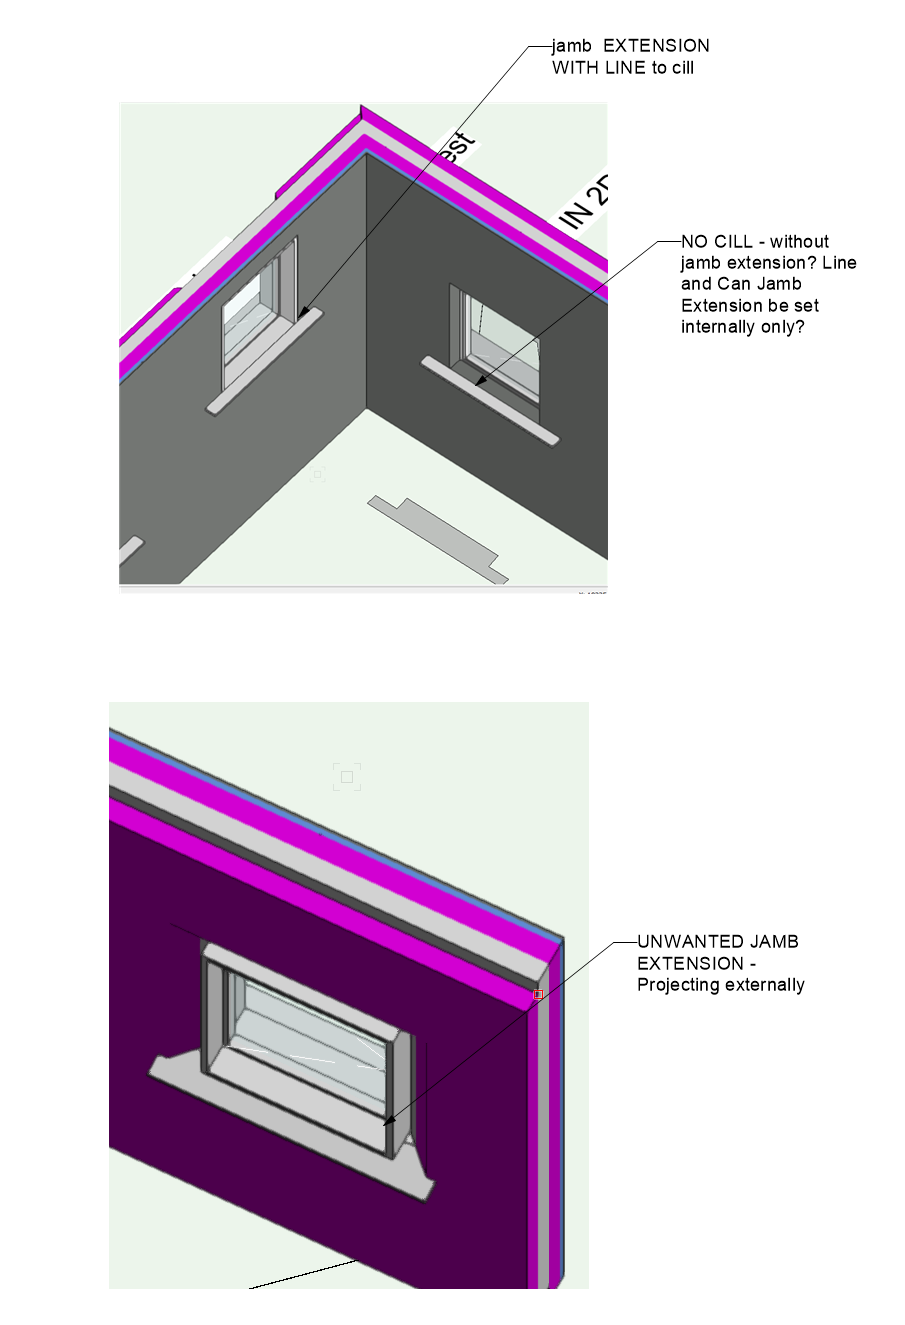
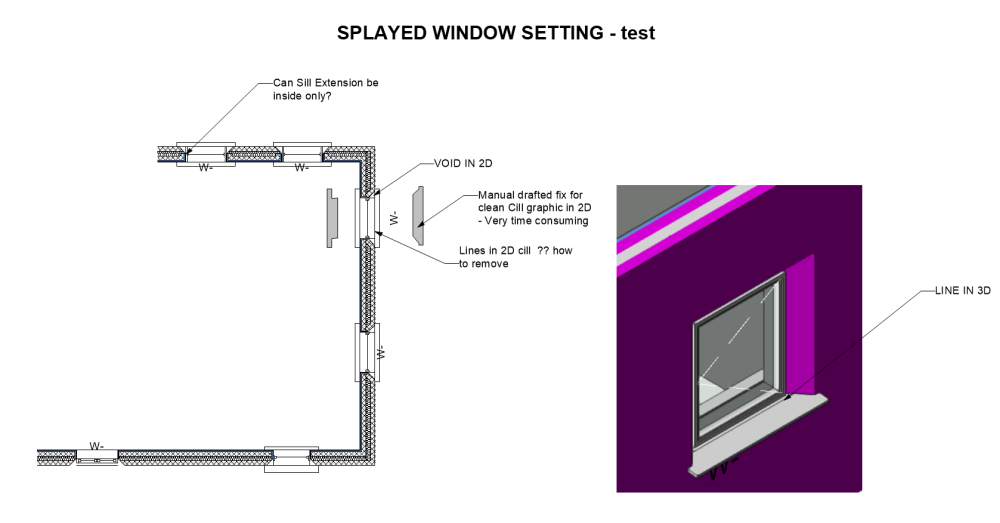
HI, Does anybody know how to solve this SILL Problem in VWX 2023 ? Trying to move from 2D to 3D and encountering the following problems with Sills. Am testing V 2023 and Window Sills within Splayed Wall. IN 2D 1. Unwanted Lines from external wall across sill EXTERNALLY 2. Unwanted Lines across Sill INTERNALLY 3. Cannot Control Internal Sill shape or dims - Length is exactly the same as external sill offsets 4. Void in 2D between Splayed Wall and Cill. IN 3D 1. Unwanted Lines to sill Externally 2. NO sill INTERNALLY unless Jamb extension used 3. If Jamb Extension used it extends externally into void 4. Cannot see anywhere to control the Shape, Dims, extend of Sills independently. - for Inside and Outside or remove unwanted lines. The only way I can see to do this is for 2D graphic to draw polygons internally and externally for EACH WINDOW , but this won't read using Clip Cube so the manual process needs to be repeated in all sections. Surely this laborious workflow ( if only option) goes against what they're trying to achieve with more interactive, time efficient design workflow ? - Any assistance gratefully accepted . Frank
-
I’ve wanted to figure out how to model this for years and couldn't find a solution till now. Window surrounds that included brick stacks (the bricks that run along side the windows), the brick sills (sometimes called rowlocks), the brick soldiers (the taller bricks that run along the top of the windows) and the keystones (the sandstone shape in the middle of the soldiers). This is how I did it: - Window symbol was put (in the window class) and gave it my desired width/height specs. - I gave it a exterior trim roughly the width of a brick (3.67”); made it very thin (1/16”); and turned off trim under the window. - I assigned a brick bond texture (with a brick bond hatch) to the exterior window trim class. So far this gives you a window with brick side stacks and trim above the window that will soon be covered up by another piece. - Then I duplicated the window in place; turned it into a cased opening; made the jambs, trims and sashes all 0”; - I turned on the “lintel” and gave it an 8” ht. ( the ht. of a soldier); and an 1/8” ext. protrusion (so it sticks out proud of the top window trim). - I assigned a brick bond texture (with hatch) that runs vertically... to the "lintel" class. - I turned on the “sill” and fooled with the specs till I had it where I wanted it. - I assigned a brick bond texture (with hatch) that runs vertically (it might be the horizontal brick bond that works) to the "sill" class. - I also increased the width of this duplicate window symbol (wide enough for the lintel above and sill below to line up with the edge of the window trim on the main window symbol). - I may have fooled with the ht. slightly so that lintels and sills all aligned properly with the ht. of the main window symbol. - I changed the class on this duplicated window symbol to “non-plot” so that it would not show up on the window schedule - Lastly, I extruded a keystone shape (these vary in size)…I made mine a little taller than the soldiers…and slid it into place.


