


Project Sharing is a multiuser environment that streamlines project management and execution. It was developed to help Vectorworks users manage projects involving multiple users, fostering effective collaboration and communication within a project team.
Project Sharing is a single-file structure providing a mechanism that allows multiple users to work within - and access parts of - a file, simultaneously.
In this article, we will show you how to set up a project sharing file and the do’s and don’ts of the project sharing workflow.
To make a Project Sharing file:
First, start by going to File > Project Sharing within the document you wish to make the .vwxp or Project Sharing File.
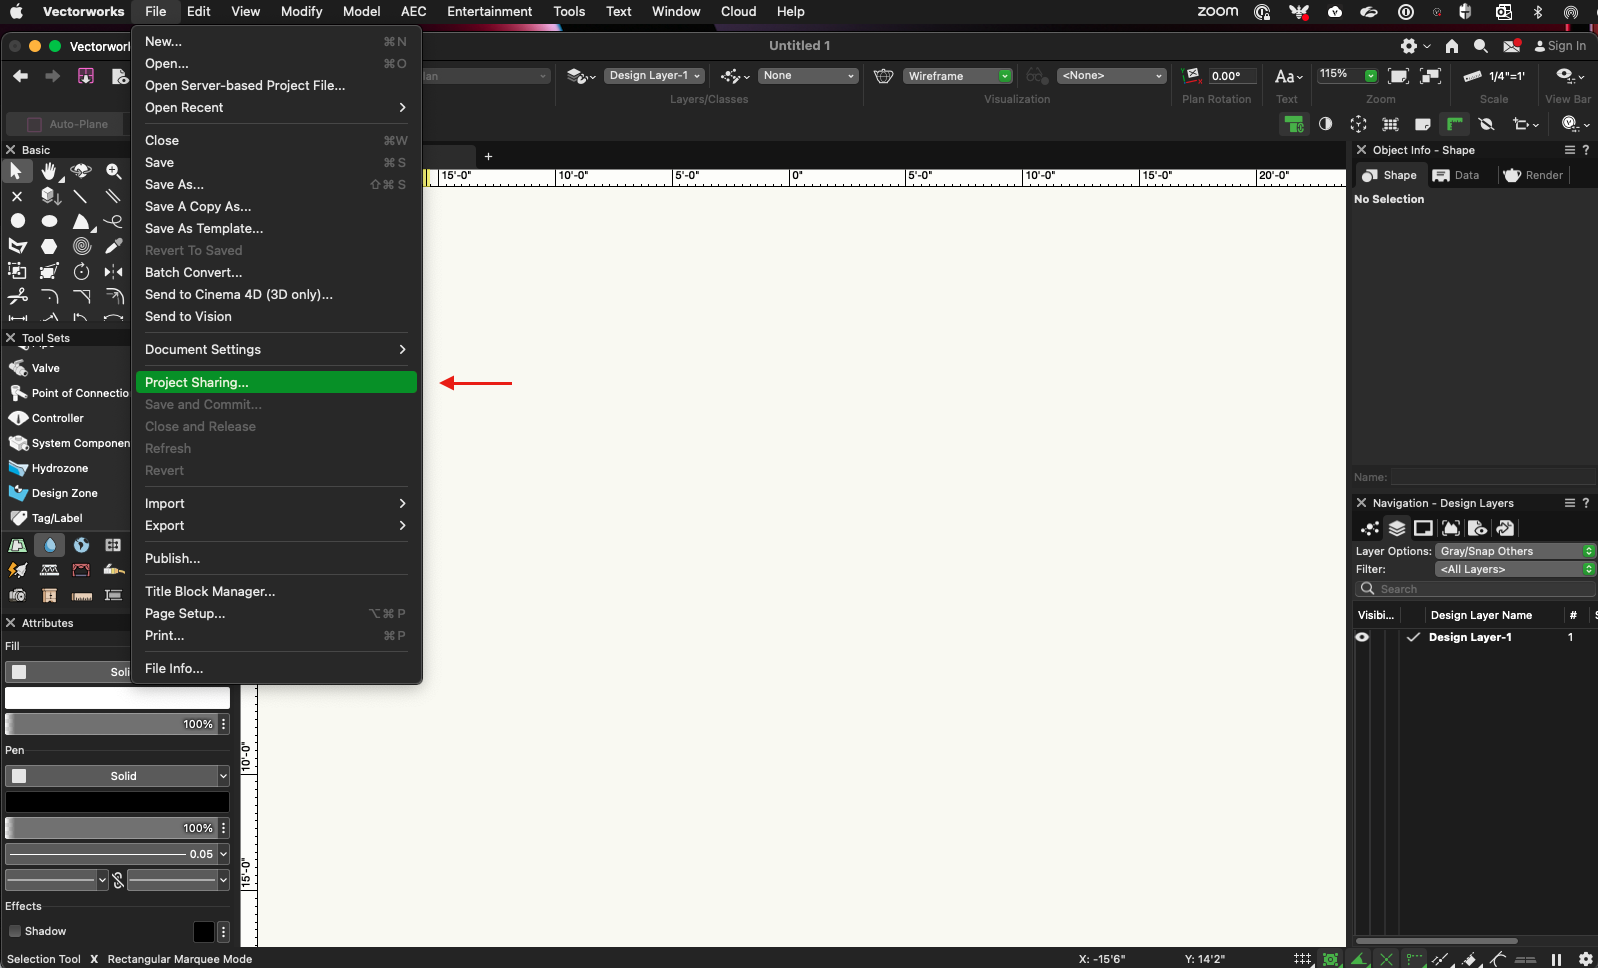
We recommend having the file already saved in the proper shared location before making it into a project sharing file.
(Example: A unique folder in the desired cloud or server. This folder will exist to host the project sharing master file and nothing else)
- The Project File (the .vwxp file) should be placed on a server or a shared network location that is accessible by all team members. This means that all team members must have full access to the server. They must be able to read, write, rename, delete, create, etc. to the folder on the server or shared network location in which the Project File is kept. This is necessary for when check outs, releases, commits, and refreshes occur.
Once you have confirmed this file is saved in its own folder on the cloud or server, you can begin.
The first step in the process is to determine which network protocol this file will be shared with. You can choose SMB or AFP, (Do NOT use a mixture of SMB and AFP structures.)
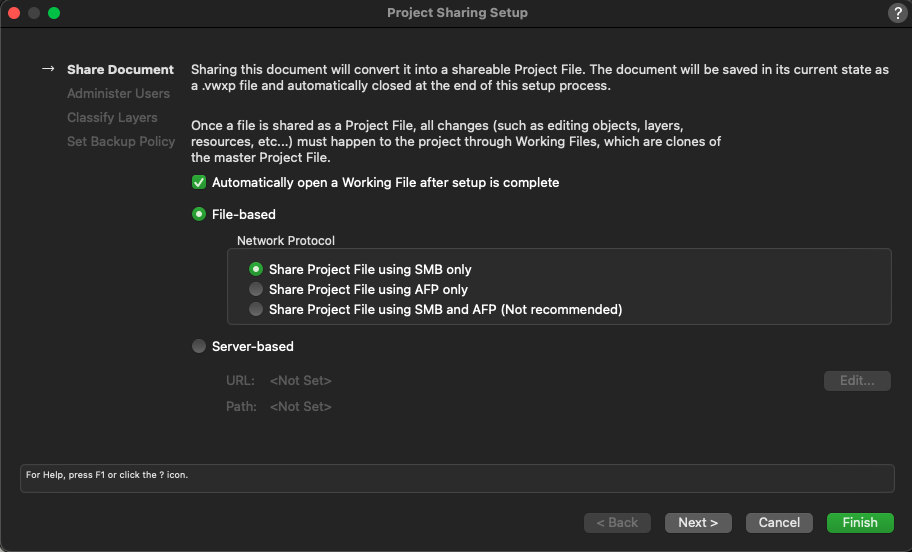
We recommend keeping the option “Automatically open a Working File after setup is complete” checked. This will automatically create a working file after completion.
- A working file is a local copy of a Project File specific to the user who has created it. The Working File is used to add to, subtract from, or modify the Project File. In essence, all modeling and drawing creation is done in a Working File and then is committed back to the Project File. A Working File is designated with the file extension .vwxw. When a Working File is open, the title bar on the file will include WORKING FILE to indicate that you are currently in a Working File (FIGURE 2). The Working File is kept on the hard drive of your local computer.
Select “Next >” to proceed to the next step:
Here, you will be given the chance to add users to the project file and determine permissions.
- Management in Project Sharing is done through a robust, permission-based system with options to control access and rights among the design team. Team members are granted specific types of access to either layers (design and sheet layers), or to an object or groups of objects. They can check out those layers or objects, work on them, and then check them back in. Vectorworks communicates the status of the changes being made by project members along the way, keeping the entire team informed during the project.
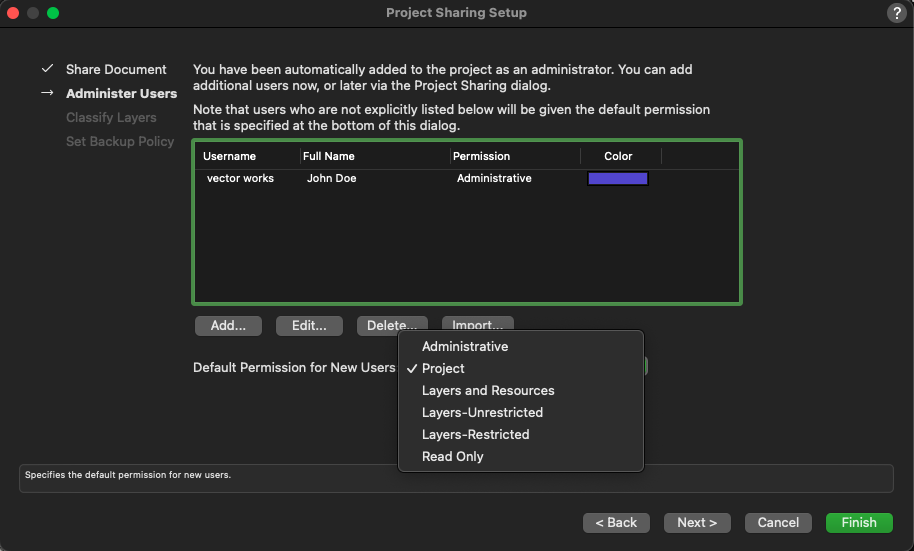
Users can be added by selecting the “Add” button.
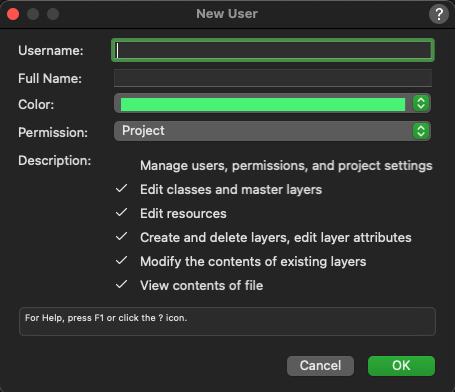
When you add a user, it will take you to the new user dialog:
Here is where you can put in the username (typically resembles the username of the machine being used) and the user’s full name. Choose a color to uniquely identify the user and then choose their permission clearance.
Here are the following permission levels:
ADMINISTRATIVE
The Administrative permission level essentially has no restrictions. This permission is automatically assigned to the person who first creates the Project File. Exclusive to this permission level is the ability to manage the project sharing settings (such as Project File backup policies) and the ability to add, delete, and edit the users on the project. The administrator will also have the ability to do an administrative release if needed.
- It is highly recommended that there be more than one Administrative user on each project as a backup policy. This can be an office-wide BIM or CAD manager along with the project’s model manager
PROJECT
The Project permission level is the least restrictive level in the project (aside from Administrative). This includes the ability to change and commit document preferences and settings. Project permission is also required to create, edit, and delete references that are being used. This permission level is also necessary to create and delete classes.
LAYERS AND RESOURCES
The Layers and Resources permission level is needed to create, edit, and delete resources. This includes, symbols, textures, wall styles, slab styles, etc. Resources that do not require this permission level to create and edit include worksheets, records, scripts, and script palettes. A person with this permission level can also create, edit, and delete dimension standards within the document preferences.
LAYERS-UNRESTRICTED
Aside from the ability to create, edit, and delete layers, this permission level also allows you to commit saved views back to the Project File allowing others to access these views. This permission level or a higher permission is needed to create, edit, delete, and commit publish sets and batch render jobs. Lower permission levels can access publish sets and batch render jobs but cannot create them or commit them to the Project File.
LAYERS-RESTRICTED
The Layers-Restricted permission level allows you to create, edit, and delete objects and information on layers that already exist in the Project File. Resources that can be created, edited, and deleted with this permission level include worksheets, scripts, and script palettes. It is important to note that this permission level allows you to create saved views, working planes, and edit any unrestricted document preferences so that you can continue to work in your Working File as you like. These types of changes or additions, however, will not be committed to the Project File.
READ ONLY
As indicted by the name, the Read Only permission level only allows you to navigate through the file. You can access and view all objects, layers, and information, as well as update out-of-date viewports. You can change layer and class visibility in your Working File but cannot commit these changes. This permission level does allow you to publish drawings and run export commands.
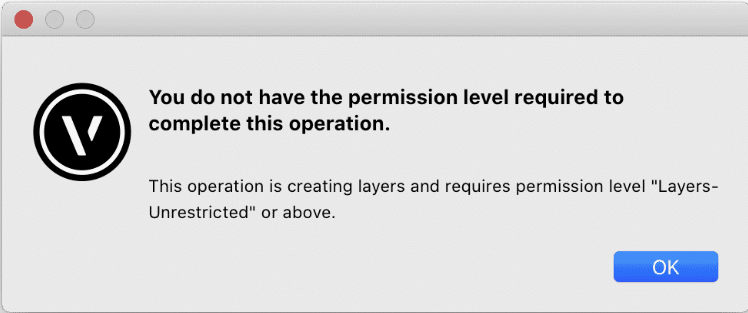
- If a team member is attempting to complete an operation for which they do not have the proper permission level, a dialog box will appear. This dialog box will inform them of what permission level is required to complete the operation.
Select “Next >” to proceed to the next step:
In this window, you will be given the chance to determine which layers will be considered “Master layers”.
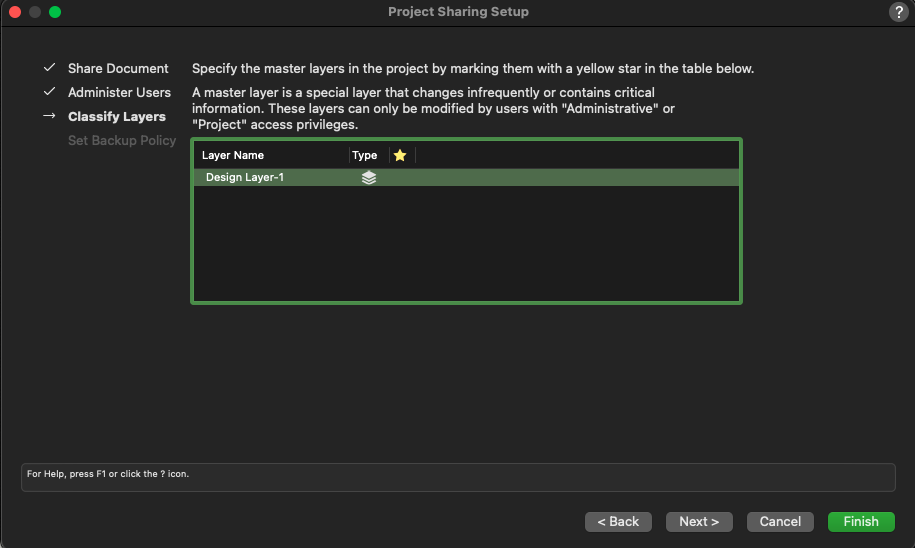
MASTER LAYER
A designated, special layer that changes infrequently over the life of a project. A master layer may contain critical information that should not be changed or overwritten. An example of such a layer may be a design layer that holds a project’s structural grid. You can have multiple master layers in a project.
Select “Next >” to proceed to the next step:
The next window will allow you to determine how the project sharing file will be backed up. Chose the default option to create an automatic backup folder in the same location as the Project File or choose a custom location and save the backup folder in an easy to remember location.
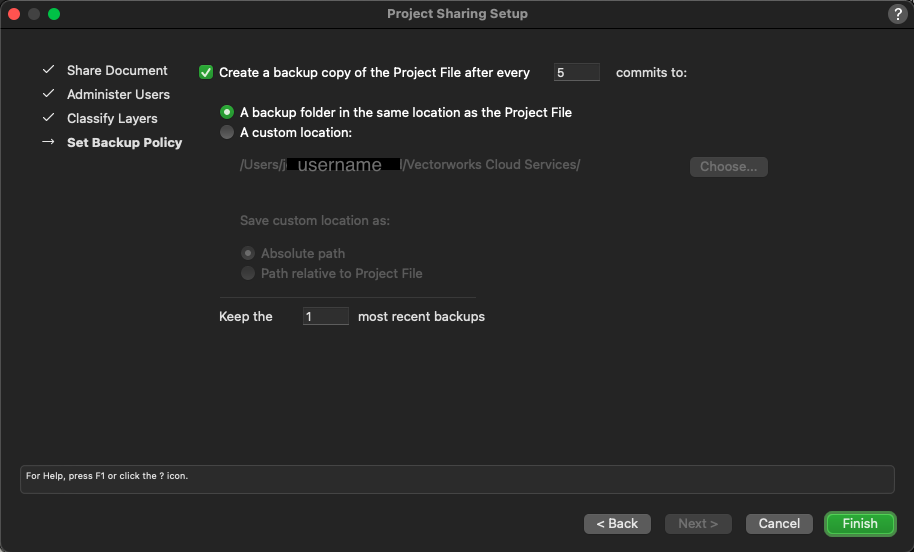
Once you have determined the frequency and the number of backups you need, select “Finish”. This will automatically take you to your new “Working File”.
You can read any additional information regarding project sharing at the following link:
https://university.vectorworks.net/mod/scorm/player.php?a=20¤torg=articulate_rise&scoid=40
Do’s and Don’ts of Project Sharing:
When Creating the Project File
- Do NOT use a mixture of SMB and AFP structures.
- You must have full read/write/delete/rename access permissions to the project folder, subfolders, and Project Files.
- Everyone working on the project must be using the same version of Vectorworks.
- If your VPN is slow, it will take time for Working Files to Update to Project Files and visa versa.
Important Note: Vectorworks does not support using a virtual machine with Project Sharing.
Vectorworks Cloud Services
- If using Cloud Services you must at least be running 2021 Service Pack 4.
- If using Cloud Services the desktop Cloud app must be running.
- Access your files through the local folder or the Cloud App.
- Share files using the correct permissions.
- Save your Working File to your local hard drive.
Dropbox
- If using Dropbox, the Dropbox app must be up-to-date.
- Do NOT save your Working File on Dropbox.
RULES
- Do NOT rename the Project File
- Do NOT move your Project File or rename folders that contain your Project File.
- Do NOT save your Working file on a server.
- Do NOT duplicate Project Files or your Working File.
- Only use one Working File per user. You must remember where you saved you last working file.
GENERAL NOTES
- Nobody can open a Project File after it has been created.
- A Working File is different than a Project File.
- File>Save only saves to your Working file.
- Save and Commit saves changes from your Working File to the Project File.
- Close and Release releases anything you’ve checked out to your Working File from the Project File.
- Save and Commit, and Close and Release will take more time to complete over a wireless connection.
If a Project Administrator releases someone’s exclusive lock, that user will be unable to commit their changes from their working file.
The user will need to create a new Working File, then copy and paste changes from their old ‘unlocked’ Working File to the new Working
File.
Vectorworks provides an alert when the Administrator tries to release a user’s Working File.
Visit the following links to watch video tutorials and learn even more about Project Sharing:
COFFEE BREAK - PROJECT SHARING IN VECTORWORKS
Report Article
There are no comments to display.
Join the conversation
You can post now and register later. If you have an account, sign in now to post with your account.
Note: Your post will require moderator approval before it will be visible.