


1) Use the Workspace Editor to add the menu command to one or both of the context menus. You can then access the command with your mouse, from either the right click options of your mouse (on Windows) or the Control + click options (on Macintosh).
2) Select Tools > Workspaces > Workspace Editor.
3) Select Edit a copy of current workspace, in case you need to revert back to the original format of the edited workspace.
4) By default, "Copy of" or "-copy" is added to the name of the workspace that you are editing. Enter another name if you wish.

5) Click OK.
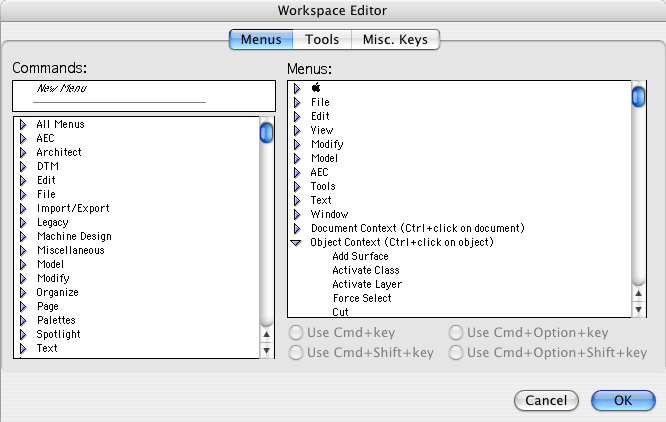
6) In the Workspace Editor dialog box, make sure that the Menus tab is selected. In the right window, click the plus sign (Windows) or arrow (Macintosh) next to the context menu (Object Context in our example). This displays the commands currently in the menu.
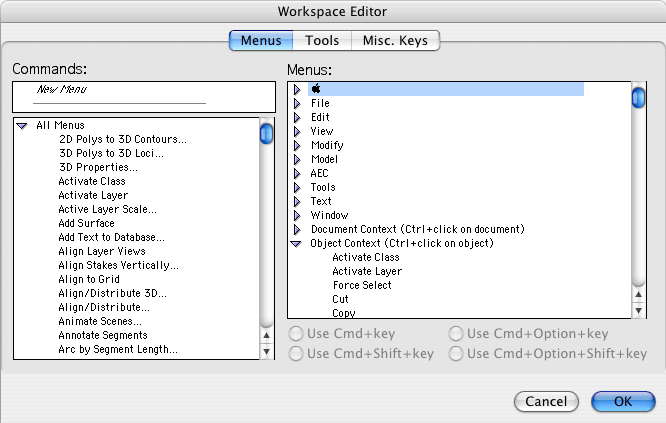
7) In the left window, click the plus sign (Windows) or arrow (Macintosh) next to All Menus. This displays all commands from all menus in Vectorworks.
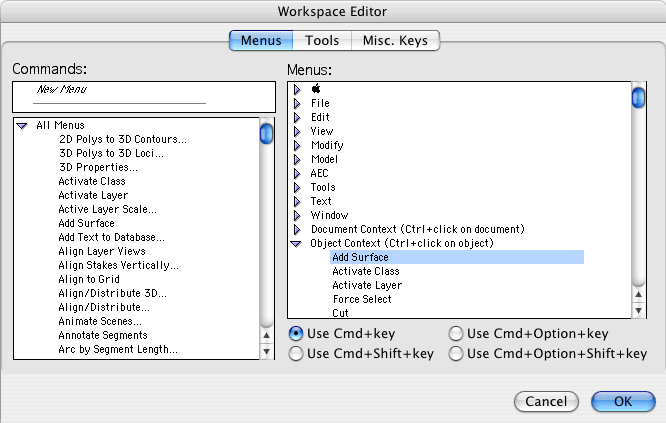
8) Select the command that you want to add to the context menu (Add Surface in our example). Drag it from the left window to the appropriate position in the menu in the right window. Add more commands if you like.
9) Click OK to save the changes. Vectorworks automatically changes to the new workspace.
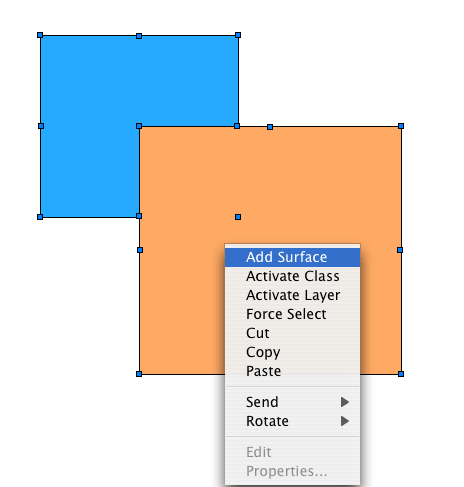
10) When you right click (Windows) or Control + click (Macintosh) the mouse, the new command (Add Surface in our example) is now available in the context menu.
Edited by JimW
Report Article
There are no comments to display.
Join the conversation
You can post now and register later. If you have an account, sign in now to post with your account.
Note: Your post will require moderator approval before it will be visible.