


Luis M Ruiz
-
Posts
457 -
Joined
-
Last visited
Content Type
Profiles
Forums
Events
Articles
Marionette
Store
Posts posted by Luis M Ruiz
-
-
Here is my finding. When creating a section viewport the lines hide correctly. But you are correct, directly in design layer, a hidden line rendering does not look correct.

-
Nice work, very nice work!
-
 1
1
-
-
Only if you are serious about 3d.
I typically spend min 30hr per week on projects and at this point, I can't see myself without it. A couple of years back I started with the small navigator but now I use the space mouse enterprise. I need my shortcut buttons.
-
1
-
-
- Popular Post
- Popular Post
Here are a couple of styles I am experimenting with. White model, color, and sketch all blended in a single image.

-
5
-
- Popular Post
- Popular Post
Hello again.
Card models are an interesting approach, and you are correct, in reality, the final rendering is not exactly all white but a combination of plain textures/colors with a few colored entourage, like photographing a real physical studio model. I think in this case is not just a matter of creating a rendering style but also applying a class and setting up the attributes so these can be overwritten on viewports. A few years back I created my own checklist of things to consider for this type of renderings:
•All objects by class
•All classes need to have a texture
•Cameras need to be present and effects like bloom and depth of filed need to be set
•For outdoor models, s single source of light, heliodon, 125% power, 10:00 am or 5:00 pm. I like longer shadows.
•Ambient occlusion on at 90%
•No ambient light, I let the light be controlled for what I place on the model.
• Perhaps a grey or light grey background
•Let environmental light come from a specific HDRI background, that would alter the general tone of the scene. I have my favorites for every occasion, happy to share.
•Create a rendering style, just 1 for a number of reflections, blur takes time but I use it depending on how close I am to the textures, otherwise, if it is from a birds view I leave it unchecked.
•Create viewports, 17x11" starting at 25dpi for fast reviews and increase up to 600dpi when I am totally sure I am going to like the final result.
•Export image view as TIFF
I'll post sample images from back in v2011 when experimenting with my first cardboard models. my best in those days but it served for what the type of presentation I needed for the client.

-
6
-
Here is what I learned about light and white models:
After modeling comes adding lights and then textures but after being happy with the color rendering and all looking fine. The problem I find is that if I want to create a white model rendering then lights are just too bright, so I am doing something new this time. Model > set lights with low power> put them all in a class > duplicate these lights, increase the power > put them in another class. This lets me switch lights between viewports and I can render in color or white models no problem. Something to consider.
-
After seeing that screenshot I was going to say, check your user's origin but it seems like you found the problem already.
-
But of course, this is for anyone to use. Take a look at the rendering tab on the walls, I switched the textures to be controlled by objects, that gave me the option to add texture to the top.
-
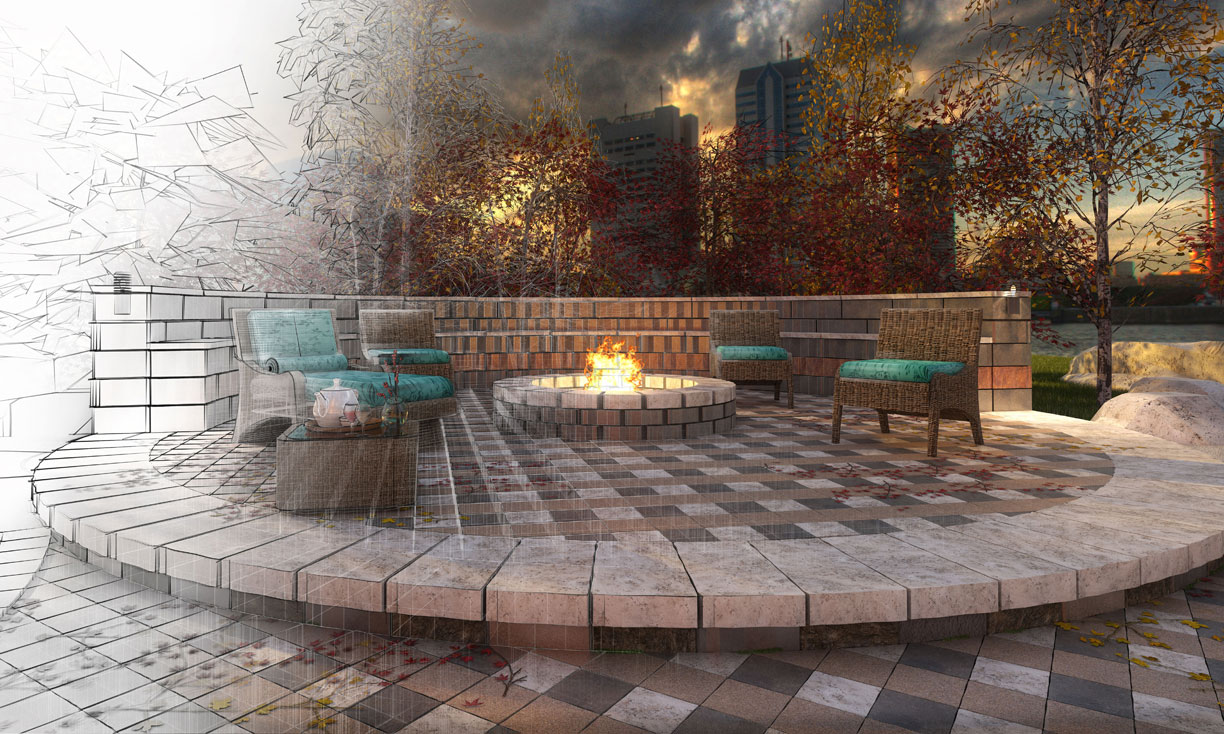
These are three samples of what I typically use for presenting renderings. A nice artistic pencil sketch style, white model, final rendering style including camera effects.

-
3
-
-
-
Congrats. The second render looks very convincing. Don't forget to share the file later so we can all learn from your challenge.
-
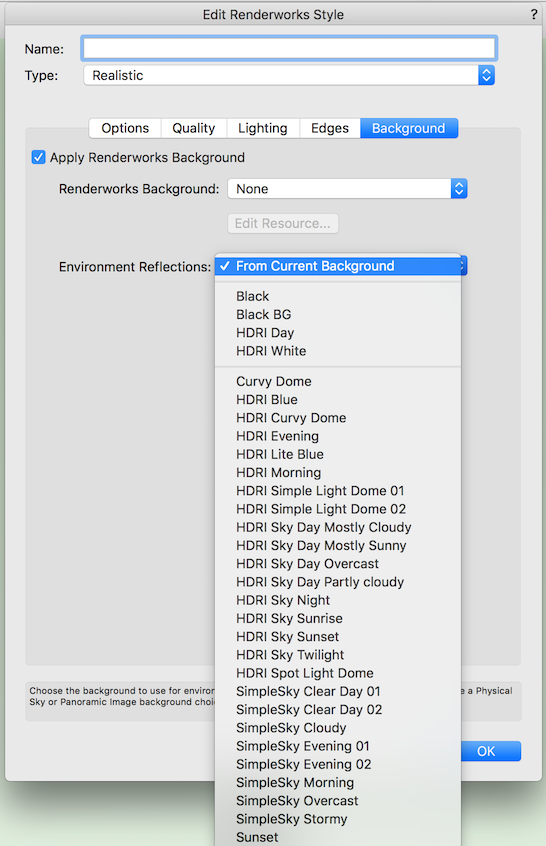
The short and quick answer, add a background.
If you don't need to see the background, create a Rendering Style an assign an environmental reflection to the scene.

-
Agree. Do not slice the wall, reshape the picks.
-
I'd recommend getting to use custom lights
-
2014 texture mapping? mm. Have you tried by offset H & V?
-
Congratulation, very nice work, keep it up!
-
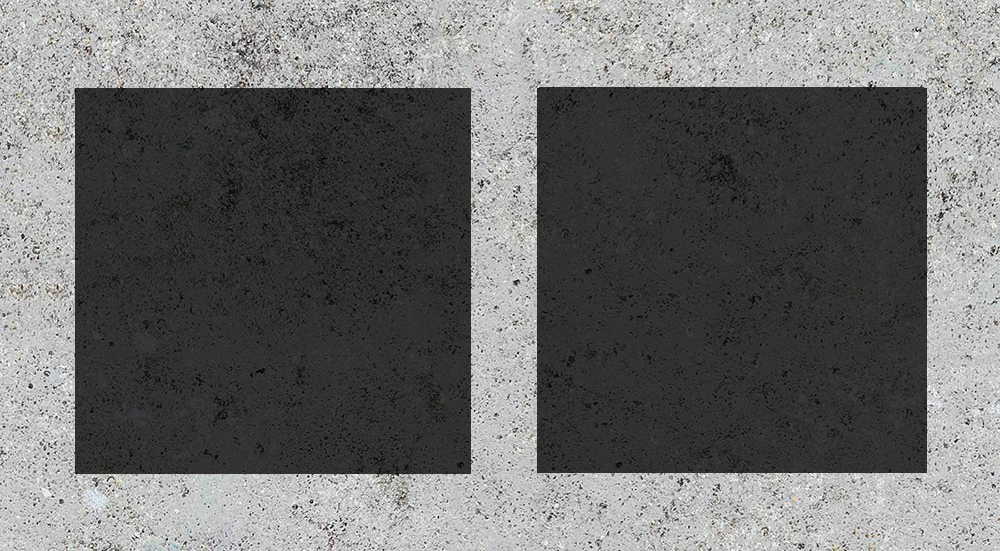
My recommendation for avoiding those spots on textures:
Even if you have 16 bounces you still need to increase your rendering settings to high.
-
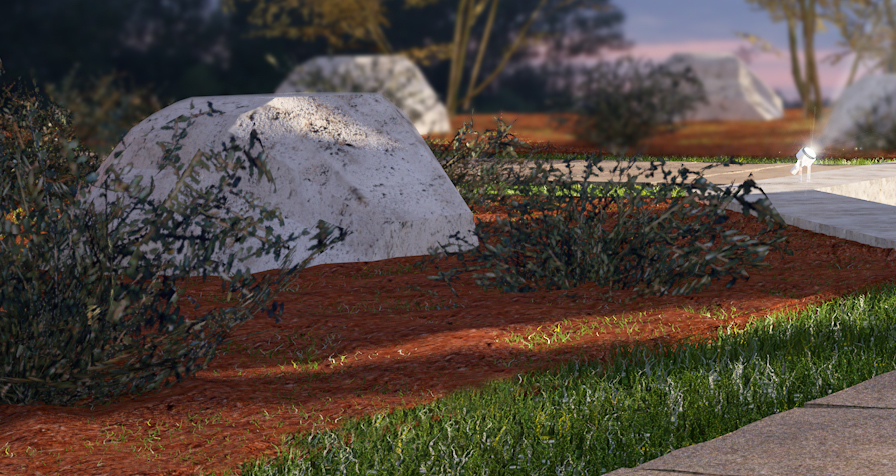
Not too long ago I needed a similar result from one of my renderings and I found that I could achieve the desired result if I use multiple objects, sharing the same plane if needed but with a variety of displacement mapping dimensions and resolutions. For example, in this patch of mulch, grass blades were needed to grow in between and make it messier and more realistic.
-
The facets are controlled by the viewport resolution. I had the other two at 300dpi and rendered the cartoon at only 72dpi, just to make a point on this post.
-
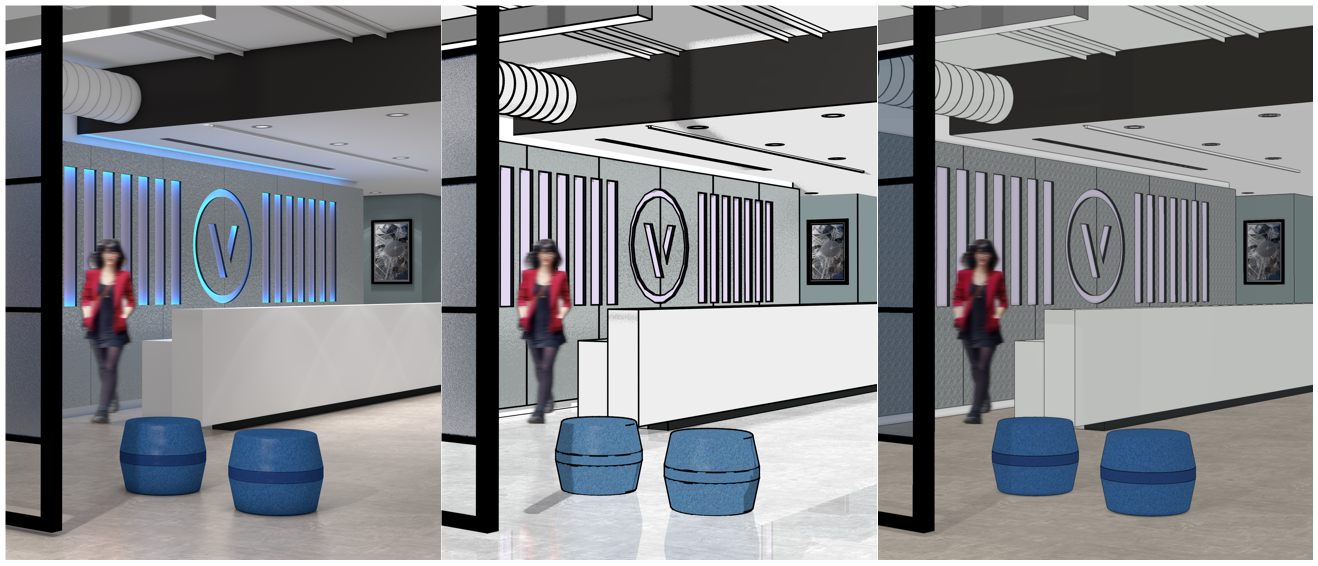
For a fast rendering and unique looking style, I'd recommend using an artistic > cartoon. It represents the models well, with quick textures and edges and in my opinion with a more fun look than OpenGL but still not a full photorealistic rendering. I've been using this cartoon style more and more lately, especially when creating early panoramas.
On this screenshot, you'll see Realistic on the left, artistic cartoon in the middle and OpenGL on the right.
Give it a try and post your test results.
-
Here are a few:
• Don't use Final Quality.
• Learn the benefits of Custom Renderworks
• If you are serious about quality control and your rendering standards, create your own Renderings Styles.
-
4
-
-
By grabbing a group of colleagues over here we all agreed this should be improved but, here is the today solution to adding these dimensions to our drawings, make use of the third mode of the angular tool, "by reference line"
-
1
-
-
You are correct Kevin. I tested this issue and it's has been reported.
-
1
-
-
If you can be content with creating an animation with only OpenGL quality remember there is a current way. It's about setting a series of saved views and making a slow speed transition between views but at the same time record the screen with another software. A trick that solves the problem when I need to present ideas not polished enough.
(sort of like SketchUp transition animations)


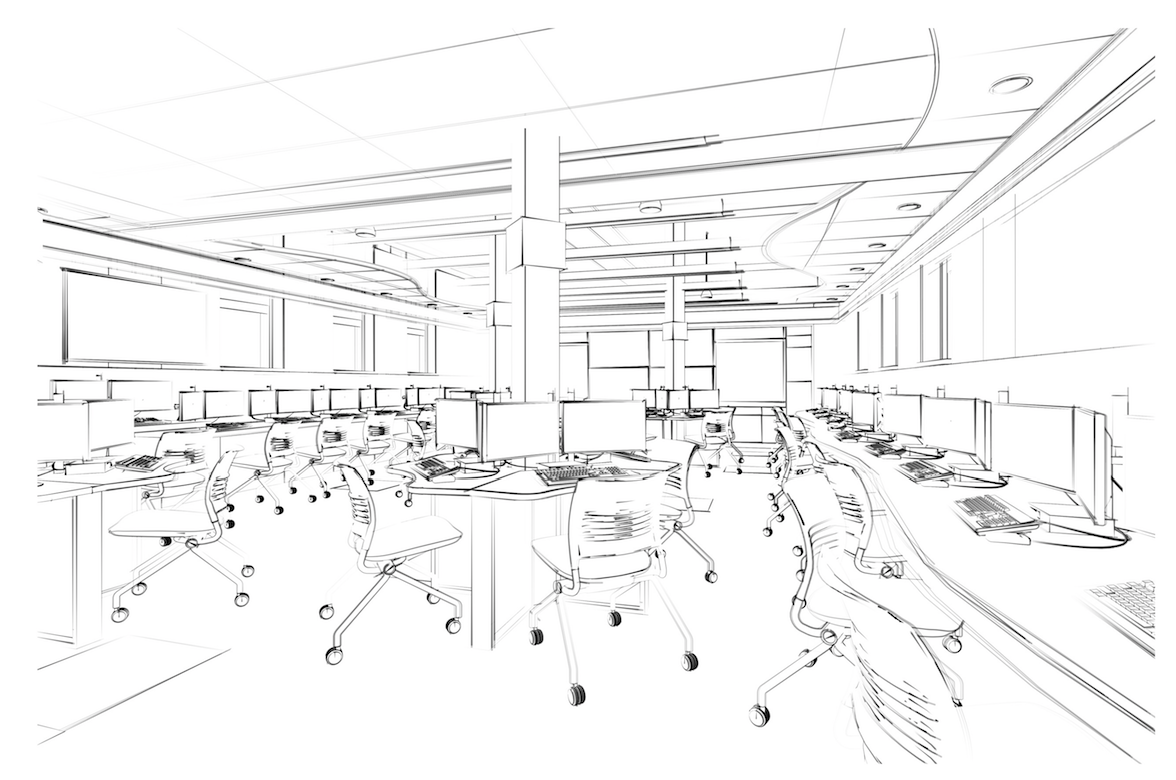

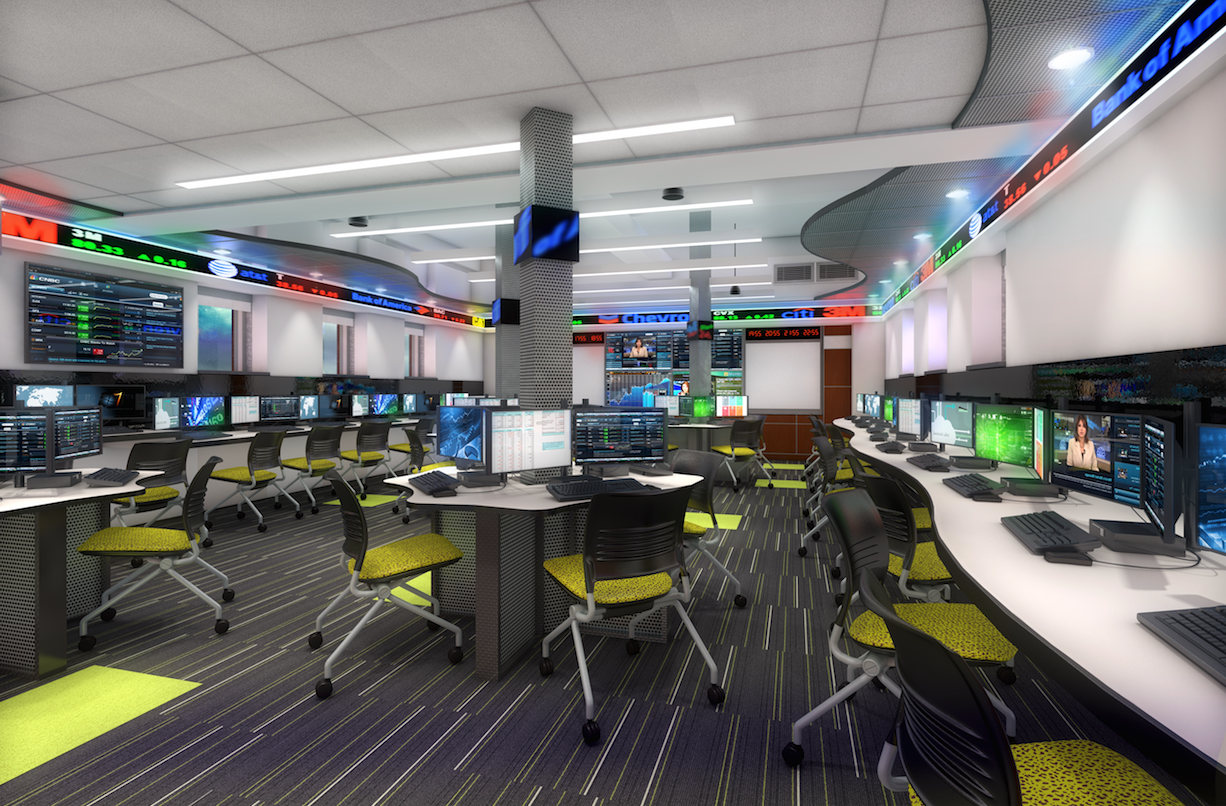

Hidden Line Render Mode not hiding everything in 2018.
in Rendering
Posted
I just replied to a similar behavior in another post. Try for the moment creating section viewports instead of pure side viewports with a hidden line rendering.