
Luis M Ruiz
-
Posts
451 -
Joined
-
Last visited
Content Type
Profiles
Forums
Events
Articles
Marionette
Store
Everything posted by Luis M Ruiz
-
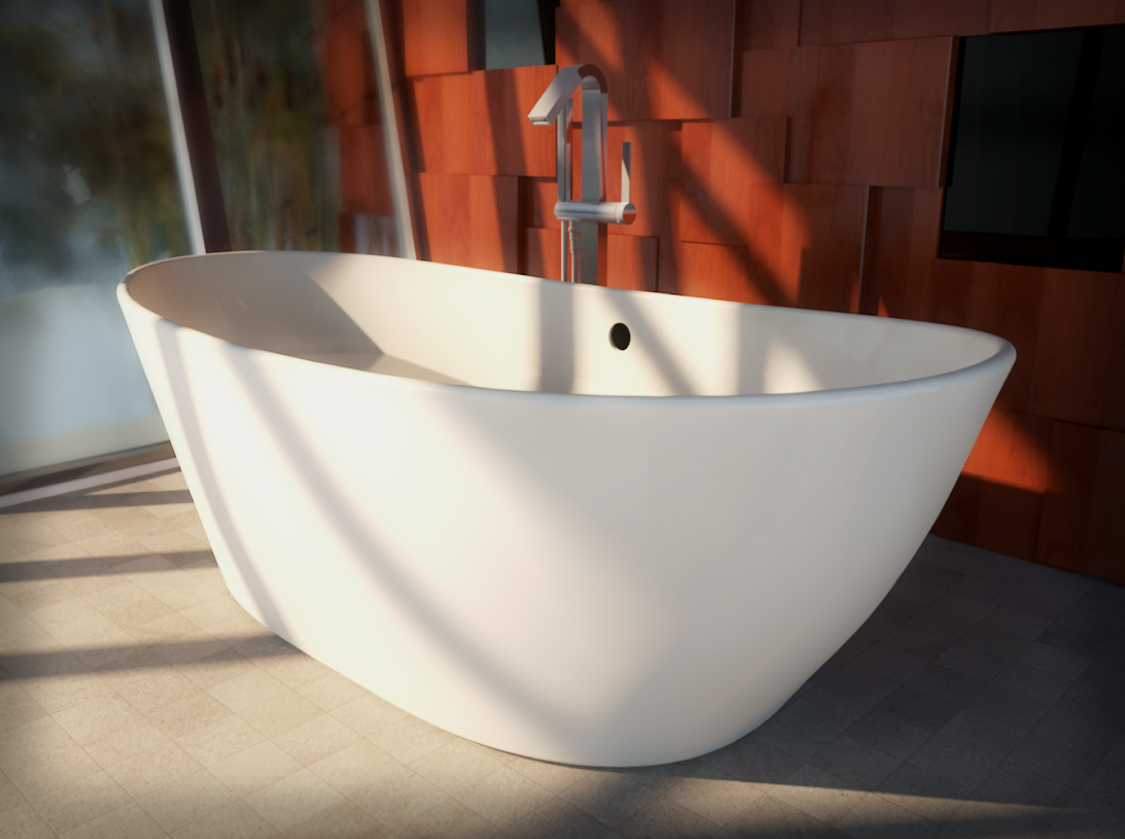
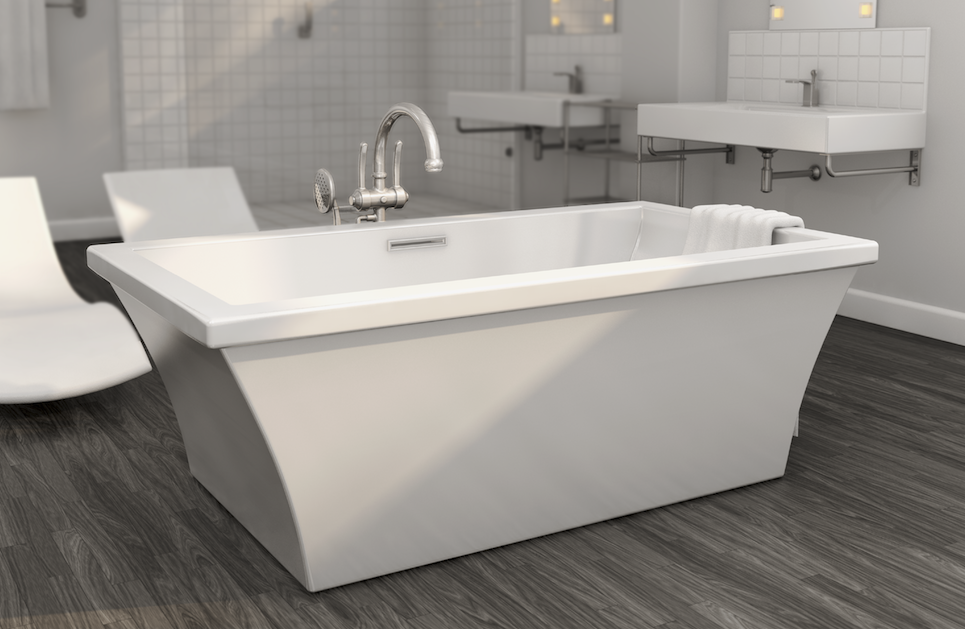
When possible, check out how to remake those tubs using nurbs, results are really appealing.
-
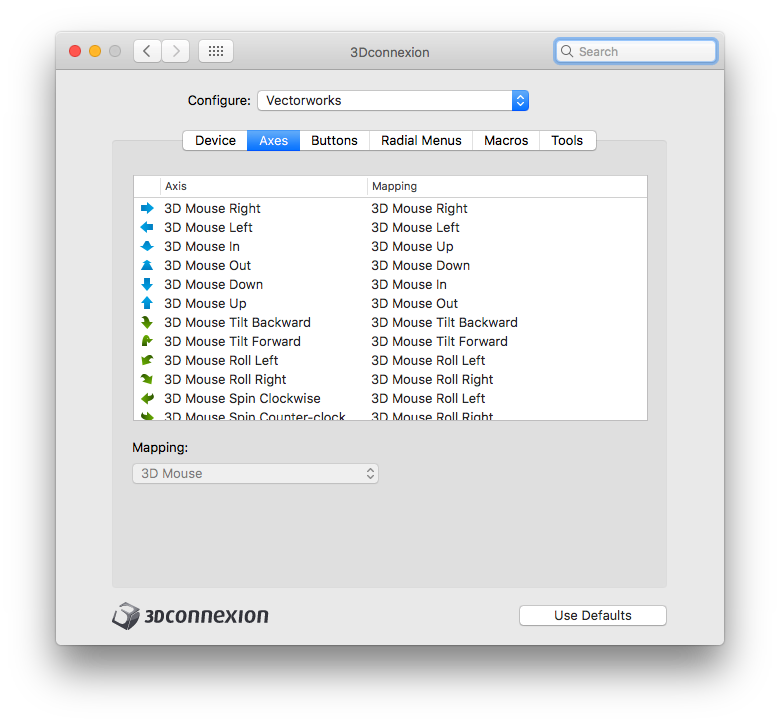
I guess the beauty in this is that if we work in this 9 hr a day we must enjoy the time seating in front of the screen. To modeling, there is not a single approach, the device settings is what makes the difference. Adjust them to your liking and we are ready to roll. Here are mine.
-
I used them all and all the time, shortcuts and all and I thought I was fast and precise.........now I drive in style
-
Fit to object button is one of my favorites. Also, I think I added a change projection command to one of the view keys and that I use a lot. Basically all I use is perspective now, I guess I abandoned isometric views since navigation is not really for that. As you noticed, the whole environment is set in Vectorworks for moving around the model as the first person, settings for other modeling programs are based on rotating the object, I guess it is ok if I am designing a wrench tool but not intuitive for architectural buildings.
-
Well, like we say around here, The Navigator chooses the user.
-
Also remember that sheets are control by resolution, 72 dpi is the default, good for 2d lines but for renderings crank it up to 300 or 600dpi, you'll be surprise with the quality, then export your pdfs. I do this type of process for my graphics team over here.
-
I have this file where I am replacing boxes for 3d projects we've done over these past months. Actually thanks to "project sharing" many collaborators are providing a large contribution. Navigation using these devices has really no comparison. The only drawback is that I am personally becoming so dependent on these gadgets, more productive yes but spoiled at the same time drone_navigation.mp4
-
I use both devices. All shortcuts assigned to the buttons makes modeling and viewing go faster. icons? Negative, no yet, just names.
-
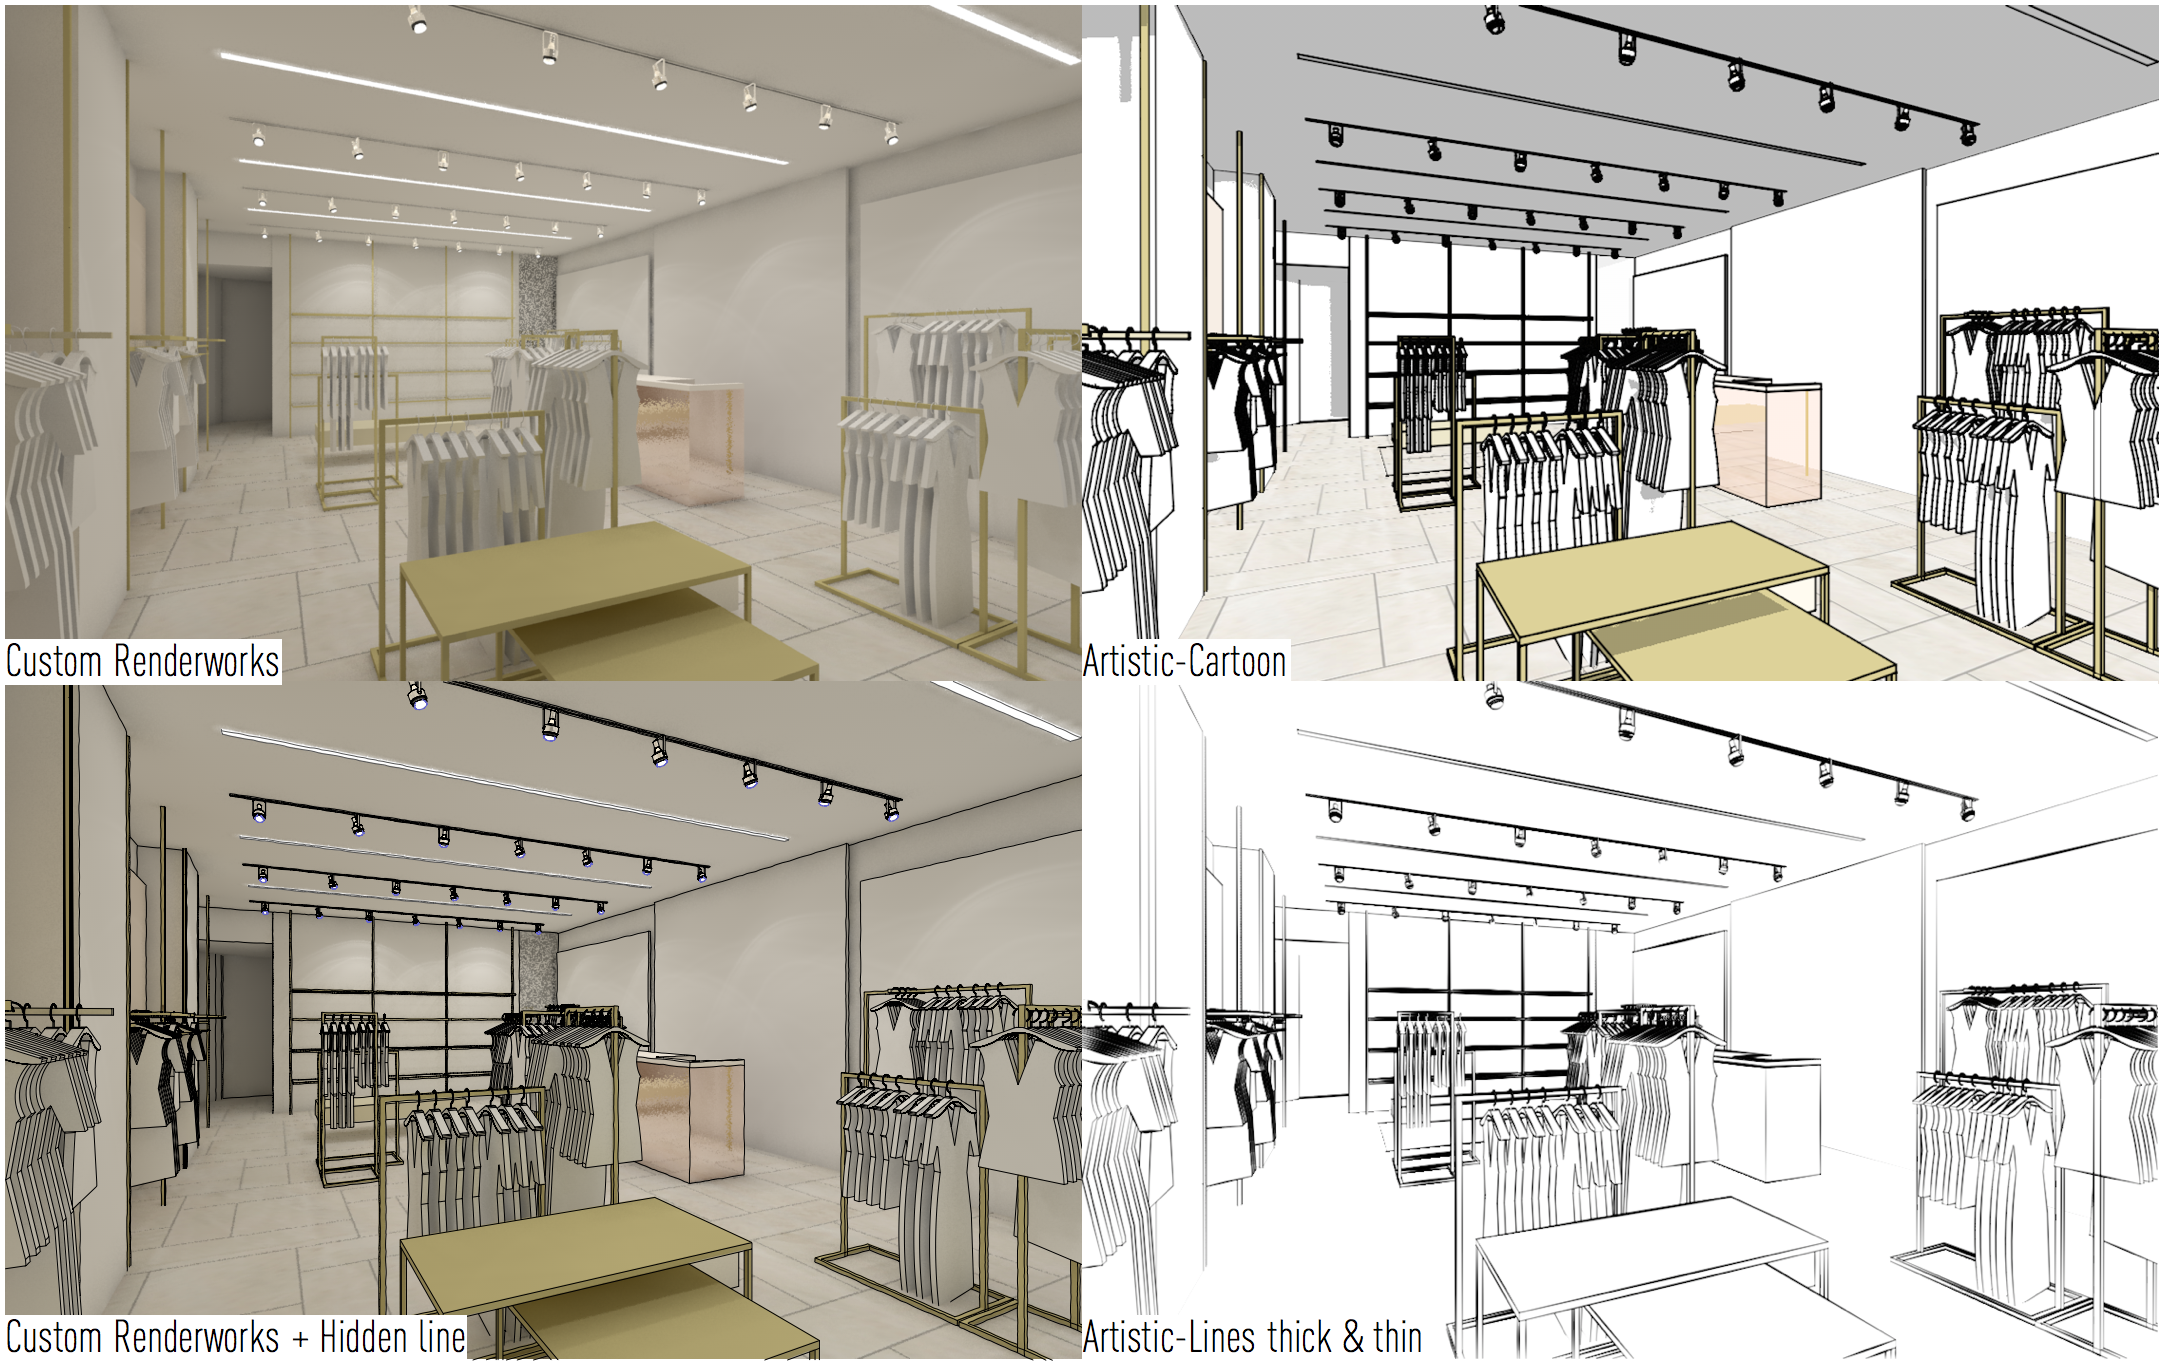
When using artistic rendering with edges, you can set the edge to be 1,2,3,4,5...etc or even, .5, .3, 0.5, .05 and that makes thinner lines.
-
ah, something else I forgot. Try configurating your buttons to tools or modes that make sense to you, don't get stuck with something you don't need. My small navigator has Left button set to radial menus with rendering modes and Right button with switching projections between isometric and perspective. Remember, helicopter mode works great in perspective.
-
Friends. Just use Helicopter Mode, for vwx that is the best way to start getting use to the navigator. I going to push for changing the name to "Drone Mode" that seems more current.
-
My first reaction when I saw the screenshots was to check on the geometry of those hollow objects and possibly remake them again. I'd suggest controlling your light levels before rendering, one by one and see the effect on the scene. start with all off, then turn on light sources one by one and finally to balance the scene add ambience light.
-
Mmh, adding reflectivity to individual objects? that's a good one.
-
Hi. I thought I'd jump into the conversation and offer a hand. I grabbed the file and added a edited a few things. Here is my list: • I turned off the floating point lights. These were not corresponding to the tracks or glow from the ceiling. To make the scene realistic light must match a light source. • I did noticed the hangers having too many points but did not bother the speed of my rendering, but what I did do is convert the extrude profile into a nurbe curve, duplicate it and created a loft solid, I ma a big fan of using nurbs now, saved lots of memory processing. • Each one of the spot light symbols contains a IES custom light, these produce a more realistic halo projected on the walls and floor. • Since this is an interior rendering and not knowing if the store is inside a mall or faces a street I did not use environmental lights, I left the glow objects and track light fill the place. • Custom Renderworks did the trick here, some ambient occlusion, 8 bounces. Also set the indirect light to medium or higher to avoid those spots on walls. • These images are a quick previews. 72 dpi and small. • Since I imagine this is just a starting rendering and the card board clothing serve as place holder I recommend going for an artistic look, cartoon is actually a good friend of mine as this stage along with pencil sketch. • If you do want to go more realistic look, add edges to the objects on scene, hidden line can do the trick or start using a rendering style. • Keep in mind that is best to create rendering using viewports. This is a fun exercise, post later further results please.
-
when testing hdris, be sure to turn other lights sources off so you can appreciate what the background provides to the image.
-
This is my typicall workflow when creating renderings. For showing quick previews when someone is looking over my shoulder and asking questions > Fast Renderworks For middle of the road and while having my daily coffee > Custom Renderworks, adjust quality as needed For those almost there moments and fine light tunning > Always Renderstyles + adjust sheet resolution as needed ( 25dpi, 72dpi, 150dpi, 300dpi, 600dpi)
-
Without looking at the file I'd check for unused nurbs curves and left over 2d lines.
-
This was a fun thread to read and with a happy ending. congrats to all.
-
Version 1.0.0
131 downloads
This set of wrappers are good for creating multiple shells from a solid object. Steps: Name you solid object > set the desire thickness > spacing > run the script. -
This marionette I posted earlier last year but seemed to be lost in action. This set of wrappers are good to create multiple shells from a solid object. Steps. Name you solid object > set the desire thickness > spacing > run the script. Create_multiple_shells.vwx

-
Doctor, I conquered.
-
So nice to read this comment, that makes my Monday morning. Thank you. Luis
-
After reading this tread I realize there is no mention of .........attempting to render the scene in design layer or by using viewports?
-
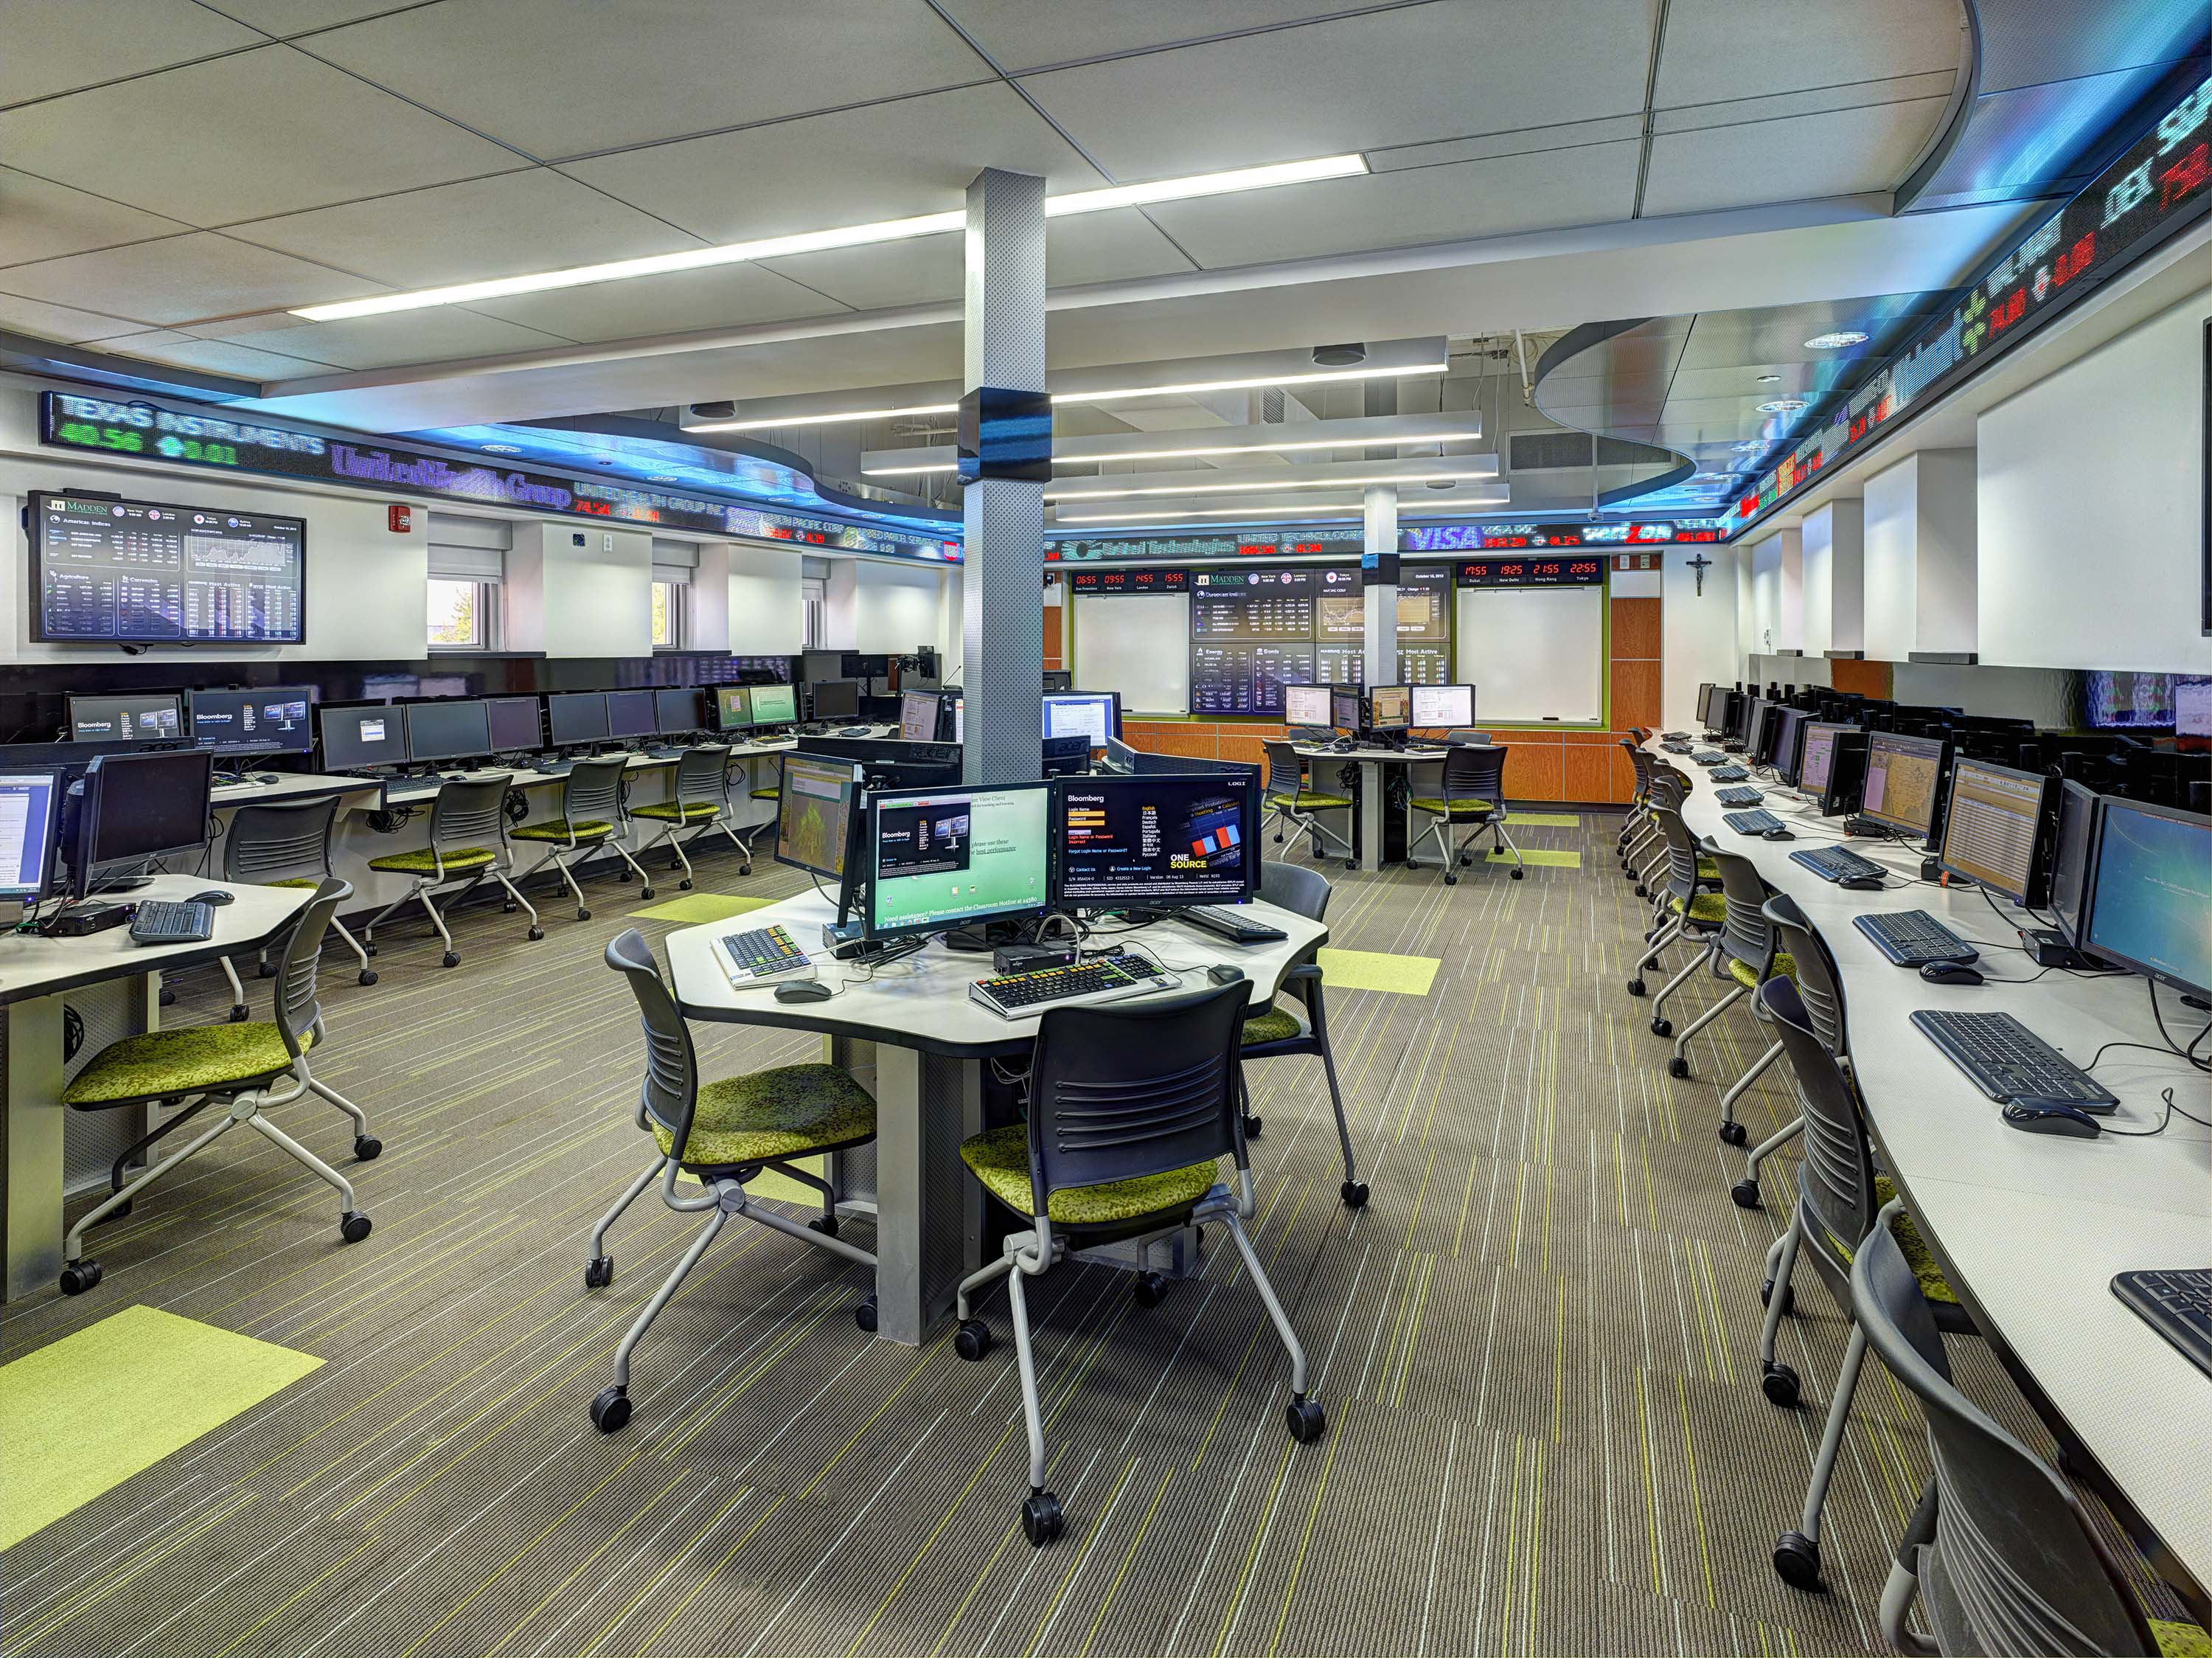
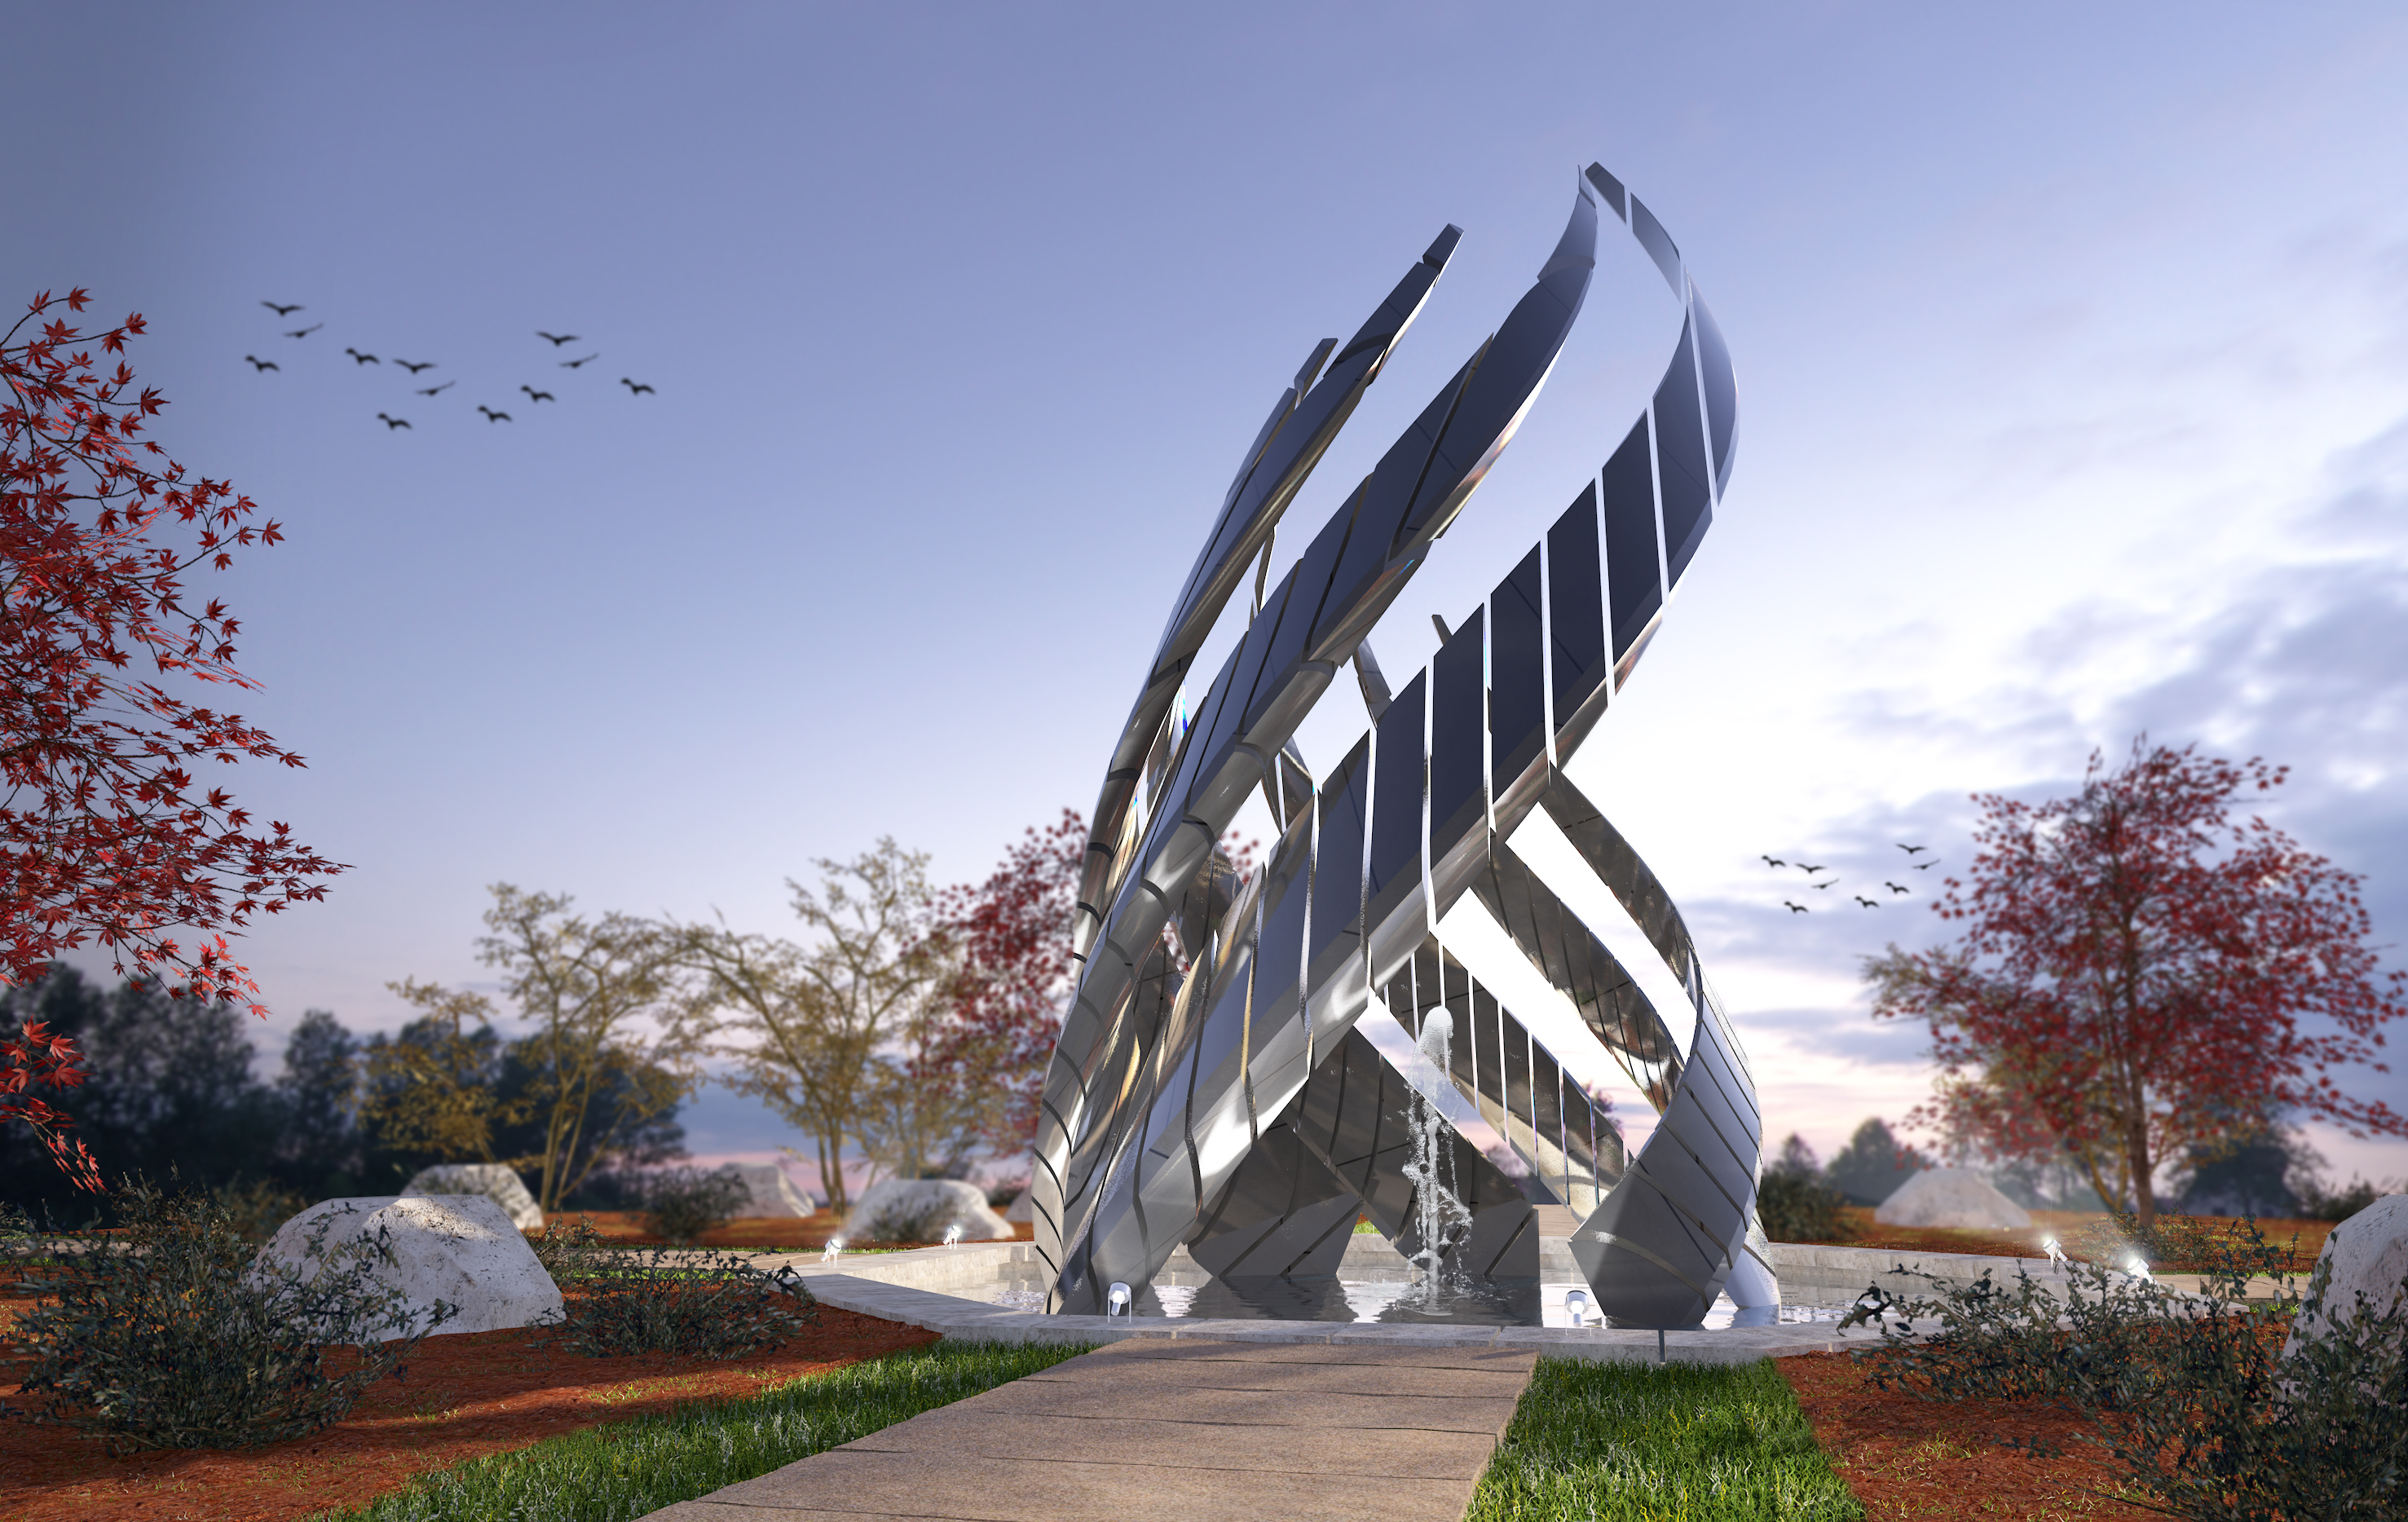
Next Level Rendering Techniques Webinar - Available Online
Luis M Ruiz replied to Luis M Ruiz's topic in Rendering
and here is a photo of the final project:
-
3DConnexion Spacemouse Radial Menu settings survey
Luis M Ruiz replied to Neil Barman's topic in General Discussion
Hi Neil. For my radial menus I have: solid operations, add, subtract, intersect and section. for my second radial menu is all rendering or view modes: fast renderworks, hidden lines, custom renderworks and open gl.