MaxStudio
-
Posts
319 -
Joined
-
Last visited
-
I guess more of the problem stems from the fact that I do Architecture for a living and not coding/scripting. A lot of time was put into writing my past scripts. My entire office used them and relies on them. Time was something I had when I was younger now not so much. I don't have the time to go analyze my old code. That's really why I don't want to veer to far from the standard marionette nodes. Thanks Again
-
Thanks to everyone for all of their help!
-
I guess it's possible to create my own python node, although, I don't trust that vectorworks will continue to support vectorscript or python. I previously have put a lot of time into my own scripts which have been rendered useless after version 2016. And this is the main reason I want to stick to their provided marionette nodes and also why I'm disappointed that marionette didn't offer more in the beginning. Lets hope they continue to provide support for marionette and python in the future.
-
Yes if that is the case it is disappointing. I just wish they had Marionette a little more polished before releasing it. Organization is a huge part of coding or scripting. I hope they eventually have a better way to organize and create drop downs in the OIP. If they haven't gotten it done by 2022 since 2016 that is very unfortunate.
-
Ok so i've been playing around more with the numbers in the beginning. At the moment if I use "01" it gives an error. If I use only a single digit "1" or "2" it seems to work. If I use "11" I also get an error.

-
Same error?
-
Can I use spaces in the naming? Or does that cause an issue also?
-
For example I changed the name of "Overall Height" to " 01 Overall Height" and receive the syntax error below.

-
I've tried adjusting the locations and have been unsuccessful in reordering. I wonder if has anything to do with the order the node is added to the overall script. I am working on 2016. I am curious if in the newer versions of vectorworks this issue has been resolved or made easier to organize the OIP.
-
I have tried that but I get a syntax error any time I add a number in the beginning.
-
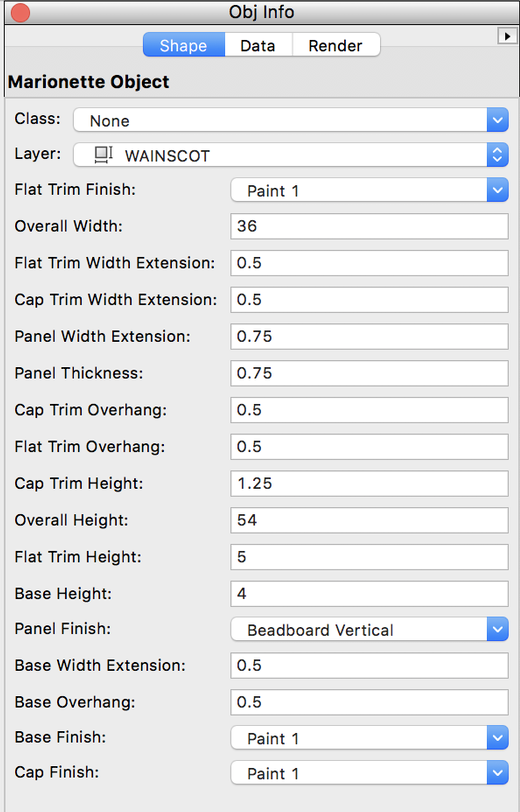
Every Marionette node object I create seems to list the inputs in a random order in the Object Info Palette. Is there a way to reorder the listed inputs in the Object Info Palette? Is it possible to group certain items? My office is still on Vectorworks 2016. See the attached image.
-
i'm a little late to the convo but I'm still using vectorworks 2016 Try this: Create a trimmed opening for the overall width of the opening (this will be the door that cuts the hole in the wall) Create a second door that will be the actual operating door (change the jamb depth to 1", change the interior and exterior trim depth to 1" and the trim width to 3") Duplicate the operable door and change the width to the size of your sidelight Line it up with the trim of the operable door (created in step 2) Remove the interior and exterior trim, remove the hardware Set the opening rotation to 0 degrees and Set the L/R Stile Width to 1-1/2" Duplicate this "sidelight" and move it to the other side of the operable door (created in step 2) Group the operable and 2 sidelights You should now have the following: 1 trimmed opening that will cut the hole for your full door a group containing 1 operable door 2 sidelights Place the trimmed opening in the location you want the door and then align the center of the group with your trimmed opening now you can set the operable door on the schedule and call out the sidelights you can now add transoms over each door/sidelight if you want 1 transom over the full door then add it to the trimmed opening if you add a transom you may want to increase the size of the Mullion depth so it overlaps the top trim of the operable door if you want to add a threshold add it to the trimmed opening It's not perfect but better than the default tool and I think it is better than using a door and 2 windows. Cheers!
-
Second Floor Walls under First Floor Roof
MaxStudio replied to MaxStudio's topic in General Discussion
Thanks for your reply line-weight. I'm curious and scared of solution 1 (with a new set of problems) Solution 2 might work, I'll try it out but, I'm not sure how doors and windows will interact with multiple walls stacked on the same layer. (in this case there is no window or door so it might work) -
Second Floor Walls under First Floor Roof
MaxStudio replied to MaxStudio's topic in General Discussion
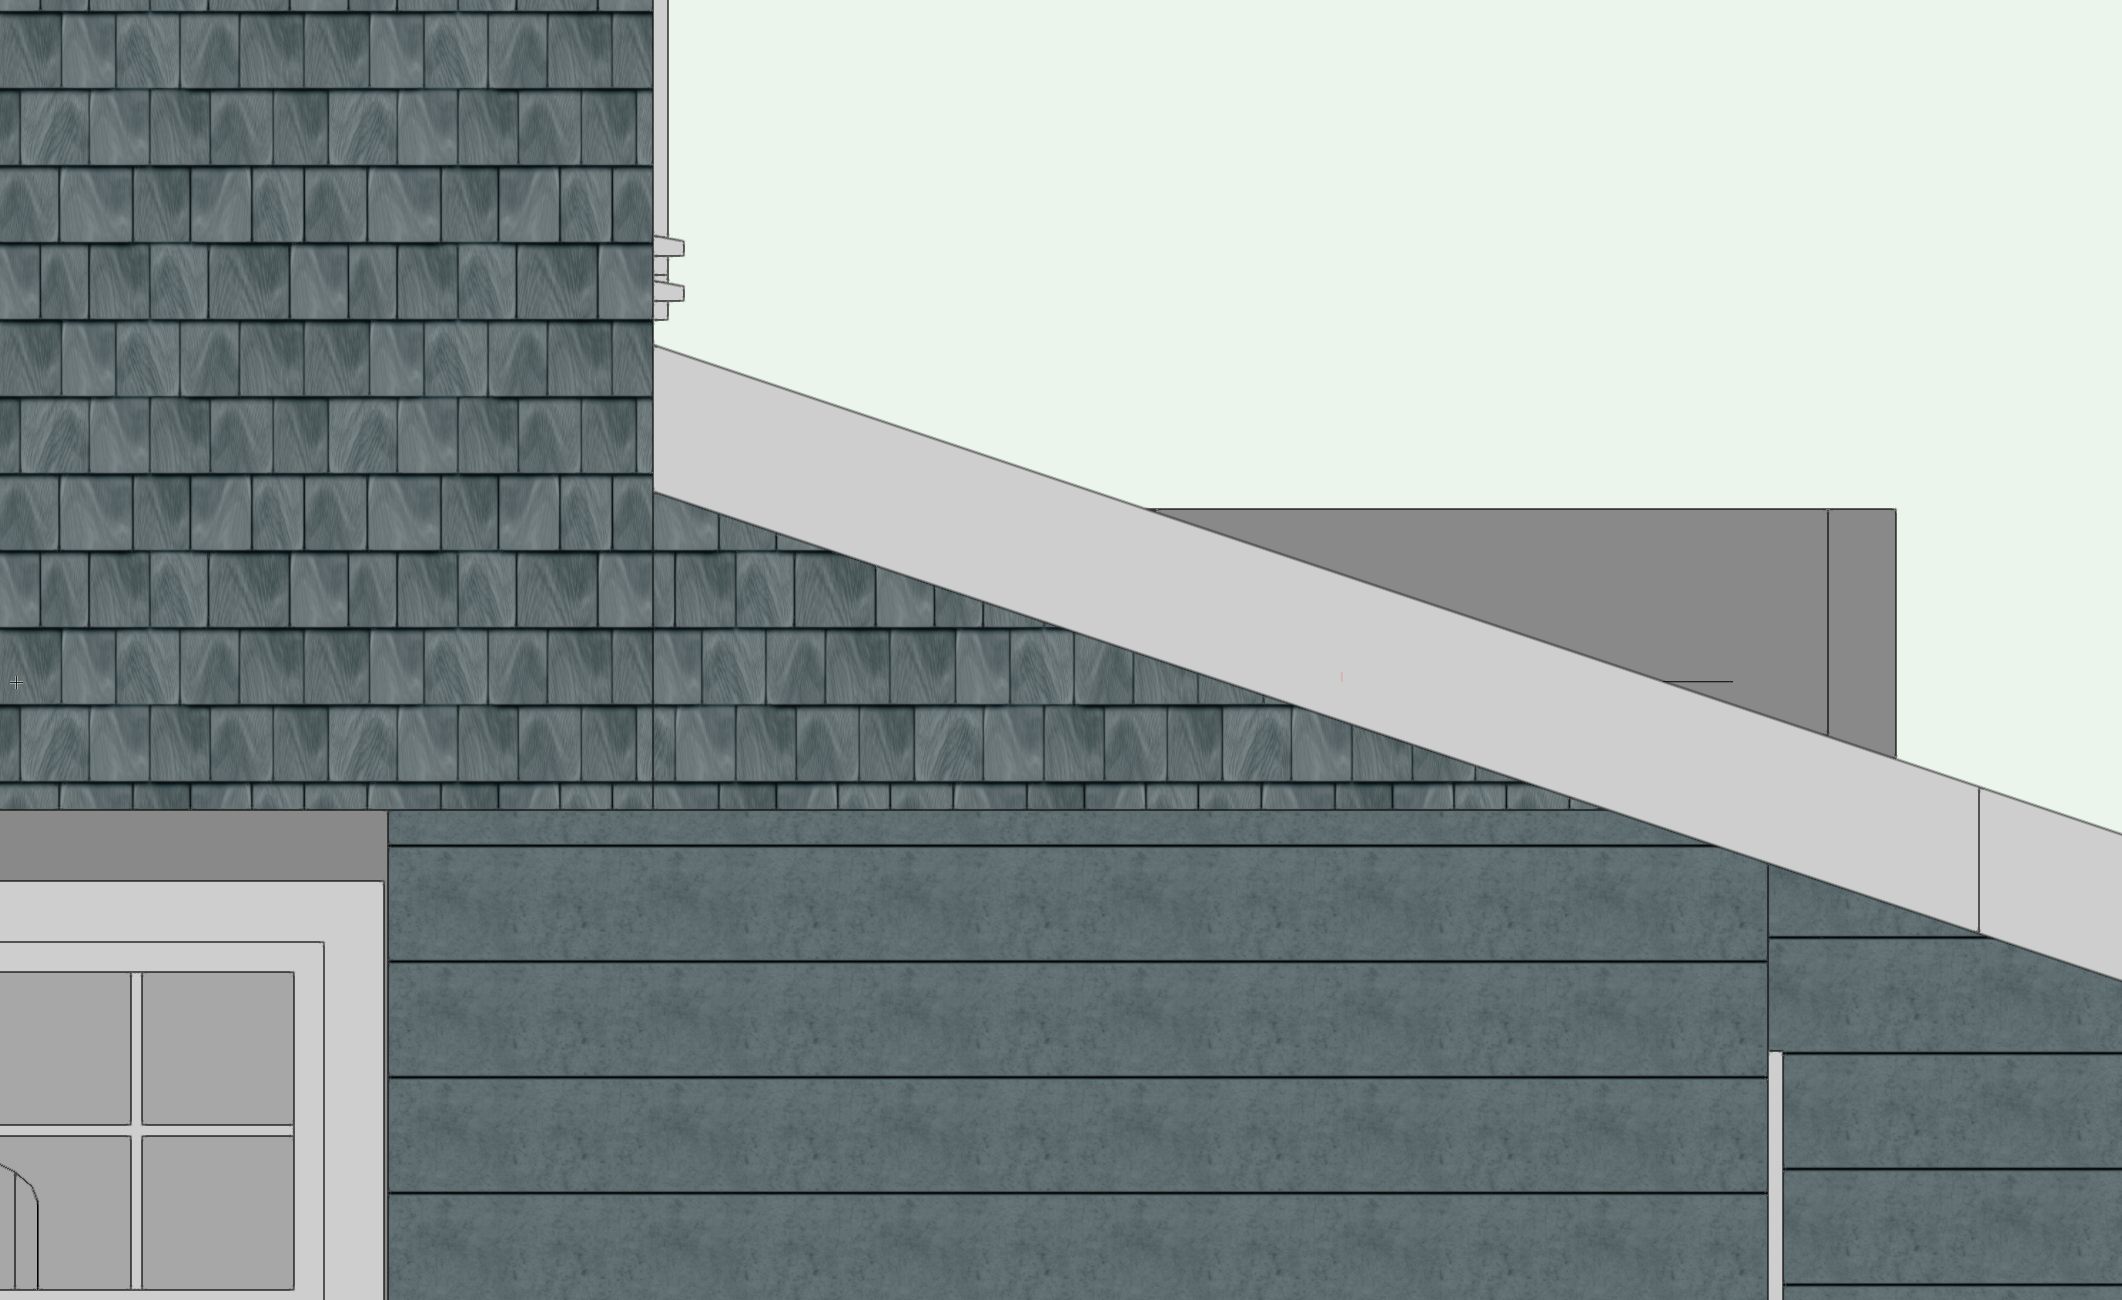
ps don't mind the gray portion of the wall that is beyond the roof that is another wall that has nothing to do with this situation. -
Second Floor Walls under First Floor Roof
MaxStudio replied to MaxStudio's topic in General Discussion
So I've been playing around with this more and I've come up with a solution that seems to work. It is best to have a class that is hidden when in plan view and visible when in elevation or perspective view. Once the portion of the wall below the roof was drawn, on the 2nd floor walls layer, I needed to offset the bottom of the wall. (the tricky part, for me, was that I needed to get the entire wall below the roof) so I offset the bottom about 36" and only made the wall height 6". I then fit the wall object to the roof object and it made the proper connection. I then needed to return the bottom of the wall to it's original position. (I wasn't sure how the model would handle this because the original bottom position of the wall was above the lowest portion of my roof intersection.) It worked and I'm happy but I guess there is no other way around the hidden class.