Stephan Moenninghoff
-
Posts
1,330 -
Joined
-
Last visited
Content Type
Profiles
Forums
Events
Articles
Marionette
Store
Everything posted by Stephan Moenninghoff
-
Is that a 3D salad?
-
Extruding an arc gives you a pie, which you then need to shell to get rid of the sides.
-

Cabinet Drawers
Stephan Moenninghoff replied to khumenny's topic in Wishes Granted / Issues Resolved
That's possible with the full version of interiorcad and yes, it's an extra plugin. There is an entry-level version, interior xs, which has full capabilities but does not do fittings, parts lists and costing. The 2021 version of interiorcad/interior xs will also feature framed fronts, face frames, openable fronts, awning doors, notched toe kicks and a slew of other features made for users outside of Germany/Austria/Switzerland. -
Cabinet Drawers
Stephan Moenninghoff replied to khumenny's topic in Wishes Granted / Issues Resolved
What would you like to do? -
@Travis.Designer Here is the help page for creating custom hinges: https://conf.extragroup.de:8443/im/latest/creating-custom-libraries However, for that type of hinge this will not work 100%. I will post a link to a Youtube video here shortly which I have just finished, explaining how to create custom fittings.
-
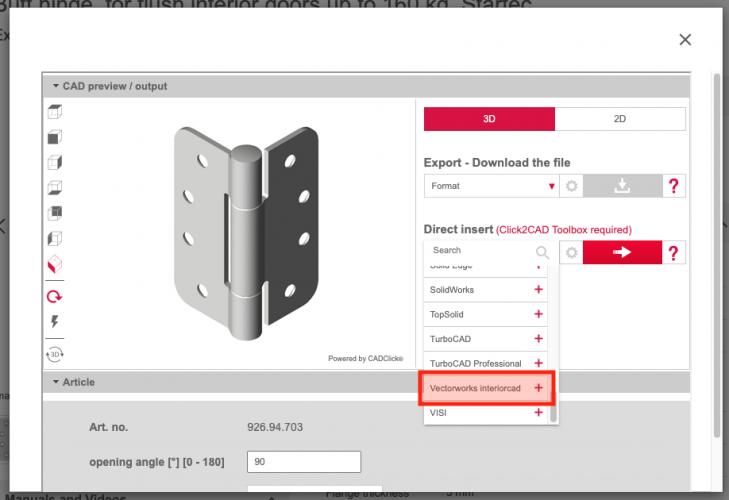
As for the file format: you can simply choose "Vectorworks interiorcad" from the list and then copy and paste into your document. This is a Java applet and is slightly temperamental so if it does not work as expected, just choose STEP and download. Then, drag and drop into your document. I will make a short film to explain how to proceed with the hinge from there on. (As soon as I get a chance).
-
Afk right now. Will explain in a bit.
-
Marionette Resources for Beginners
Stephan Moenninghoff replied to Robert Anderson's topic in Marionette
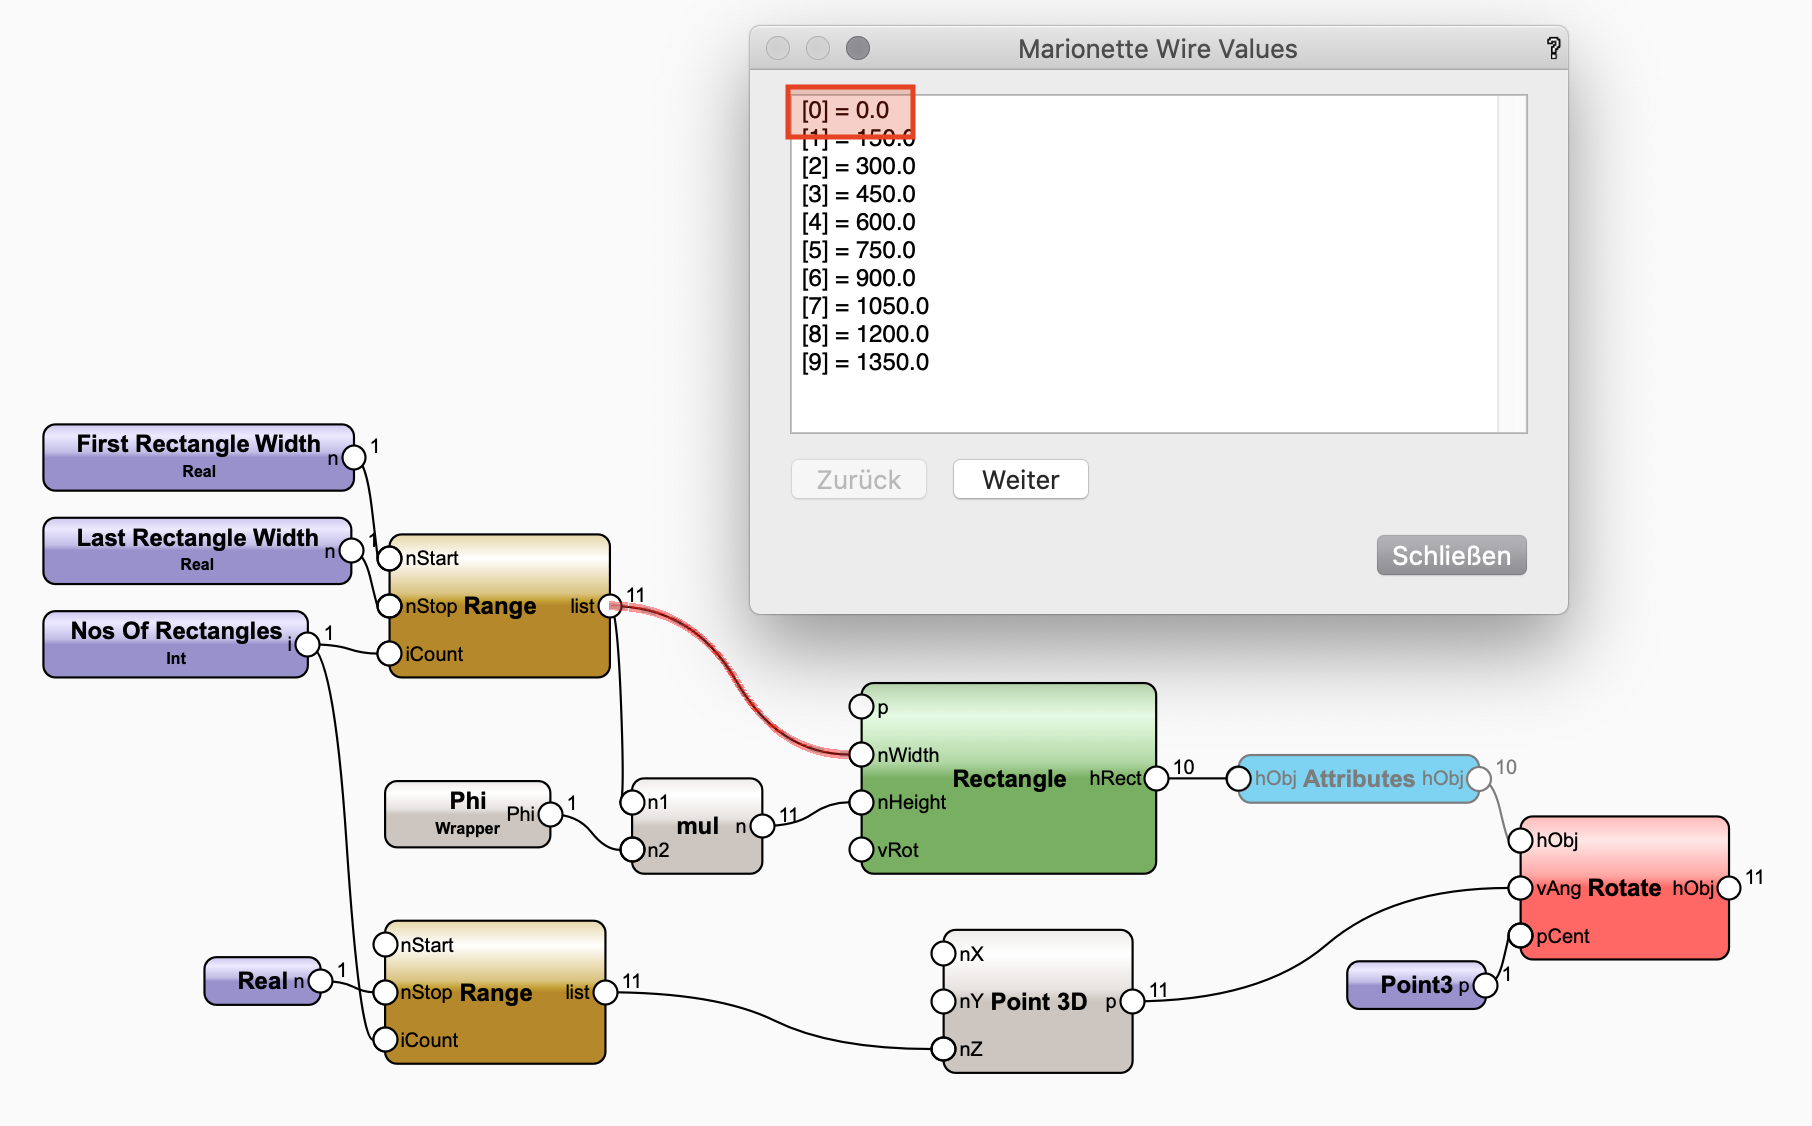
Ah, you mean the rogue object? Replace the 0 in the 'First Rectangle Width' node with 50. You are creating a dead object so the count for the rotation values is one more than that for objects. You can see it if you go to debug mode: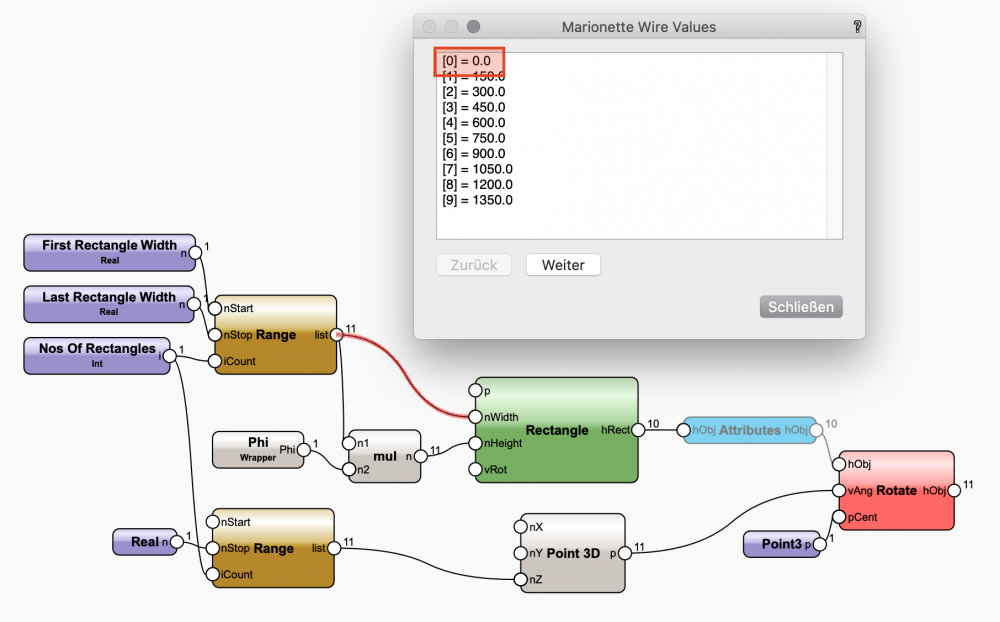
-
Marionette Resources for Beginners
Stephan Moenninghoff replied to Robert Anderson's topic in Marionette
But that is what it is doing in your example, no? -
Marionette Resources for Beginners
Stephan Moenninghoff replied to Robert Anderson's topic in Marionette
What is the result you were expecting? Like this?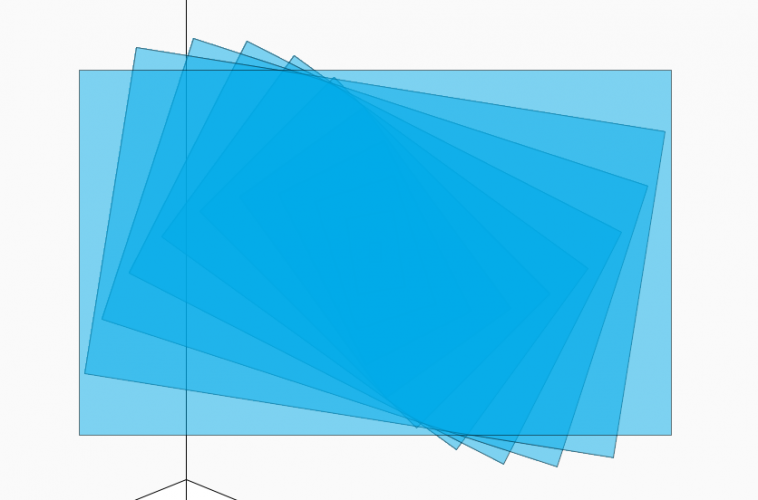
-
@Tom Klaber are you on Windows?
-
Version 1.0.0
221 downloads
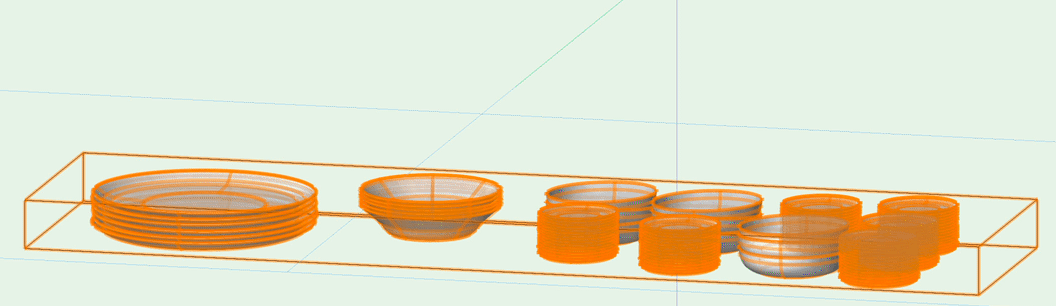
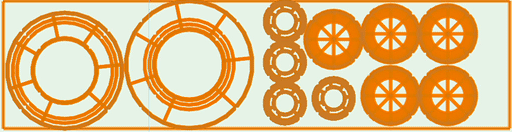
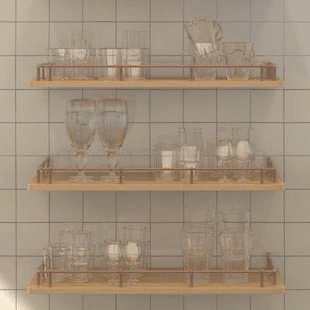
This Marionette places glasses, cups and dishes randomly on a shelf. Choose to display glasses, cups or dishes or any combination Cups and dishes are rotated randomly Objects outside max shelf height are automatically deleted from stacks- 1 review
-
- 15
-

-

-
Not strictly. Diameters are used to determine which is the largest object participating in the zig-zag array. Objects falling below a certain diameter are assembled in rows, then the remaining space is used to distribute them and as a last step they are shuffled about by a random value. It doesn't matter. Not really. The only limit is that I will stop filling up the shelf once I have finished the last of the distributor modules (because I cannot loop).
-
They are stacked symbols and symbols outside of the max vertical shelf space get deleted. That's all straightforward . The hard part is: objects get placed randomly. That's kind of the point of the object. You want each shelf with a different set of objects and different placement. So, it's not about the stacking, it's about placement on the horizontal plane in x and y and filling up the shelf in x and y. Does that make sense? I'm posting the object soon anyway. Maybe it becomes clearer then.

-
A new project. I'm filling up a shelf with plates, bowls, glasses etc. Mainly round or roughly that shape. So I'm doing the math but it is impossible to guess the total length as the filling is not linear, as with the books because I have the shelf depth to take into account. So, I'm looping through the process until I have filled the shelf. I can see no other way.

-
I wonder if an option could be added to create a loop that will be executed until some condition is met. Think about filling up a shelf until full and then stop. I haven't found a way to do this other than repeating a wrapper n times and using valves to stop the unused wrappers getting executed. Unfortunately, this makes debugging inside of Marionettes very slow because the valve does not seem to start working until the object has been exited. Also, with each repeated wrapper, the compile time gets longer. This makes duplicating the object slow in the document (although I am sure my wiring could be optimised 🙂 ). Any ideas? Could this even be implemented at node level?
-
 Ok send me the file please. I'll have a look.
 -
You also need to assign the values for width, height and depth. I think you probably forgot to set those.
-
Can you try and remove it and then add it again?
-
Please deselect everything. Check the Attributes palette. Do you have a black fill there or a "by class" style with a black fill?
-
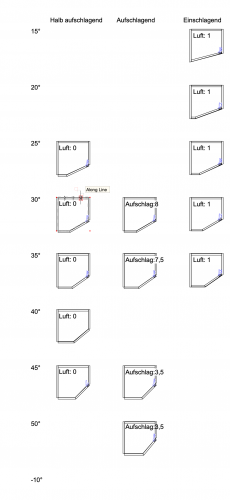
I think I answered this already? You need an extra 3D part. There are no disadvantages as to manufacturing because you can still attach your fittings. The only drawback would be that the individual custom part would not adapt to reshaping of the parent cabinet. You can. This type of hinge is not supported by the interiorcad hinge tool - yet) but you can still add it. Import the hardware, attach an interiorcad 3D drilling, group it and run the "Assign Fitting Type" command (under interiorcad > Fittings). Place it appropriately and send to CNC or export parts list. It will be accounted for in both types of exports. Angular doors are supported. You may have to play with the type of construction where the door hinges. Manufacturers require very precise parameters for particular hinge types. Here is an example document listing all supported types of angular door construction types: Angular hinges.vwx
-
Hi Zeno, for the c-shaped panel, you need to use a custom part. You can still use your usual fittings. If the custom part touches the surrounding parts, a grid will be shown as soon as one of the interiorcad tools is running. As for the cutout, here is a little movie showing how to go about: Cutout.mp4
-
Not yet. I think I read somewhere that it is not as easy and straightforward to implement as one would imagine 🙂
-
 @SimA you need to define your rail within a box that has the dimensions of the cabinet box. Then, link the box width, depth and height to the cabinet's box width depth and height and you're good to go.