
E|FA
-
Posts
1,246 -
Joined
Content Type
Profiles
Forums
Events
Articles
Marionette
Store
Everything posted by E|FA
-

Add "Plug-in Object Style Options" button to OIP where relevant
E|FA replied to E|FA's question in Wishlist - Feature and Content Requests
But still of interest, especially if you’re willing to share the worksheet. That’s a technique that’s outside my comfort, but it would be useful to look through. -
I completely agree with @Jeff Prince. In my case this is always called out by the structural engineer as part of their shear wall schedule and typical details. If needed to indicate specific placements due to potential conflicts with other items, I will include the anchor bolt in my details with an "anchor bolt per structural" callout. These are 2D drawings and are not part of the model.
-
I don't know if this will help, but in situations where inserts into Walls have problems, moving the Wall 0,0 will force the wall to reset without actually moving it. You could try doing that with both the Roof and the Wall.
-
If you build a 3D polygon (or Nurbs) of the hole you want to create and assign it to the Site-DTM-Modifier Class, it will create the hole you need.
-
Add "Plug-in Object Style Options" button to OIP where relevant
E|FA replied to E|FA's question in Wishlist - Feature and Content Requests
Assuming I actually understood why they're separate, couldn't the OIP have a button that calls up the "Plug-in Object Style Options" window? They'd still be separate, it's just a shortcut to get to the separate settings. In addition to being a bit quicker and consolidationg settings, there's at least a chance that someone who doesn't know where to look for the settings can stumble upon them. -
Add "Plug-in Object Style Options" button to OIP where relevant
E|FA replied to E|FA's question in Wishlist - Feature and Content Requests
I've even voted that one up... Vote there. -
Although the Corner Window option is far from perfect (buggy), an equivalent feature for doors would help.
-
I find this very unintuitive, so I added a Wishlist item to add a button to the OIP. Please comment & vote (up arrow at top left):
-
I would like to suggest that a button is added to the OIP to bring up the "Plug-in Object Style Options" as an addition to the right-click action. There are no visual interface hints for users to know that they might need to access "Plug-in Object Style Options" to achieve the results they want. It took me a while to figure this out when updating template file Wall Closures and now I'm seeing the issue in another thread:
-
Adding your computer info can also help.
-
Or model in 3D as a Symbol and use that as the Window. You can take existing PIO windows and ungroup them to get the parts you need.
-
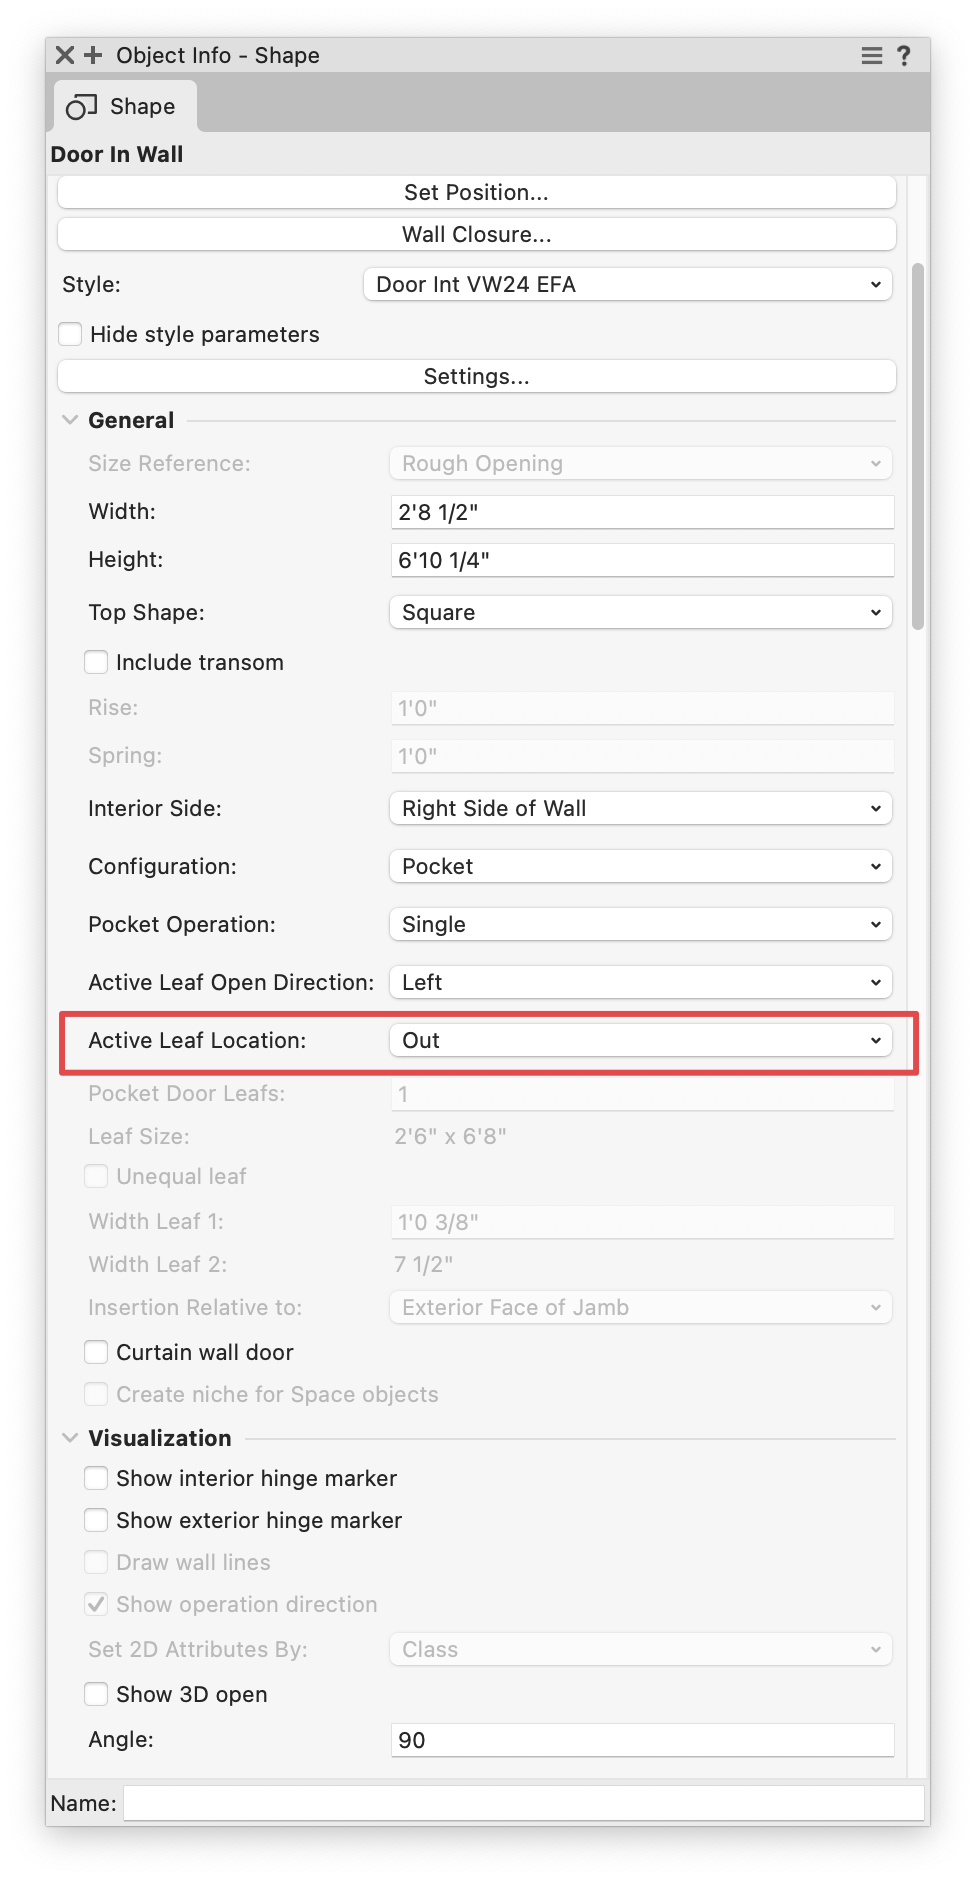
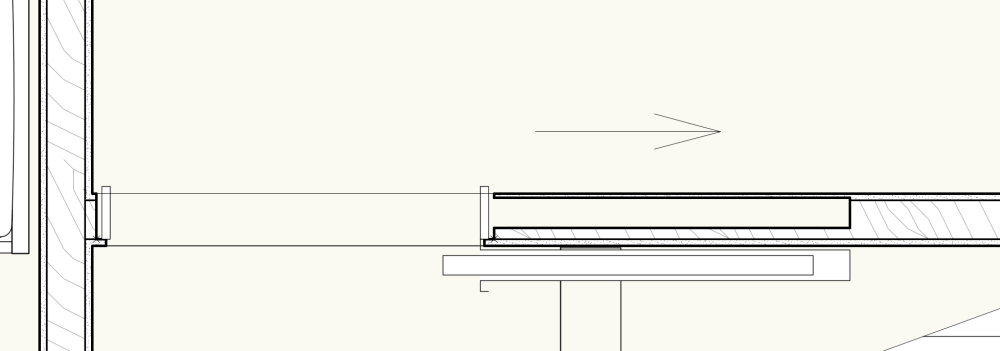
Found it. It had to do with the Active Leaf Location: In vs Out. For some reason "Out" fixed it. Don't ask me what it means or why it works.
-
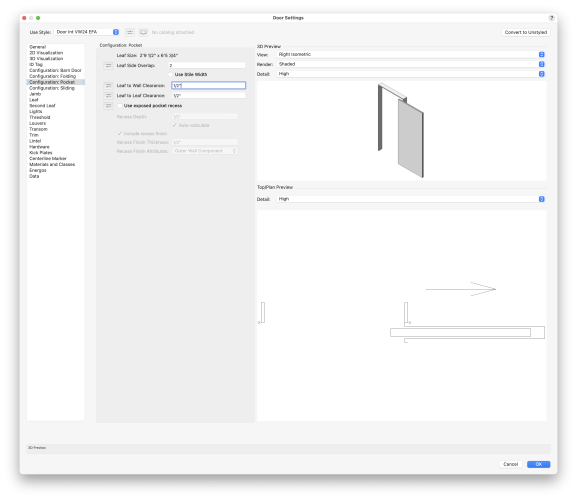
Thanks. I'm in the process of working out VW24 Wall Closures, and as part of that transition I've changed some of the insertion options even though I don't have a good grasp of them. @Matt Panzer posted an explanation drawing recently. I'll tracj that down and see if I can get it to work.
-
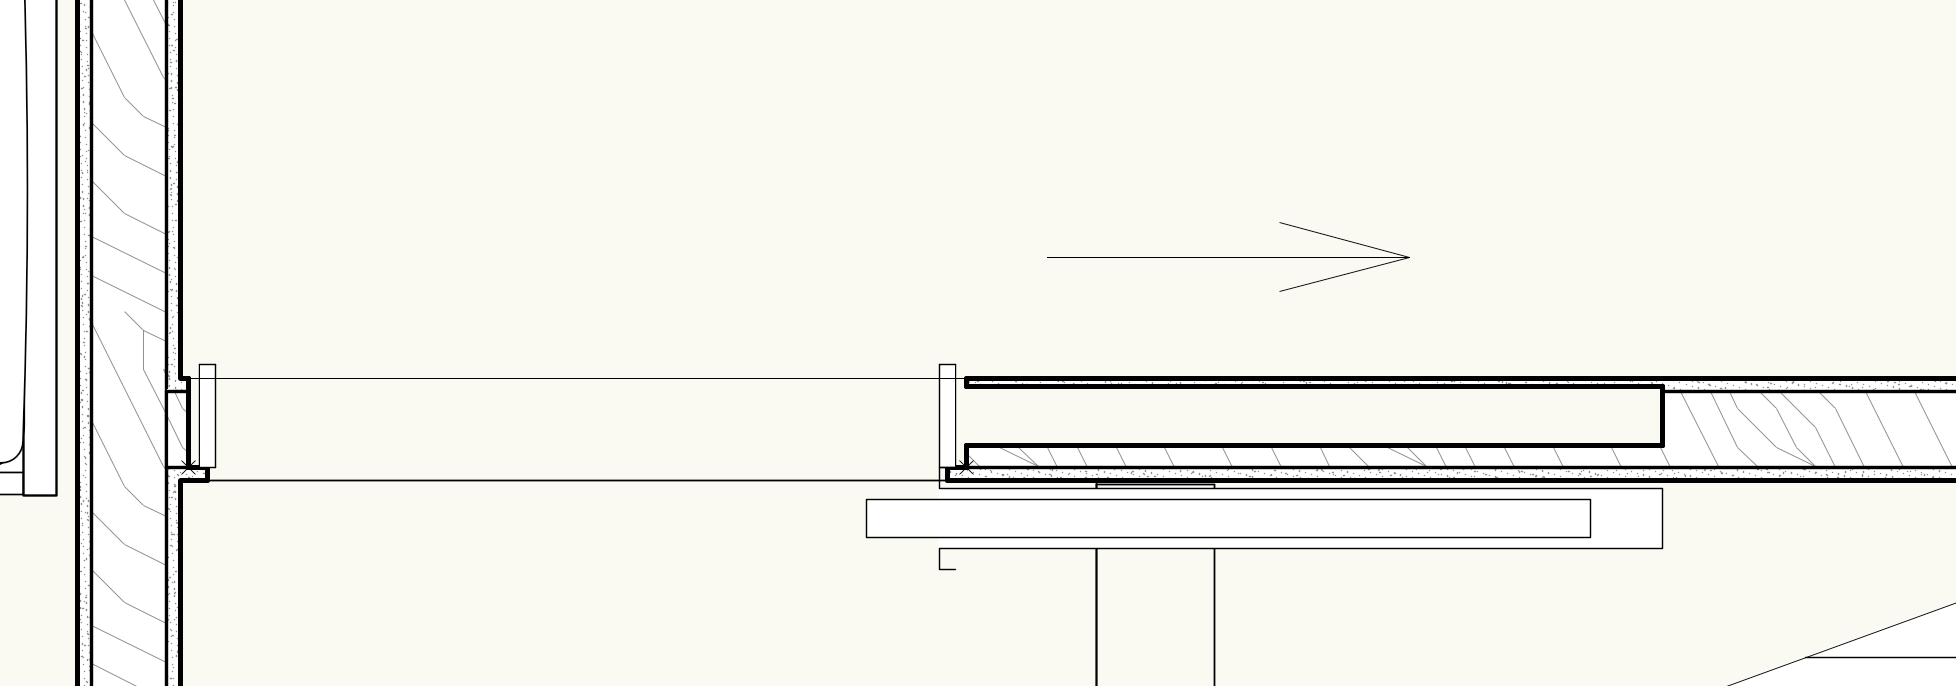
I have a Pocket Door that is pretending to be a Barn Door. A pocket is created (poorly), and the door leaf is shown outside of the wall like a barn door. Is this related to poorly configured Wall Closures, user error, bug? Any advice would be appreciated. VW2024 Update3.1 VW Pocket Door Issue.vwx
-
"This symbol is using a bound story that does not exist" Vectorworks 2022
E|FA replied to MHBrown's question in Troubleshooting
It has to do with the Stories feature, so the message does make sense. It lets the user know that the symbol will set its insertion elevation to a predefined Level within the Story. If you don't use Stories you can ignore it. You can find the Story & Level settings in the Organization window. I don't use Stories so mine is blank.
-
One thoughtless click and I had to dig out this old post. Thanks.
-
I'm running VW24 Architect Update 3.1 on M2 MacBook Air 24gb macOS 14.3.1 with no issues that I would associate with the system. More memory would be nice, but not keeping dozens of Safari tabs active helped a lot.
-
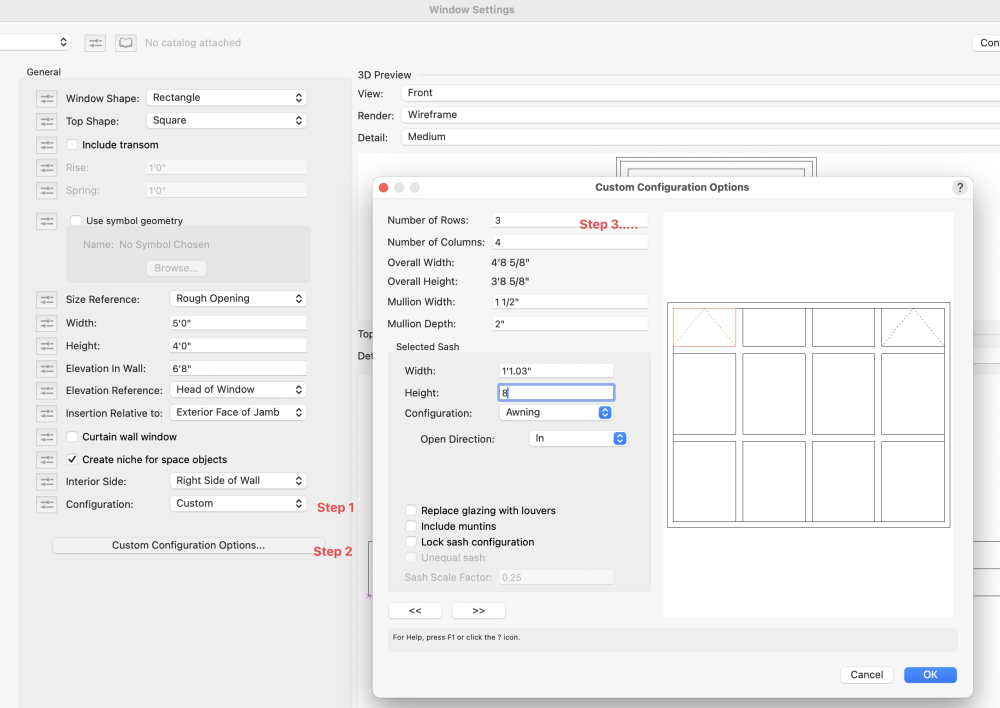
It's still there, but I find it doesn't always register input and is a little quirky. Here's how you get there if you want to try. The "Use symbol checkbox" is what you'd use if you want to model the window as a symbol and use that. Quickest way would probably be to create a Window object that is close to what you want, Ungroup it, and modify the resulting objects to create the Symbol.
-
I use Leaders, Trailers, and Notes all the time and have never had this happen. Could be a bug, and worth reaching out directly to tech support. Someone else might have a way to troubleshoot.
-
Here are icons to use. I'm guessing there's a way to add these via Windows:
- 1 reply
-
- 1
-

-
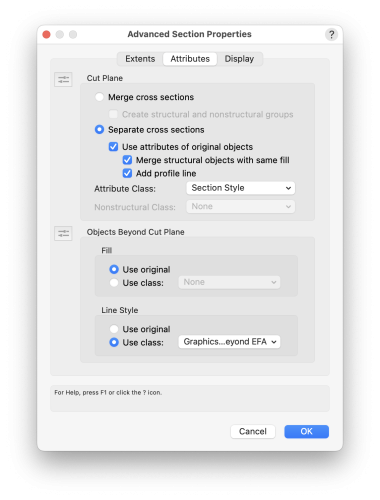
Two possibilities: 1. Make two slabs with different core thicknesses. In your Section Viewport->Advanced Settings->Merge structural objects with same fill. This should eliminate the line in section between the two slabs. 2. Model the floor finish as a separate Slab (or Extrude) on top of a Slab with the structural core. This is a technique used to deal with situations where different rooms have different floor finishes. The model is built with a standard floor Slab and finishes are added above. I'm guessing someone else will have other options.
-
I agree completely with @P Retondo. I also think most of the frustration I read from new users is when they try to map their previous software's methods on to VW. Forget what you know, and to take a look at VW University beginner courses and the VW Essentials webinar. https://app-help.vectorworks.net/2024/eng/VW2024_Guide/Basic1/Selecting_objects.htm
-
Wall Closures - VW2024 Workflow, and transitioning files from VW2023
E|FA replied to E|FA's topic in Architecture
I would be somewhat careful looking at pre 2024 info, because of the addition of Closure Names. -
This was news to me as well: https://app-help.vectorworks.net/2024/eng/VW2024_Guide/Import/Importing_mtextur.htm
-
Wall Closures - VW2024 Workflow, and transitioning files from VW2023
E|FA replied to E|FA's topic in Architecture
It is not. I am old with limited brain power as well, but eventually got it working. It would take me just as long to do it a second time, other than the notes I scratched out. I will try to put together a cleaned up guide after I get through some project deadlines.