EliM
-
Posts
20 -
Joined
-
Last visited
Content Type
Profiles
Forums
Events
Articles
Marionette
Store
Everything posted by EliM
-
Problem with controlling wall texture by class in VW 2024
EliM replied to EliM's question in Troubleshooting
@line-weight We in the past have controlled texture by class for exactly the reason @Jeff Prince describes in his second comment, ultimately to avoid management of a bunch of different wall styles that are the same in every way but the finish. @Tom W. It does make sense that this is related to per component texturing of walls. I will try reporting this as a bug so that just maybe the developers can add this functionality back in. In the meantime we will adjust our workflow...c'est la vie! -
Interesting about the handles being off. I noticed that they are off even in the generic doors when there is only one sidelight or two sidelights of different widths. It seems to put the door handles centered within the whole door-sidelight unit.
-
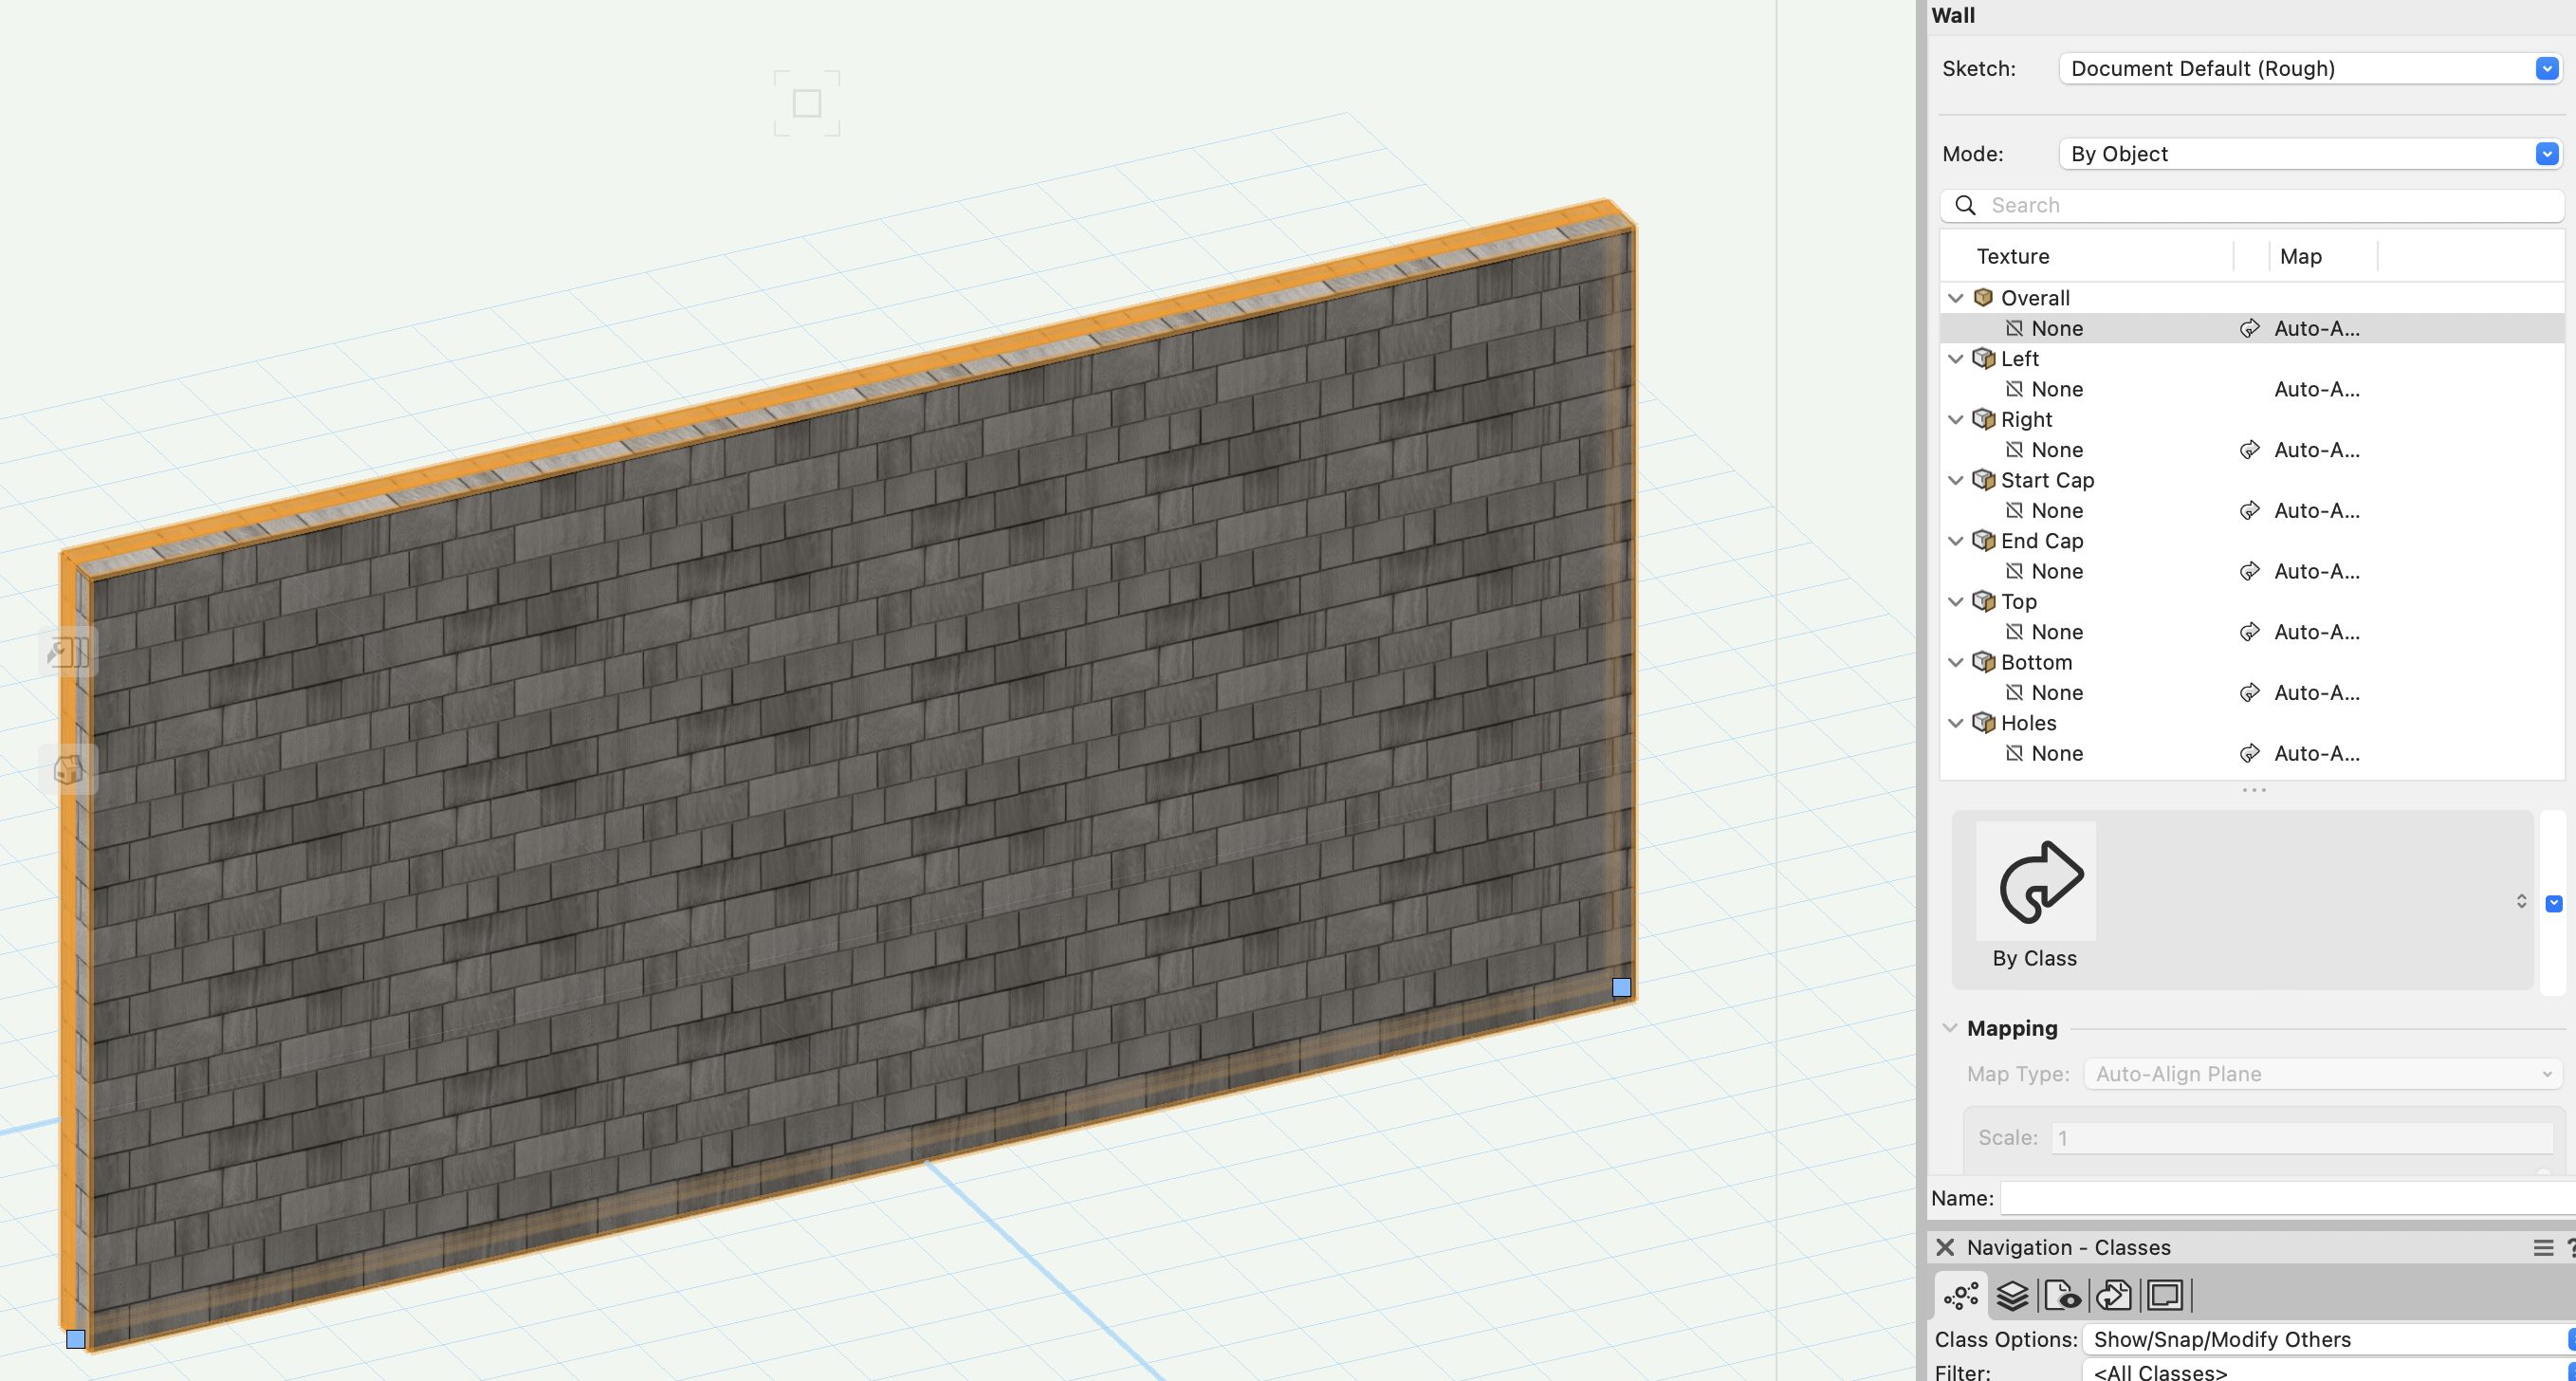
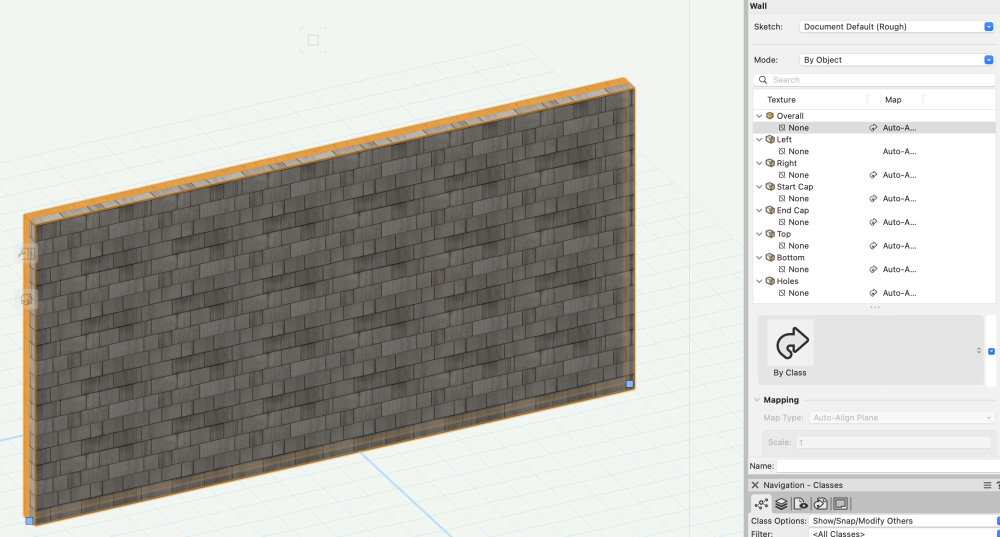
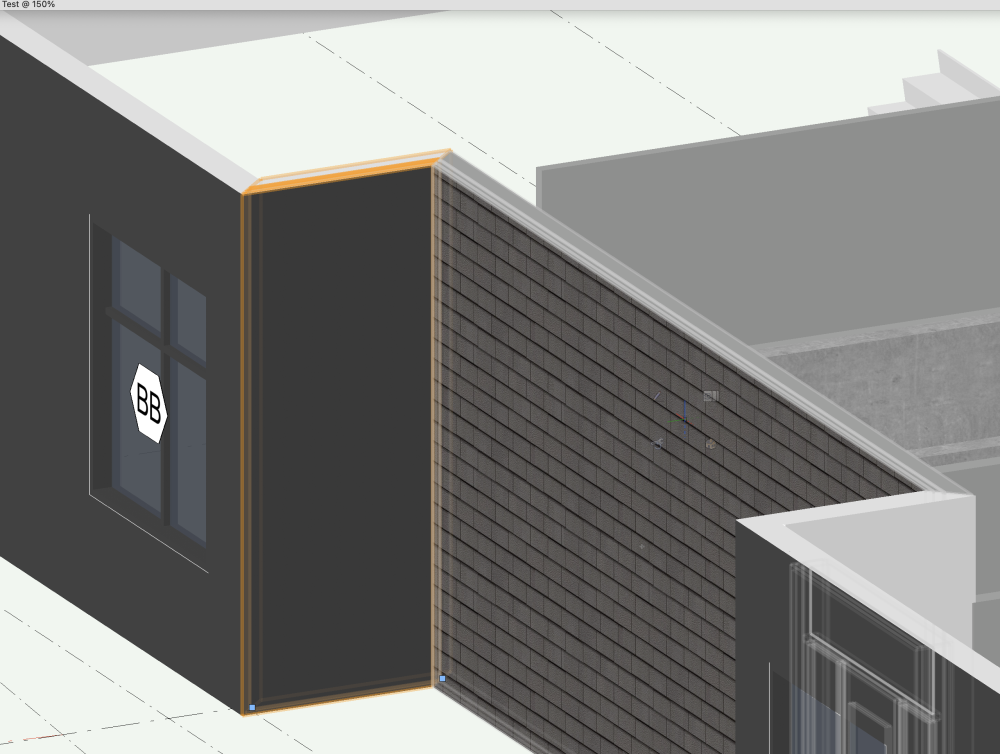
Our office has always used class to control wall textures, but this functionality seems to be severely diminished in VW 2024. In the below screenshot, I have a wall in a class with the wall textures specified as a shingle texture. The wall does show this texture BUT the Render settings in the Object Info panel do not acknowledge the texture and suggest the texture is None. The problem with this is then all the supplemental settings are greyed out and I can't, for example, adjust the texture vertically to get my coursing where I want it. Our workaround so far has been to manually override each wall's texture in the Object Info panel, which then allows us to control those supplemental settings, but this is far from ideal if we want to be able to quickly change all walls of a particular class from one siding to another. Is this a VW 2024 bug, or is there some new setting turned on in VW 2024 that is causing the issue and we just don't know about it. Thanks in advance to anyone who takes the time to provide insight! VW 2024 Wall Texture Issue.vwx
-
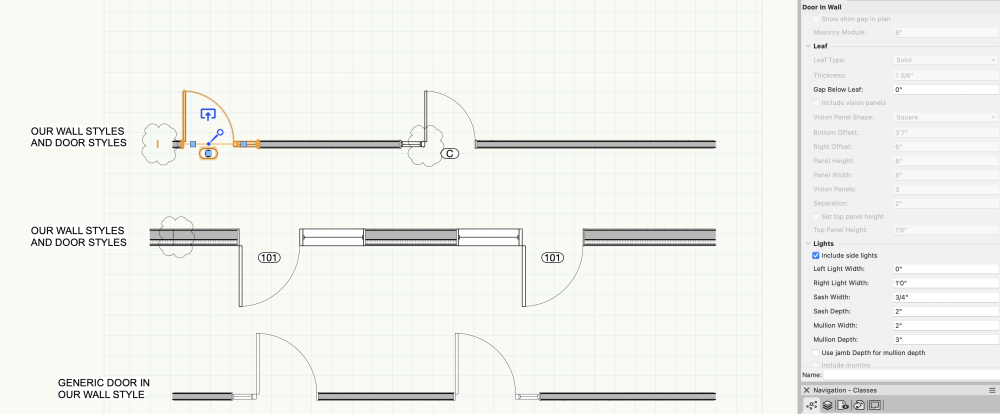
In our office we've been getting errant lines for doors with single sidelights in VW 2024. We use the same door styles and wall styles we used in VW 2023, but we did not have this problem before. I suspect it has to do with our door style settings, since when I put a generic door with a single sidelight into our wall style, there is no issue. But for the life of me I can't figure out what setting to tweak in our door styles to make them work right in VW 2024. I've included a mock file along with a screenshot so that some generous soul might look over our door settings and identify the issue. VW 2024 Sidelight Issue.vwx
-
I am having the same issue with walls whose texture is controlled by class. All the texture mapping settings are greyed out and locked, including the map type. Strangely, the texture is also listed as None even though the class-controlled texture is showing properly. If I specify a texture for the object rather than leaving it defined by class, I can then edit the texture mapping settings, but this is not a good solution for future workflow.
-
Objects in Groups and Symbols becoming invisible
EliM replied to Horst M.'s question in Troubleshooting
I was wondering if possibly there was some setting I didn't know about that would change the behavior but you are absolutely right--I will alter the workflow as you describe and fix the problem that way. Thank you Pat! -
Objects in Groups and Symbols becoming invisible
EliM replied to Horst M.'s question in Troubleshooting
@Pat Stanford Hi Pat, hoping to lean on your expertise if you have the time to advise... In regards to your recommendation to put objects within a group in the classes that you want them to be in and then the group itself in the none class, I've noticed something strange: When I class off the objects within the group but leave the none class on, I can't see the objects but I can still select them. This is annoying because it means that I will sometimes inadvertently select them. Stranger still, if these grouped objects are in the screen plane, they are still selectable (but invisible) even in unified view (see screenshot). Is there a best practice I could be following to be able to xturn those grouped objects fully off. (To give you a concrete example, I like to group screen plan annotations in my plan, but then those annotations, while invisible, are "in the way" when I'm trying to select things in my 3d model.)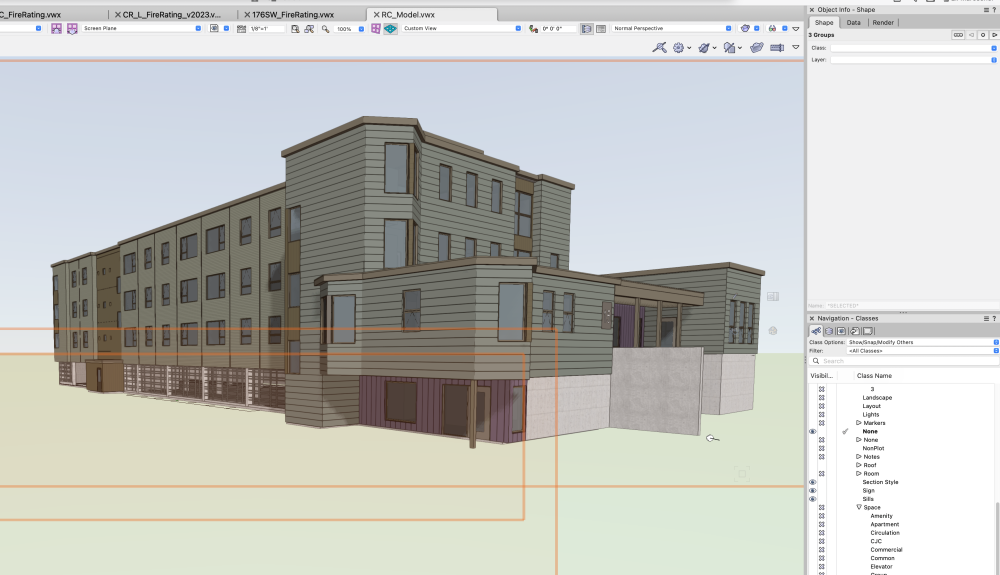
-
I shut down VW and restarted it and my problems were fixed. Must be a strange cache issue that has lingered in the program for more than 15 years now....very interesting.
-
Wow, nearly 15 years later and I am having this exact same problem.... everything exactly as HOUCAD describes it
-
Resource Manager: Just Search Active Document
EliM replied to trashcan's question in Troubleshooting
Was just looking for how to do this as well... -
Wall component graphic behavior changes when part of a symbol
EliM replied to EliM's topic in Architecture
Hi Edward, that didn't work for me unfortunately--but a good idea--I've used such kinds of tricks to correct window tag sizes in the past. Tom, the explanation makes sense, thank you. I did find that turning off unified view did fix the issues (i.e. the wall container class is now turning off with the outer component class even inside a symbol) -
Wall component graphic behavior changes when part of a symbol
EliM replied to EliM's topic in Architecture
Great--look forward to hearing how it works for you -
Wall component graphic behavior changes when part of a symbol
EliM replied to EliM's topic in Architecture
2023 -
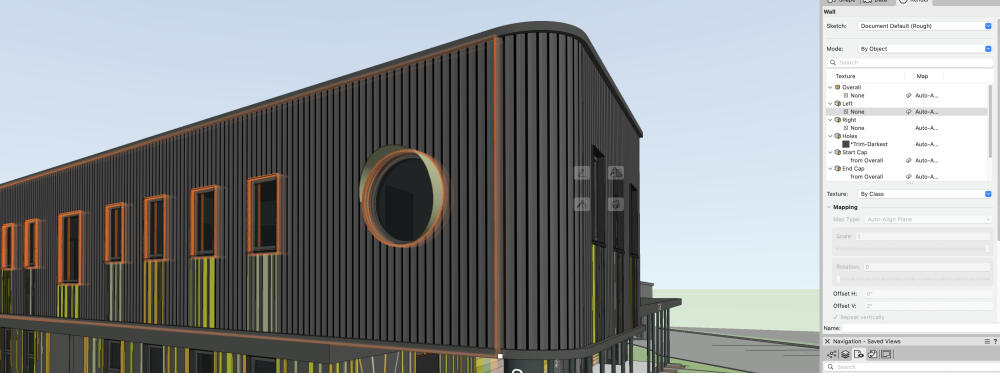
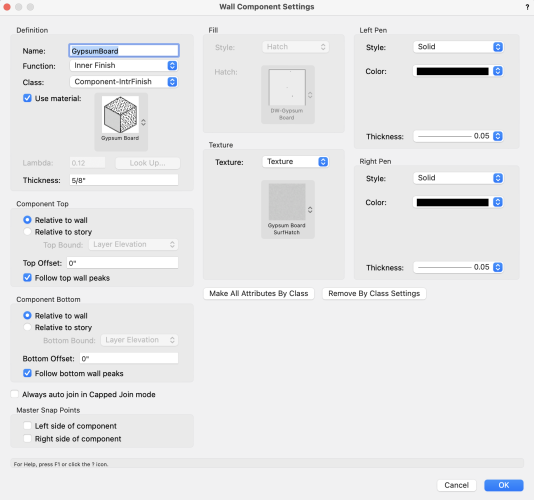
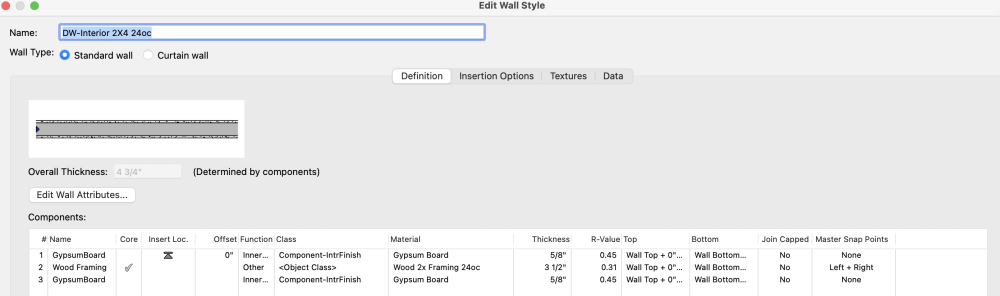
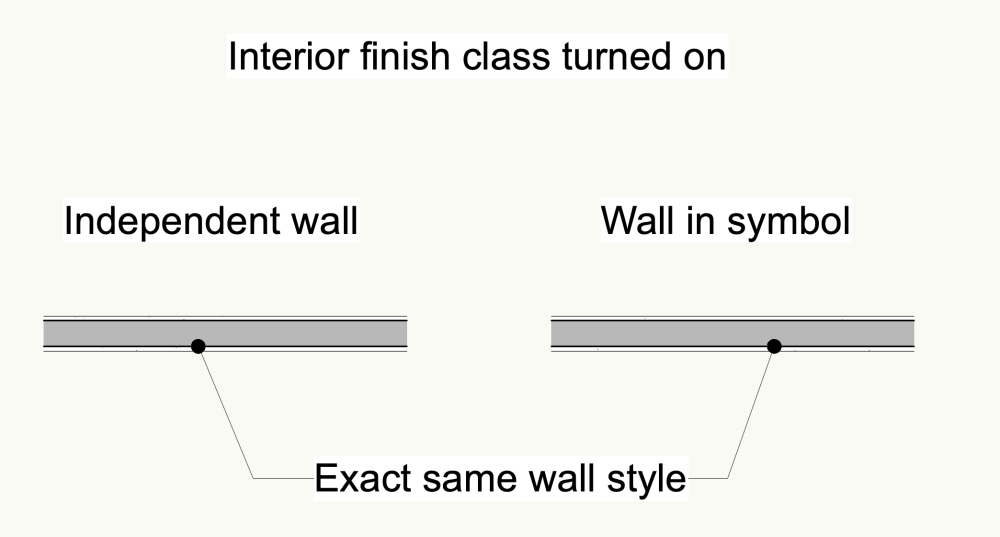
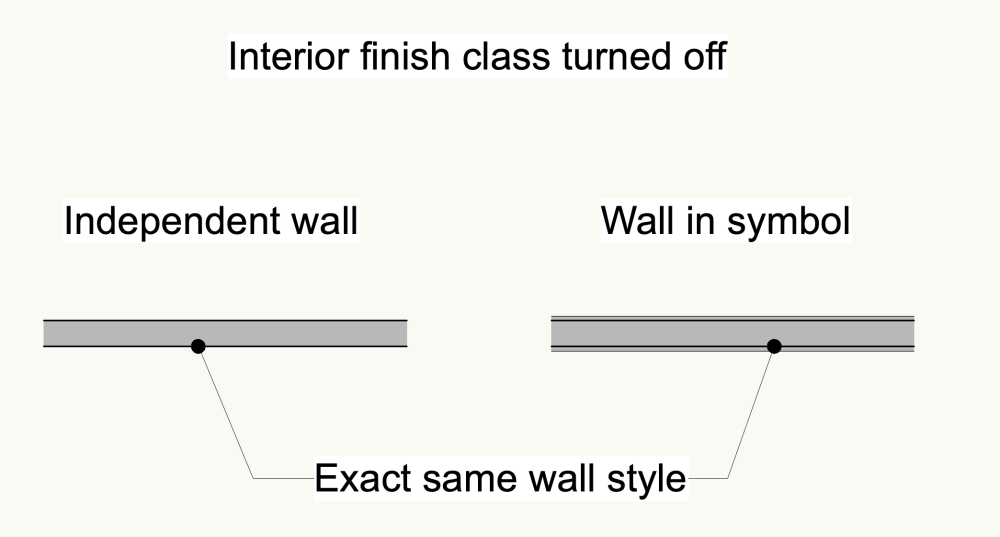
In my wall styles, I specify the interior finish (e.g. gyp board) as a separate class so I can turn that class off when I want to see just the stud framing. My issue is that when that wall is part of a symbol, the graphic behavior changes, and the interior finish continues to appear even when I turn that class off. Anyone know what is going on here or how I might be able fix this problem?
-
Thanks FBernardo, I use the spaces in the design layers--as I do most of my plan edits in the design layer, I'd rather not be navigating between my design and sheet layers when editing walls and spaces. As for autobounding spaces with walls--that is a method I should try more often but I'm not in the habit of it because there a lot of situations where it simply doesn't work (e.g. space abuts another space without a wall between). Perhaps time for me to be mindful about using the autobound when I can. And thanks for introducing me to the coincident selection tool! Can't believe I didn't know it. I think that pretty much fixes my problem and makes selecting spaces for me (almost) as efficient as before.
-
Thank you for the helpful discussion. I do understand that you can click on the boundary of the space object and thus edit it that way. But, what I was trying to say in the original post is that the boundary of the space object is often at the face or midline of a wall, and sits behind the wall objects, so I actually don't have a good way to click on the boundary without clicking first on a wall, sending it back, then clicking on the space object, and then sending the space object back again when I'm done reshaping it. So much more hassle then in VW 22 when I could double click on the data tag and reshape the space. VW could combine the best of both worlds by allowing you to ctrl-click on the data tag to select the space object and regular click on the data tag to select just the data tag, or something like that...
-
It is nice being able to move around the data tag so easily now. I just wish that you could, say, hold down ctrl when you click on the data tag to select the whole space object.
-
Hi there, Does anyone know how to select a space object in VW 2023 without clicking on the boundary of the space? Often the boundary of my spaces are behind the boundaries of walls and so it is difficult to select a space by clicking on the boundary. In VW 2022, you could click on the space tag and it would select the space object, but in 2023 do so only selects the data tag....
-
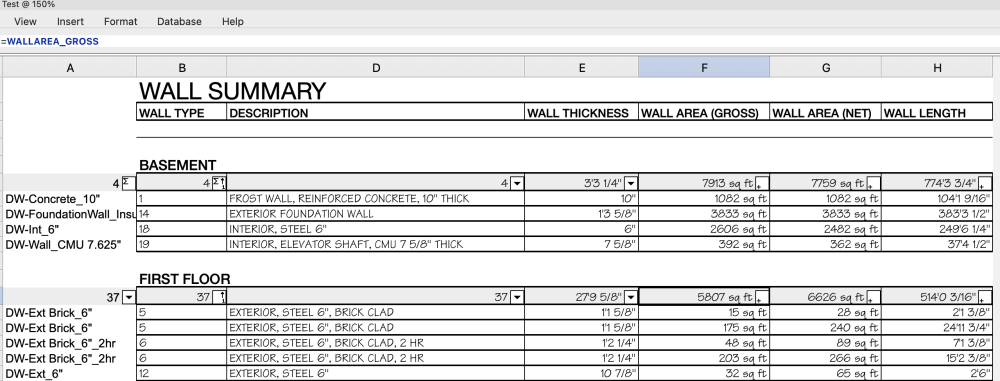
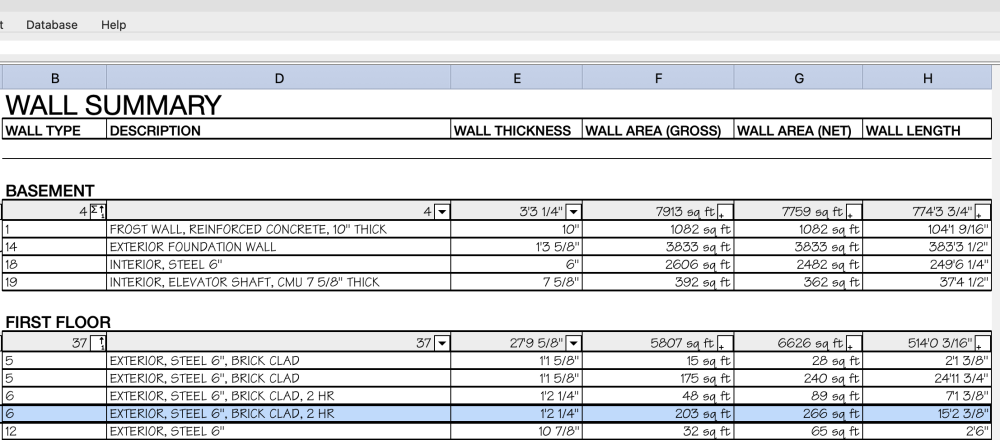
I am using a worksheet to report information on walls: gross area, net area, and length. My formulas are as follows WALLAREA_GROSS, WALLAREA_NET, and WALLAVERAGEHEIGHT/WALLAREA_GROSS. Bizarrely, the reported gross areas are less than the reported net areas for some walls. In some cases, I do not even have anything (door, window, other symbol) embedded in the wall, so the net and gross areas should be the same. Any ideas where I may be going wrong or if this is a bug with a workaround? Thanks in advance for considering!
-
Our office uses spaces for energos energy modeling and must draw the spaces so they are contiguous, cover the whole floor plan, and extend to the outside face of the exterior walls. We also need to display net areas that do not include the area taken up by the walls. I have tried a couple of methods but none of them work well: 1) Using Auto-bound, which will display correct Net and Gross Areas for simple spaces but Auto-bound does not accommodate spaces that are not fully enclosed by walls, walls within symbols, and more complex perimeters, and it is cumbersome for each space to custom specify the gross boundary definition by identifying exterior walls where the bound should go to the outside face of the wall and interior walls where the bound should go to the wall centerline. 2) Displaying an approximate Net Area using the formula =(#Gross Area#) - (#Gross Perimeter# * 0.25), where the 0.25 represents an average wall thickness of 3" around the Perimeter of the space. The fundamental flaw of this approach is that wall thicknesses often vary around the perimeter of the space and some sides of the space don't have a wall at all, so the estimate is very crude. (But further I am also having trouble with the custom formula--#Gross Perimeter# is yielding a large result off by orders of magnitude from the actual perimeter, which is correctly displayed if I just add Gross Perimeter as a space label not through a custom formula.) Short of always drawing two different polygons for each space, is there a better way to display gross and net areas when the auto-bound will not work? Is there a way with a manually-drawn space to make the subtraction areas for the net area calculation equal the area of the walls encompassed within the space?