


Archistyles
-
Posts
38 -
Joined
-
Last visited
Content Type
Profiles
Forums
Events
Articles
Marionette
Store
Posts posted by Archistyles
-
-
I received a notice yesterday .
They are increasing my SS fee by more than 50% !!!
I find it exceesive and was expecting a more incremental increase.
-
 1
1
-
-
On 1/6/2024 at 3:22 AM, Bhumareddy said:
is it still available?
yes it is available
you can PM you contact info
thx
-
Pat , Tali , thanks a lot for your input.
So if I understand correctly:
Let's say I have 5 townhouse units types (4-storey units) :
1-Create 5 files ? with layers and stories file structure.
2-Create 4 DLV's for each unit ( storey 1 to 4)
3-In the master file , place at each story , 5 DLV's +Duplicate , rotate as required.
What if I stick to one file system and create symbols of each unit type instead.
1-Create 4 symbols for each unit ( storey 1 to 4)
2-Place symbols + rotate as required.
I am wondering what are the pros/cons of DLV's vs Symbols ?
Thanks for your help
-
Hi
I would like to some assitance from my fellow VW experts
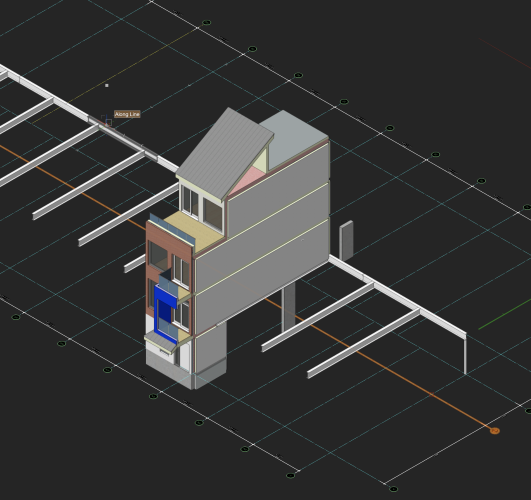
I am in process of laying out a series of townhouses, 4-storey high, with some repetitive units ( 3 or 5 types) and I am wondering what is the best way to organise the file.
I was thinking to create each townhouse type as symbol and place them as required however I think I am not able to.
I thought I would create a symbol containing story 1 to storey 4 objects (exterior walls , interior walls, ..etc) but get a message " illegal object selected" . so symbols can't be created from objects on different series/layes ? is that the case?
I appreciate any help to get me on the right set up.
Please see the attached work in progress.
Thanks
-
Vectorworks Architect 2024 for Sale with access to previous versions : Architect 2020 to 2023 and Fundamentals 2017 to 2019.
$2,500 CAD
Let me know if interested
-
1
-
-
I am having an issue with "create joists" under AEC/framing.
If I select a slab as object to create joists , VW becomes not responding (spinning wheel)
it seems to work only on rectangles, polygons..
Is this bug?
-
Thanks Pat , Yes I had in mind some basic representation
VIRTUALENVIRONS, thanks a lot , that will work fantastic.
Cheers
-
Any suggestion on how to model an attic ladder?
-
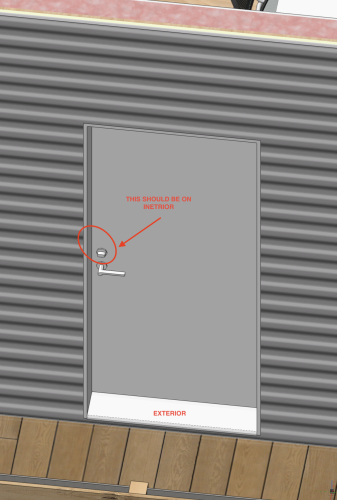
I am experiencing also an issue with door hardware.
It seems VW2024 is inverting interior and exterior when locating the lock cylinder and thumb turn.
Can someone confirm if it is a know issue or it is somthing with my setup?
Thx

-
1
-
-
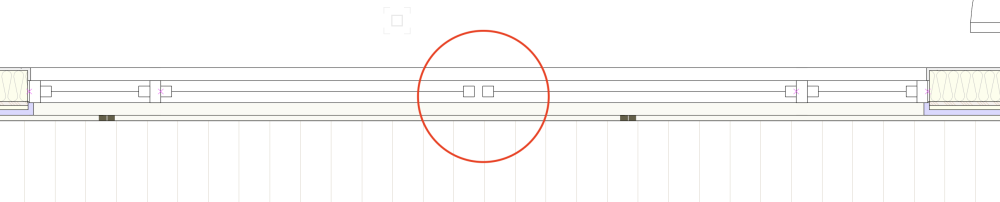
Having the same issue with some window mullions.
-
Offloading one of my VW 2024 Architect licenses.
$3500 CAD + Any transfer fee + Transaction fee (eg. PayPal)
Was told by Vectorworks , there is no transfer fee if new owner is in Canada, US or UK.
Thx
-
3 minutes ago, Tom W. said:
No I am using Design Suite I didn't realise it wasn't available in Architect but a quick search suggests it was design suite only in previous versions too...?
No
I had it in VW 2023 Architect
-
4 minutes ago, Tom W. said:
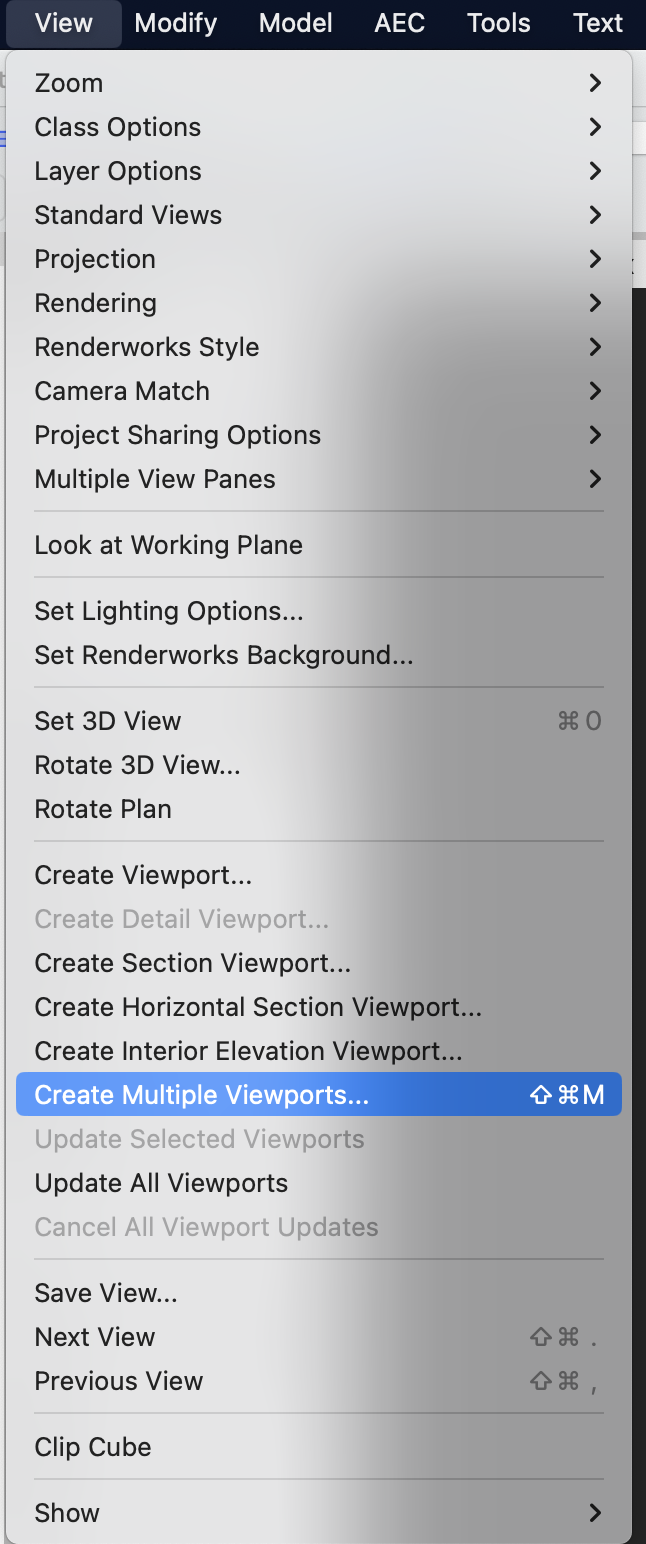
Create Multiple Viewports... is present for me in VW2024. Do you need to edit your workspace?
Architect version?
-
TomKen , not that feature
see below
-
Someone please tell me this is not actually happening.
Vectorworks has disabled Create multiple viewport in VW 2024 Architect ? no no no !!
-
Super. you are a champ!
I applied your settings and it worked
Th edge thickness set at 0.001 , we loose the line weight for the edges. I guess with this mode you win some an loose some!!
The look in white is much better than in shaded mode.
I am still curious if there is away to get the shadows in shaded render to look same as in Artistic render?
Cheers
-
3
-
-
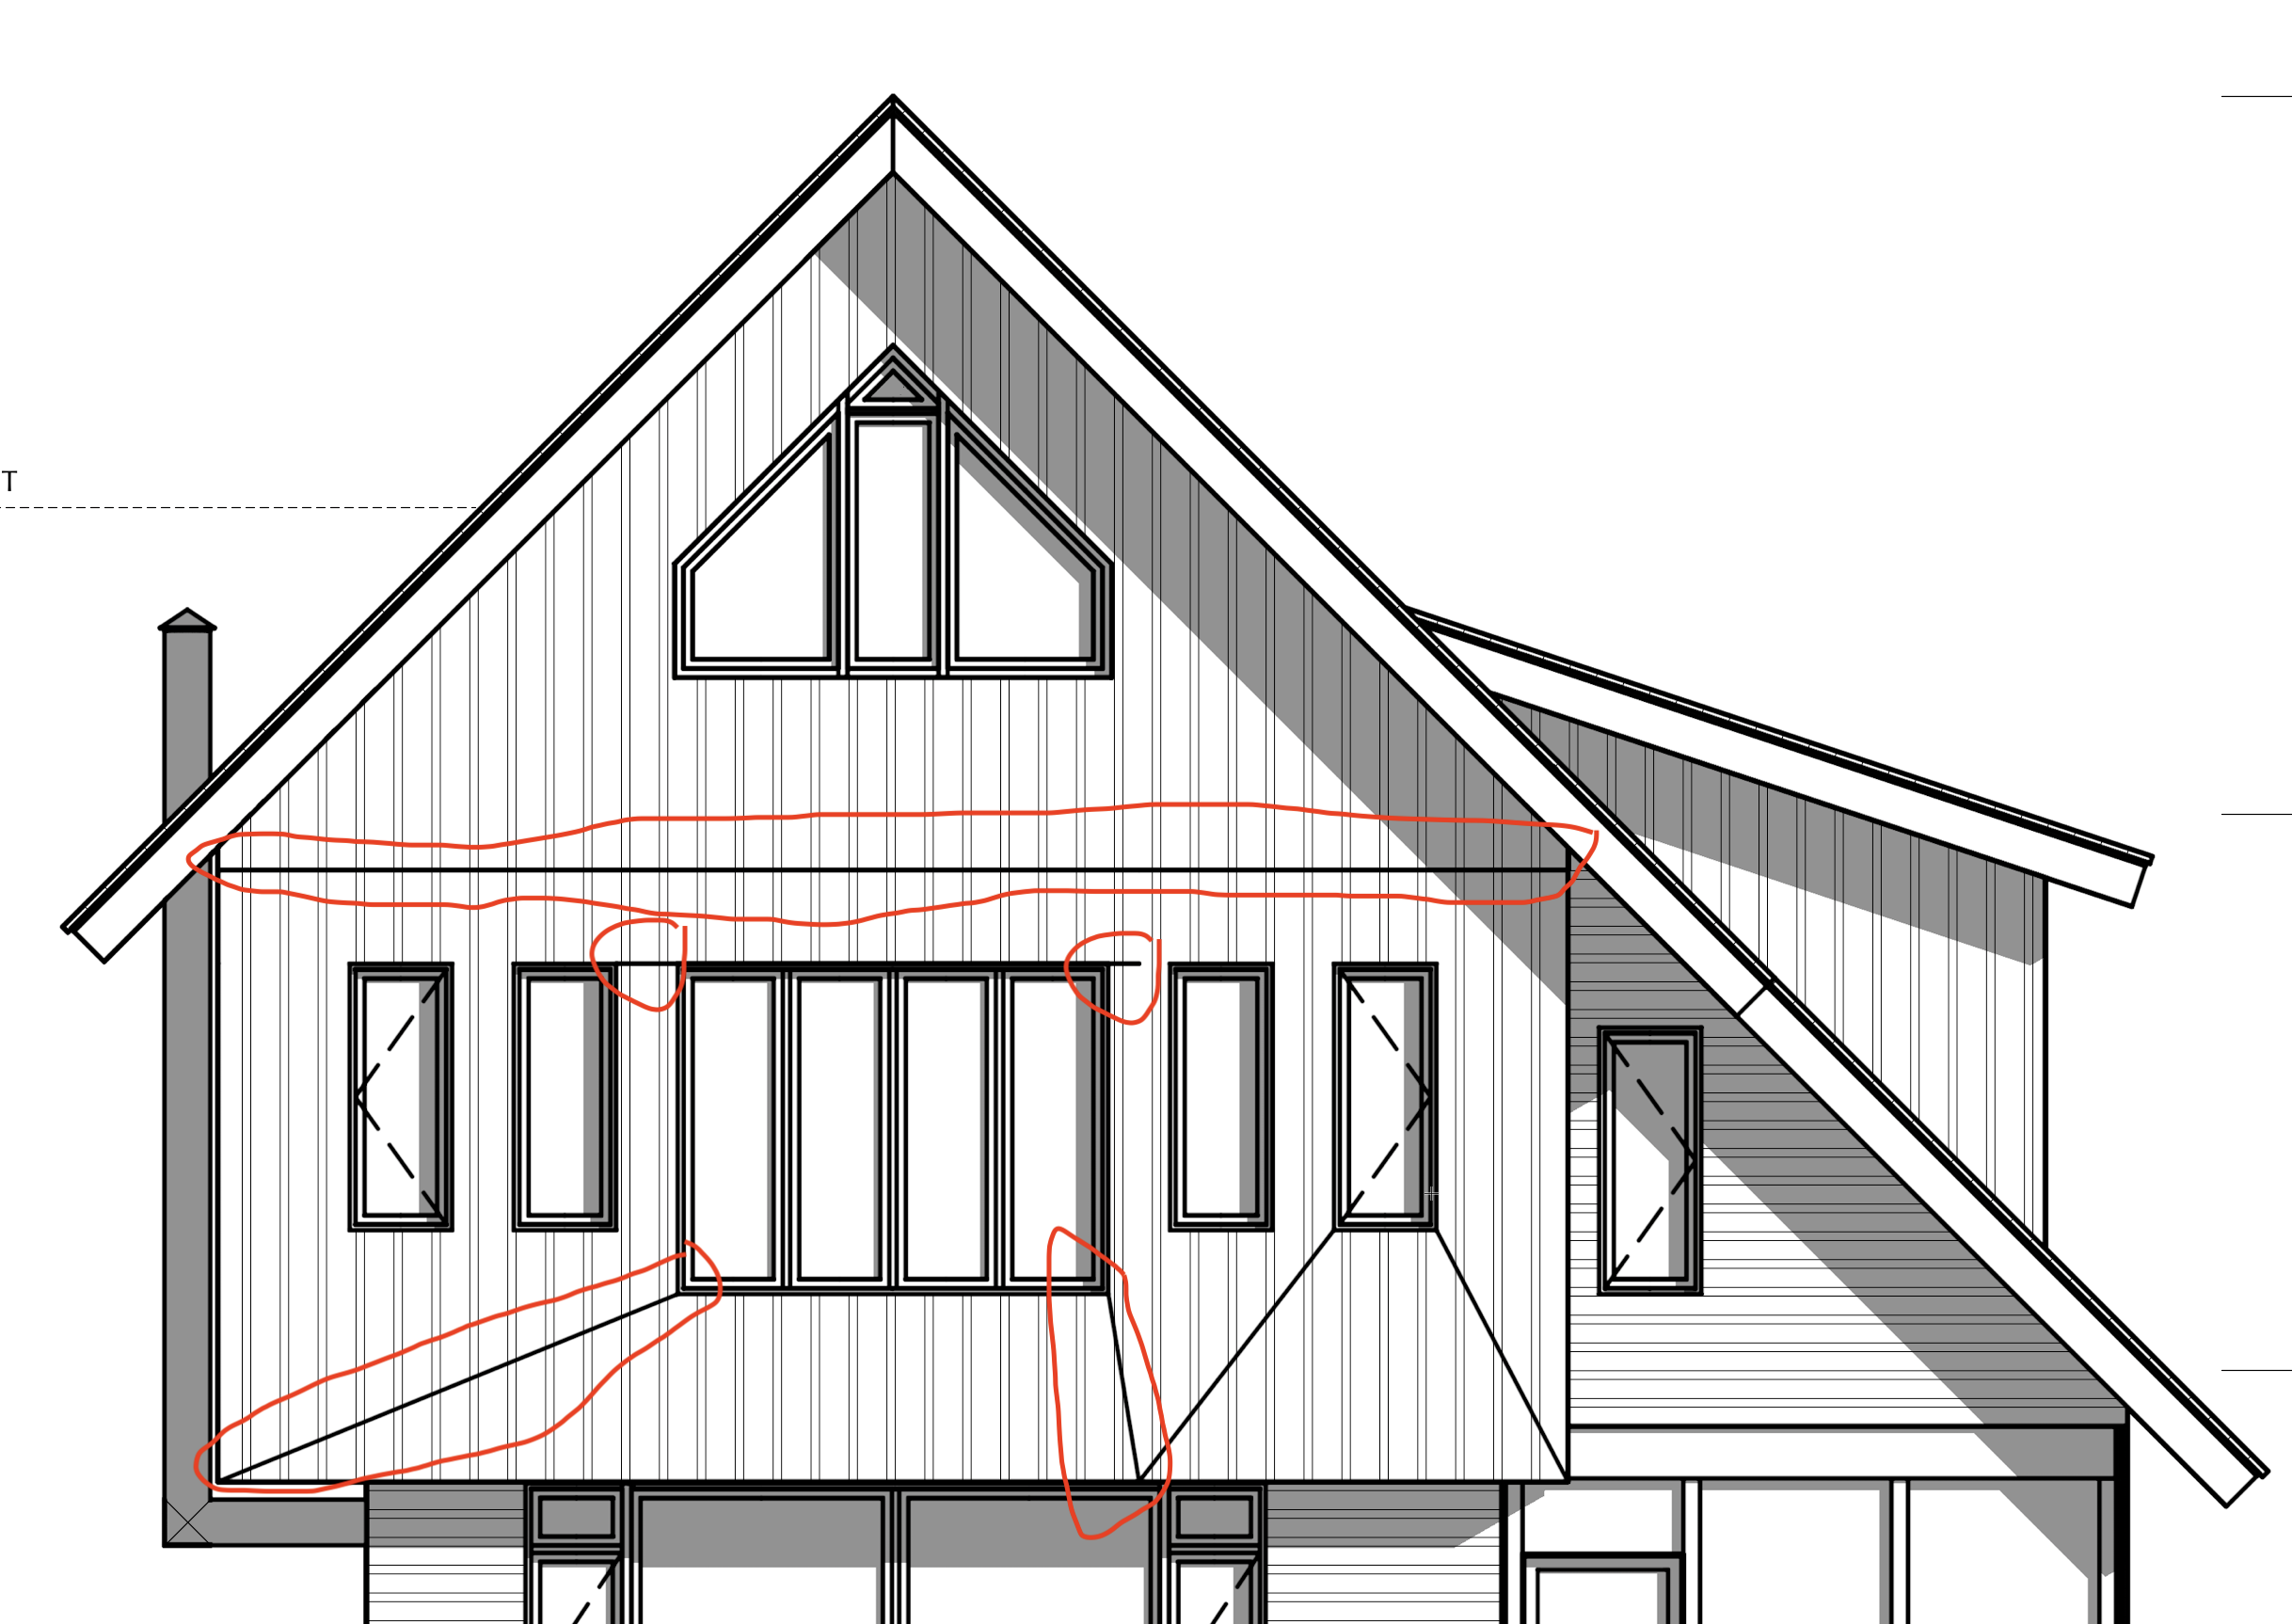
41 minutes ago, michaelk said:
Ambient Occlusion, which combines with Indirect Lighting settings to give you nice depth.
I played with those settings and got this result
A bit close to Artistic Render.
What I am not getting is the shadow from Heliodon ( eg roof overhang shadow show perfectly in Artistic render above)
Any setting in Shaded mode to adjust to get the shadows? (I had it checked in Shaded options)
Thanks
-
Well , looks like it is not me 🙂
Opened one of VW University files and the lines are showing !!
All this doesn't make sense to me . if Artistic render has a flaw , what is the point of having it.
-
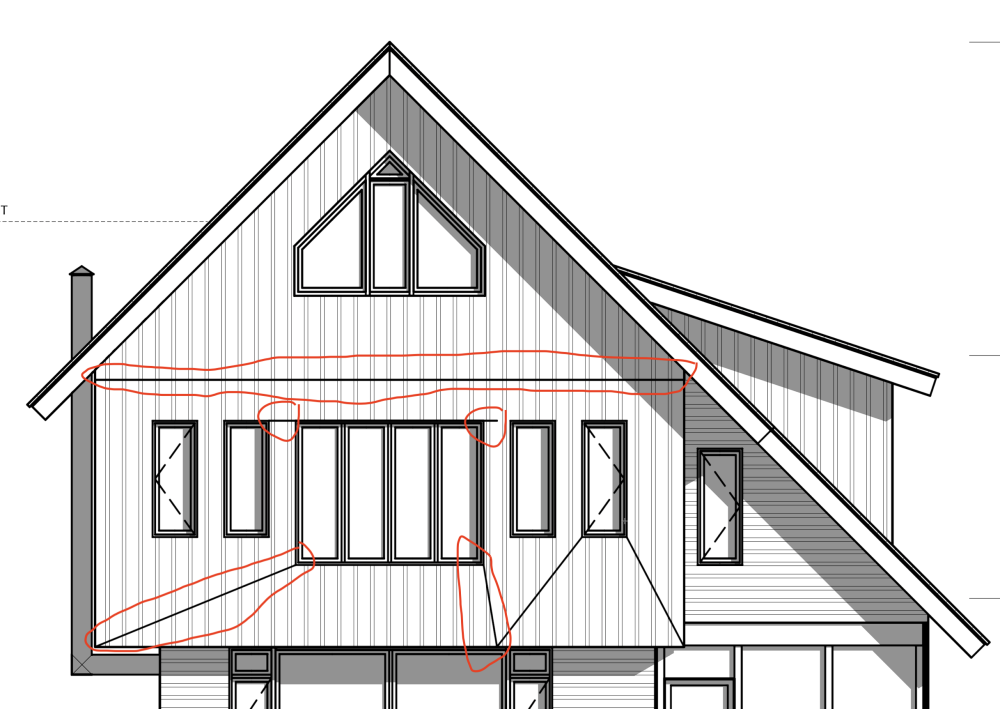
8 minutes ago, michaelk said:
I think Artistic Render mode is not going to be able to do what you want. It's a very old render mode.
You can use Shaded mode with the color turned off. Either enable Draw Edges or disable Draw Edges and add a hidden line Foreground rendering. This will get you the shadows you are looking for. (With MUCH faster render times)
Thanks but I am not getting anywhere near Artistic Renderworks with those settings. see below.
Kind of like the Artistic Render and would really really love to find out what am I doing wrong that makes those lines show.
The objects are simple walls and windows on same layer/storey
thx
-
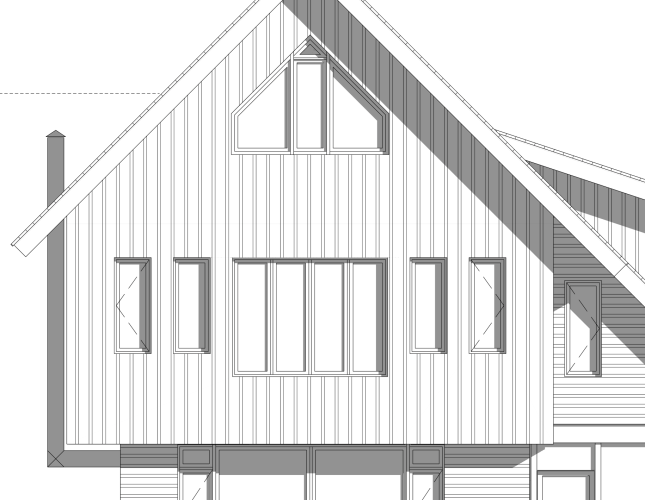
Any guidance to troubleshoot the issue is much appreciated.
No idea why these lines shown in Artistic Renderworks with lines and shadow setting.
Tried with VW 2023. same result
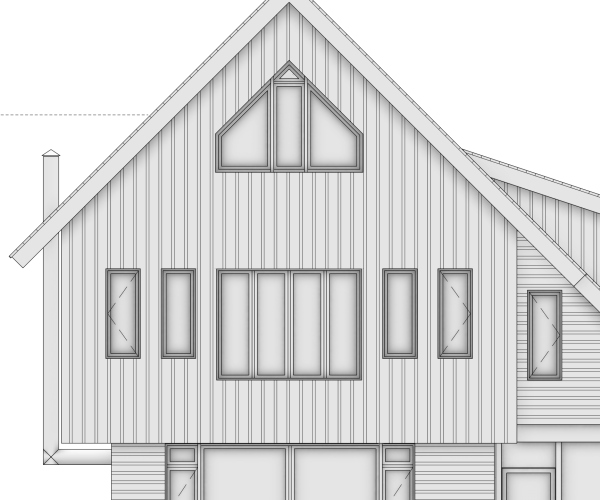
In Hidden line render below , the lines disappear!!
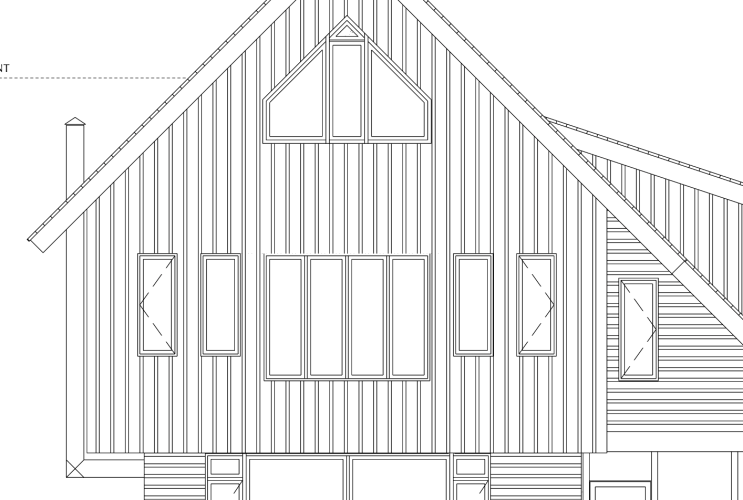
-
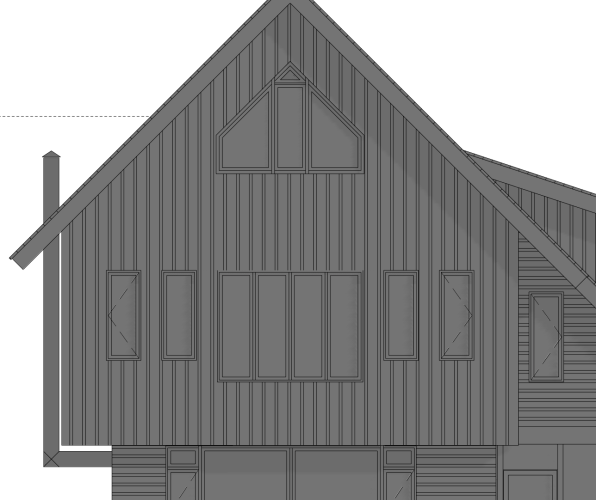
Hello
Re:
Background render : Artistic Renderworks with line and shadow setting.
Foreground render: Hidden line
I am getting these lines at top and bottom of some windows and at attic slab level .
And one know what might be causing them and how to get rid of them? Please see screenshot below
Thanks in advance.
VW 2024 on Mac
-
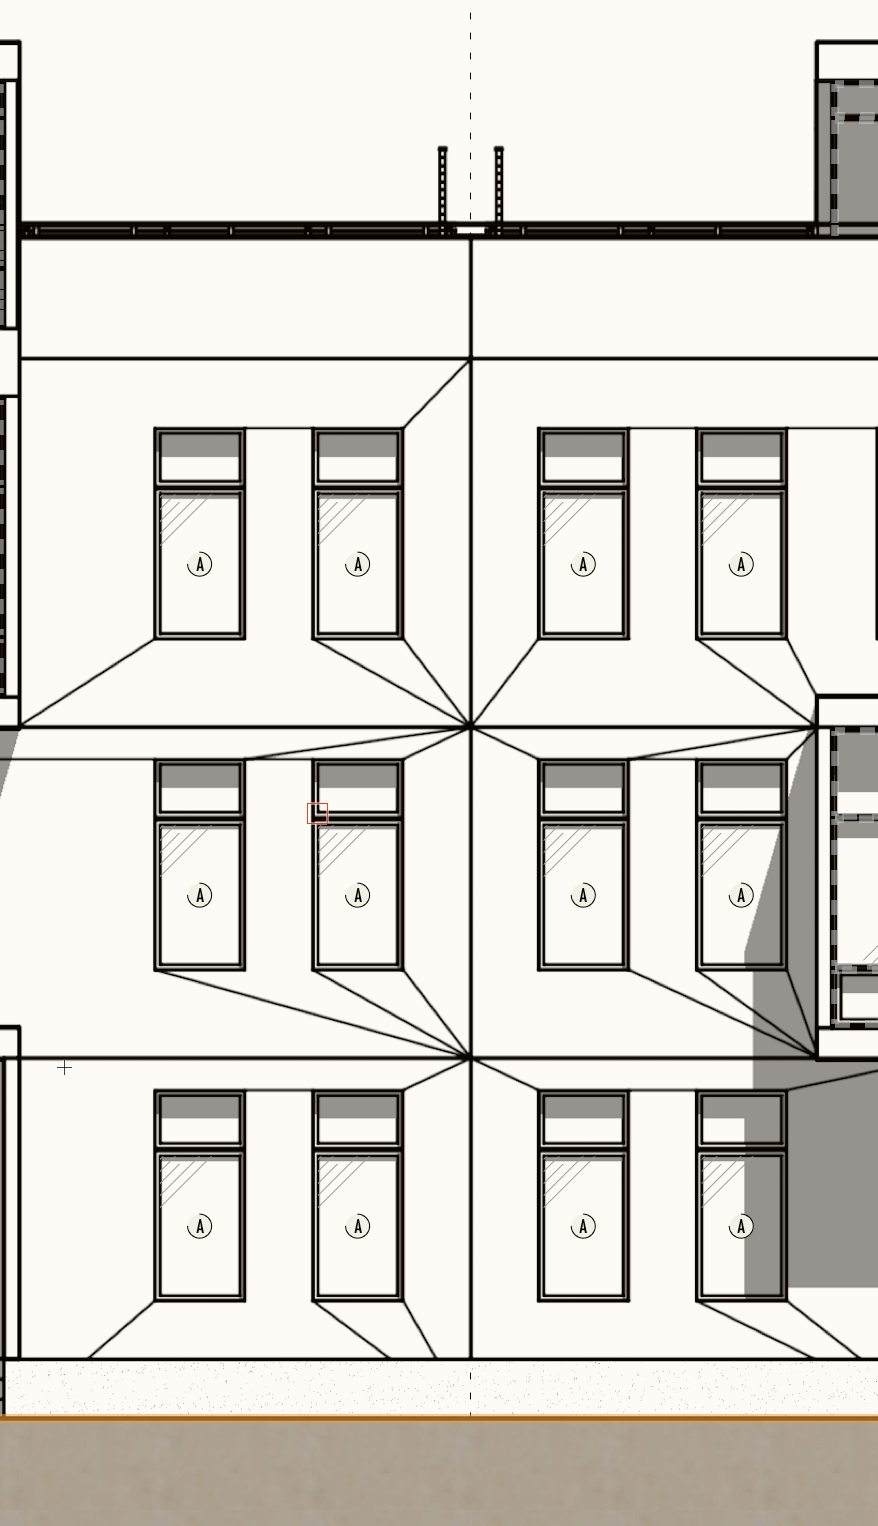
2 hours ago, Tom W. said:
I don't really understand this. Can't you just send the second floor Stair graphic to back so that it is displayed behind the second floor Slab in Top/Plan? Like Matt says.
So you have the Stair object itself on the first floor layer + in the Stair settings you tell it to display the upper floor graphic on the second floor layer along with the second floor Slab, then just make sure the Slab is in front of the Stair graphic. When you turn off the second floor layer you just see the 'cut graphic' for the Stair on the first floor layer.
I got it.
in the stair setting , I switched the top graphics from floor-2 layout layer to floor-2 slab layer.
Thanks Tom W & Matt Panzer for your help.
So in summary there is no pros or cons of using Top/Plan vs horizontal viewport section for floor plans drawings?
Another question : what is the trick to show building components on floors below ( eg columns ) and floors above ( eg balcony projections )
Thanks again
-
On 9/18/2023 at 12:50 PM, Matt Panzer said:
The only thing you can do in Top/Plan is to adjust the stacking order of the stair and slab (using "Send to Back", etc). If you keep slabs on a separate design layer, you could move your stair objects to that layer as well. This will allow you to better control the stacking order between these objects
Thank you for the reply
I am not quite sure how this can be achieved (ie ground floor stair object and second floor slab be on same layer?)if the stair is on Storey-1 layer and the slab is on Storey-2 layer? or am I missing something
It seems the workaround you provided ( changing location (Z) of the stair object in the viewport to hide steps below slab) ) only works with horizontal viewport sections , no Top/Plan
I read the users comments and I would like to know what are the pros and cons of opting for Top/Plan vs Horiz. viewport section when generating floor plan drawings.
I can start by :
Top/Plan cons:
-Stair underneath slab will be visible.
-
-
Horiz. section viewport pros:
-Stair underneath slab will be hidden (yeah!!)
-
-
Please feel free to add .
Cheers
-
I just experimented it with horizontal section viewport and it worked.
So is there a solution for regular viewport for Top/Plan views? (Hide stairs below slab)


Service Select Increase is Crazy - Not Impressed
in General Discussion
Posted
@leecalisti Thumbs down to me or to Vectorworks ? hhh