Tom W.
-
Posts
4,962 -
Joined
-
Last visited
Content Type
Profiles
Forums
Events
Articles
Marionette
Store
Everything posted by Tom W.
-
Ok but the Wall Tool is hardly 'a legacy tool which hasn't been updated for some time'...
-
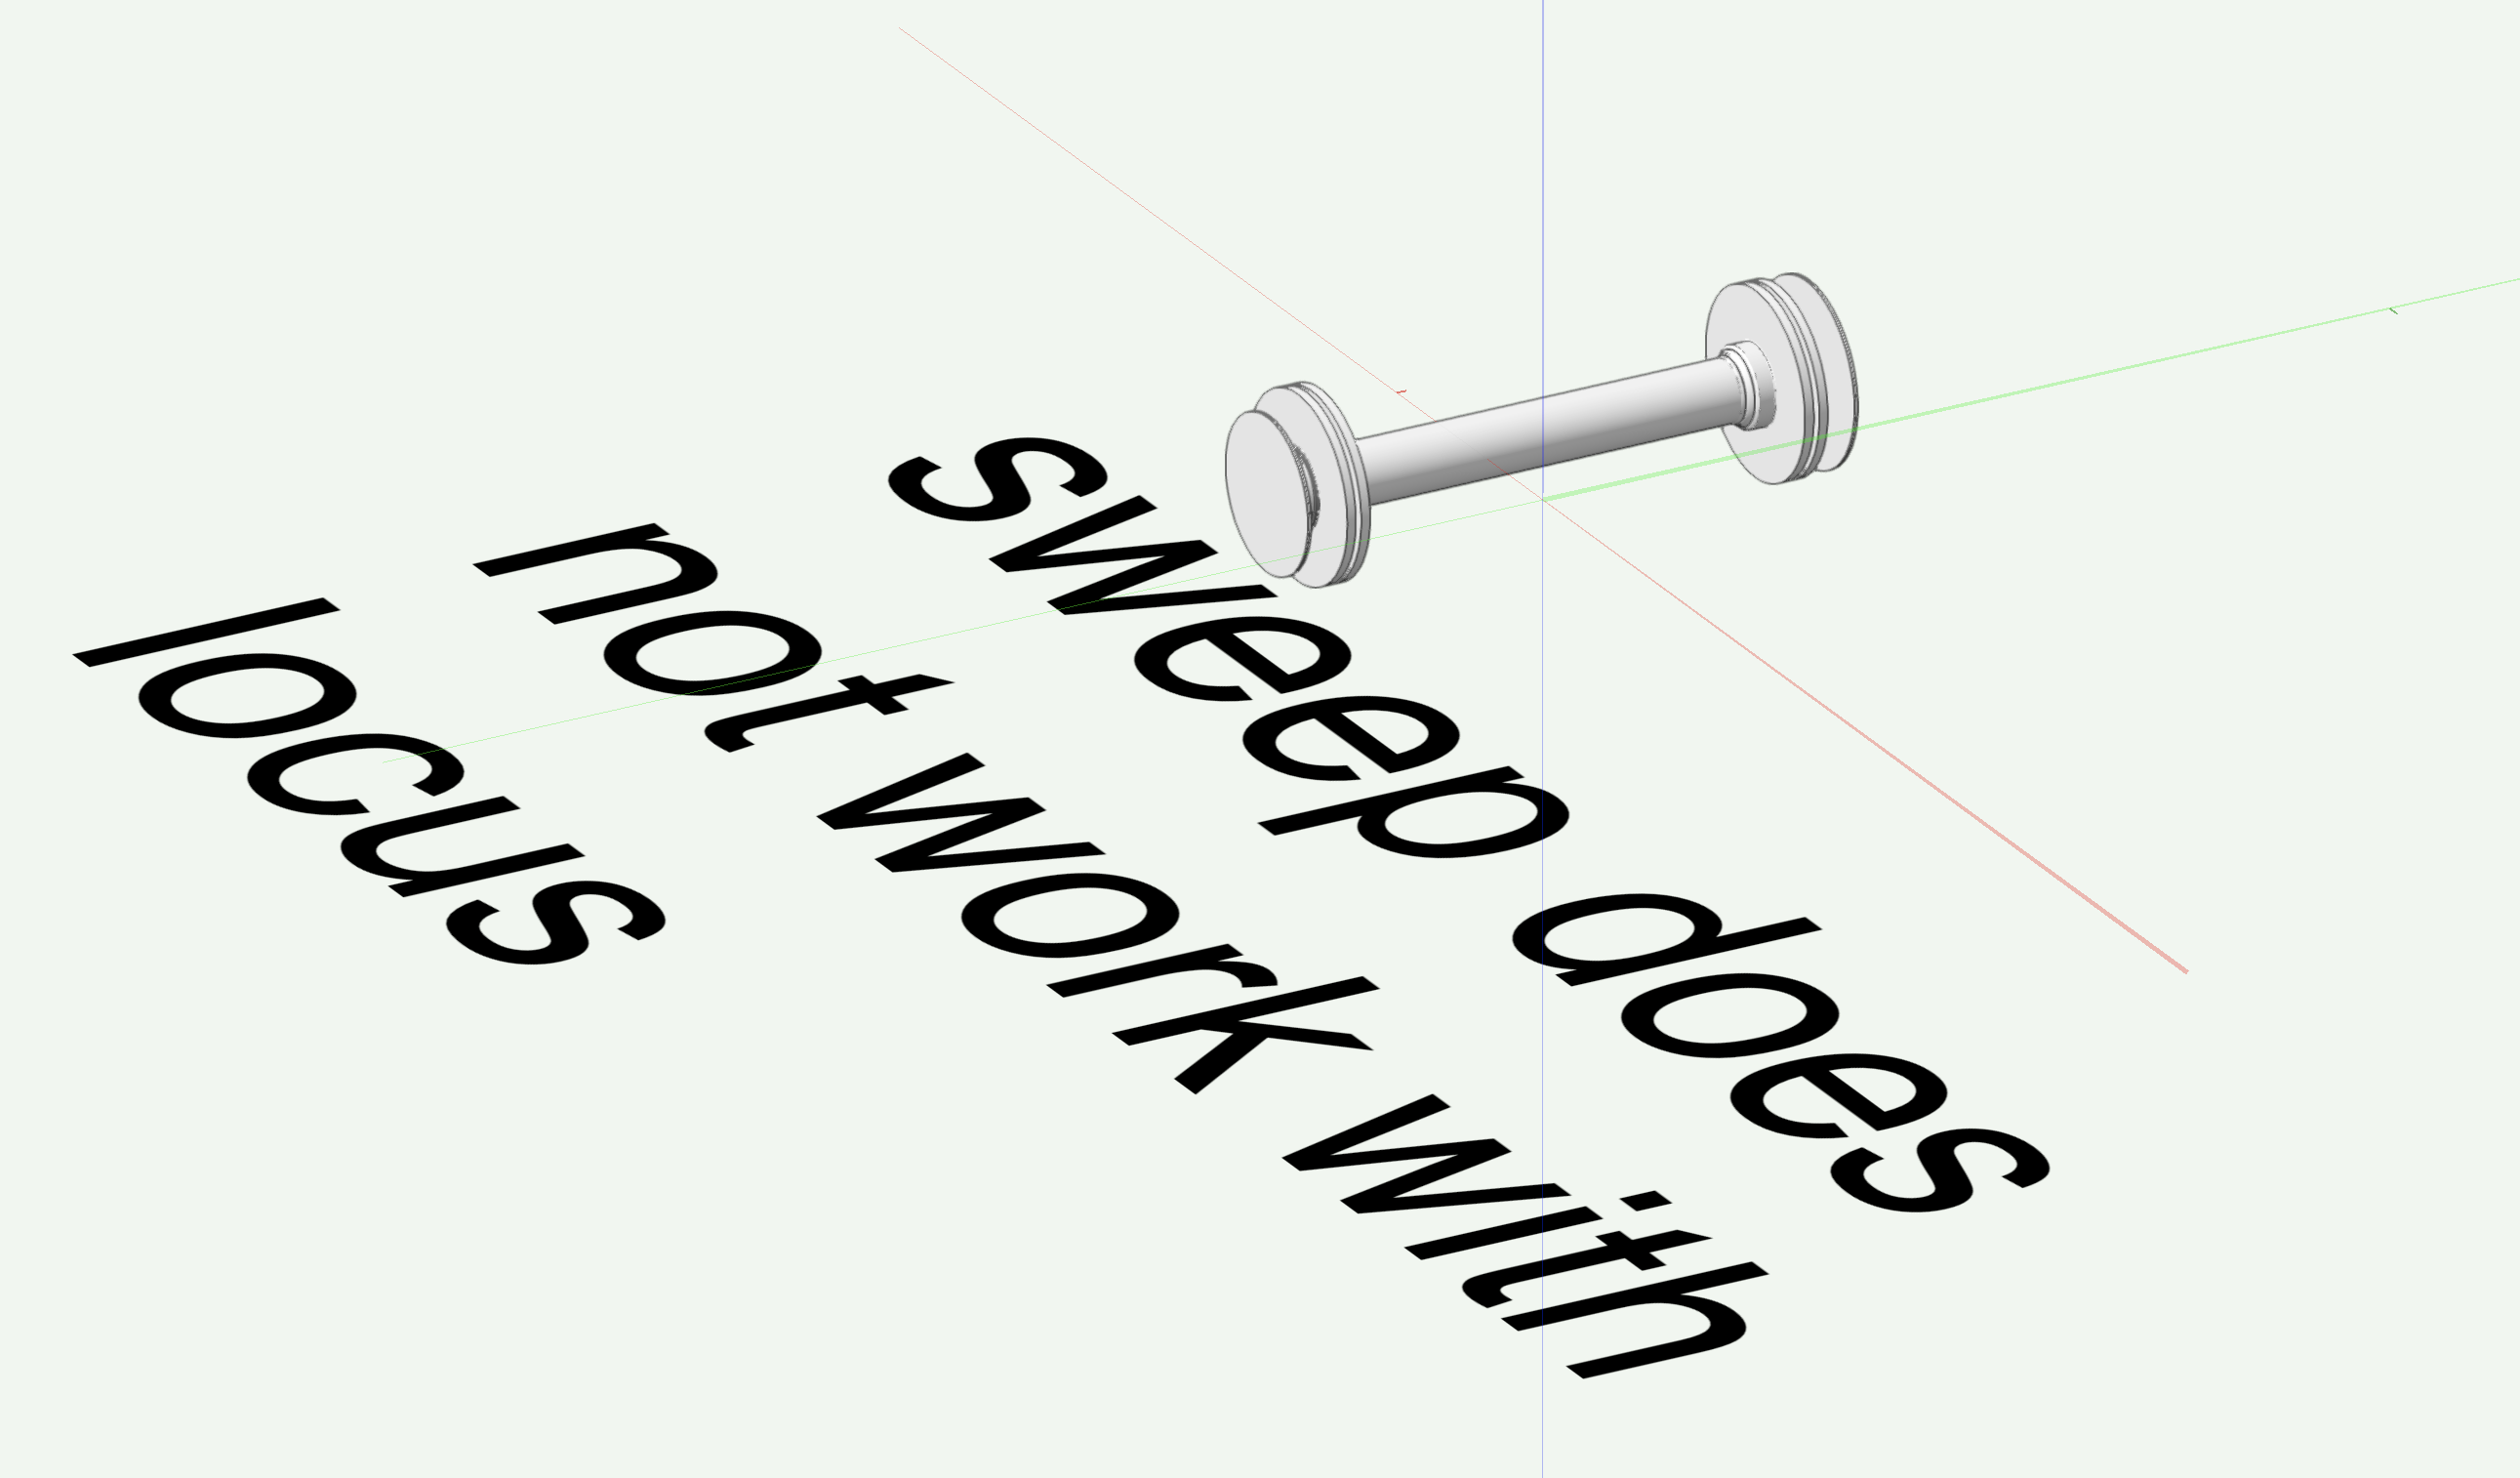
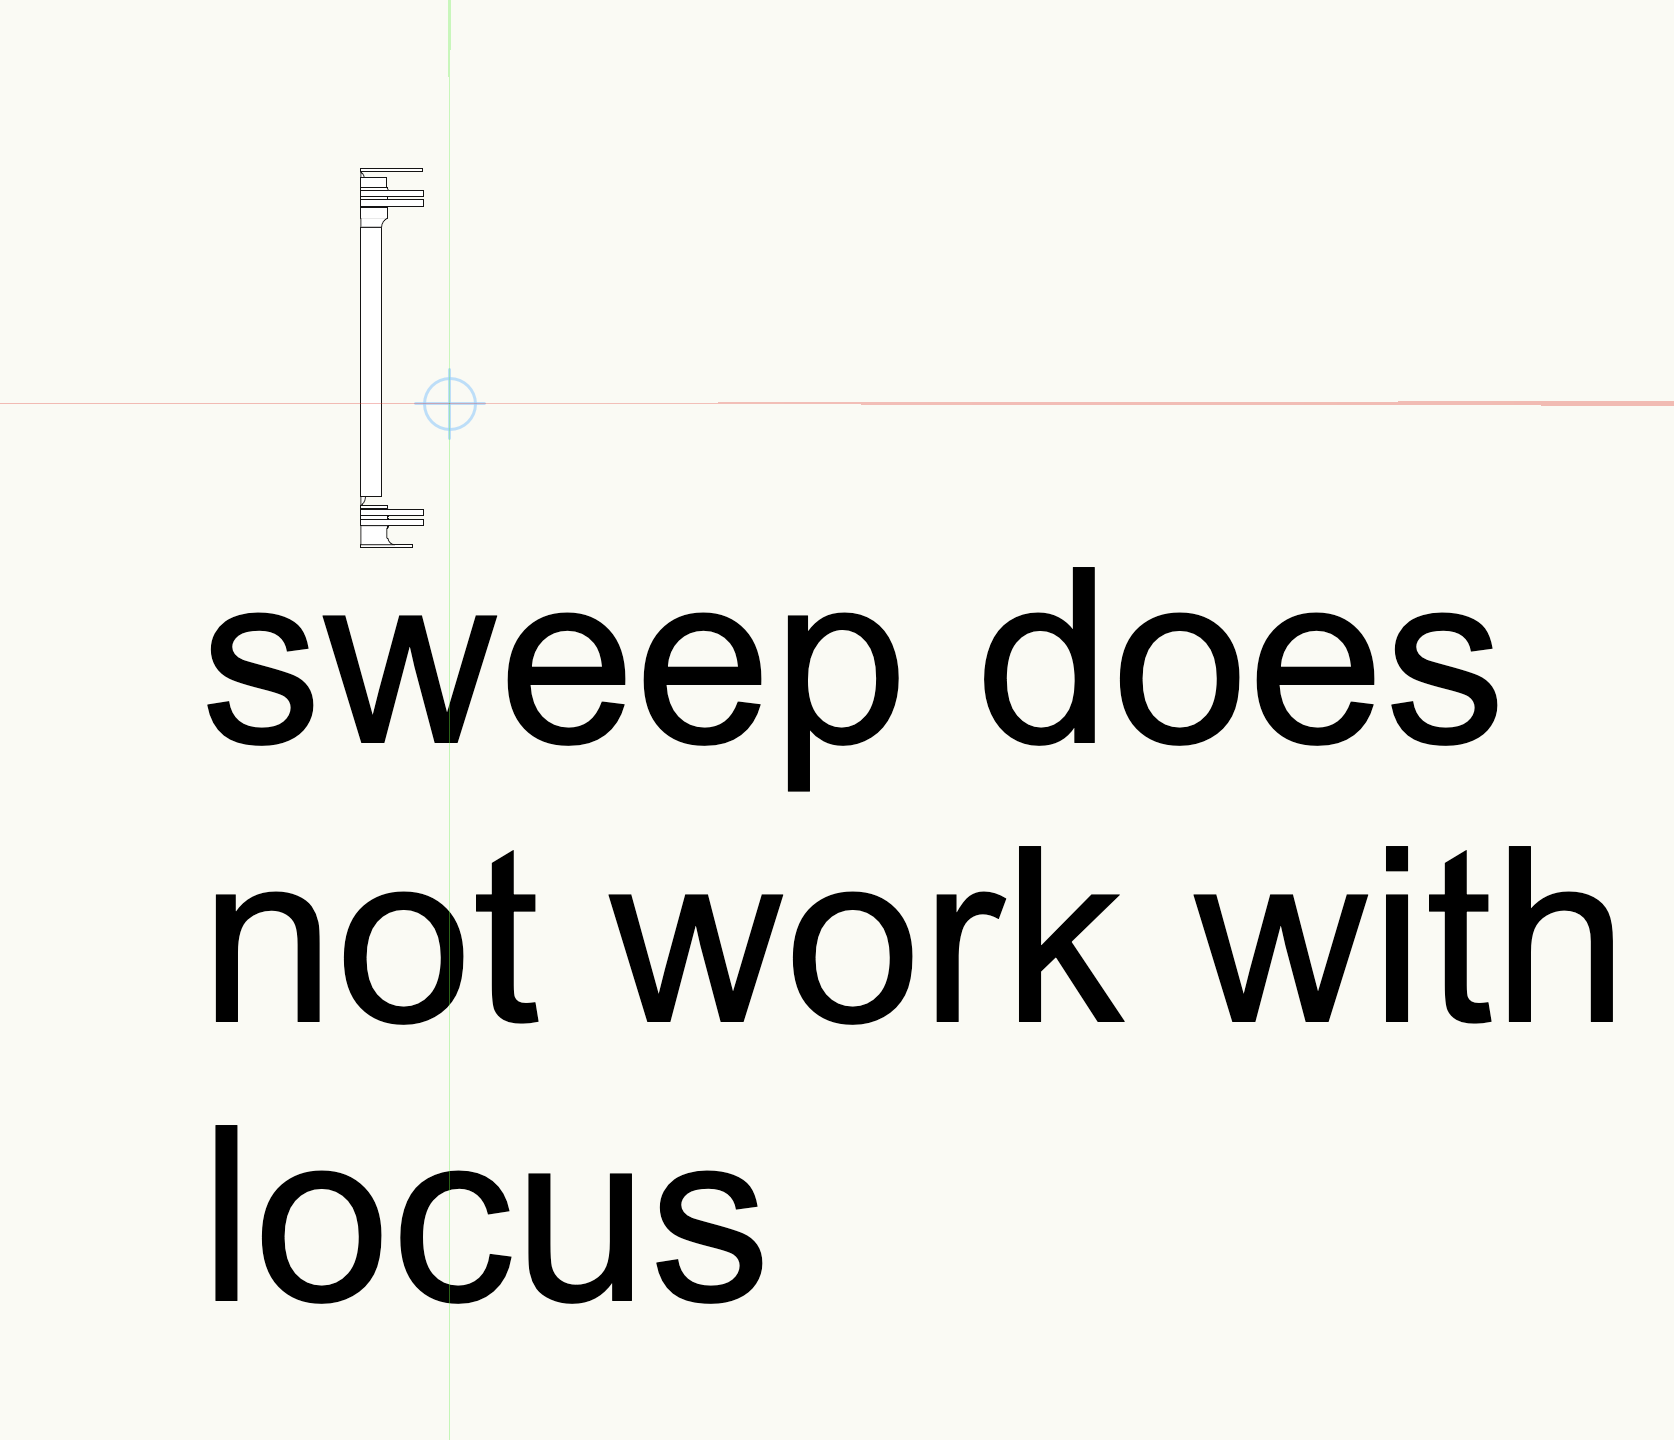
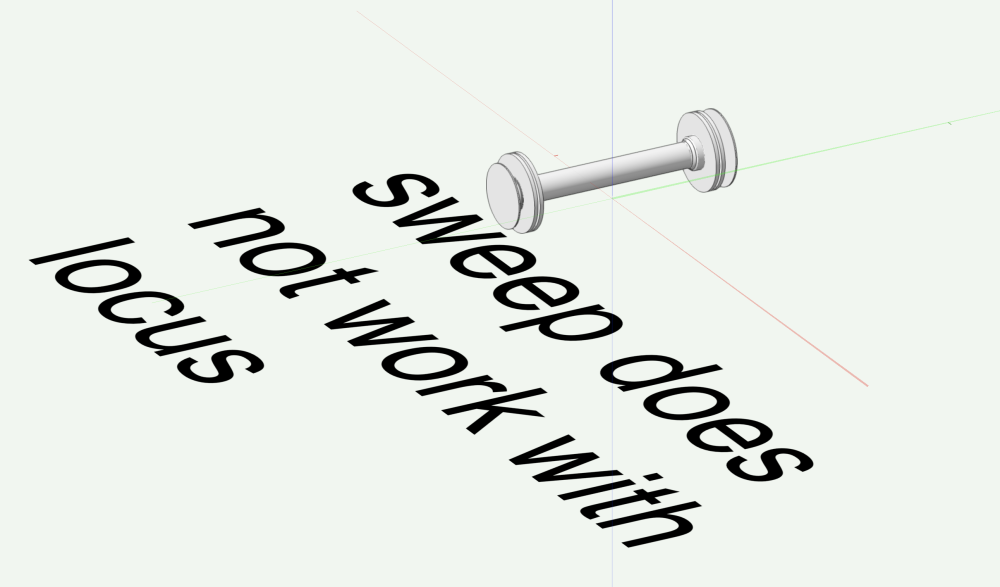
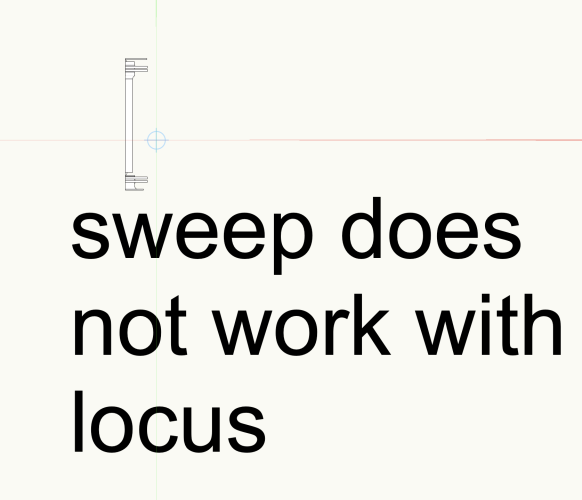
Re the Sweep, you don't need a locus because the centre of rotation is the edge of the object. Plus the Sweep command works on the X axis so you need to rotate right then run the command. That's why you're you're getting the warning message: Unless I've misunderstood the shape you're trying to create.
-
Are you talking about the Wall Framer command or the Wall Tool...?
-
You can do this using your first method, by applying the necessary offset to the Door. It's more the idea of being able to do it with a single object rather than two. I have no idea how Revit works in any other respect. I would just love to be able to 'bind' two parallel Walls together then insert single objects in them + wrap the components of both Walls to that object...🙂
-
It is interesting to know that a single Door can span two Walls in Revit...
-
How do you set the elevation of the directly modelled footings?
-
This is a recent project with footings + foundation walls all modelled as Walls, with symbols inserted for ducts/openings:
-
I model my strip foundations as Walls + have never had any issues doing it like that. I estimate their size/depth initially then adjust them once I've had the SE input. I used to use the Wall Framer command for timber framing but now do it manually using a series of hybrid symbols I created. I find this the same amount of work, after I've gone through the Wall Framer model + tweaked everything, plus everything is automatically in the right class with the right attributes + I get the Top/Plan look I want. But that's not to say I wouldn't be very grateful for a properly developed automated solution. See:
-

Clip cube on a sheet viewport + data tags
Tom W. replied to stingalleman's question in Troubleshooting
Can't be certain but sounds like the issue discussed in this thread regarding attempting to tag objects in Section Viewports: March 17 onwards. @Nikolay Zhelyazkov filed an enhancement request regarding it + says it's on their radar...- 1 reply
-
- 1
-

-
@Stephan Moenninghoff might be able to advise
-
No file attached... If you close + reopen VW it corrects the issue right? And how long before it happens again?
-
To me it looks like the problem is with the way you've set your Wall up. It looks like the plasterboard component is the only one extending the full height, the others have zero height. I don't really use Stories so am not going to be much help unless you post the file but do the Wall components need to be bound to those levels the way they are? What are you trying to achieve with the top offsets? I don't understand why you have the wall itself bottom bound to the layer elevation + top bound to the layer wall height + then the individual components bound to story levels, but then like I say I generally use a layer bound set-up.
-
Only if the Internal Origin is coincident with the User Origin. These coordinates indicate the distance to the User Origin which can be wherever you want it. The critical thing where Far From Origin issues are concerned is the location of the Internal Origin so that would be the thing to check. You can't see it in the video.
-
Use @Jesse Cogswell’s example above. Place the locus inside the circle. Does it allow you to run the command?
-
Can you show us the Wall Components settings for that Wall: are there top offsets are applied?
-
Whats the best 3d survey file type for us to import
Tom W. replied to builtra's topic in General Discussion
My preference is to receive the points as 3D Loci in a dwg file. Then it's just a case of selecting them + running 'Site Model from Source Data...'. -
Like @Jeff Prince says, use an Opening-configuration Door in the second Wall. Or use the Wall Edit tool to shape the second Wall around the top of the Door (unless you need to use Wall Closures).
-
Roof objects no longer displaying blue selection handles
Tom W. replied to Tom W.'s question in Troubleshooting
Doh that was it thank you!!!! That's Monday mornings for you... I have been finding it defaulting to this mode quite a lot recently too - since Transform mode was introduced? It never happened before. I'm not actually sure that there's any use whatsoever to having Roof objects be affected by the different tool modes in this way but that's another matter. Anyway many thanks glad it's sorted! -
Roof objects no longer displaying blue selection handles
Tom W. posted a question in Troubleshooting
My Roof objects have suddenly stopped displaying their blue selection handles. Normally with the Selection Tool active, each face of a Roof has a blue selection handle which you can click on with hand cursor to edit that face. These handles are no longer appearing. If I export the file to VW2023 the handles are present as normal. All was fine up until half an hour ago... Closed+ reopened VW + it's the same. Restarted computer + it's the same. Anyone else seeing this...? I have filed a bug. Luckily I can still right-click on each face + select 'Edit' + it opens up the settings for that face in the same way as clicking on the blue handle but even so... -
I'm quietly confident all is working correctly now too... Hoorah
-
I find the Organisation palette a bit of a pain to get to. I invariably have it set to 'Details' rather than 'Visibilities' plus you have to go through a big long list of VPs to find the one you're interested in (assuming you've named them all correctly). @Jesse Cogswell wrote a script that generates what's essentially a version of the VP visibilities pane of the Organisation palette but it is a lot quicker to summon it up + the currently selected VP will be pre-loaded: I wonder whether VW couldn't do the same + combine layers + classes in the same dialog: is there a reason for separating them? Otherwise I agree with the wish, it should be easier to toggle between them.
-
This is new behaviour in VW2024. Previously, when you moved an Elev BM the control point moved with it which was annoying in many circumstances because you had to keep readjusting the positions of control points + had to be careful they were set to the right position as it wasn't always obvious. Now you can duplicate multiple Elev BMs + move them wherever you want around the VP + they will all share a common control point. However, solving one problem seems to have created a new one as like you say, you definitely DON'T want the control points to stay in the same place when you move a VP. I hadn't realised this was happening as like @Jonathan Pickup I'm more often using 3D Elev BMs which are getting their info from the model. But I am voting it up as whilst I wouldn't necessarily want it to go back to how it was in previous versions you should definitely be able to move a VP on a sheet without it affecting the location of the control points.
-
If you use a Custom Leaf you can apply an offset in the symbol definition but it will only affect the 3D representation of the Door. You'd need to edit the 2D Component to show the offset in Top/Plan too (+ then the 2D graphics would be 'fixed' + no longer linked to the PIO...). I don't think you can offset the hardware however so to include hardware you'd need to make it part of the leaf symbol then increase the leaf thickness accordingly... 🥴
-
Using a Hedgerow for the first time. It seems that if I want it to have a texture in 3D I can only use a solid fill colour or hatch fill in Top/Plan. If I use a Gradient the Hedgerow displays as wireframe in 3D. So instead I thought I'd use a solid fill colour but reduce the opacity. However when I do this the opacity setting is applied to the pen as well: This can't be right? @Katarina Ollikainen? Secondary question: how come I can use a hatch + retain the texture but not a gradient...? Be great to have Hedgerow Styles + Plant-level control over 2D attributes! Thank you

-
Apologies you’re absolutely right it’s Mac only! I vaguely remember learning this at the time but obviously completely forgot… That’s a bit crap. I am very fond of the small size option + would be unhappy not to have it.