Marshallae
-
Posts
40 -
Joined
-
Last visited
-
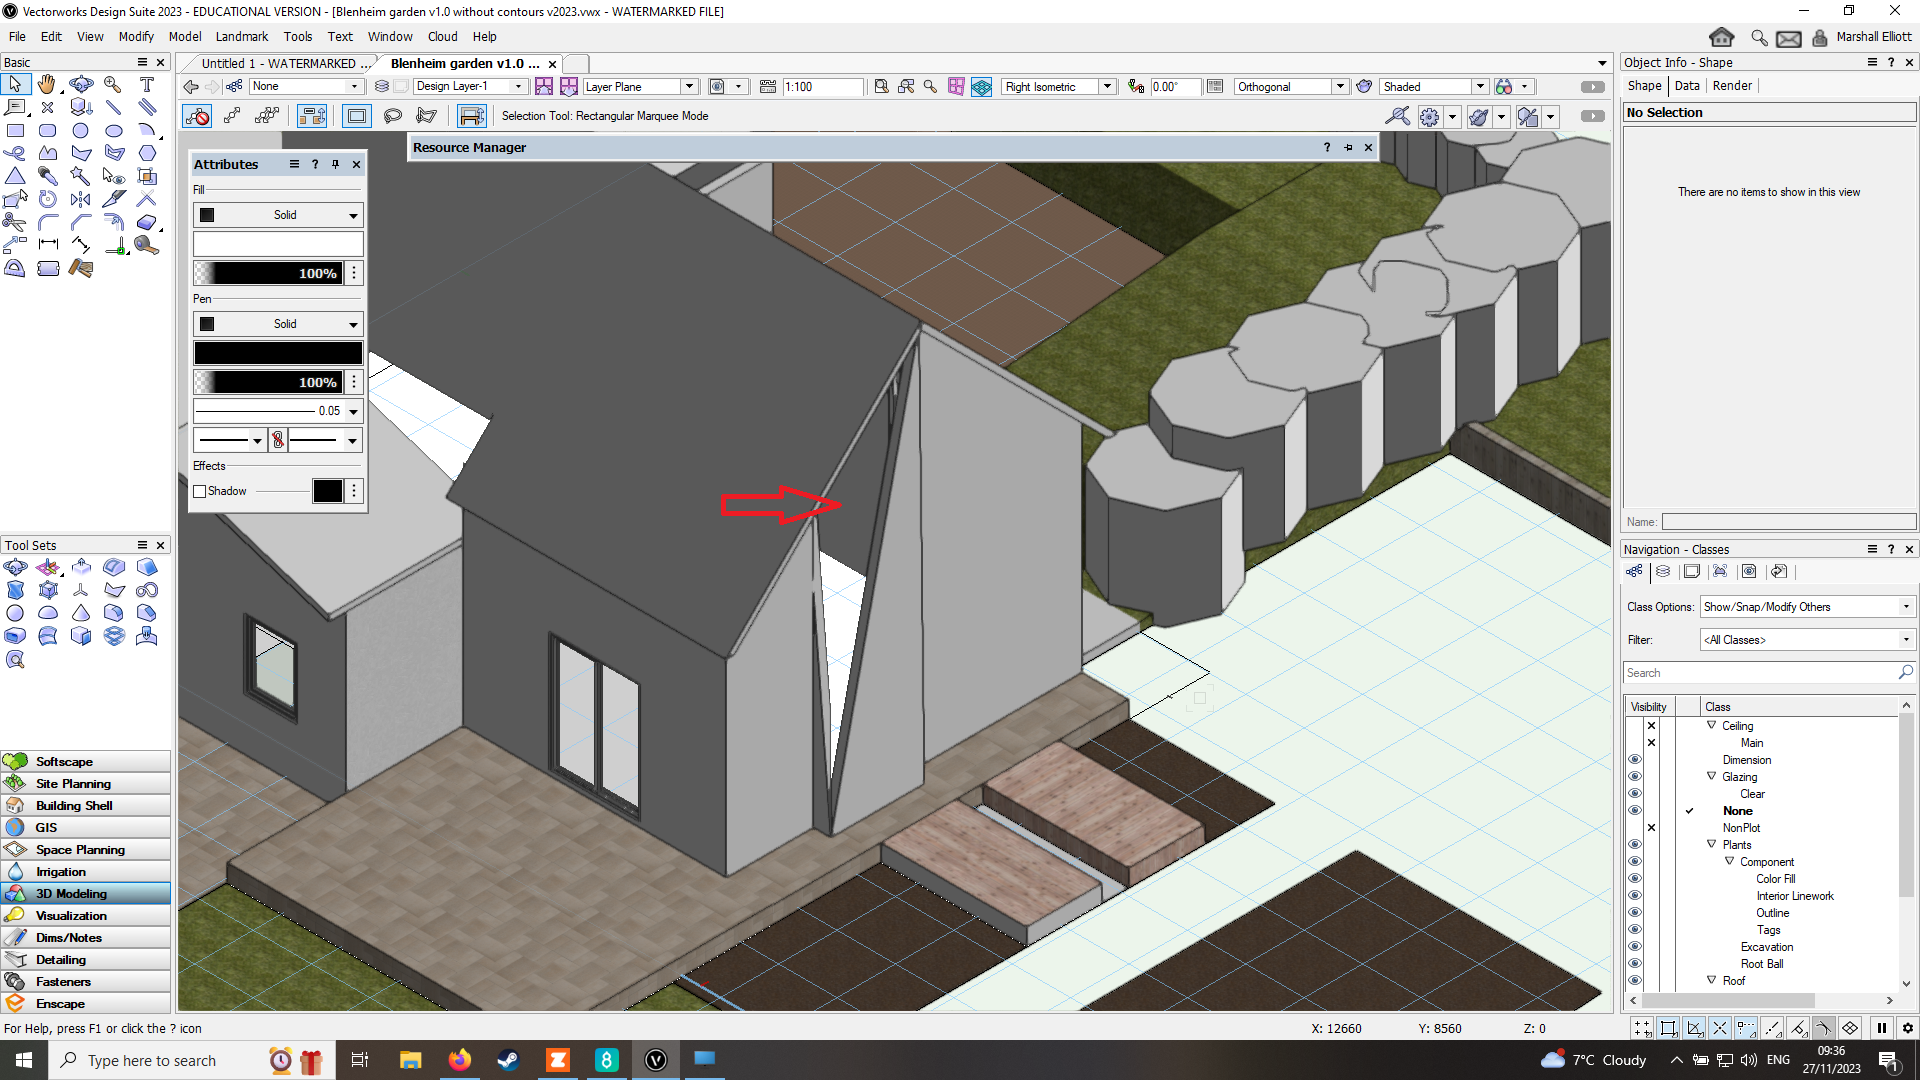
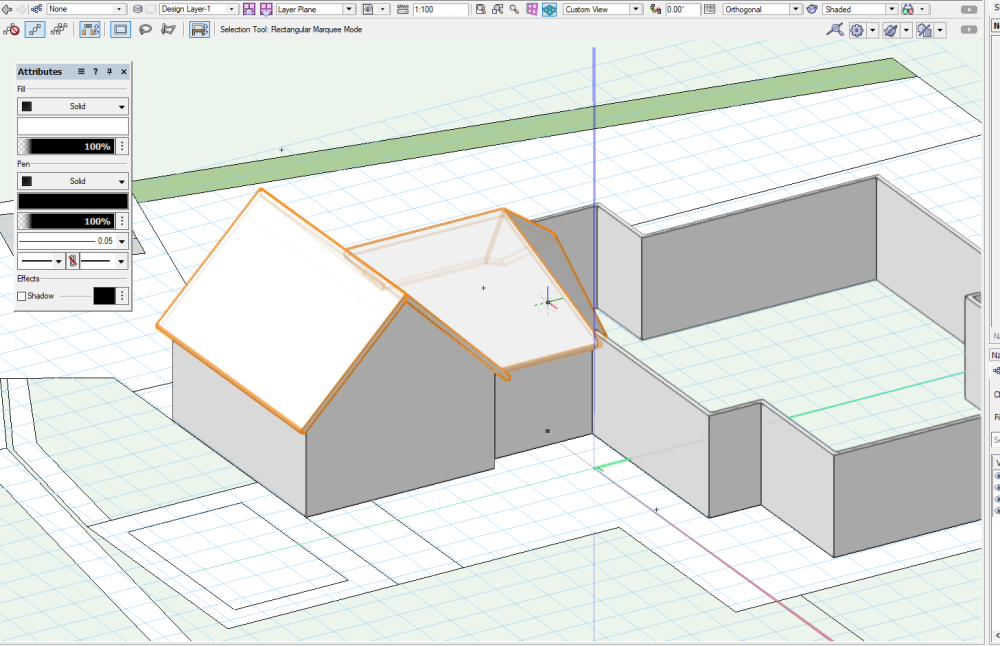
Hi all, I'm doing a garden design at the moment and have modelled the house in the garden for situational context. I've been using the 'fit wall to object' tool to get walls to reach up to the eaves of the roof. Mostly this has been working fine, but there is a chimney breast which is exhibiting strange behaviour, where each of the walls (3 sides) all only fit on one side of the shape, leaving me with 3 triangles - picture below should make it easier to see what is happening. Not sure how to resolve this to make the walls fit the roof properly like they do elsewhere. Any tips?

-
Hi all, Thanks for the tips and link to other threads. I'm making progress. Not perfect, but probably good enough for what I have in mind for this particular project (which is more about the garden around the house). Roof looking more or less like the house in the picture now, just need to tweak angles etc. Not all of the measurements of the house itself are prefect sadly, but again sufficient for now. Thanks again!
-
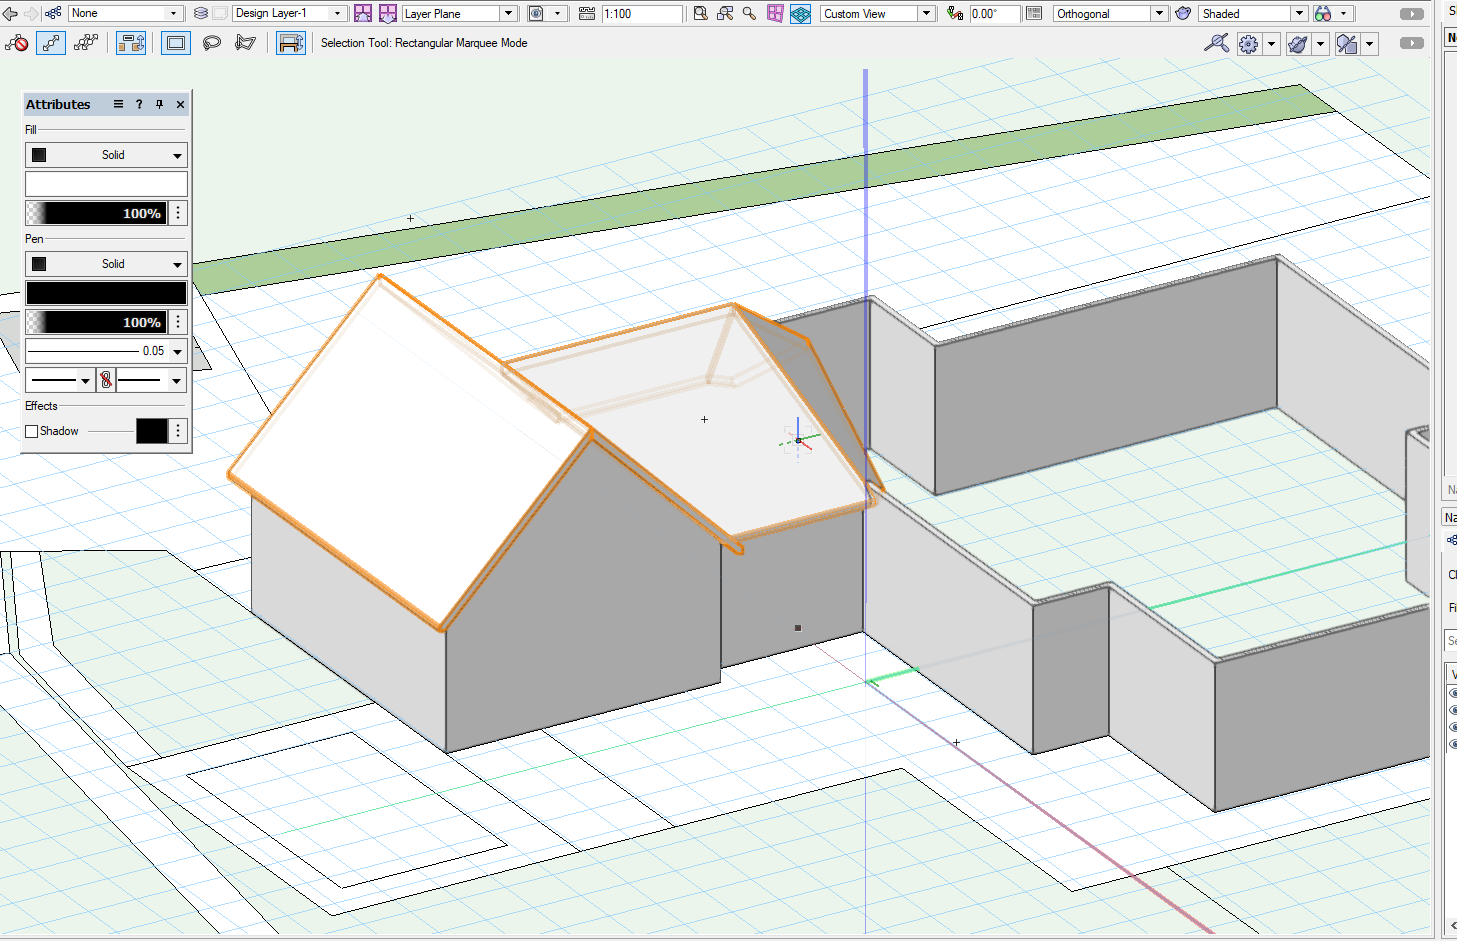
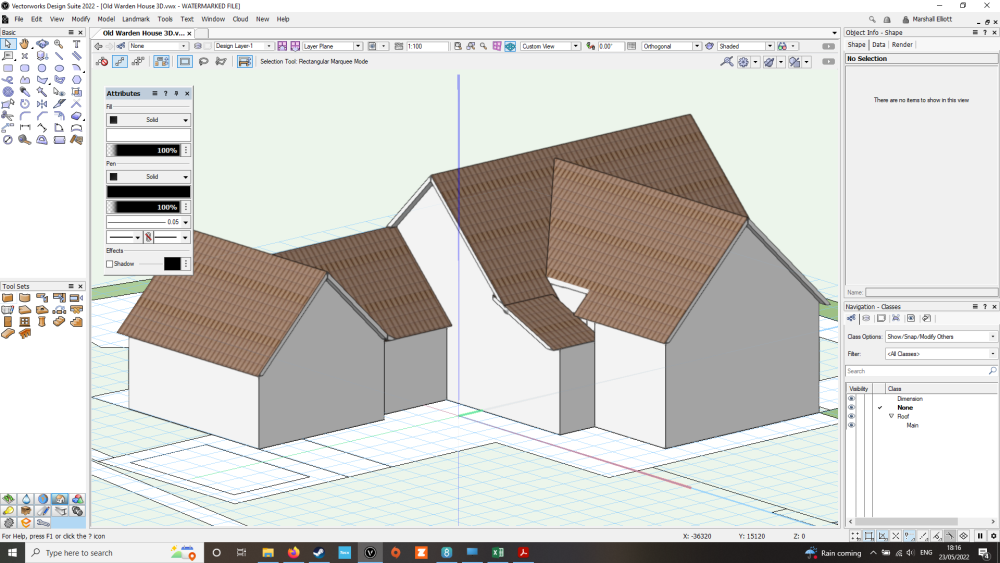
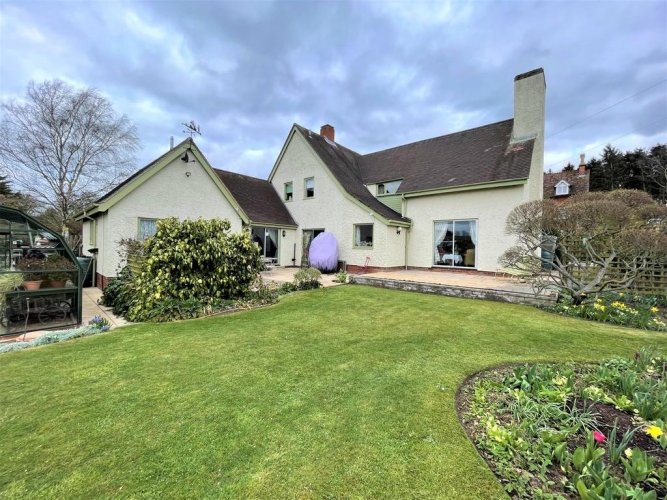
Hi all, I'm trying to model a fairly complex roof shape and struggling to get VW to do what I want. I usually use VW for garden design, and so this is a less familiar area of functionality for me and so hoping some experts might be able to help. I've attached a couple of pictures to help show what I'm trying to do. One is a photo of the house I'm trying to model. The other is a screenshot of VW so far. I tried to create a roof that went over the whole building footprint but quickly realised that wasn't going to work. Instead I'm now trying to build it up in sections. On the screenshot you'll see I've managed to get it to model the single story wing of the house roof, but then there is a little 'extra' bit at the end closest to the bulk of the house. I can't seem to get rid of this bit and so any tips would be welcomed in terms of the most efficient way to build this model. Thank you all in advance!
-
Please allow plant spread to be easily modified
Marshallae replied to Marshallae's question in Wishlist - Feature and Content Requests
Thanks both. Just as an additional point, I often find myself wishing to have different sizes of the same plant, either for existing gardens, or as part of a new planting plan. Particularly this is the case with trees, but also it may be that some areas will have larger specimen shrubs than another area. Again, having to make each different size a separate asset is very irritating. As an example, I'm current working on a garden which has 3 mature stone pine trees - naturally they all have different spreads and heights. Previously I could have just put 3 x tree symbols down and then adjusted the spread for each = 30 second job. Now I've got to go through this convoluted workflow for every tree = extremely inefficient. Now imagine this on a large scale garden with 10s of large trees all different sizes.... -
Hi, I used VW for garden design. In previous (pre-2022) versions it was a 2 second job to change the spread of a plant symbol. Now it requires multiple levels of object editing and saving; this feels like a massive step backwards in terms of workflow efficiency. I can't be the only one suffering from this I'm sure. Please can we go back to the old way of being able to manually type a spread (and height) into the plant object info palette?
-
Hi Tom, Thanks for the quick reply. This does work, my only issue with auto hybrids is that you can't fill them with any colour/render on the top plan (unless I'm missing something?), which is why I've tended to avoid them in the past as I need to do both 3D renderings and 2D top plans, and if using hybrids for 3D I end up having to pretty much draw the 2D version separately using other shapes in order to render it. If you know a way around this then please let me know. Thanks!
-
Hi all, I'm currently doing a garden design where I want to have some topiary hedge which is cut in such a way that it slopes from the edge of one object (a raised water feature) up to the edge of another object which is at a higher elevation (for context, the visual effect will be that the change in slope will be less obvious because the topiary will be cut to meet the two edges and thus make it look quite seamless). I've created the two objects (water features) using slabs feature, which is fine as their tops are flat. One is 500mm high, the next is 700mm high. However, I'm now after some advice as to the best tool to create a sloping 3d shape to go between the two. It is a non linear shape and so the slab drainage tool doesn't give the effect I need. Perhaps I should use the roof tool? Thoughts?
-
Creating elevations - issues with 3D Sections and rendering
Marshallae replied to Marshallae's topic in Architecture
Hi all, just giving this a bump in case anyone else can think of a way to solve this? -
Slab directional texture issues - please help
Marshallae replied to Marshallae's topic in Architecture
Interesting. I've not had much cause for using floor objects previously, but it's useful to know this for future reference. As you say, odd modelling behaviour. Floor does seem fine if using it for flat edged shapes, but perhaps worth avoiding for curved surfaces if a smooth finish is desired. Again more good reason why they should just allow slabs to rotate and scale textures, then all these issues go away! -
Slab directional texture issues - please help
Marshallae replied to Marshallae's topic in Architecture
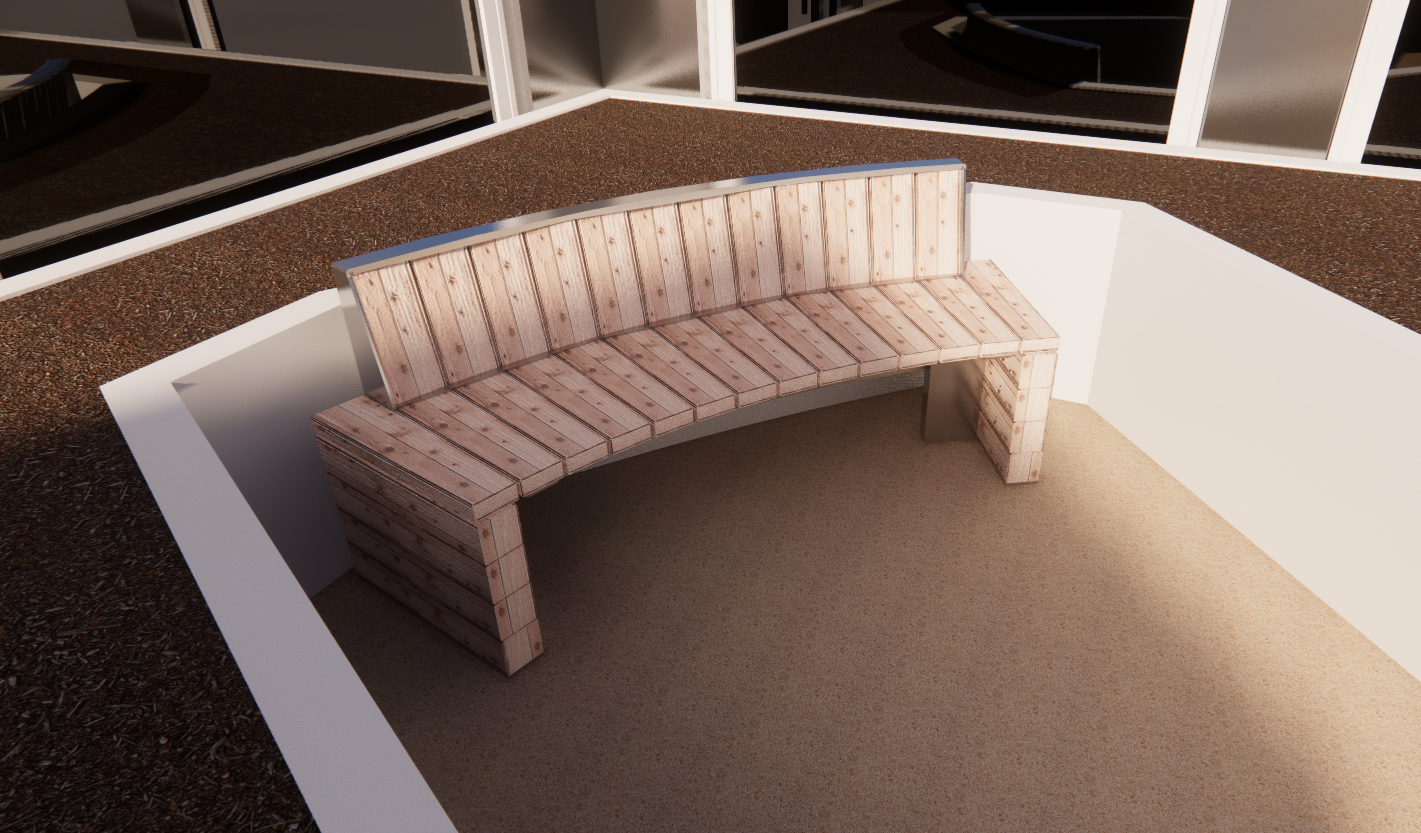
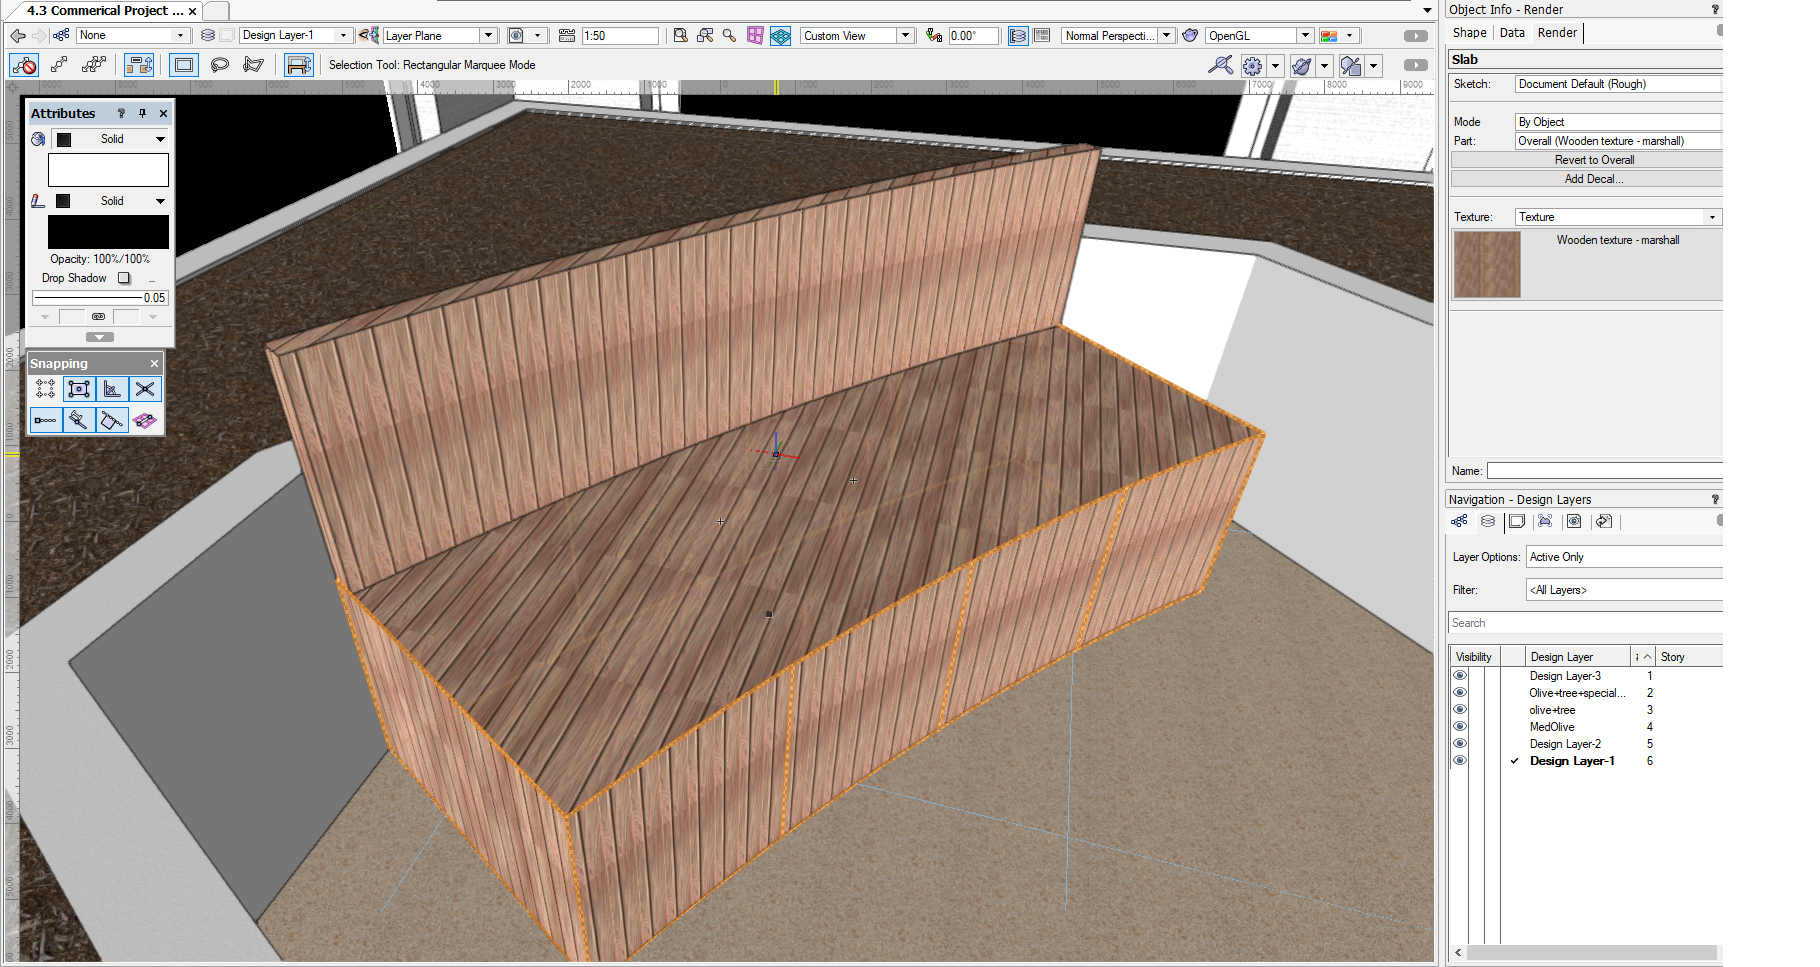
By way of an update on this, I've ended up using one of the library assets (Site-Furn_DuMor Bench), an existing curved bench, which I've then edited the textures of for wood. Overall looks nicer as it has the steel sides and is generally a bit more architectural than the blocky bench I originally had. Here you can see it rendered in Enscape, with the correct directional wood grain.
-
Slab directional texture issues - please help
Marshallae replied to Marshallae's topic in Architecture
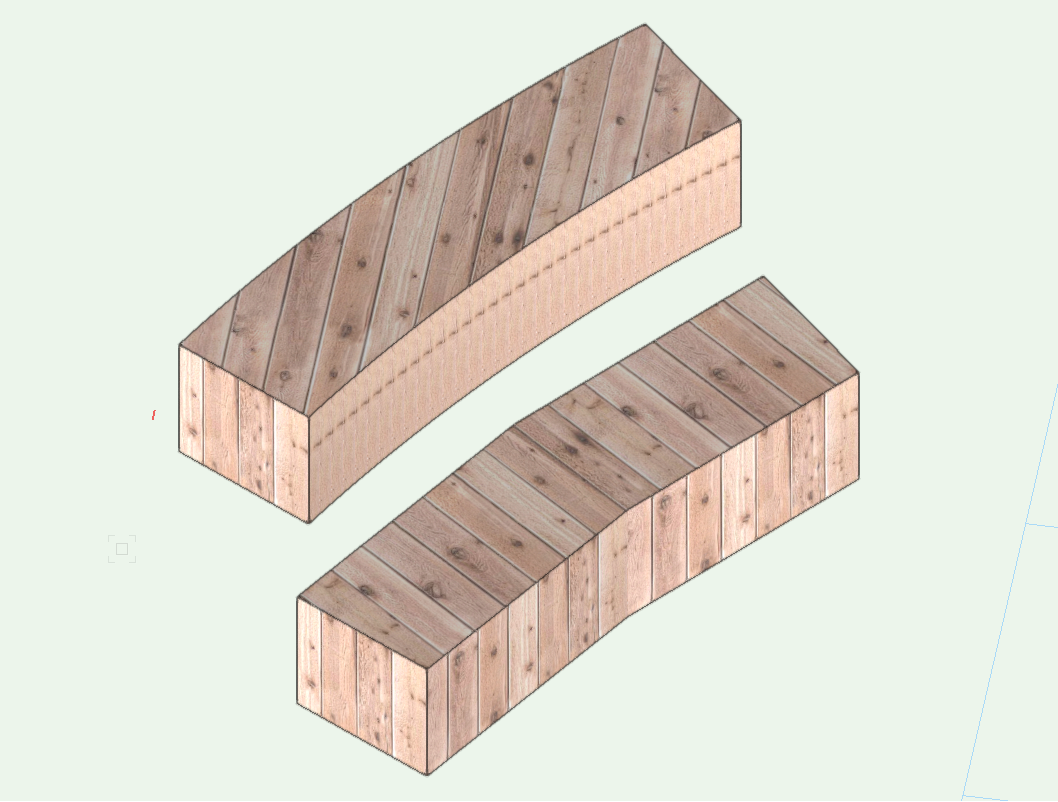
Thanks, I've just tried it using the floor method and this works nicely. Seems a lot faster to me for most use cases. The issue I had with using the sweeps etc, is that whilst they are fine in a blank document, when you are trying to use those in the middle of a busy model, flipping between front view (with lots of things in the way) and top view etc it becomes rather harder to be accurate. Whereas using floor method I can get the dimensions right in top view much more easily, so thanks for the tip. Edit - just noticed one thing which makes floor method less appealing. It seems that on a curved object, making it into a floor loses the smoothness of the curve, and instead has some quite severe corners along the curve line compared with slabs which seem to cope well with curves (see attached pic).
-
Slab directional texture issues - please help
Marshallae replied to Marshallae's topic in Architecture
Hi Matt, Thanks for taking the time to do this video - much appreciated and gives me a way to do what I need to for this specific project. That being said, it feels rather clunky overall to create something relatively simple, which could be done a lot more efficiently if we could only rotate the direction of textures on a slab. I'm not sure how much influence you have over future development of VW as a staff member, but if you can feedback the request to be able to rotate textures on slabs then it would be hugely appreciated. It would be such a useful feature! -
Slab directional texture issues - please help
Marshallae replied to Marshallae's topic in Architecture
Hi Matt, Thanks for that. That does indeed look like what I'm trying to create. Just had a look in VW and it seems that slabs cannot be converted to auto-hybrids, is that correct? If so will I have to create everything from fresh to use these? When you say you used two sweeps, can I just check, did you draw the side view of the bench, then sweep that through x degrees? Then presumably needed to rotate that 90 degrees to get it to stand up in the right direction? It would be great to see the workflow steps you used so that I don't end up doing this in a really inefficient way. Thanks! -
Texture Mapping for Slab Objects
Marshallae replied to Tom W.'s question in Wishlist - Feature and Content Requests
+1 -
Hi all, I've created some bench seats using VW slabs. When applying a texture for rendering it seems that there is no way to change the rotation of textures (other than changing the texture itself). For the uprights of the bench the render goes in the right direction (i.e. wooden slats running vertically). I want the horizontal ones to run in a different direction though. (attached image shows the current state issue). I've got a few of these benches, each set at different angles (they all face into a central focal point but from different point). SURELY the answer isn't that I have to create 10 versions a texture each with different rotation angle and apply it to the different faces of the slab?! 🤯 VW can't be that dumb right!? Before someone suggests using extrudes, I can't do that either as they don't solid fill on a top plan, which is needed for this plan (again, why VW, why!! 🙄)