
trashcan
-
Posts
546 -
Joined
-
Last visited
Content Type
Profiles
Forums
Events
Articles
Marionette
Store
Everything posted by trashcan
-

Import Illustrator File
trashcan replied to Bruce Kieffer's question in Wishlist - Feature and Content Requests
I google this every time I forget how to do it and it still works great. -
How to toggle off the red/blue green axis in Open GL mode
trashcan replied to alexg's topic in General Discussion
I've only been able to find it on double clicking. If you search the help field it "smartcursor" yields nothing 😞 -
How to toggle off the red/blue green axis in Open GL mode
trashcan replied to alexg's topic in General Discussion
thanks @markdd ! -
oh man @mjm if you don't have any ideas we're screwed !!!
-
"Soft Shadows" is never really soft enough for me. In the real world, I'd jus throw some diffusion on a light to soften it up. In VWX, at the very least, I thought I could emulate that by putting frosted glass in front of a spot light, but all that seems to do is DIM the light. I also thought maybe I could crank the spread up really high and bring the beam angle really low, which, in real life, would soften the shadow as well. But that doesn't work either! Any ideas?
-
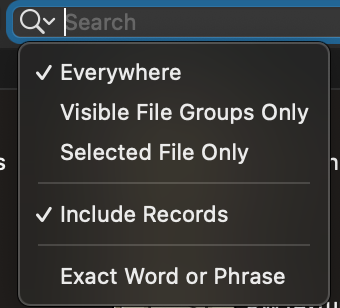
Another brain dead moment If I want to search just my active document (I.e., not the VWX libraries), is there a way to do that? Clicked the little gear - no dice. Ahhhh figured it out, the search icon has a dropdown
- 1 reply
-
- 1
-

-
I get that - all the other software I use is adding Sherlock like capabilities with a hotkey and it is amazing how much it's improved my workflow. Quick search kind of does that, but it doesn't verify against existing data (ditto for Vectorworks scripts). Like your amazing RECLASS script, if it had verification, as you filled out the class it would autocomplete against existing classes. Takes a little of the guess work out of it.
-
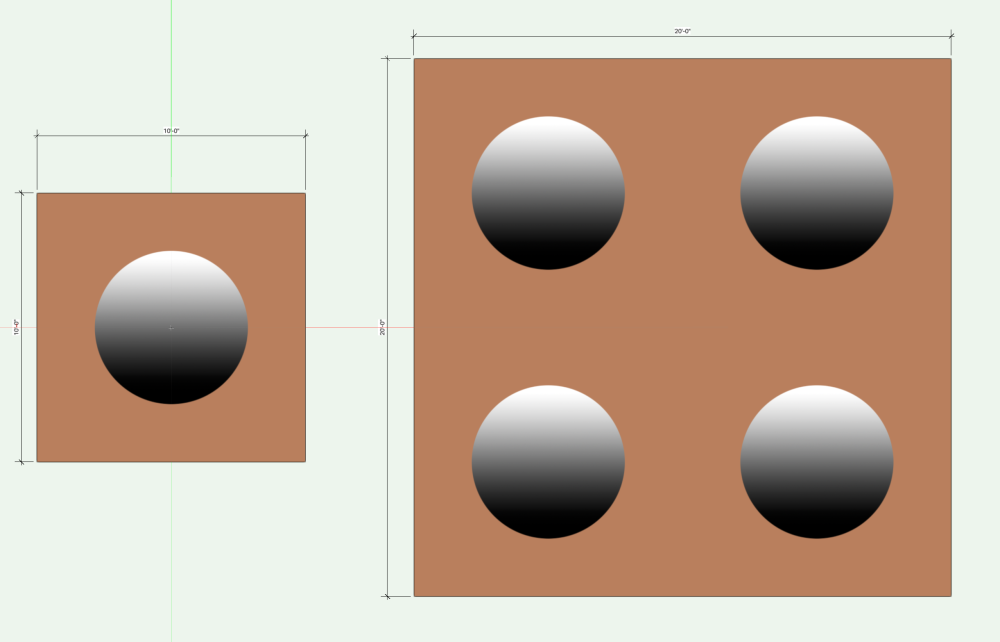
@Pat Stanford - Modify-->Scale Selected Objects results in the behavior I'm talking about. It'll scale the plane that the image prop is on but it won't scale the texture. When brought in, I set the image prop as 10' x 10' Oddly, you'd think a quick change in the texture edit would be the obvious solve after you scale it up, but 1) That would effect every use of the texture which we don't want. 2) The data in the Edit Texture has the size defaulted to 1" - so even though it's appearing correctly at 10', if you choose to reuse that prop texture, it will show up as 1" @Dave Donley converting an image prop to a nurbs surface wipes the texture from the image prop and doesn't allow any texture mapping at all. Before you turn the prop into NURBS, you have to extrude it, which you can't do with an image prop. You would have to create the image as a texture first, then extrude the object, then apply the texture to the object. At that point, you are circumventing image props completely.
-
When you scale an image prop's 3D polygon, it doesn't also scale the image. I understand why that's the case and I know how to solve it fairly easily, but is there a way to scale the image and 3D polygon simultaneously?
-
@Pat Stanford amazing. great work. have tried it on groups (which is my intended use case). works great. thank you. If VWX added this functionality and it allowed for verification (to reclass to a pre-existing class), it would be incredible.
-
Ahhhhh the caveat !
-
Create new class with attributes of selected object
trashcan replied to michaelk's question in Wishlist - Feature and Content Requests
@Pat Stanford to clarify: my goal here is the ability to use the quick search function in order to quickly class new objects or groups. Anything that goes into a menu via workspace editor can show up in quick search. So using this script is a work around to achieve some thing else 🤪 If I use the script as built (not the VWX packaged version) on a single item, it somehow makes the fill style None for that new class. If I use the script as built (not the one now packaged with Vectorworks) and I have attribute overrides on objects within a group (i.e., an object in the none class but it's yellow instead of white), then they revert to the attributes of the none class. If the objects within a group are already classed before the script is run, then it works as I would hope ✅ If I use the script as included with Vectorworks, the script doesn't work at all. Nothing happens 😢 @Peter Vandewalle I couldn't get this to work in VWX 2022. Added it to the plug-in directory and it failed to launch. Maybe I'm doing something wrong. Either way though, not sure if this is what I need - but it looks super useful nonetheless !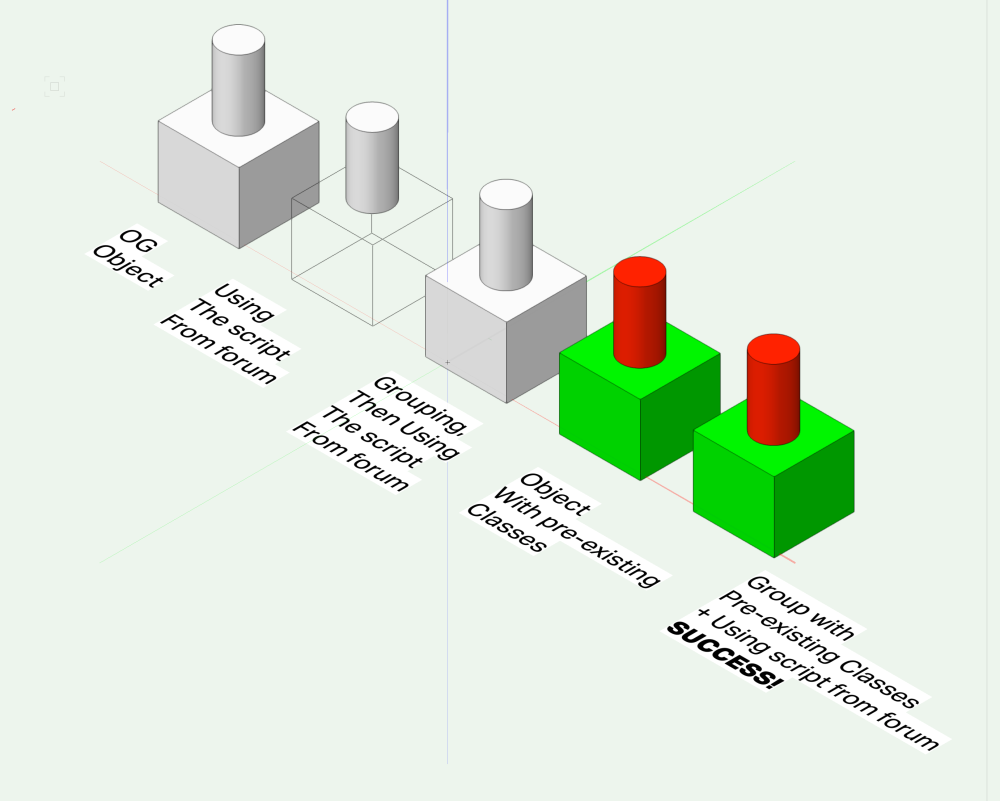
-
Create Class with Selected Attributes works as a work around but there are some obvious caveats to it - like if you have objects in a group with multiple attributes, then it's not the droids you're looking for 😢
-
Polyline bucket tool is the winner for me ! Nice call
-
VectorScript: Detect self-intersecting polygon/polylines
trashcan replied to caravanio's topic in General Discussion
Doesn't seem to work 😞 -
Ahhhh - just creating a renderworks texture that has glow attached to it and then applying it to a solid that is your "bulb" (like a ring light)?
-
Create new class with attributes of selected object
trashcan replied to michaelk's question in Wishlist - Feature and Content Requests
Quick question - how would one modify the script so that the items in the group do not switch to the None class? Using "New Class From Object Script II" jk -
This does the trick ! And some other amazing goodies in this thread.
-
Create new class with attributes of selected object
trashcan replied to michaelk's question in Wishlist - Feature and Content Requests
You guys are absolute legends ✅ -
@Boh - coming back here, quick question - that command will show up in quick search if I add to menus. is there a way to for those command scripts to show up without doing that work around? Also curious about how to write a script that is Create New Class and Assign to Selected Objects - essentially combining your change class to none and create class scripts. Any pointers?
-
Duh, thanks @Andy Broomell
-
I'm sure there's an easy answer here. I have a number of lights that I'm using for specific viewports, but there are some viewports where I want to use the default Vectorworks lighting. If I turn off all the Viz lights, everything is dark in those viewports (obviously). Simple solve?
-
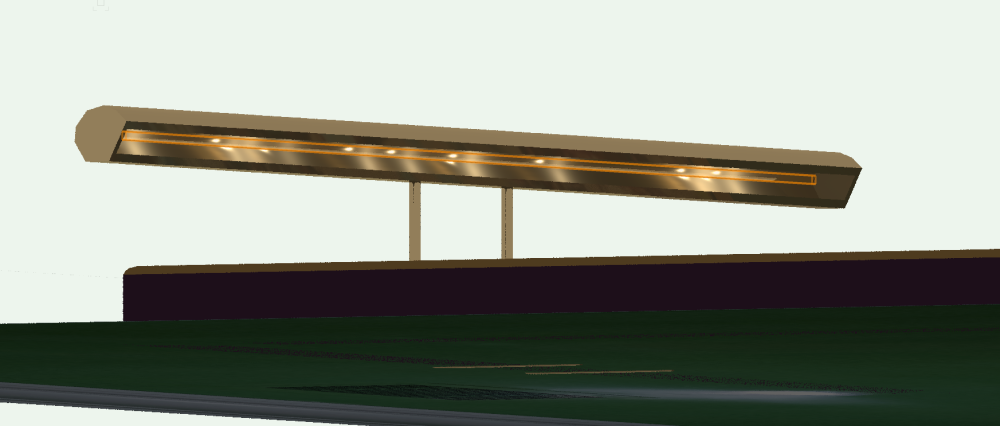
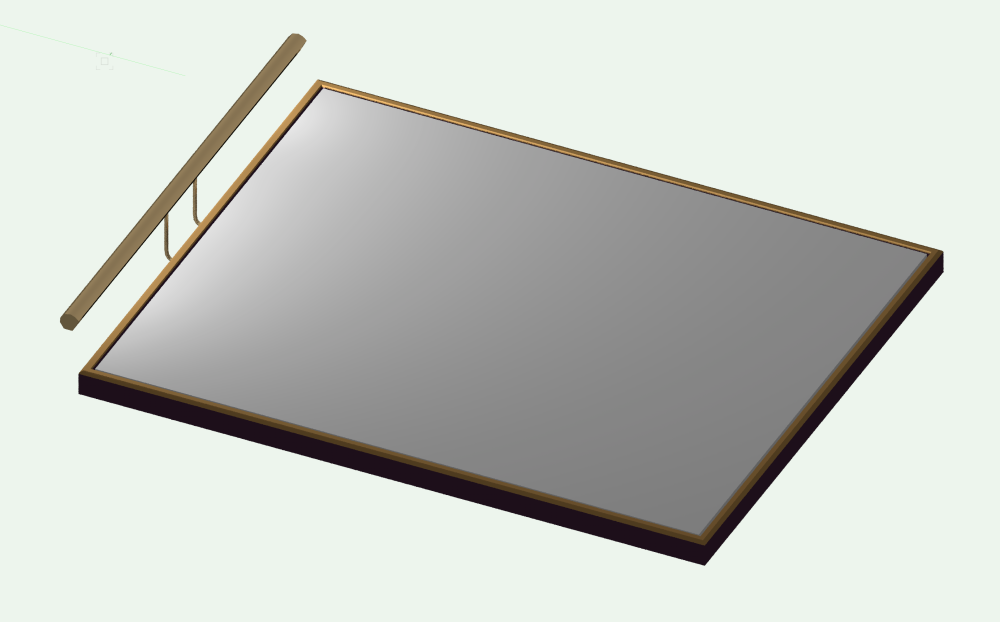
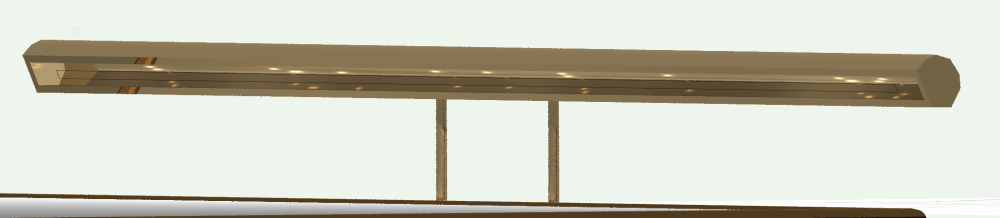
I have art lights that I want to insert diffused type lamps in for my renders. Here's what I've done: Modeled my art light's hardware Put a rectangle inside of the art light Converted the art light to a line light Here's what that looks like: The quality of light is closer to a non-diffused LED strip light than it is a diffused light. In order to get a more diffused, uniform look, I cranked up the brightness values, the dimmer and changed the falloff to NONE. Looks pretty good. A couple of notes about using these types of lights that's helpful: This help article is useful These lights will only render in Renderworks modes ("shaded" will not work) When you change light settings in the OIP, your entire canvas disappears consistently. Just switch to shaded and then back to your render mode and things will re-appear. This must be a bug! Turning off "render geometry" does exactly that in the OIP. A little confused that the light still is treated as many individual lights (at least that's how reflections are interpreting it):
-
I don't know if this is true for all textures - but - I have 3D polygon that has a transparent PNG on it. When in "Shaded" it displays a shadow, even though I have Cast and Receive shadows off for that texture type. If I switch to any other render mode (I.e., Fast), the shadow goes away. Bug?
-
I can't believe how absolutely brain dead I was when I asked this, thanks guys. So obvious lol