


Chris Fleming
-
Posts
112 -
Joined
-
Last visited
Content Type
Profiles
Forums
Events
Articles
Marionette
Store
Posts posted by Chris Fleming
-
-
Good morning! The invite was expired this morning when I tried to join. Could I get a new invite?
-
Update:
I downloaded the F5 release this morning (I just got back from vacation), and it appears that this issue has been resolved. The dimensioning is working correctly now. I didn't see my particular issue mentioned in the release notes, but it is functioning as it should.
All good!
-
I got a reply to my 2D presentation problem. It seems I've discovered a bug. I'm told I'll be kept apprised of a solution when it's available. Other than deselecting the "show dim" box for the dimension in the OIP, and putting in my own, there is no real work around at present. Personally, I'm not a fan of entering fictitious dimensions to make everything appear correct. There's simply too many opportunities to miss that and leave mistakes on the sheets.
I'm sure it'll get handled however, and I'm glad they're going to working to fix it.
-
 1
1
-
-
Not yet. Only a message that my file wasn't attached. I replied and tried attaching it again. I'll post back once I get a reply.
Thank you!
-
-
I turned this into the extragroup site and filed a ticket, but have haven't heard back in six days. Honestly, I'm not sure they even look at the support tickets.
The 2D box that represents the cabinet on top/plan view, includes the door thickness. This is a problem for dimensioning and getting questions from both the cabinet supplier and my installers. For a 24" deep base cabinet with an overlay door, I need that box to be 24" deep. What Interiorcad does create a 2D box that is 24.75" deep (cabinet box plus the thickness of my door).
I can get around it by editing the 2D component, however the connection between the actual cabinet and the graphic is lost when doing that. I could "fudge" the dimensions by selecting "no fractions" in the dimensioning precision box, but that seems like a bad way for me to do it.
I last used Interiorcad with version 2014. This problem didn't exist then, as it handled it fine. I'm thinking there must be a setting I'm missing somewhere that is causing this to happen. Can someone please guide me in the correct direction?
Thanks in advance for any help you can give.
My system:
Apple M1 Max with 64gb of Ram.
OS: Ventura 13.3.1 a
Interiorcad XS 2023
-
- Popular Post
- Popular Post
On 3/31/2023 at 10:55 AM, rDesign said:
The most common work-around for this long-standing issue is to make a duplicate of the RW texture and rotate this duplicated texture by 90 degrees (I usually add ROT at the end of the texture name so I know which is which).
Then if you’re using Classes to assign textures to the parts of the Cabinet PIOs, you can make one Class for each of the duplicated textures and assign whichever Class is needed to make the grain run the correct direction for that part. No need to convert the Cabinet object into a group.
My Vw files are filled with duplicated & rotated textures for this very reason.
This works for me about 99% of the time, but sometimes for some strange reason there might still be one cabinet door which won’t show the correct rotated texture.
Thank you! Forum member and Vectorworks user Kevin K actually picked up the phone and called me last week. All the way from French Polynesia! He recommended and then showed me how to do exactly what you're recommending. It made an immediate impact on my renders.
This forum is an invaluable resource! Thanks to all of you!
-
8
-
On 3/31/2023 at 10:44 AM, jeff prince said:
Hey Chris,
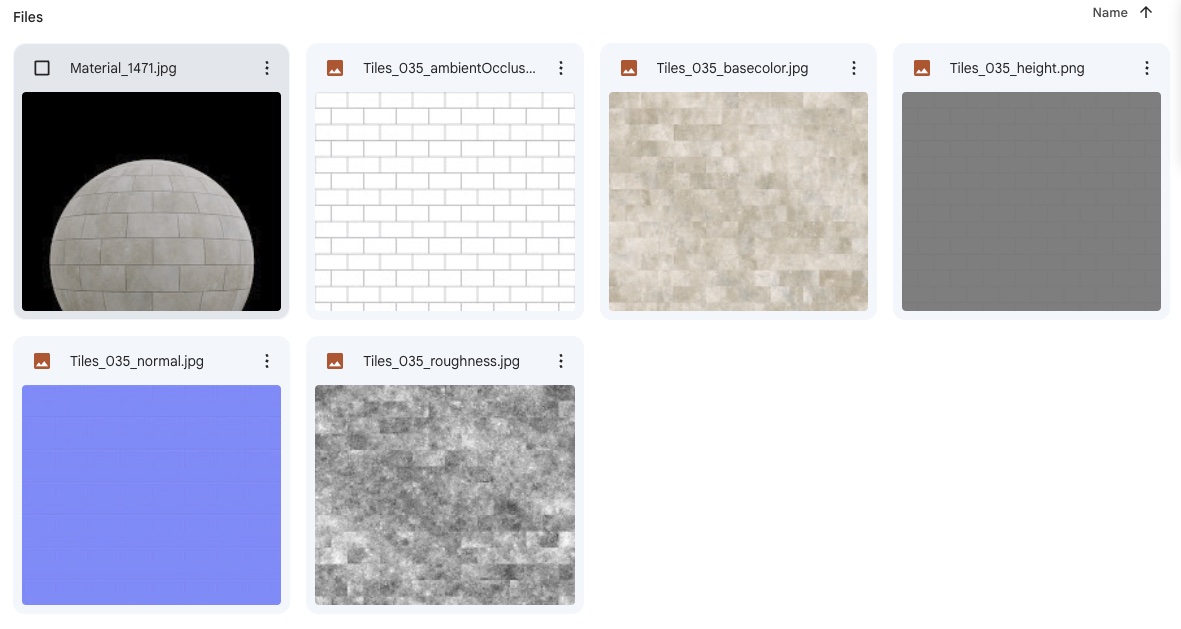
There are some tutorial about PBR textures, which is what you have. The way you set them up varies by rendering engine. Vectorworks doesn't use all the channels(Shaders) available in a PBR material, but some you will directly use and others you might edit to get more advanced effects within Vectorworks.
Here's a description based on the end of the file names:
...Basecolor = color image that looks like a photo, this is what we most associate with "texture". Use that as the Color shader in Vectorworks
...Height = greyscale image where value determines height. Use that as the Bump shader in Vectorworks. You change variables within this panel to get displacement mapping/3D from the texture.
...Roughness = greyscale image where value determines how light behaves. You could use this in the Reflectivity shader in Vectorworks and play with the variables
...abientocclusion, can be used similarly to roughness
...normal, has a specific function in PBR engines that does not translate to Vectorworks
Here's an example and file to play with for you...

Thank you! That is exactly what I was looking for with my initial question; which image to use in each panel. Very nice! Thank you!
-
4
-
-
28 minutes ago, Kevin Allen said:
I'd be curious to see what you're after. Not sure these all correspond to how VWX defines a texture.
Not thinking of 'limitations' but of differing approaches.
I'm not sure what I'm after either! LOL! Actually looking for realistic (as much as possible) grout lines, bumps, etc. I guess part of me assumed that since all these images were part of a downloaded texture, they might apply to the various fields in the Edit Texture pane. Again, maybe I'm trying to get a level of realism that Renderworks is incapable of on its own. I don't want to throw down thousands more on Cinema4D for instance, to have the learning curve etc. simply to make a kitchen look more realistic for our clients.
24 minutes ago, fabrica said:for me, I would do the following:
- in your editor of choice (affinity, Pixelmator etc) , I would overlay the ambient occlusion (at 90%) onto the base colour and export as 1 image.
Then add this image to the colour slot - change OBJ Attribute to -> image
Not 100% sure but don't think Vectorworks can handle normal or height maps. (so no need for them)
If you need to scale image you have to use the absolutely useless 'set by image' button ..!
If you are only using 'shaded' render that's all I'd do...
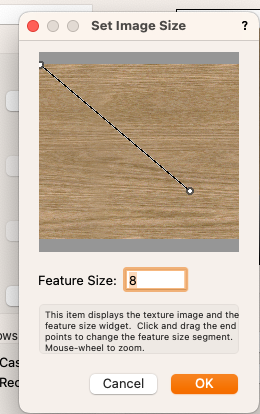
I'll give that a try. I appreciate both of you taking the time to reply.
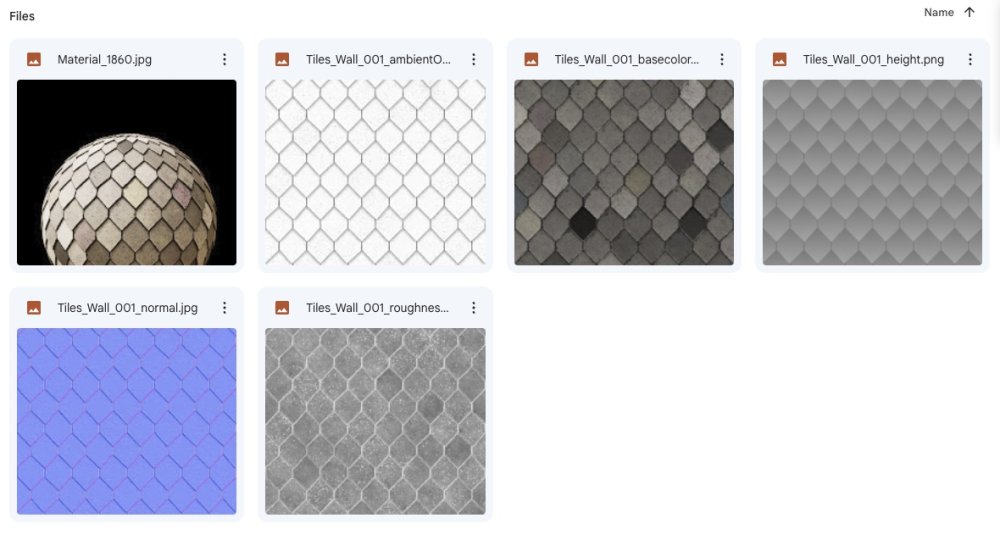
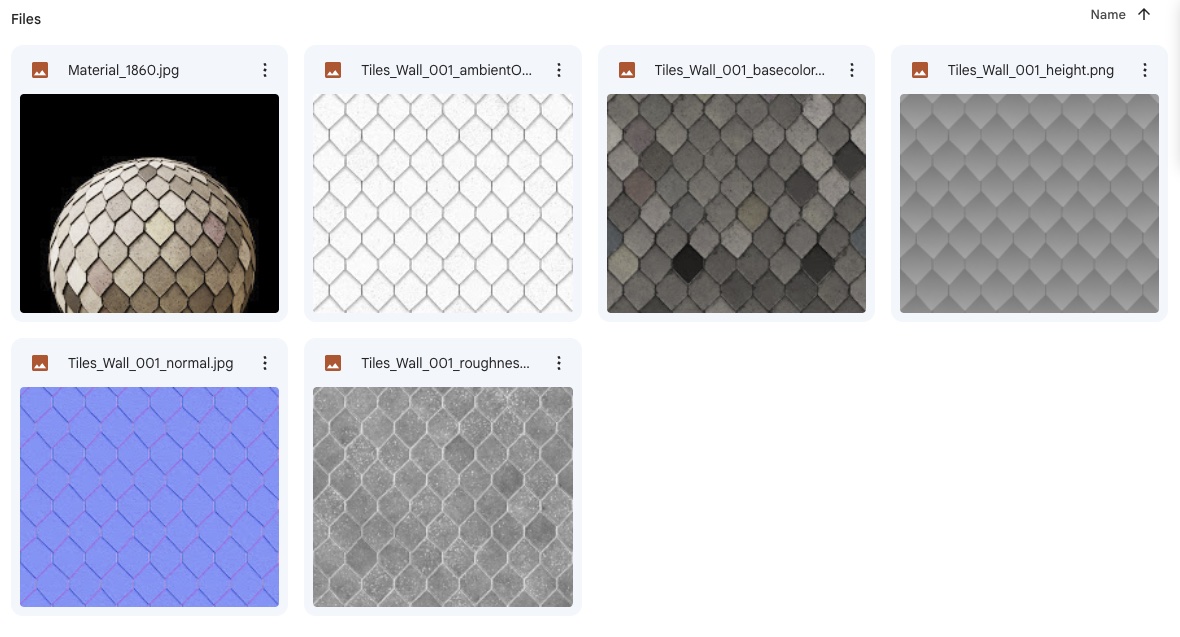
I'm attaching two files here. One is of the finished texture, the other is of the various images used to create said texture. I'm trying to achieve that level of realism if possible.
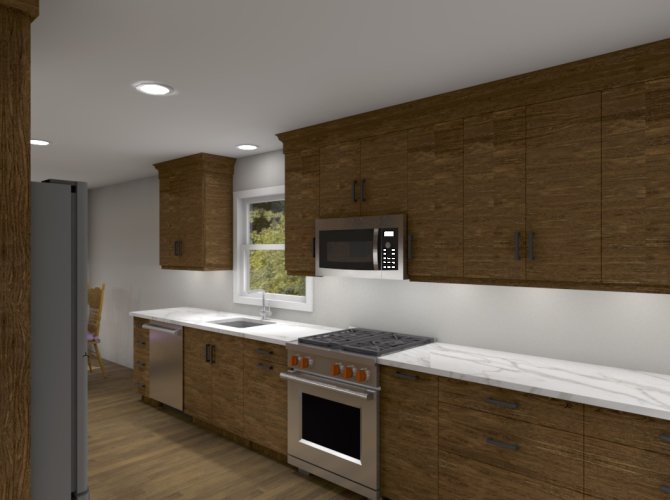
The last image is a modest project I'm working on to give the client an idea of what their new space might look like. I still have to add some props, but I wanted you to see what I'm doing currently. Don't get me started on the inability to change texture direction on the various cabinet plug-in objects in VW. To do that, I have to convert each cabinet object into a group, then break it down to texture the various parts correctly. The time investment is too steep IMO.

-
1
-
-
Whenever I need a texture for something that I'm not satisfied with the available onboard textures that come with Vectorworks, I turn to the various texture sites. My question comes in regard to the proper method of creating the new texture.
I've attached a pic of the various files for a tile texture that I downloaded from 3Dtextures.me
My question is which image to put into which field in the Edit Texture pane? I've tried multiple variations, but I never achieve the quality that I'm looking for. Is there a secret (or something painfully obvious), or is it simply the short coming of using Renderworks to do my rendering?
Thanks for any input you can provide.
Chris

-
That's it! Such a little thing, and you've made my day!
Thank you so much!
-
21 hours ago, markdd said:
If it is a data tag or any plugin based on an object Style like the Centreline Marker tag then you can right click on the listing in the resource manager and select plug-in options. You can then set which Class a style will default to.
A couple of Spotlight plugins have an option to always use a particular class in a settings dialog, but that is an exception rather than a rule.
I apologize for not understanding. Are you saying that a Centerline Marker can or cannot default to always use a particular class? If I right click on the marker in my drawing, the pop takes me to a dialog where I can change the class, but I can't find anywhere to give it a default class. In my resource manager, the marker doesn't appear in my list of plug-ins at all.
As it is now, when I put the Centerline Marker into my drawing, it seems just as simple to go straight to the OIP and change the class there rather than initiating a menu and making a selection to bring it up there. Both work. Probably within microseconds of being equal. It'd be easier to simply make sure I have Dimensions as my active class before inserting the marker, but the way dims works is so simple as I do not have to make a class change to use that tool.
I appreciate your help immensely.
-
I'm sorry if this is a basic question, but is it possible to have an item created with a tool go automatically into a pre-determined class? I know if I select the class beforehand this will happen. I'm wanting to have the centerline mark tool, create the centerline markers automatically in the dimensions class regardless of the class selected. In other words, I want it to happen like dimensions do. Working in "ABC" class, any dimension created goes automatically into the dimension class (I know this can be turned off in preferences).
It's no big deal really, but in the flow of annotating, I use multiple classes depending upon the specific annotation. It will save me 1 second, but they add up! LOL.
Thanks in advance for looking.
-
15 hours ago, Dave Donley said:
I'm an idiot! I found it. Thank you!
-
2
-
-
How do I activate the Direct Link in VW23? Is it not available? I looked into my Workspaces and unless I'm simply not seeing it, there is no tool to add to my workspace. It isn't in there by default.
I know it's most likely user error, so what am I missing or doing wrong?
-
Thanks everyone! All great info. As for price, Zoomer, we had a great year and need a solid write off, so I plan on loading it (64 GB and 2Tb SSD). Also will stick with the 16". I'm considering calling my Apple store and inquiring about the M2. I'll see if they'll let me pre-pay to get it in this calendar year.
Again, thanks for your help everyone!
-
1
-
-
Thanks for the quick reply! As much as I'd love to wait for the M2, we're making some purchases for tax purposes. Again, thanks!
-
I'm not sure if this should go here. Mods, please feel free to move it to the correct location.
Currently I have two Macs. The one I use primarily for Vectorworks is as follows:
2017 iMac 27 inch with 5K retina display.
4.2 GHz Quad-Core Intel Core i7
64 GB 2400 MHz DDR4
Radeon Pro 580 8 GB Graphics
My current laptop is:
Late 2013 MacBook Pro 15 inch
2.6 GHz Intel Core i7
16 GB 1600 MHz DDR3
Intel Iris Pro 1536 MB Graphics
Would it be possible for me to purchase a Mac Laptop that would be able to handle Vectorworks Architect easily? If so, please make recommendations with specs. My plan would be to also use a larger monitor when in office for VW work. I'd move my current iMac to my other office duties here.
I'm sorry if this is a basic question, but feel your advice is better than an Apple salesperson's because you all know what I'm running and have no interest in selling me anything. I do require it to be a Macintosh product, as all of our machines are Apple and I don't want to go outside that environment.
Here's hoping you can help!
EDIT: to add I'm using VW2023
-
Camera height and Look-to height must be equal. If you're missing some detail at the edges of the image, simply raise or lower the camera height of move the camera's position. The key is that Camera Height and Look-To must be equal.
-
1
-
-
There are a few good trainers out there. I've used member BCD more than once, and have NEVER regretted the investment. You can definitely self teach by experimenting and watching videos, but at the end of the day, if real production is what you seek, find a trainer.
BCD and I used Skype. He was in Ireland, and I in Chicago. Through screen sharing and voice call, it was a painless and productive session. Literally changed my life in regard to how I work with and use Vectorworks on a daily basis.
As barkest stated above, you'll need to let your trainer know what you're planning on using VW to do.
Good luck!
-
Thank you Cipes! As crazy as it sounds, that is a VERY important (productive) tool for me. Not sure why I had "rubber" stamp in my brain!
-
Sorry if this has been asked. I did a search of the forums, but couldn't find recent relevant threads. I've recently decided to begin using VW2017. I've been sticking with VW2014 because I have interiorCad. However, InteriorCad hasn't kept up with VW in the upgrade cycle, and I can no longer justify sticking with VW2014 simply for the interiorCad add on.
I used the rubber stamp tool to create incremental numbered or lettered labels for various cabinetry pieces that match the order when sending in to my various cabinet companies. Now, in VW2017, I can't find the rubber stamp tool. I know how to modify work spaces and add tools etc., but couldn't find it there either. Has the tool been eliminated? If so, is there anything similar available to use?
Thanks!
-
Thanks for the heads up Jonathon! I'm in.
-
Sorry Jim, I just found it. It is VERY rudimentary (at best). I love interiorcad's ability to represent real world cabinetry, but hate being chained to VW Arch 2014 in order to use it. When I found this thread, I was hoping to gain the ability to control drawer front sizes, etc. The vectorworks tools do not allow that. It gives less than satisfactory results (from a design standpoint, IMO). Place a 3 drawer stack, a standard cabinet, and a 4 drawer stack side by side to see what I mean. In the real world, all top drawer fronts should be the same height. I'll keep watching to see if that functionality ever pops up. As soon as it does, I'll kick Interiorcad to the curb!
Thanks for the quick reply!


Adjusting Angle incrementally amongst objects
in General Discussion
Posted
I was just browsing the forums and saw this thread. Doing as Peter suggests will change the rotation of all three as a group. If for instance, you had 3 square columns that you need to rotate upon themselves, you'd have to do them individually, unless I'm missing something. If however, you want the collection to rotate as a whole, Peter's method works great.
I hope that makes sense.