


The Hamma
-
Posts
360 -
Joined
-
Last visited
Content Type
Profiles
Forums
Events
Articles
Marionette
Store
Posts posted by The Hamma
-
-
Thanks, I was able to resize the message dialog manualy but only after I commented out the "ClrMessage" command at the end.
Made a quick script to fix, LOL.
message('Move and Resize this dialog box as desired. Close when done.'); -
Does anyone know how to change the size of a script message. I am unable to edit it while the script is running and it is taking up to much area. It covers a quarter of the drawing.
-
Is you door in symbol or a group?
-
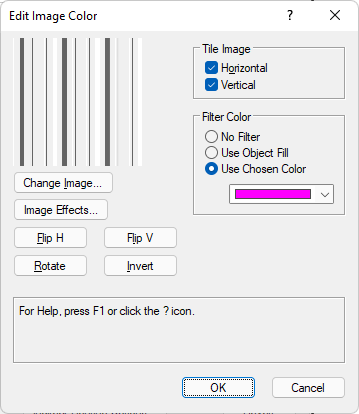
When I add a filter color to a image texture and export to lumion the color does export. I would like to have the option to apply the filter color to the image when exporting to Lumion
-
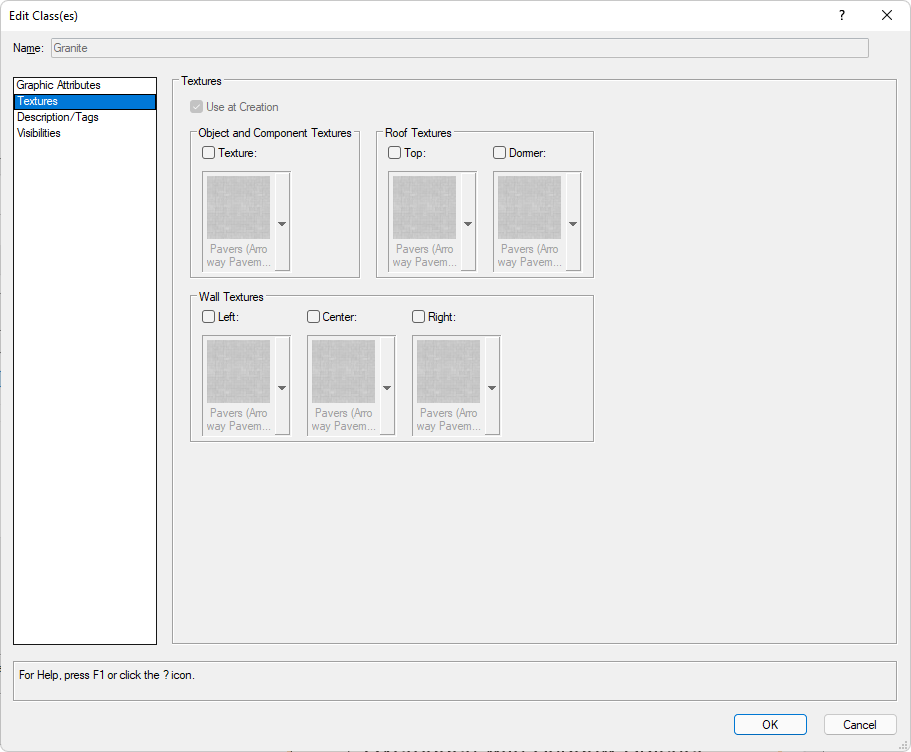
Hear is a texture I created for PEMB insulation. PEMB Inulation.vwx
-
14 minutes ago, MullinRJ said:
how many scripts is too many?
When I export the standard architect workspace there are 911 lines of menu commands. I added 128 additional lines and the last command I added does not work. I did delete some of the default commands.
-
I too was using a script similar to this to hide classes. I’ve added so many Scripts that I’ve actually hit the limit of Scripts that a workspace can handle and I’ve had to pair down and delete Scripts from my workspace so they would all work. It would be nice if there wasn’t a limit to the workspace because I did like having the script rather than using the visibility tool.
-
 1
1
-
-
4 hours ago, Matt Panzer said:
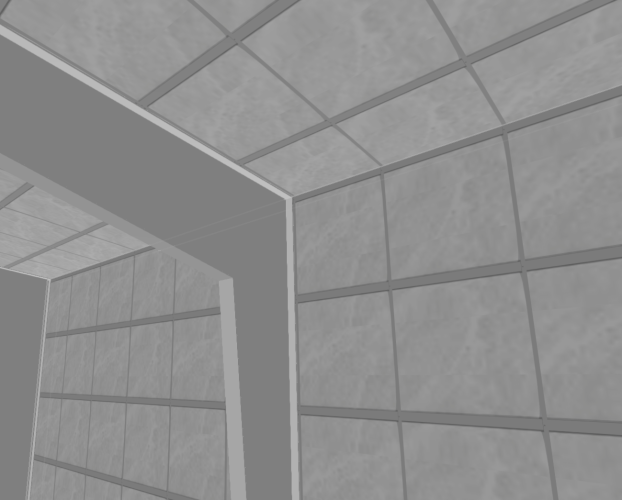
You also might want to try creating a Shadow Catcher texture and use class overrides to apply that texture to any (or all)objects that you don't want to see but want shadows on/from.Shadow Catcher.vwx
Matt:
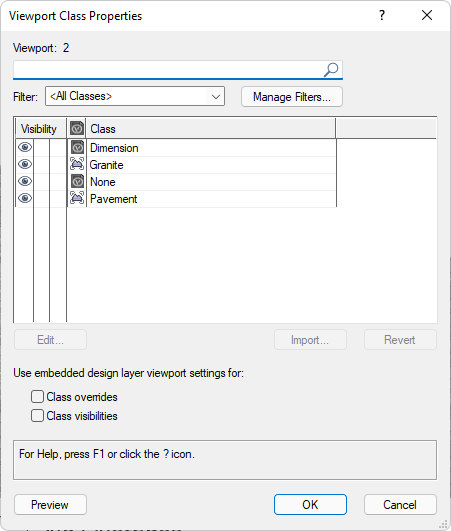
Neat idea. I downloaded the file and the wierd thing is that it works but when I open it in my Windows version of VW and the classes show they are overwritten but doesn't show how they are overwritten. See below. In the second window it should have the shadow catcher texture.
-
56 minutes ago, michaelk said:
@The Hamma is the master at this.
Not the master but getting better all the time. Here are my scripts and workflow
-
Would anyone have made a Marionette for a PEMB (Pre-Engineered Metal Building) Bent. I have attached a drawing with a symbol that I would love to have as a Marionette so that I can adjust the span, height and roof pitch as well as the base size.
-
Adding this to your script will display the time it took to run.
import time
startTime = time.time()

#your code here

executionTime = (time.time() - startTime)
vs.AlrtDialog('Execution time in seconds: ' + str(executionTime))
Use this to use a list to elimimate options from another list
OmitList =['name1','name2','name3', 'name4','name5'] #replace name# with names of items to skip

for List2 in reversed(range(1,List2+1)): #List2 is the list of items you wish to process. Remove Reversed() to step through list in order.
	if any(item == vs.GetName(List2) for item in OmitList): #if name of List2 item matches name in OmitList it will result in True
		continue #skip rest of script for this item and continue to next item in List2
	#Insert script to execute if name is not in OmitList.
-
 2
2
-
-
5 minutes ago, Pat Stanford said:
Completely unique UUID surrounded by curly brackets/braces
Section
Description
Note Text
Yes it does need this exactly as described
5 minutes ago, Pat Stanford said:Does it also need the NotesManagerDataFile text at the top and the 0 End of Notes text at the bottom?
Just tested it and all that is need is the "NotesManagerDataFile" text at the top
11 minutes ago, Pat Stanford said:Does it need the list of sections manually entered at the bottom or will that be created when you open the text file in the Notes Manager?
This is created by Vectorworks if the file is edited.
-
@PatStanford The {@} custom format works great. Thanks for the tip.
I forgot to mention once the database is created it is much quicker (in relation to file saves) to edit in Vectorworks as an XML format so I would save as XML format from the callout dialog and disregard the TXT format if you only intend to edit and delete callouts from Vectorworks.
-
So I had a file of keynotes and everything in the file was previously separated by Tabs.
Like so
I created an excel by importing the file in as a tab delimited file to create this
Then I added two columns in front of the text and copied the section header into column B like so.

We need to add a UUID to column A so I used a UUID generator site like https://www.uuidgenerator.net/version4
but it does not include the brackets, so I placed it in another excel file in the second column and added brackets to the first and third columns like so
Save that file as a tab delimited text file and delete all the tabs, then you can past it into column A of the other file like so.

The rest of the steps are outlined in this video
-
2
-
-
This is interesting:
When in a Sheet layer is the active layer the Staked Layer(Unified View) Option is False but when in a Design Layer is active it changes to True
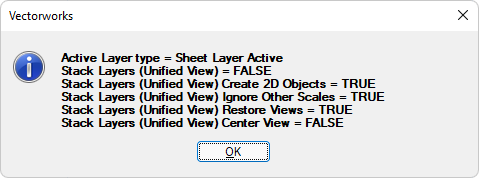
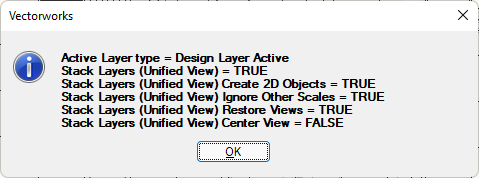
I wonder if sometimes it fails to switch.
if vs.GetObjectVariableInt(vs.ActLayer(), 154) == 2:
    activetype = 'Sheet Layer '
else:
	activetype = 'Design Layer'
if vs.GetPref(94) == 1:
	BOOL ='TRUE'
else:
	BOOL ='FALSE'
sl = ('Stack Layers (Unified View) = '+ BOOL)
if vs.GetPref(95) == 1:
	BOOL1 ='TRUE'
else:
	BOOL1 ='FALSE'
sl2d = ('Stack Layers (Unified View) Create 2D Objects = '+BOOL1)
if vs.GetPref(96) == 1:
	BOOL2 ='TRUE'
else:
	BOOL2 ='FALSE'
sli = ('Stack Layers (Unified View) Ignore Other Scales = '+BOOL2)
if vs.GetPref(98) == 1:
	BOOL3 ='TRUE'
else:
	BOOL3 ='FALSE'
slrv = ('Stack Layers (Unified View) Restore Views = '+BOOL3)
if vs.GetPref(99) == 1:
	BOOL4 ='TRUE'
else:
	BOOL4 ='FALSE'
slcv = ('Stack Layers (Unified View) Center View = '+BOOL4)
vs.AlrtDialog('Active Layer type = '+activetype+(' '*47)+sl+(' '*49)+sl2d+(' '*22)+sli+(' '*20)+slrv+(' '*26)+slcv)
-
1
-
-
I was wrong. It is documented but they call it "Stack Layers" instead of "Unified View" in the "Vectorworks 2022 Script Function Reference"
Stack Layers 94 TRUE or FALSE Pref
-
Yes it happens a lot especially with older drawings. And I had to write a script to locate the preference because it was undocumented. 😂
-
1
-
-
The attached script creates a shortcut to turn unified view back on. Add it to your plugins folder and then add it to your workspace.
the script simply sets pref 94 to true.
SetPref(94,TRUE); {enable "Unified View"}-
1
-
-
3 hours ago, bpsabatier said:
nothing changes the shadows being cast behind the glazing.
Can you send a sample?
-
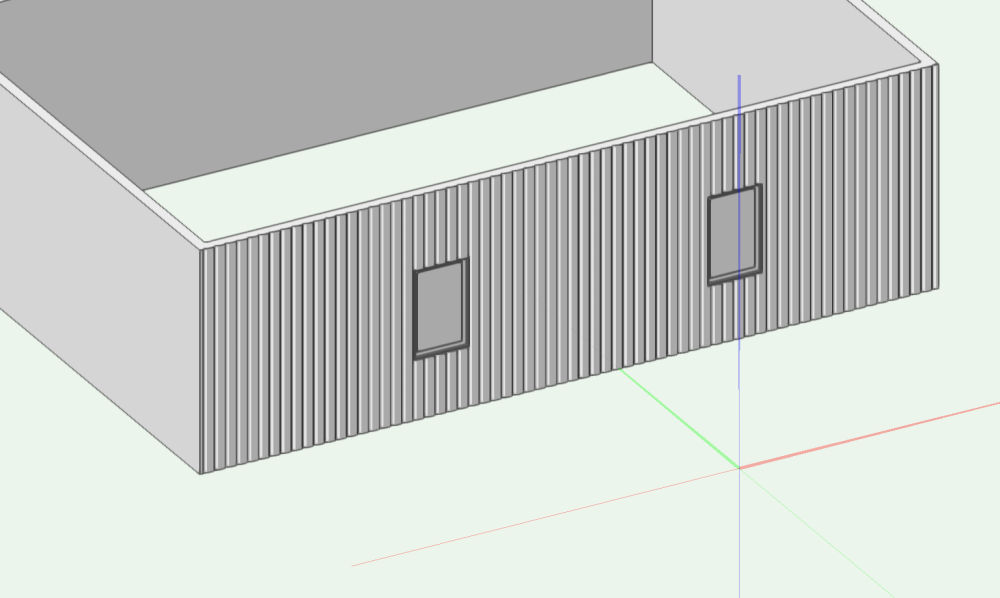
It can still be done in 2022 but it is a bit more complicated. I created the corrugation in the 3d hole component of a symbol.. You need to add a 2d loci to the symbol or it gets buggy. Once this is done I inserted the windows. This is where it gets tricky. The corrugation stops where the window starts. to fix this I added a solid in the shape of the window hole in the corrugated symbol. Then I cut the windows and pasted them in place. So what you see below is one symbol inserted in the wall. The windows are just placed in the holes created by the one symbol. Drawing attached.
-
I am curious. I see how the $include command can be used to run a vectorscript sub script but I have a python script that I would like to run as a subroutine in a vectorscript. Can this be done?
-
Because I have to sometimes open backup files the length of the file name display in Recent files is not long enough and the file will appear like below.
12034_Owner Name_Project_Date.....
this is problem when there are two in the list but one is backup and the other is not and it looks like this
12034_Owner Name_Project_Date.....
12034_Owner Name_Project_Date.....
It would be very helpful if it looked like this so I know that I am not opening the most current version of the file.
12034_Owner Name_Project_Date.vwx
12034_Owner Name_Project_Date-Backup-20220223143437.vwx
-
2
-
-
-
I figured it out.
vs.SetPref(1505,True)#enable "Enable legacy 2D features"
vs.SetPref(94,True)#enable "Unified View"
vs.SetPref(1505,False)#diable "Disable legacy 2D features"
-
2
-


Wish Vectorworks had Revit's "Dynamic Model" feature
in Wishlist - Feature and Content Requests
Posted
In Revit you can draw a 3D object with constraints. This model then becomes a dynamic model (symbol) that can change based on the parameters given in the OIP. Very similar to what we can do with PIO but much simpler to make and control.