


PVA - Admin
-
Posts
12,808 -
Joined
-
Last visited
Recent Profile Visitors


Single Status Update
See all updates by PVA - Admin
-
Lit Fog & Ray of Lights - Rendering for Success
Hi JimW and all the other VW lovers & users,the illumination of evening/night scenes whilst working with VW Architect ( not VW Spotlight ) is relatively new to me.For many years I worked with VW as a creative architect in trade shows. Now I am getting into work in events with the development of stage scenes also.Therefore I began to familiarise myself with the start-up settings of Fog & Backgrounds via VW Tutorials.Looking at the rendering from the VW file Rendering for Success - this is exactly what I am trying to achieve.But even having the VW file downloaded and testing the Saved Views with various RW Styles I simply am lost on how to re-create this scene and have many questions.- how to create the multitude of Ray of lights coming through the glass facade windows- do the glass class settings need modification for this- are the Ray of lights all individual fog lights outside the pavilion or is this a background setting- how do the spot lights present a light on the floorAlso with the original VW file most Saved Views are connected to RW Styles OpenGL or Slow High Quality.Is there potentially a “Cheat Sheet” showing which Saved Views are supposed to be rendered with which RW Style, Class & Layer settings?It would be great to find some help on these or be able to view the VW file with the RW Style settings available. This is the file available online http://vector.works/go/955Really looking forward finding help.Cheers,Grethe
-

That file should have those as viewports on sheet layers if I recall correctly, or they're modified versions of existing viewports with the furniture/fixture classes turned off. The Renderworks Styles should be saved in that file and you can apply them to duplicates of the previously made viewports or your own viewports.
This one looks like one of the originals done by @Luis M Ruiz and I think it used a combination of lit fog and either a gobo or a masked transparency object to get those shafts of light from a single source.
-
Hi Grethe.
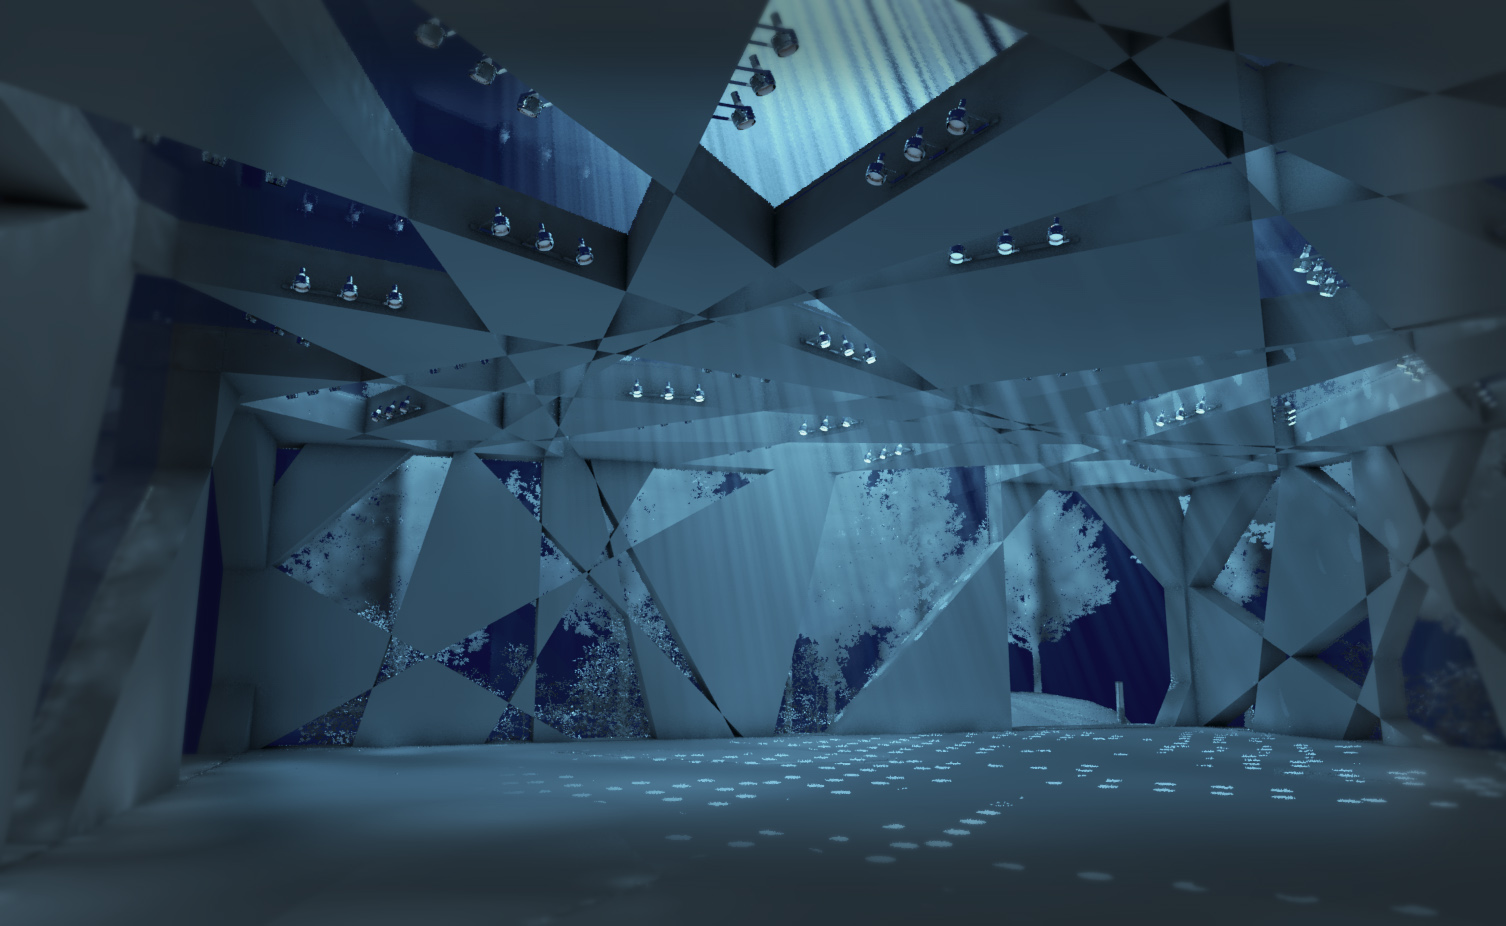
The making of this file was actually very fun. At the time I was not really sure the final intention of the final look I wanted but I sort of knew I wanted a "encounter of the third kind effect", so I put in practice a few trick I learned, put it all together and waited for the surprise. Here is the recipe:
•turn all light sources off, no environmental light, no background light, nothing.
•Add a single spotlight hovering over the model and check the setting for lit fog.
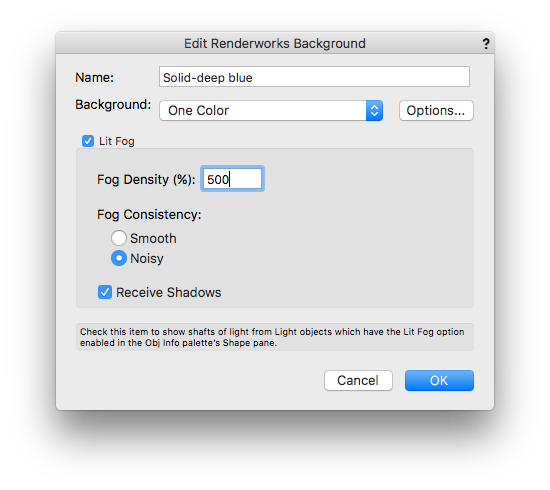
•The secret sauce is the background. In this case I made a solid blue panorama but check the lit fog box, this opens new control settings, add a greater number of control density, check noise for consistency and don't forget to check the box receive shadows.
•Now, here is the trick. between the spotlight light and the model you need to create a single flat 3d rectangle with a texture mask image, this texture allows the light to pass thru the hollow dots. Control the mapping as needed.
• I suggest making a viewport first, set the res to 72dpi , apply a custom renderworks low settings and then update.
• Increment the quality of your custom renderworks as you scene is getting better.
• Finally, once you are happy with all the settings, icrease the size of your paper sheet (17x11), set it to 300 dpi and let it render.
Noise effect takes a bit more time than an average scene bit nothing compared when you need grass, caustics, high blur effects or super high antialising, those I typically render over night.
For more info, don't hesitate to contact us.
Luis

-
 Hi Jim & Hi Luis,thank you both for your quick reply!!!In regards to the available VW file - no unfortunately the only Sheet Layer is empty and no Viewports have been displayed.What is shown in a Saved View are sample renders as screenshot/Bitmap/images copy-pasted into the file.The way I started working my way through the VW file was:- taking each individual Saved Views with it’s settings of layers & classes- note: most Saved Views on the Design Layers were set to OpenGL or Slow High Quality- creating individual Viewports- which I then rendered by the provided RW Styles, well the ones I thought were mostly fitting by nameI even duplicating the RW Styles and tested different settings for each Saved View.This is why I was hoping that there was a “Cheat Sheet” showing which Saved Views shall be rendered with which RW Style, as well as any other settings.Or maybe even the original file would be available including the Viewports and their settings in relation to the images showing the RW solutions.Honestly I exhausted myself trying, plus I admit I may be not a wizard when it comes to Renderworks in general … ;0)So basically I am at the stage that - and I very much hope this is not offending anyone or is in any way unethical to ask this here - but at this point I would even purchase this file having all Viewports set up with the fitting RW Styles as per the provided image overviews for Artistic and Realistic shown within the RWfS file.Hi Luis,I loved reading your reply. Honestly I could hear your enthusiasm shining through about creating this file.Thank you for providing me with your insights and the screenshots on how to re-create this particular "encounter of the third kind effect” which I find a very fitting way of naming this scene. ;0))I will do my best and give it a try. It’s later arvo here in Melbourne Australia, so you probably will hear back from me not before tomorrow.Wish me luck! And thanks again to both of you and your support!!!Cheers,Grethe
 - Show next comments 3 more
-

