Phileas
-
Posts
206 -
Joined
-
Last visited
Content Type
Profiles
Forums
Events
Articles
Marionette
Store
Everything posted by Phileas
-
@Mike Lamb yes, and I still get the tube... If it works for you, could you share a VW2018 file with the model like I'd want it to be? I simply can't get it to work for me...
-
@Mike Lamb didn't work... did you try it out on the file I shared? cause I get nothing but a long tube...
-
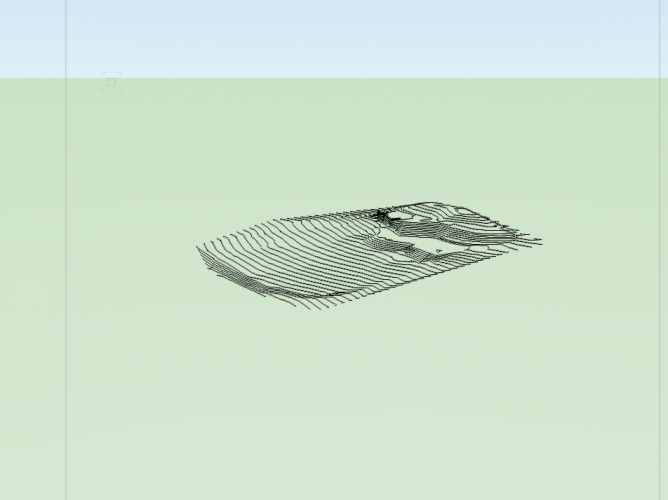
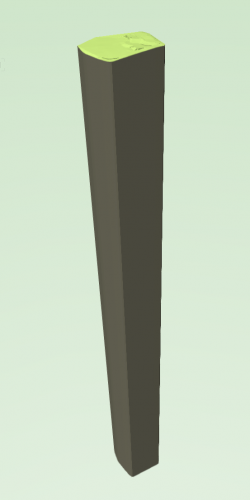
I have some 3D Polys as source data, from which I want to create a site model. I made sure there are no mistakes like intersecting 3D polys in the geometry, and set everything to be at the real height (roughly 600m above sea level), because I later want all the height indicators to show the real height above the sea level when I'll be making elevation VPs since that's how our office works. However, when I then create a site model from the data, I get this kind of object: I made sure the issue is not layers' height not corresponding to the height of the site model You can check as I will add the file with the base geometry: there are no objects far below the base geometry, so I don't know what might be causing this. Anyone can help me out? this endless tube is just annoying... I'd like to have later height cotations to show 600m above see level, but without have that endless tube object. Is that possible? CRA_EXE_50 Site Model.vwx

-
@bcd UPDATE: setting both to be on the same layer was the trick!! now it show exactly like I want it to be 🙂 thanks mate 🙂
-
@bcd yes it is. Is that the Problem? I'll check that out. Here are pics of what I get now: When I edit objects in the VP: (just as I want it) When I exi edit mode:

-
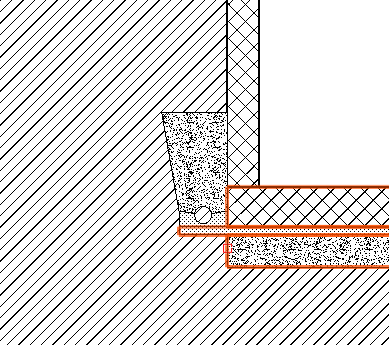
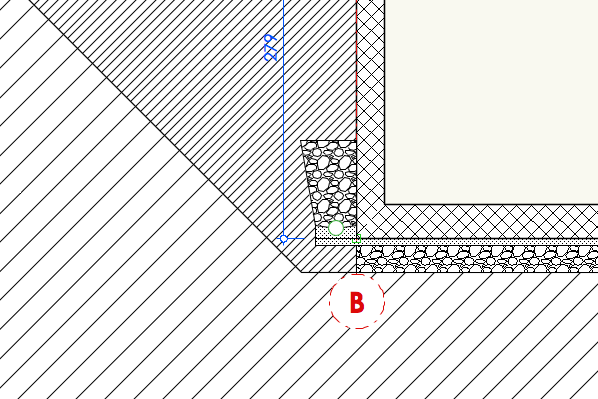
@bcd so simply placing it inside the terrain without "digging" out a hole for it? I tried that, the problem is that in my office we have a specific hatch for the terrain, and your technique worked just fine as long as I didn't give the terrain a hatch, but as soon as I applied it the hatch of the terrain then overwrote the appearance of my drain symbol...
-
Hey guys I have a question: I need to insert some drainage pipes into my site model, next to the bottom end of the burried walls of the basement of a project. These drains would be next to the pad site modifier for my basement, and are supposed to be completely covered with soil, which is why I'd like to simply cut out the shape of the drain pipe from the terrain kind of like solid substractions would work, so I can insert them easily inside the terrain and have them show up completely burried in future section viewports. I tried solid substracting shapes from my site model object, and quickly noticed that this doesn't work. I then thought I could simply make a pad modifier for the drainage pipes, insert the pipes, and then cover them up with an extrude that would have the same fill as the site model, hoping VW would automatically merge the objects with the same fill in section VPs. Doesn't work either. I don't have VW Landscape and no possibility to upgrade to get it, and have no Idea how to solve this. Anybody can help?
-
I have some problems with my site model: I need to insert a drainage at the bottom end of my building into the terrain: I want it to be inserted like this. But that is something I can't achieve using pads, since they always cut until the top of the terrain. If I don't have VW Landscape, is there a way to achieve this?
-
@Marissa Farrell if that doesn't exist yet, I'd like to wishlist it 🙂
-
I want to make a roof in VW using marionette so I can edit it easily later on. mainly because the slope of the roof is very likely to change, and when it changes it will also change the level where the supporting walls end. These walls' height is determined by story elevations. that means I'd like to be able to edit the height of a certain level within a story (let's say my "wall end" level) using my marionette nodes. Is that possible?
-
@JMR happy you could figure it out 🙂
-
@JMR If you rotate the heliodon that causes the color issue to the angle of -180+45=-135°, do you still get the issue? I'm wondering if the problem is simply caused by the angle.
-
@Marissa Farrell Thank you once more 🙂
-
coming back to this thread cause I don't know where to go otherwise: Is there in VW 2018 a node that allows me to run a list through it and deletes all duplicate values? Or a boolean kind of operation I can set up that reads a list and goes "if this value already exists in the list, delete said value"?
-
@Marissa Farrell I made it 🙂 🙂 Thanks!
-
@Marissa Farrell that's a bit embarrassing, but I can't seem to find a "user" folder we work mainly on a server that's common to all computers, I can't seem to find any kind of personal user library on my local hardrive... 😞
-
@Marissa Farrell yeah in the application folder exactly should have clarified this
-
@Marissa Farrell You just gave me one more reason to upgrade to VW2019 😞 I already tried to convince my boss, no f***ing way... Anyway: I found the Libraries, and imported the nodes as red symbols into the already present .vwx file in there, "marionette default library.vwx", and classed them in there as I want them to be. However, they do not appear in the later drop-down menu when I want to place a node, as if they don't exist, even after refreshing my Ressource Manager's Libraries. Any Ideas where I went wrong? When I check the symbol options of the nodes they all have the same than the basic ones. I can't find a "convert to Plug-in object" checkbox tho) By now I must look like a helpless chil to you @Marissa Farrell lol I'm trying to work my way up!
-
@Marissa Farrell I really like the Classes Popup node! Is there a way I can add that node to my library so it'll be in the list of nodes I can use in all my projects in the future? In fact, since I know my way around a little in Python, is there a way to store nodes I might create in the future in a personal library?
-
@Marissa Farrell Thank you very much again! I really want to improve in marionette so I can do stuff like that on my own later 🙂
-
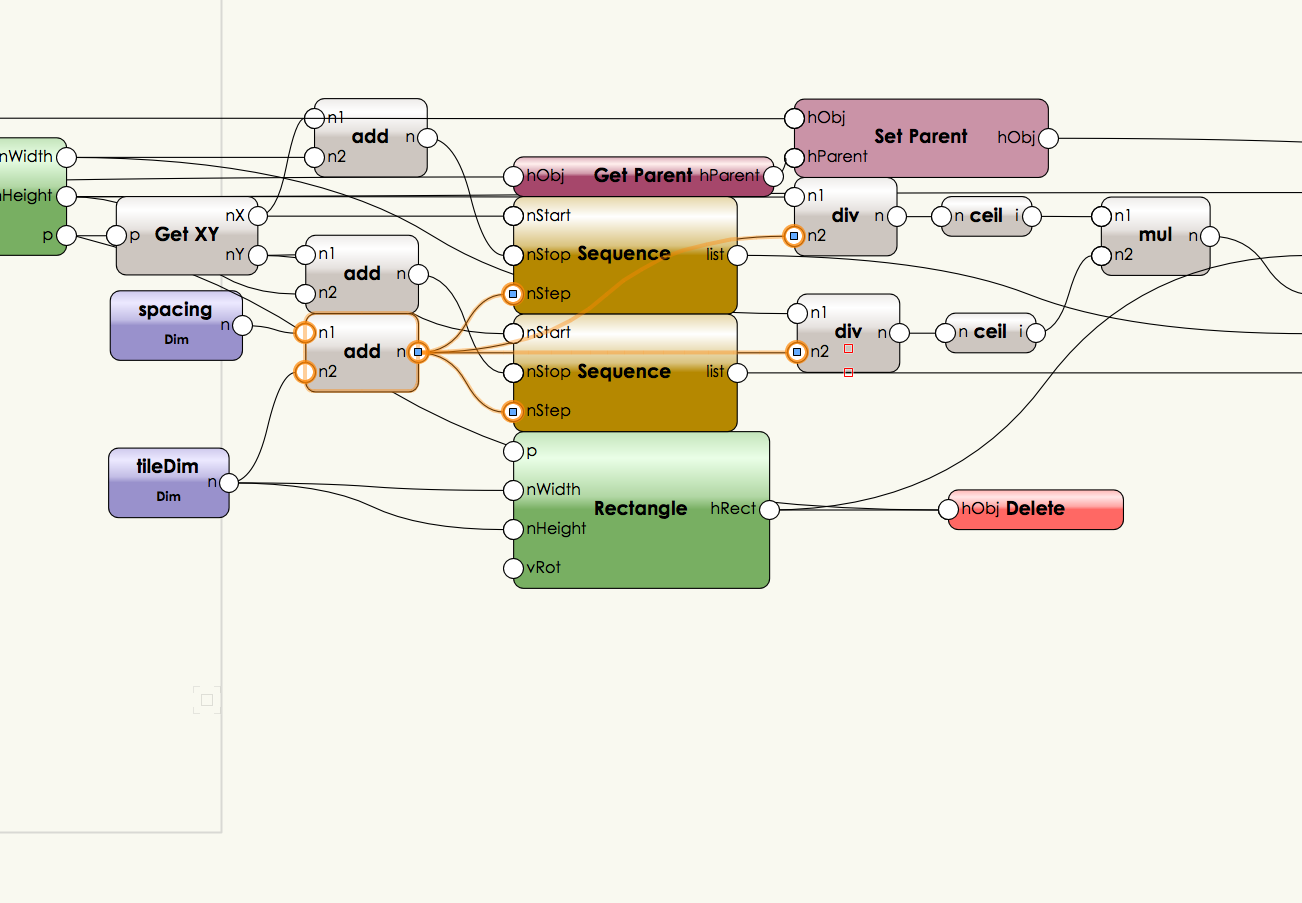
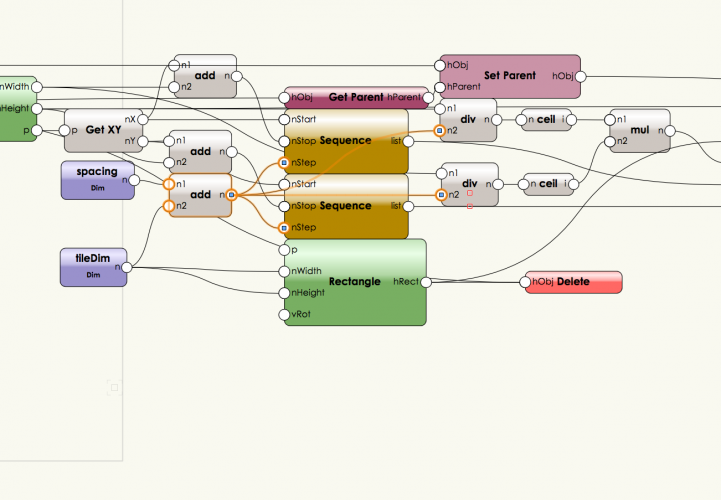
@Marissa Farrell OK so I'll try to explain what I understood, I'd be very thankful if you could correct/complete my explanation: first, get the bounding box of the containing shape by giving it a name and using a name node and a "get bounding box" node. use the two extreme coordinates of that bounding box to make a rectangle out of it. Get the 2D center of that rectangle with a "get 2D center" node, as well as the height, the width and the XY coordinates of the bottom left corner of that rectangle using a "get rectangle" linked to a "get XY" node. Then delete that rectangle with a delete node. you then create the tiles by using a "rectangle" node and the two parameters "Width" and "Height" You now need to make 2 sequences. Both start at the XY coordinates of your bottom left corner (I'll call that point the origin from now on). To get the stopping points, you added the width (or the height respectively) to that origin using "add" nodes, and linked them to the stop inputs of the sequence nodes. Concerning the steps, you used the added value of the width (or height) and spacing, all three of these values being my parameters. If I understood that right, you had to add the spacing to the 2 other parameters each time because otherwise the tiles would not have been separated right? you then get the exact amount of tiles that need to be placed by using the math nodes after the 2 sequence nodes. I think I get that. By mixing the 2 lists into one you get every 2D point where a tile needs to sit you then move duplicates of the tile rectangles to everyone of these loci I have to admit that I didn't manage to understand the rest as I don't even know most of these nodes 😞 If you still have time to spend on my case, I'd be glad if you could help me understand the logic behind the rest better 😞
-
@Marissa Farrell Thank You very much for your quick answer!
-
@Marissa Farrell Thanks for everything, your help is very appreciated, as I'm only getting started with Marionette and sometimes even find myself having trouble understanding what you did lol 🙂 But it works! Thank you for the transcription to 2018 too, that's the version I currently have. Concerning the slope, that's the least important thing I'd say, if it happens to be too much of a complication feel free to ignore it 🙂 I have one big question tho: Do I understood this right: You used a Dim node to set both the width and the height of a tile, since they are the same (?). That means that if I wanted to wrap up the nodes now, I'd only be able to make the tiles bigger or smaller squares, but never rectangles with a different width/height right? Cause I'd only get 2 parameters: TileDim and Spacing (if I got this right) I'd happily make the adjustment myself, but I don't quite understand everything that's going on starting at the 2 sequence nodes in this image (I'm a bit embarassed, but I'm still an absolute newbie to Marionette). I don't want to use up even more of your time, so I'll try to figure out the logic behind these nodes on myself and update when I have more precise questions. A big thank you again!
-
@Marissa Farrell Sure, here you go: Base Shape.vwx
-
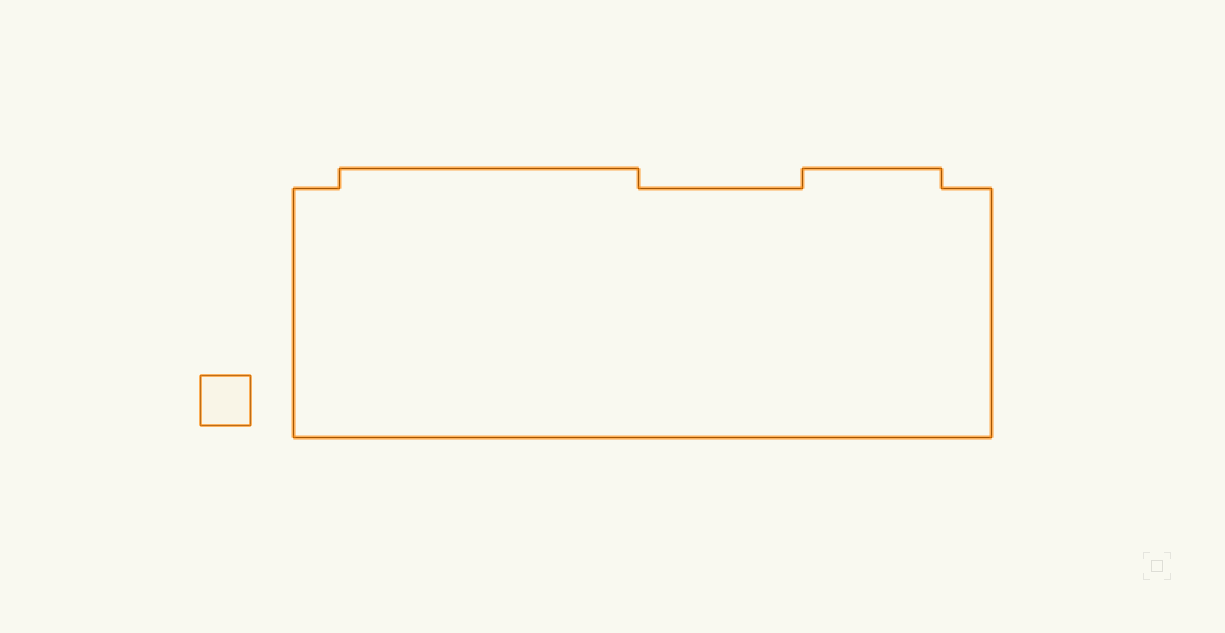
I have a question about something I'd like to do using the marionette tool so I can easily modify the parameters afterwards: The big polygon is the outline of a terrace I'm building. It's a 5cm thick layer of concrete, sloping down at 2%, that is set to be covered by 4cm thick stone tiles. These tiles are set to be 50cm x 50cm, and the is a space of 0.5cm to be left between two tiles for the joint. The thing is: These dimensions will certainly vary, so I'd like to make them a parametric object so I can modify them in one click later on. second point: obviously, the tiles won't fit in perfetly in this shape, some tiles will need to be cut at the edges. So I'd like to be able to tell VW "fill this surface with these tiles while respecting the spacing, cut them at the edges if needed, have them lie on top of the concrete slab and follow the slope." How would you do this using Marionette? I know I can later on wrap up all the nodes within one single node, and specify what the parameters of my object are. Anyone who knows his way around Marionette who cares to help me?