BSeigel
-
Posts
118 -
Joined
-
Last visited
Content Type
Profiles
Forums
Events
Articles
Marionette
Store
Everything posted by BSeigel
-

Instruments not attaching to/Following Hanging Position?
BSeigel replied to miguelZinfandel's topic in Entertainment
This shouldn't be too tough of a fix. First make sure that whatever you are hanging your lighting devices on does in fact appear as a Hanging Position in the Object Info Palette. Once you've confirmed that, go ahead a place all of your lighting devices on the hanging position in their correct 3D position. Make sure that some piece of geometry from the lighting device is intersecting the geometry of the hanging position. Then select all of the lights for that hanging position, right click one of them, select the option for Attach to a Hanging Position, then left click the hanging position. Now all of the lights should move with the hanging position. Another way to verify this is by clicking just the hanging position. Once you select it you should see little blue arrow where each of your lights are attached. I've attached a file for reference. Ladder.vwx -
The closest I have come to getting something like what you're describing is by using the Dead Hang Mode of the bridle tool and then replacing the down leg with a hoist in the Object Info Palette. The trick is to make sure that your truss is centered directly beneath the house riggings point. I have attached a file for reference. Hoist to House Rigging Point.vwx
-
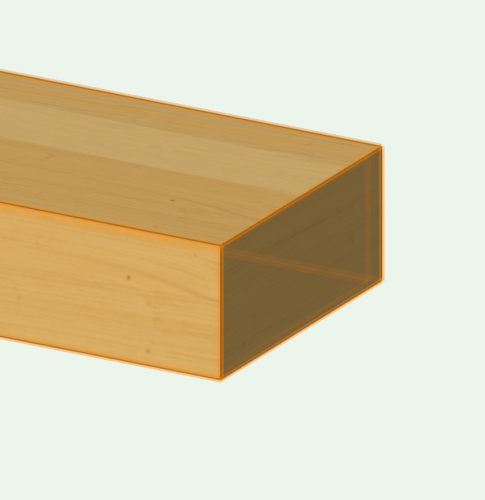
Hey @scottmoore These look awesome! I wanted to ask if you've had the chance to see how these look in Vision. I can see a lot of users wanting to use these symbols for Vision as well, however Vision will currently only support image based textures. Not sure how you textured these, but I'd be curious to see the results.
-
@G Curtis Please send an email to training@vectorworks.net and we will get your order refunded. @Cory Pattak Vision Getting Started Guides: https://www.vectorworks.net/training/2019/getting-started-guides/vision/what-is-vision There is currently content for Vision that does not exist behind a paywall, although I will be the first to admit that these resources are fairly limited. In 2019, our Customer Success team became more focused on developing training resources for Vision, because this is an area where we knew that we needed to improve. Now, we could have put together a few more quick tutorials to help users with certain workflows, but we felt that something more comprehensive would better support our Vision users. We have also received a lot of positive feedback from users for our other Essentials Seminars (Spotlight, Landmark, Architect) saying that this was a key resource in helping them succeed with Vectorworks. This is why we felt that this would be the best place to start improving our Vision content. It's not that we don't want to make more free content for Vision, it's more of a left-foot, then right-foot scenario - we started with the Seminar and now we are working on the free content. Of course we did consider that by creating a seminar, Vectorworks users would have to pay to view the seminar. This is true with all of our seminars and a part of the reason why we are able to dedicate more of our resources to develop this higher-quality training content. With all that being said, we still wanted to do something for our new and active Vision users that would really benefit from this new content, so..... We offered it for free to everybody Then we received feedback from users saying they couldn't make it, so we offered for free again Now, we won't be able to give away this seminar for free much longer. But please understand that this was a sincere gesture to our Vision users. You all have been patient and integral in helping us develop this product and we wanted to thank you as best we can by helping you succeed with Vision. @Cory Pattak I appreciate the feedback you have provided and I would not wish for you or any other user to think that we want to make any content exclusive for money sake. There is simply training that we can offer for free and training that we cannot. In the case of online seminars, we understand that $150 isn't necessarily an option for everyone all the time. If that is the case for any of our users, please contact us, we are people and we will strive to help in any way that we can.
-
Hello @Charlie Winter I did look into this, it is working as designed and is not a bug. In fact, many commands that produce objects select the objects after creation (which is usually helpful). But, seeing as it is frustrating to so many users, and is fairly easy to change on our end, I have submitted an enhancement request to have it improved.
-
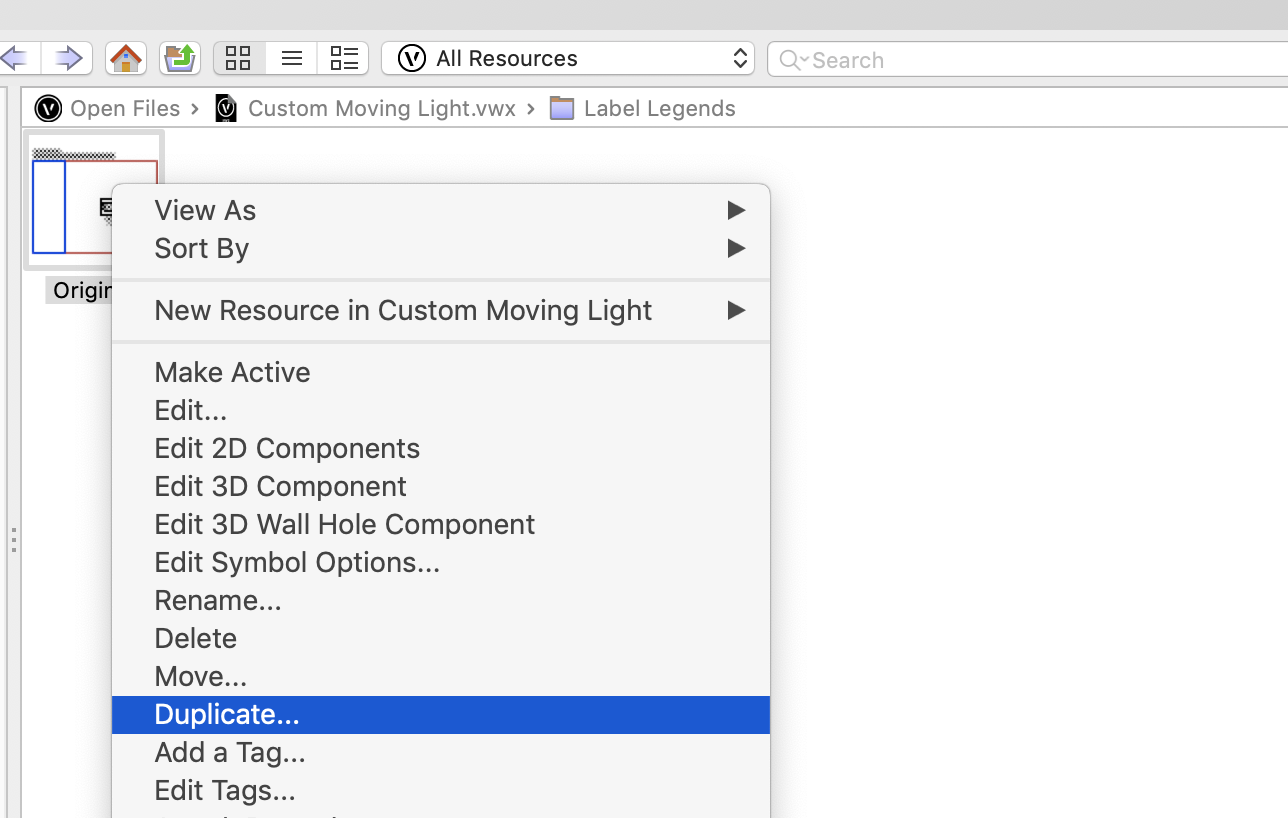
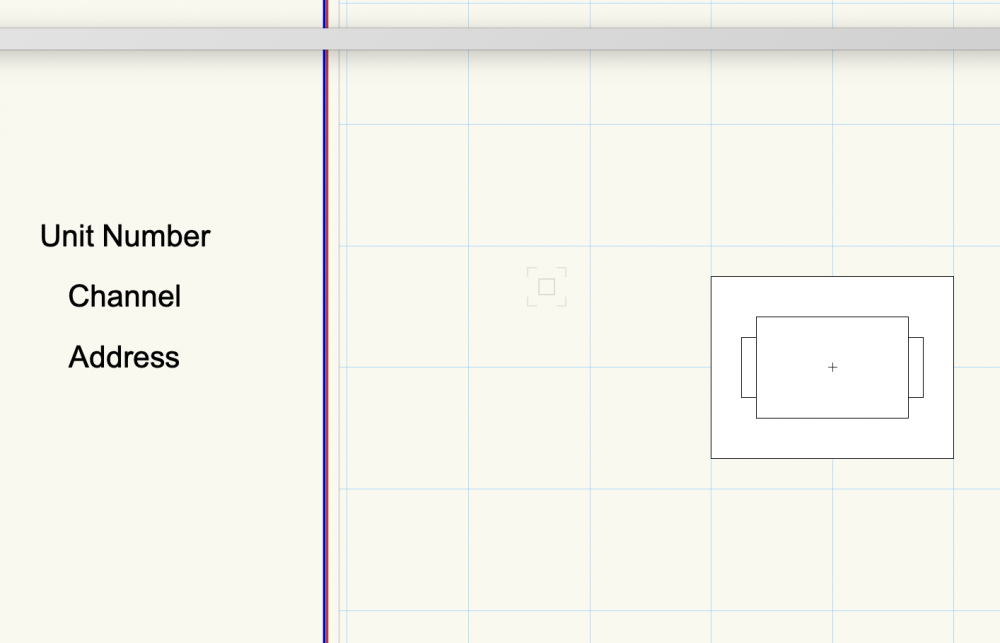
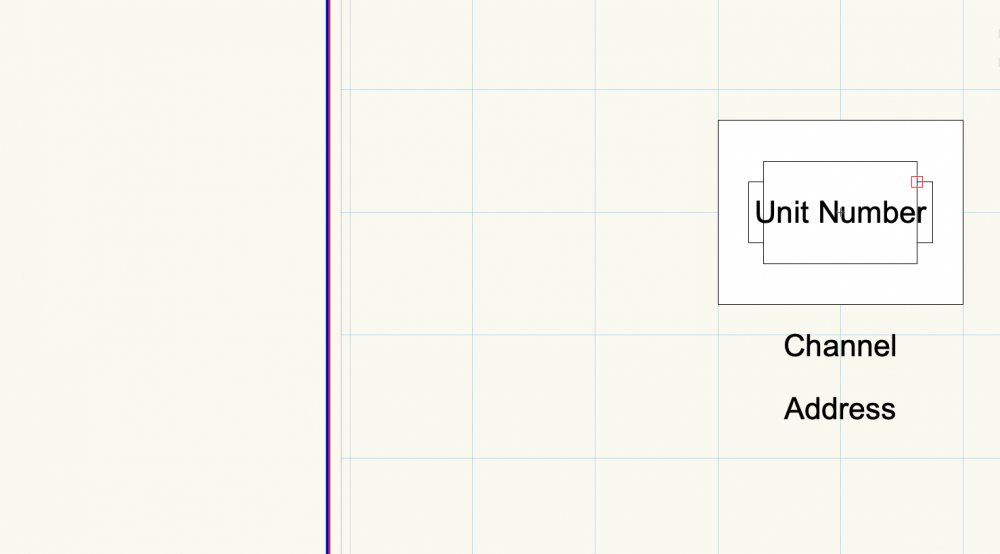
[Label Legend] Duplicating via Label Legend Manager repositions labels
BSeigel replied to Charlie Winter's question in Troubleshooting
I'll have to check up with our engineers as to why duplicating legends is behaving this way. But, I do have an easy workaround for now. If you duplicate the Label Legend while working in the Label Legend Manager it will reset the label positions. If you duplicate the Label Legend in the Resource Manager, the labels stay in position. Let me know if this works on your end as well.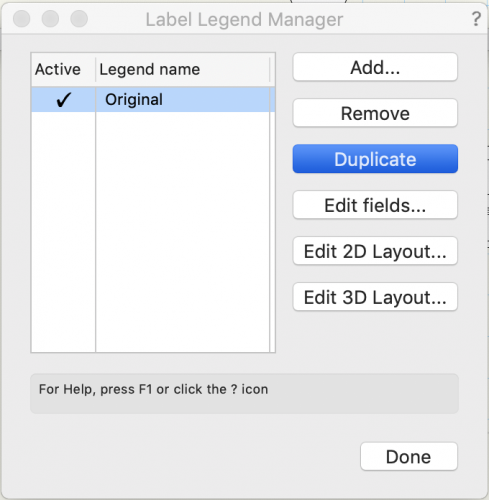

-
Just finished testing, the IES profile has a huge spread and is very bright. (Even for a 200W LED) Dimming it produced more reasonable results.

-
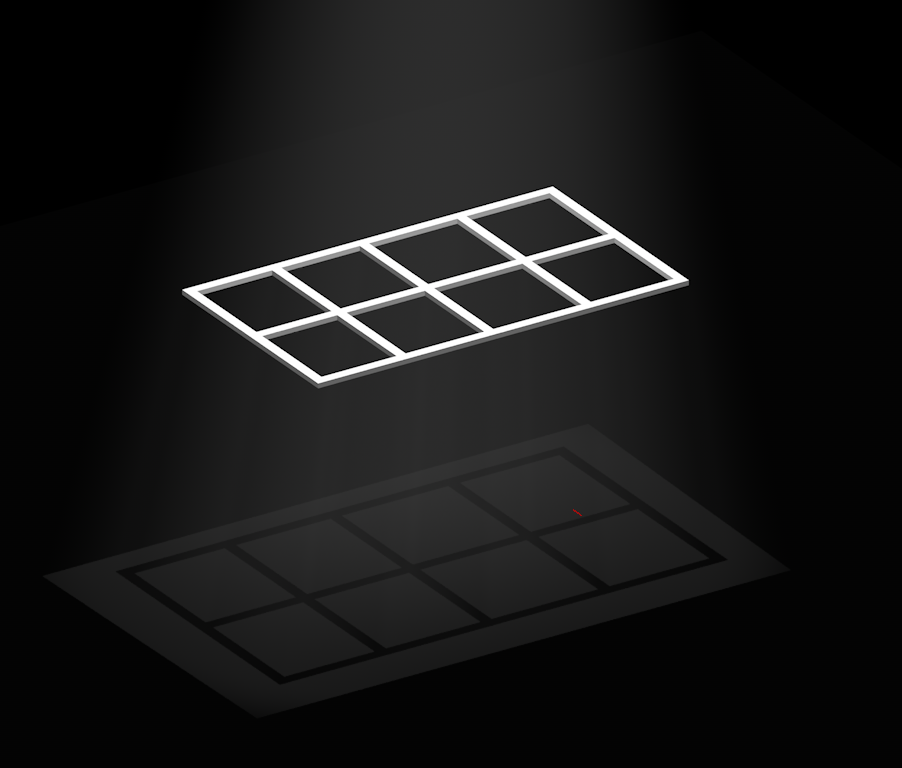
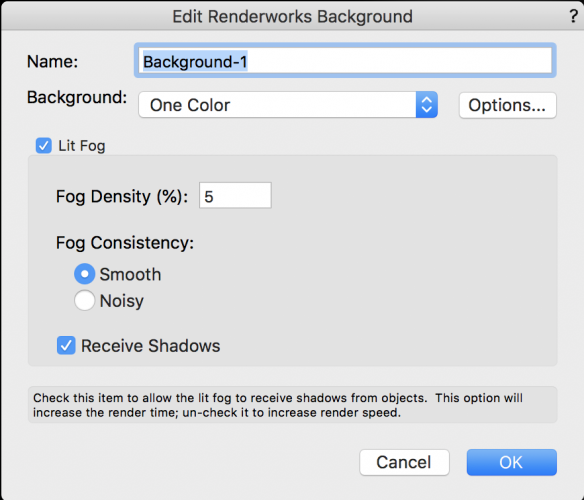
If I understand correctly, you are looking for a result like the image below. If thats the case, I would recommend editing the resource for your Renderworks Background and making sure that receive shadows is checked. Let me know if this helps.
-
Found it

-
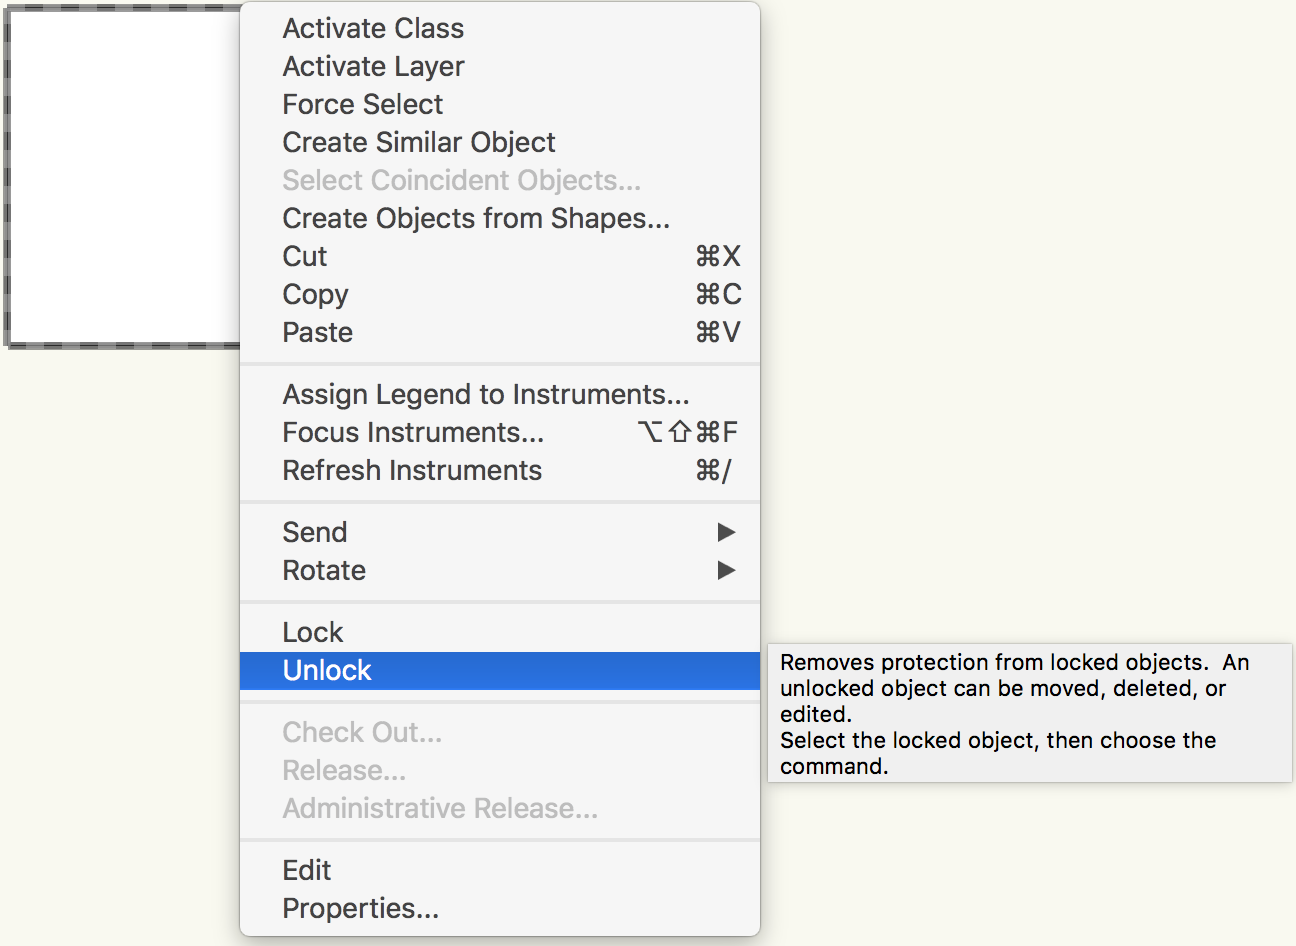
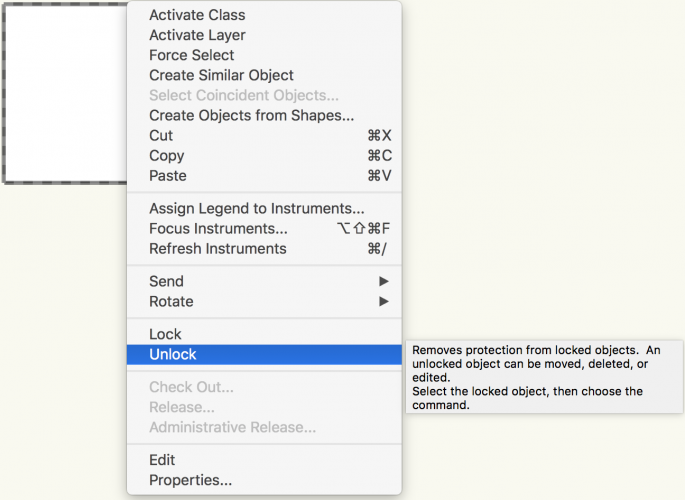
You may also want to check that the symbol in not locked. Try right-clicking and choosing unlock.
-
Are you available to share any pictures of what is happening or the file itself?
-
What are your class and layer visibility options set to?
-
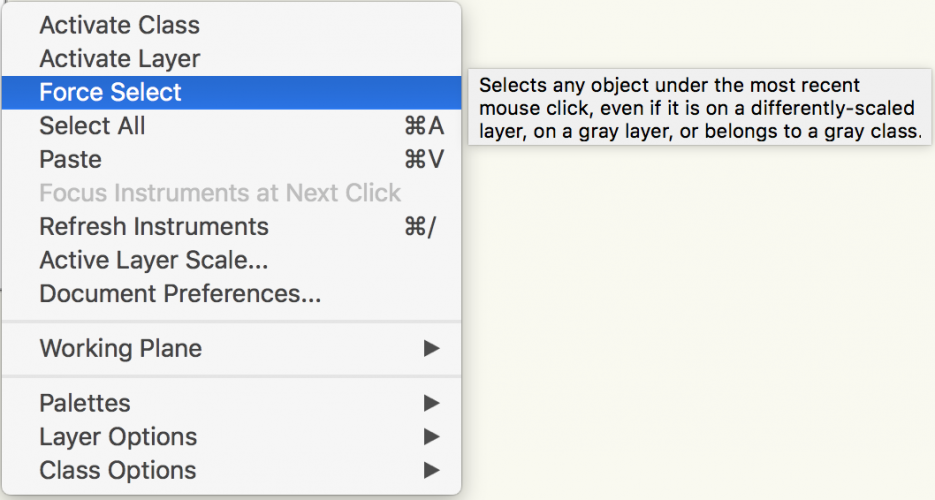
Right-click on one of the edges of the object and then choose force-select. This will automatically activate the layer and class that the object is located on.

-
Happy to help!
-
Actually spoke with the content team about this yesterday. They are working on putting the library together as we speak.
-
Happy to help!
-
It would appear you are working on a version of Vectorworks that is not compatible with Mojave. I would suggest updating to SP5 and seeing if the issue persists.

-
Hey @Simon Allan Looping in @bbudzon for some backup, but I'll do my best to answer these questions. It is important to note that while MVR export is now available in Vectorworks, this is a project that is being continually developed and optimized. This has to do with the way that programs using MVR treat lighting fixtures. Not every program uses a lighting device in the same way that Vectorworks does, instead they often use native geometry and parameters for how the lighting device should appear and function in their program. For this reason MVR contains info for a light's 3D location as well as some info about the light. The receiving program then decides what object belongs at that location, what attached info is relevant, and how it should behave. I would have to check up on this, but I might assume it has to do with the first answer. The rotation information is being applied to the geometry of a lighting fixture in a VWX file that is not being transferred through MVR. If true, this would be a sensible optimization for the future. Not certain what the reason for this is. But I have had several experiences where similar objects ended up grouped together. Another thing I'll need to ask about, but it may just be to simplify the drawing. This sounds like it is working as designed. MVR was created to contain information about lighting devices, 3D Geometry/Locations, and textures. All other info may be extraneous and could lead to larger file sizes and possibly less performance.
-
Right-click the object then force select. Usually does the trick.
-
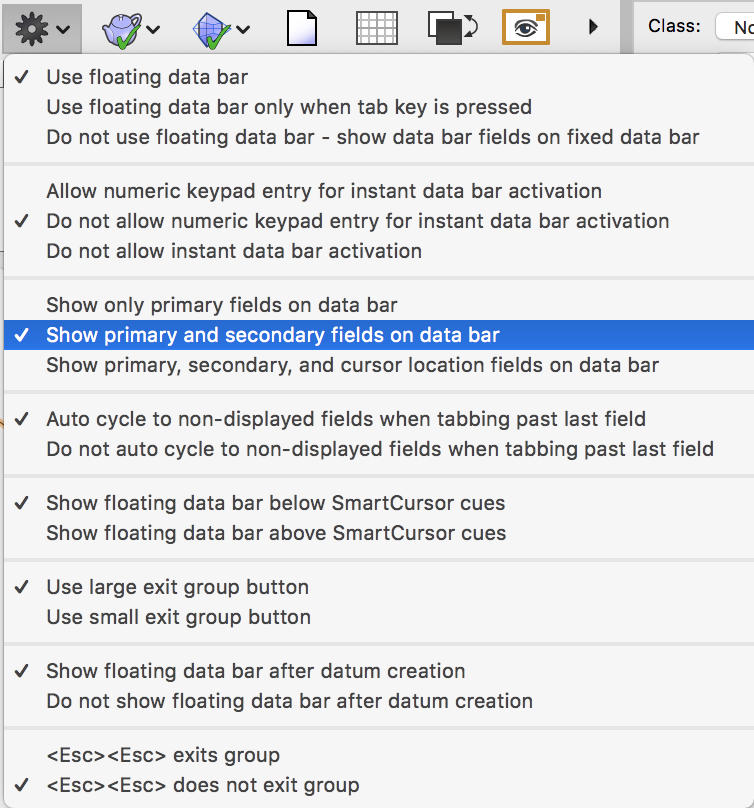
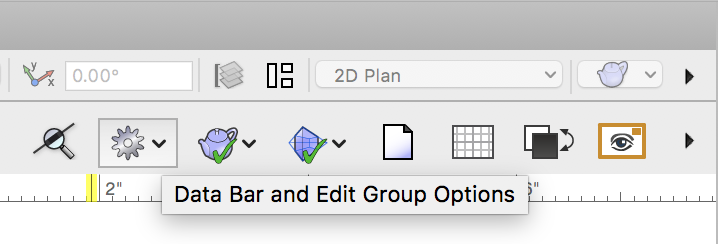
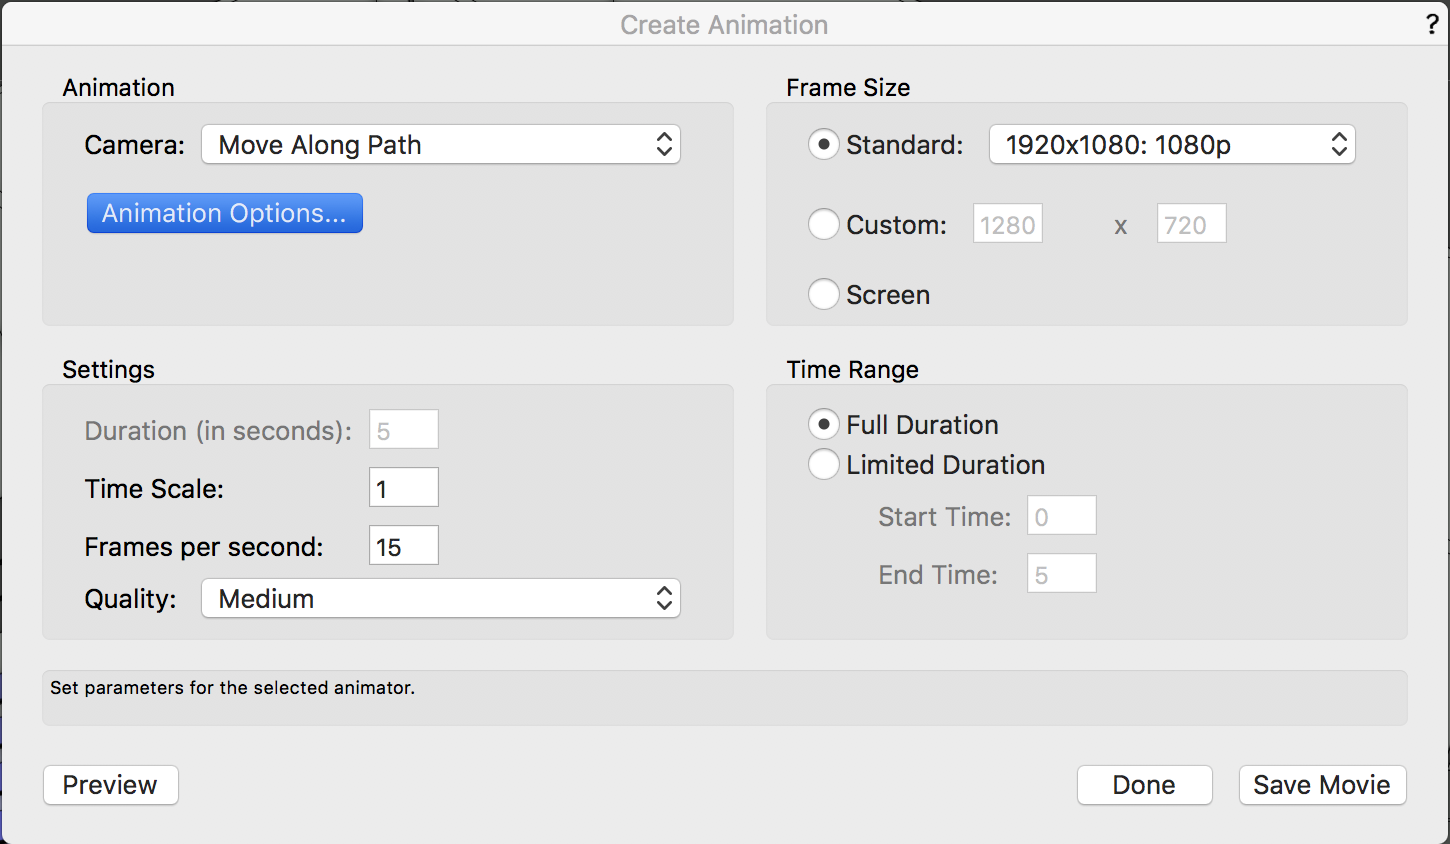
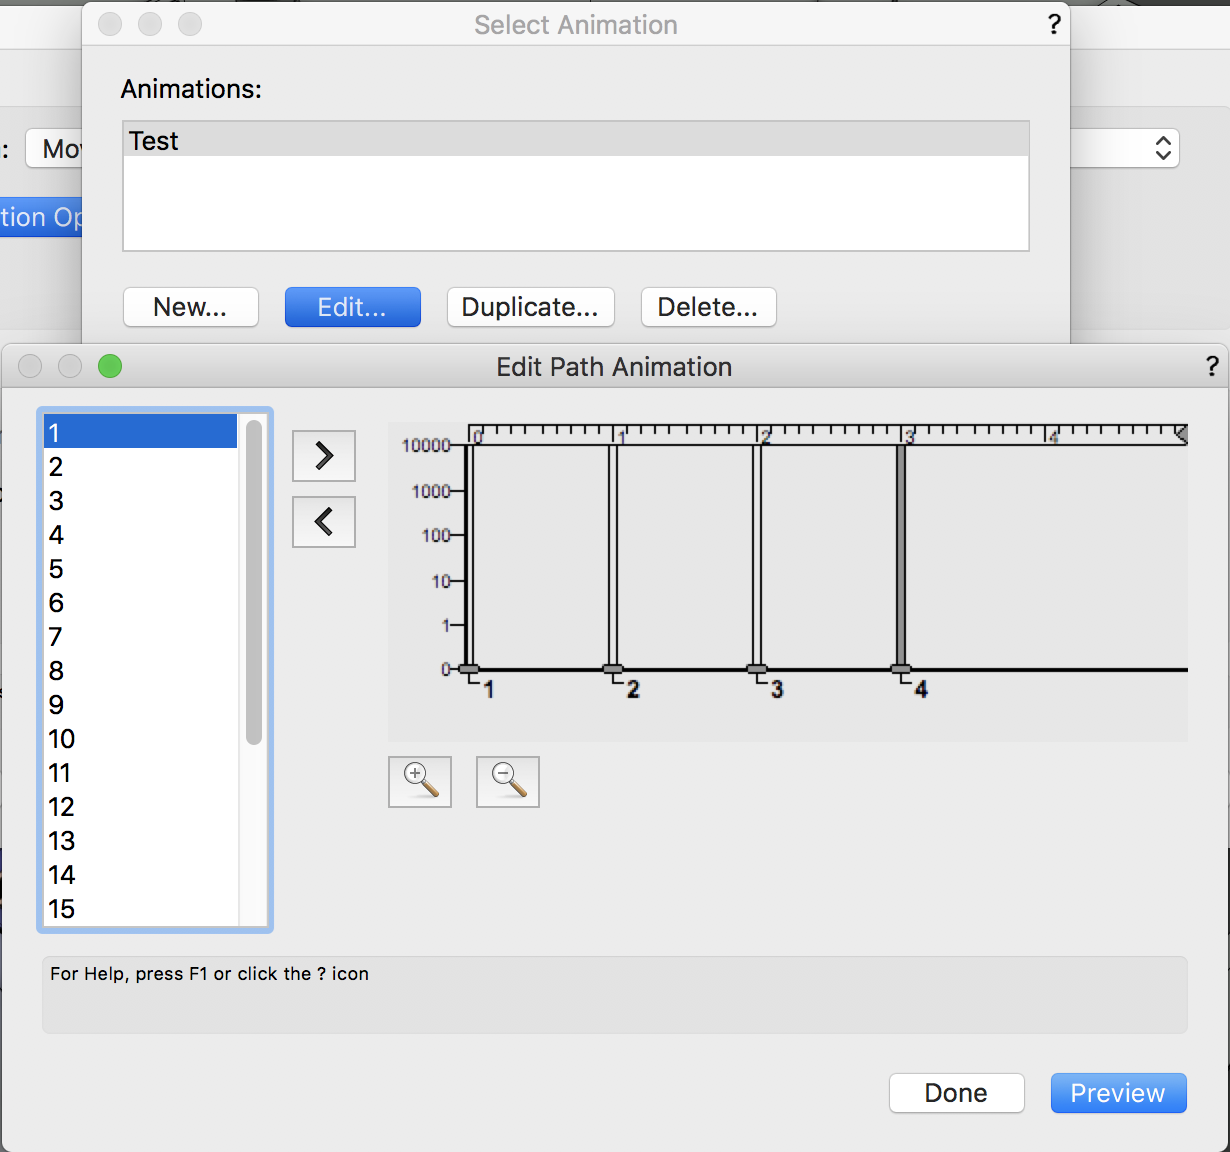
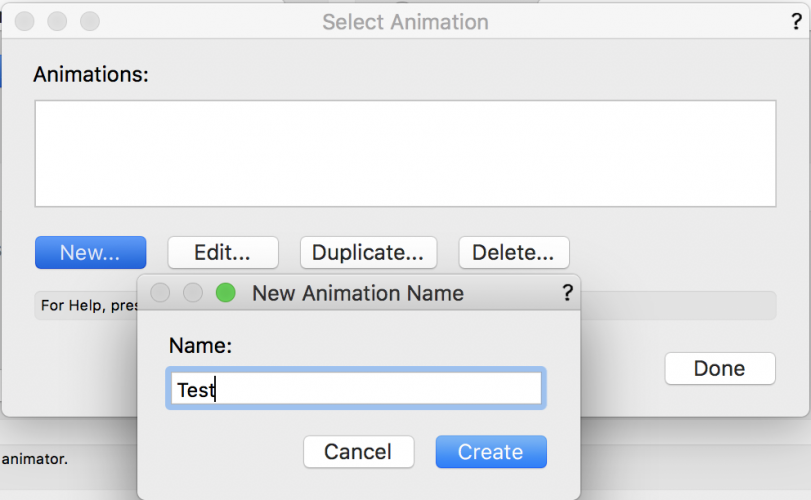
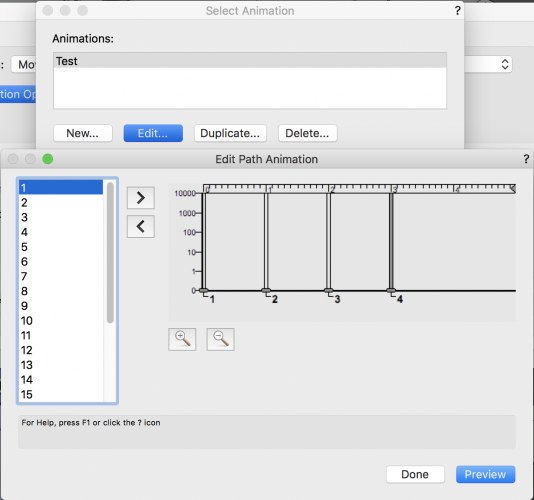
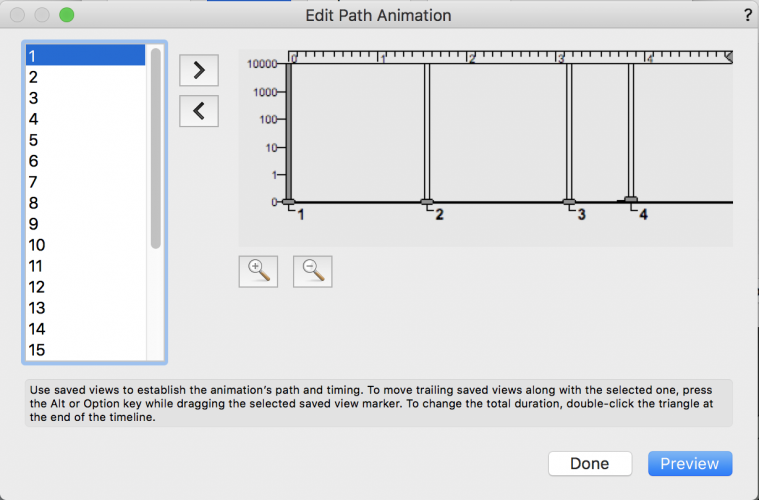
Hello @sjordan_, If you would like to change the transition speed between saved views in your animation you just need to set a few more options. Select "Animation Options..." Create a new animation Choose to "Edit..." the New Animation Now you get a timeline where you can add or remove saved views and specify the length of transitions.

-
@Adamsauder There is a bunch of info here about how to take geometry and turn it into a glowing lighting device in Vectorworks. You can apply these same techniques to any objects you want to use to resemble LED Tape. I talked with one of our Vision engineers and you can essentially do the same thing in vision and make the LED Tape DMX controllable. Let me know if you'd like some more info on that process.
-
All great suggestions, here's one more option.
-
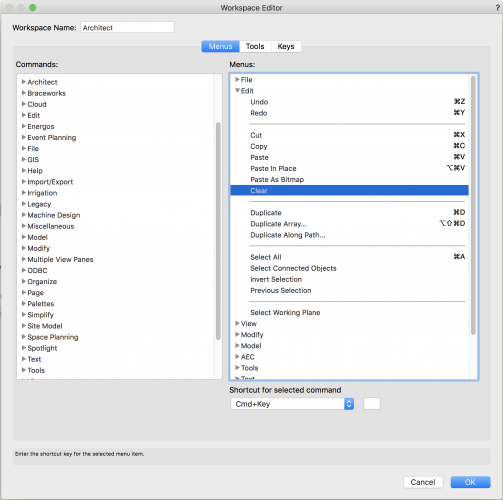
If you go into the workspace editor you can customize the shortcut for the Clear command. You wouldn't be able to set it to just "E" (You can only use single keys for tool key shortcuts). You could set it to Command + "E" or something like that. (Command + "E" is the extrude key shortcut by default so you'd need to change that as well). Your only other option would be a third party application that lets you remap your keyboard.
-
VW2019 crashes when trying to adjust renderworks texture
BSeigel replied to Ride's question in Troubleshooting
Awesome! -
VW2019 crashes when trying to adjust renderworks texture
BSeigel replied to Ride's question in Troubleshooting
Can't replicate the issue. But changing the attribute mapping to auto-align plane seems to work nicely.