BSeigel
-
Posts
118 -
Joined
-
Last visited
Content Type
Profiles
Forums
Events
Articles
Marionette
Store
Everything posted by BSeigel
-
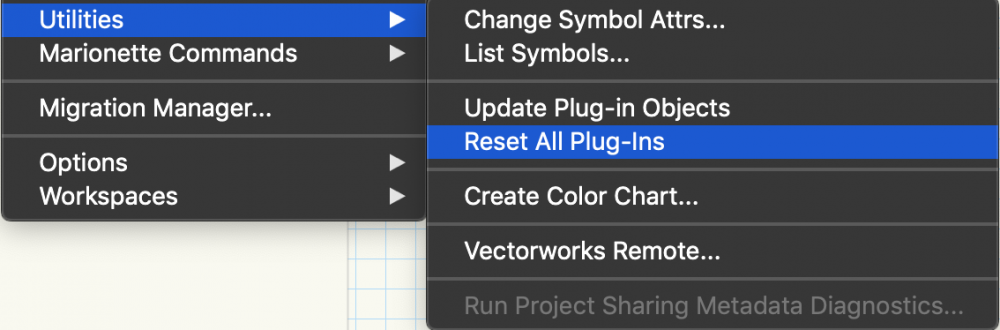
It's possible, you will need to have the files downloaded on another machine with Vectorworks. 1. One the computer with the resources downloaded, find the Vectorworks 2019 application folder (Applications folder on Mac or Program folder on Windows) 2. Open the "Vectorworks 2019" folder 3. Open the "Libraries" folder 4. Locate the "Objects-Ent Truss" folder 5. Copy the "Objects-Ent Truss" folder onto a removable drive 6.On the computer that does not have the resources downloaded, find the Vectorworks 2019 application folder (Applications folder on Mac or Program folder on Windows) 7. Open the "Vectorworks 2019" folder 8. Open the "Libraries" folder 9. Copy the "Objects-Ent Truss" folder from the removable drive to the Libraries folder 10. Restart Vectorworks and you should have the resources available 11. (optional) if you still do not see the resources select the gear icon in the Resource Manager and choose "refresh libraries"
-
Here you go Swivel Cheeseborough v2019.vwx
-
More cores and higher clocks speeds on the CPU will be the most beneficial to rendering performance in Vectorworks. In terms of "Kickass" performance I would look into AMD 3900X or Intel i9-9900K processors and possibly work your way up to Threadripper, Epyc, Xeon processors if budget allows. One other thing worth considering is that Vectorworks is continuing to integrate with other programs for rendering that utilize the graphics card much more than Vectorworks does. For example, if you plan on picking up Vision, a good graphics card will help your rendering performance. I recently put together a suggested build for a client with roughly a $3000 budget. You can get a great machine for much less than this, but this will give you an idea of a higher spec machine. https://pcpartpicker.com/list/wNzpb8
-
@nicolas06 Are you trying to make these visual changes on the label legend for each of the lighting devices or just in the lighting instrument summary?
-
You may not have the truss libraries downloaded. Go to Help>Download Content and make sure that you have the Truss Libraries 1 and 2 as well as any other libraries you might need installed on your machine. Let me know if this does not solve the issue.
-
@Mike Wright is spot on, let me know if you have any trouble attaching the parts record. I would also suggest editing the clamp, the geometry for the clamp seems like a fairly dense mesh and could hurt performance in your drawing. You also probably don't have much need for wings nuts, washers, etc. I would suggest tracing out the right profile of the lower bracket and extruding it an inch or so. This should significantly simplify the geometry.
-
Hello Everybody, I received a request for an adjustable swivel cheeseborough, so I created a marionette object that I would like to share with you all, enjoy! If you would like to add it to any of your files you can just copy and paste the object or import the "Cheeseborough Marionette" folder from the Resource Manager. Swivel Cheeseborough.vwx
-
Hello Mik, There a few possible issues here. First, check to make sure that your graphics drivers are up to date and ensure that Vectorworks is using the graphics card as opposed to integrated graphics (may not be an option on your Xeon processor). Typically, this sort of behavior indicates that there is an object very far away from the origin in the drawing. A good way to check for this is the following: 1. Deselect all objects and Turn on all classes and layers 2. Set class and layer options to show snap modify others 3. Go to View>Zoom>Fit to Objects 4. If you get zoomed out very very far, you have objects a great distance from the user origin. If this happens, proceed to the next step 5. Draw a marquee selection around the objects you want to keep in your project, in your case, the whole house and any neighboring objects 6. Go to Edit>Invert Selection 7. See if any distant objects become selected, check if they are important, and delete them Hopefully this can resolve your issue, feel free to report back with any questions
-
If you wouldn't mind sending the VWX file over my way I'd be happy to take a look
-
Have you tried using the Export MVR option and opening that in Vision?
-
Bug submitted: VB-165734 . In the meantime, I would suggest a white fill color on the decks or creating a custom Data Tag. Let me know if you have any questions.
-

Lens of lights not lighting up??? [Friday Rant]
BSeigel replied to frozenwaffles's topic in Rendering
This is true, I included a note in that section stating that in order to set the glow and the light's intensity to be "off" your need to enter a color field value of (1,1,1) -
I was able to resolve the issue in your file by creating a new Label Legend in 2020 and applying it to the lighting devices. Be sure not to duplicate the existing one or the issue will persist. The issue is specific to that Label Legend and a bug has been submitted to look into this further. VB-165564
-
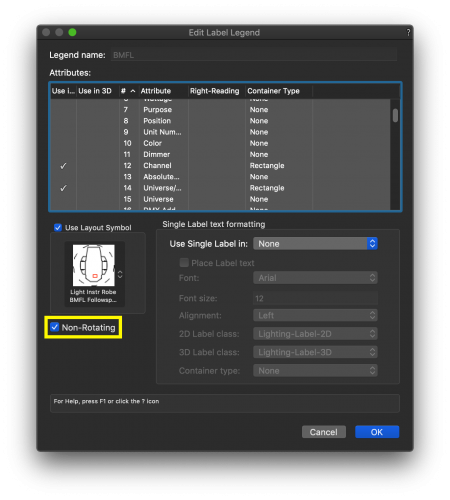
You may also want to check over the Non-Rotating checkbox for the Label Legend that you're using.
-
@sbarnett I've tried a few different methods in a test file and cannot seem to reproduce this result. Would you be able to share the file?
-
Lens of lights not lighting up??? [Friday Rant]
BSeigel replied to frozenwaffles's topic in Rendering
This should help you get everything set up: Spotlight Rendering Cheat Sheet.pdf -
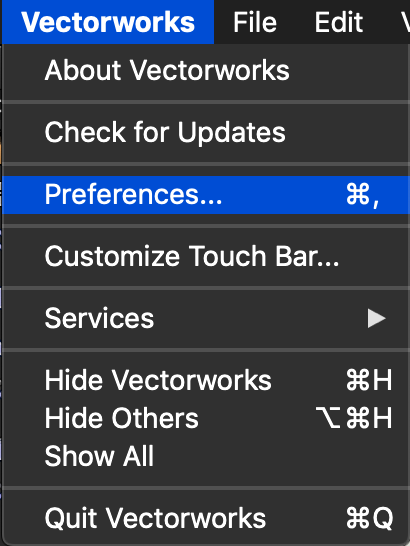
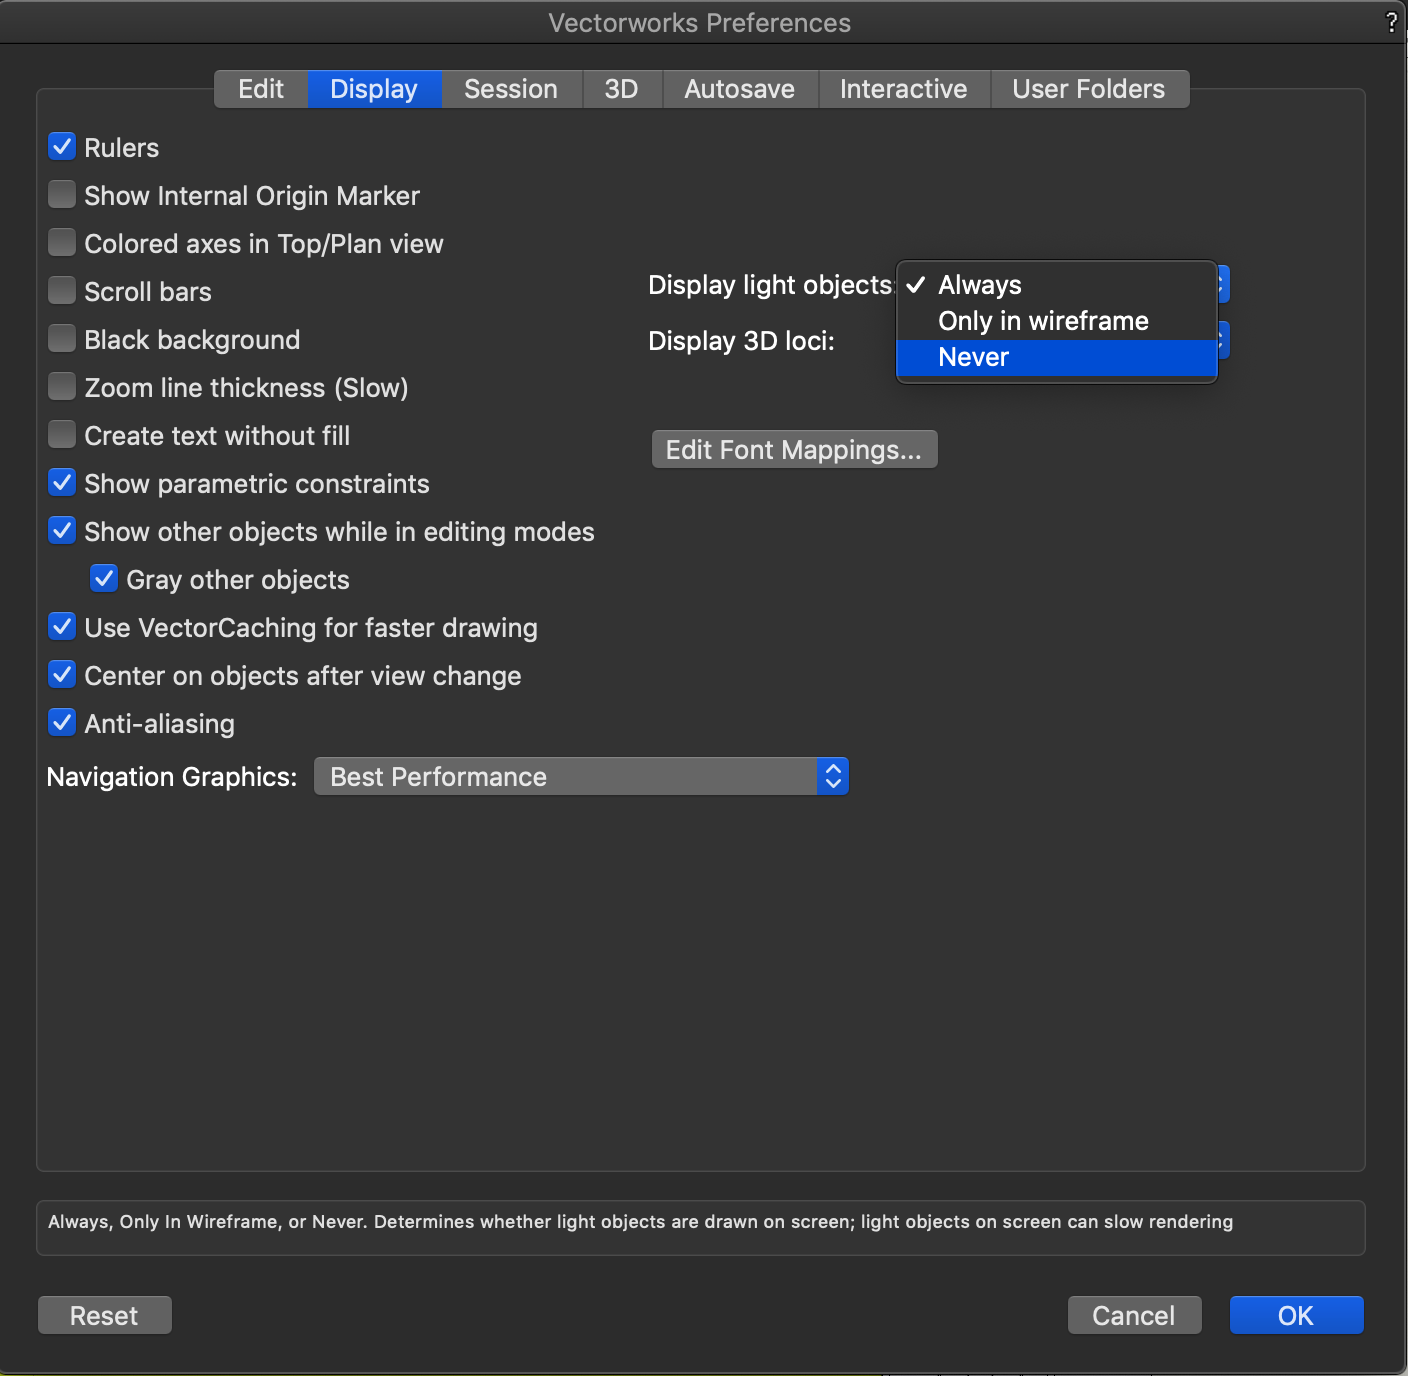
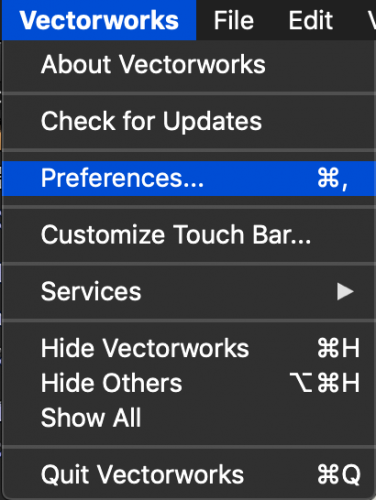
1. Open Vectorworks Preferences 2. Under the Display Tab, set Display Light Objects to "Only in wireframe" or "Never"

-
@rseybert I haven't had many issues with Live Data Visualization, but there certainly a few steps in getting everything set up. Feel free to drop a file here if you are having any trouble and I can take a look.
-
If you were a big fan of that look, there is always Renderworks
-
@frozenwaffles for 2020 we have also added to capability to use the Align and Distribute items tool in 3D which will be a great help with these sorts of workflows.
-
@Sebastiaan Thank you for the test file. I've spent the morning working through various workflows on this file and honed in a couple of the key issues. These issues have already been submitted to our engineering team: VB-165010 In the first example you listed in the file, you can only move the lighting device and have it properly attach to a different pieces of truss in the original 3D model. This will update correctly in the schematic view objects. For now, the schematic view lighting devices do not seem to understand when they are being attached to a different piece of schematic view truss. While it may not be ideal, you can avoid this issue for now by using a single piece of straight truss. In the second example, I ended up with the same result, but it only took about 30sec to process. This does not occur when you have the circle truss lying flat, convert it to a hanging position and then you create schematic view objects. The primary issue is that there is no top/plan representation (usually shown by gray 3D geometry) being drawn when the rotated truss is converted to a hanging position. These issues are known and currently being addressed. Feel free to let me know if you find any other issues.
-
Hello Sebastian, The issue seems to be related to the hanging position object. You should be able to do everything that you are trying to do without needing to create a hanging position. Essentially the schematic view command makes a schematic view object for every piece of truss and each lighting device. By converting the truss into a hanging position object, Vectorworks technically considers it one object which can make things tricky. This is something that we will look into. For now I would suggest not creating a hanging position.
-
Once you have attached a lighting device to a truss you can move it to another chord and it will maintain its position relative to the truss. When in doubt, move the light to where you want it positioned on the hanging position, right-click the fixture, choose "Attach to Hanging Position" ad select the appropriate Hanging Position.
-
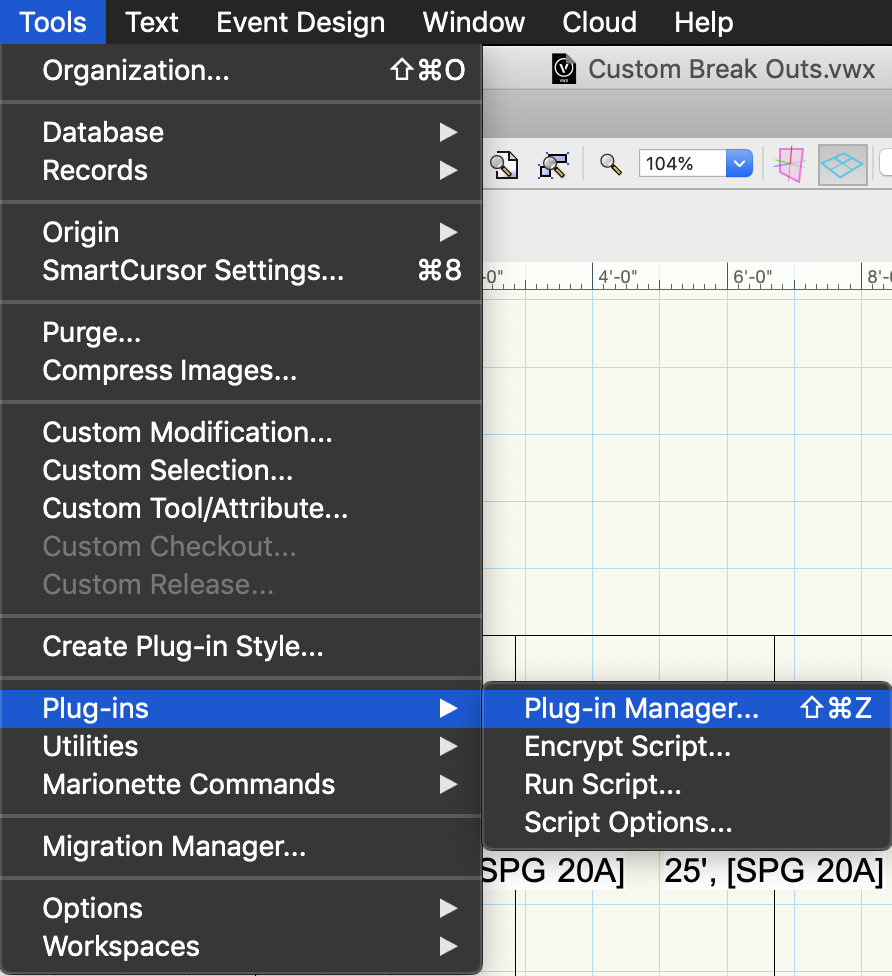
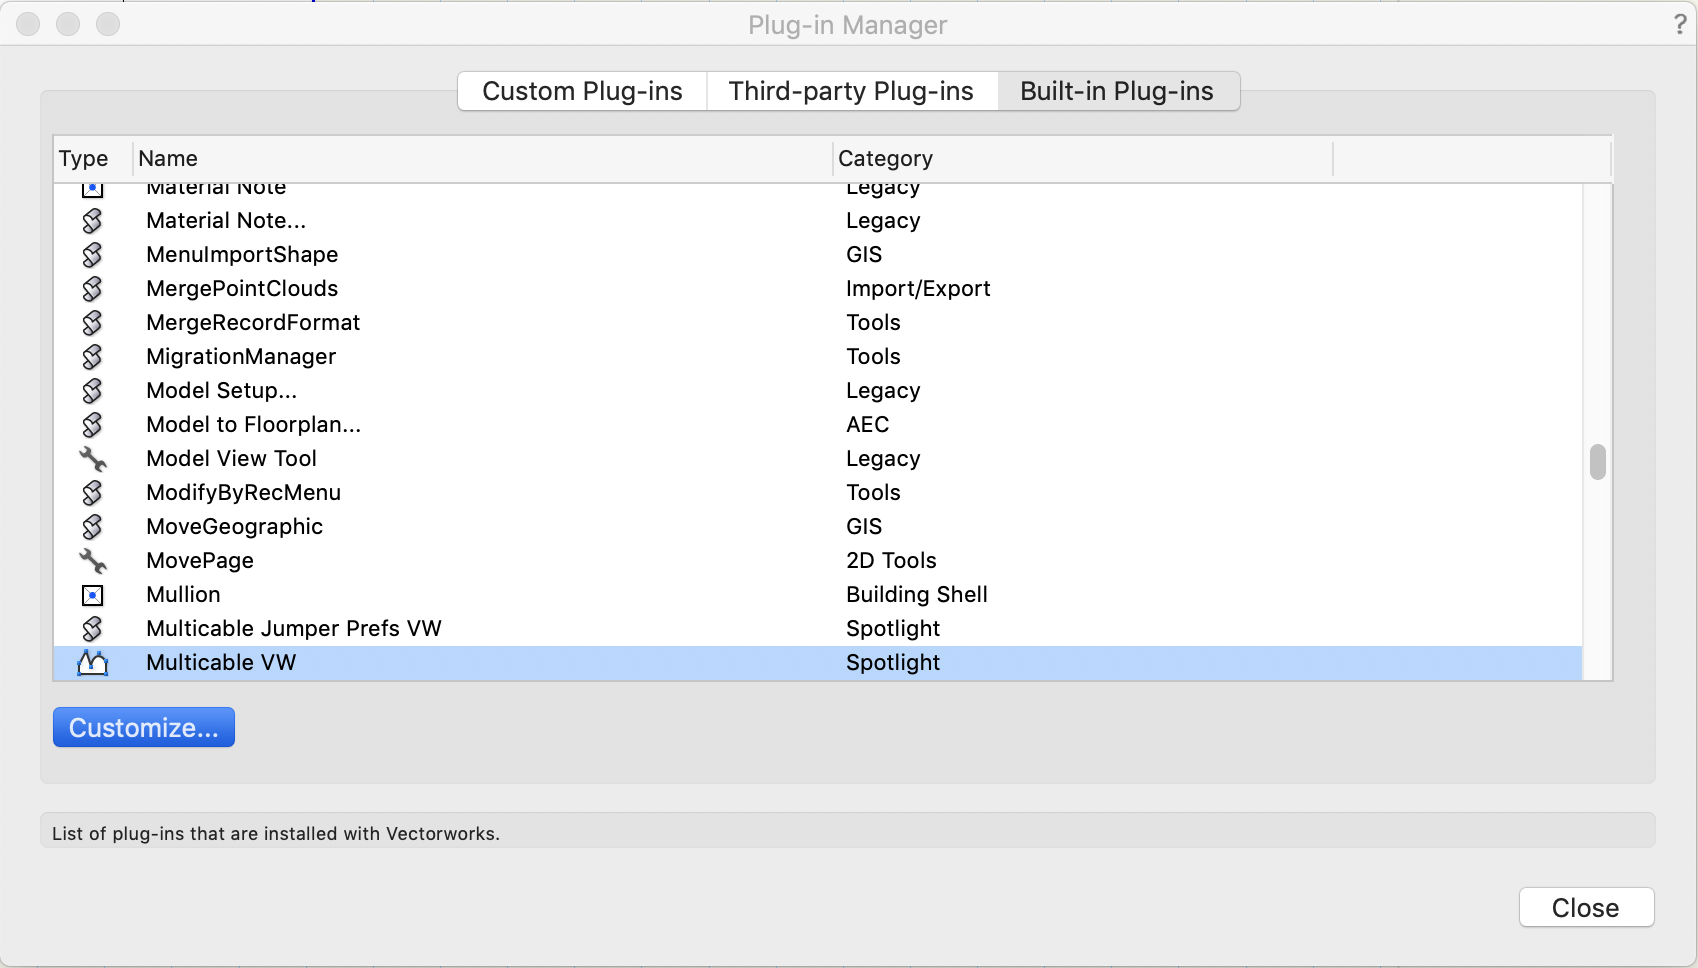
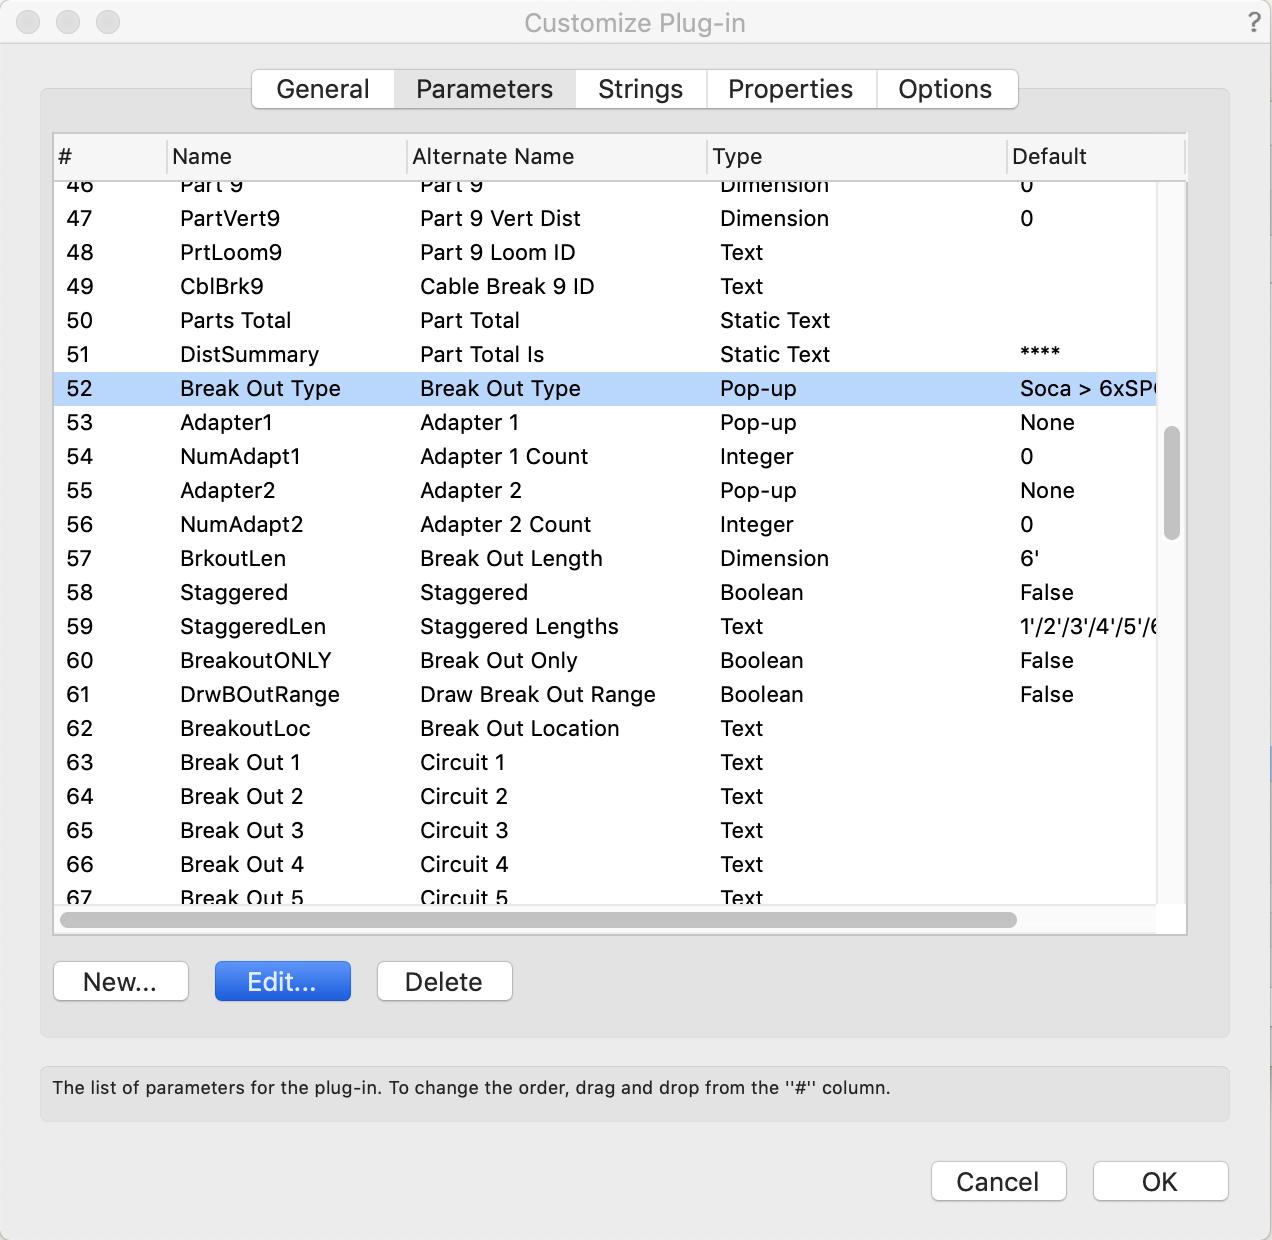
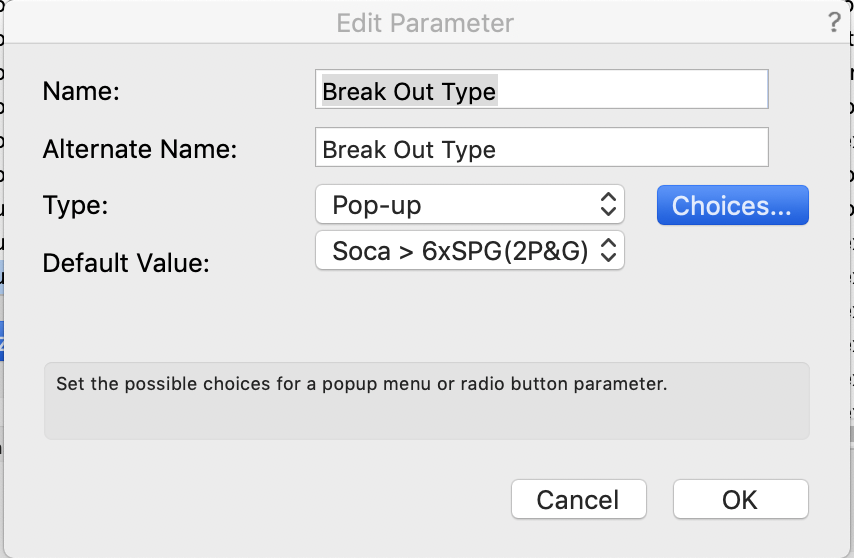
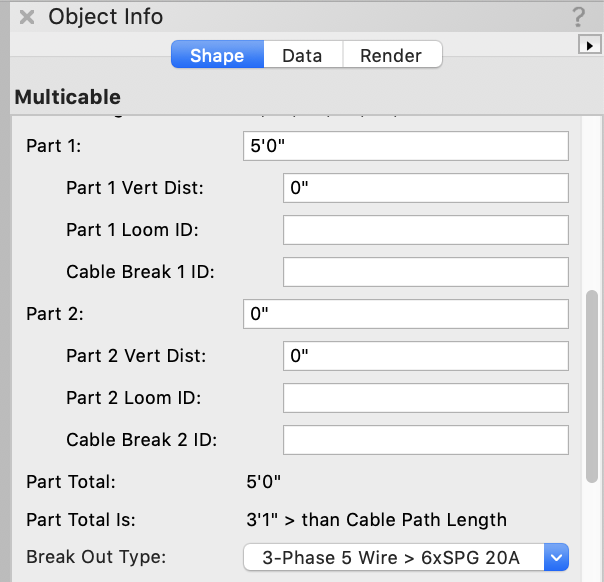
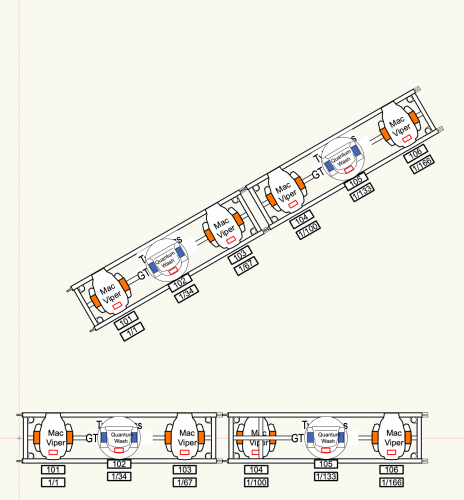
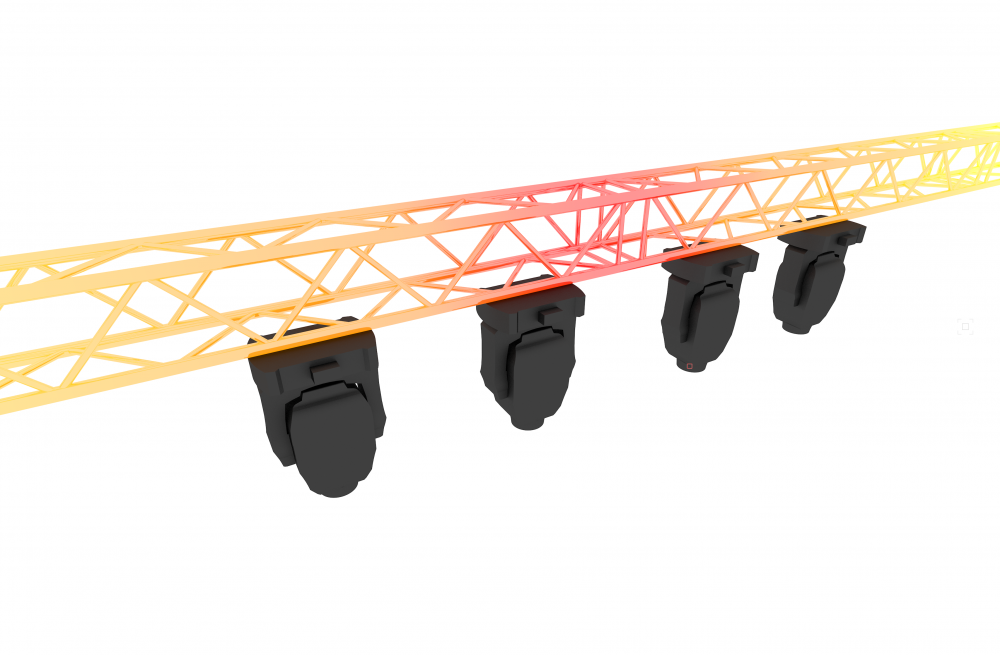
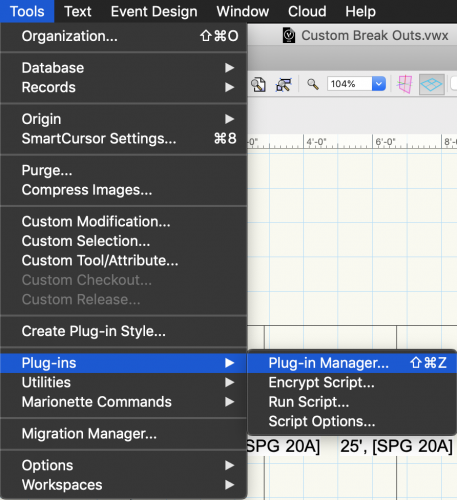
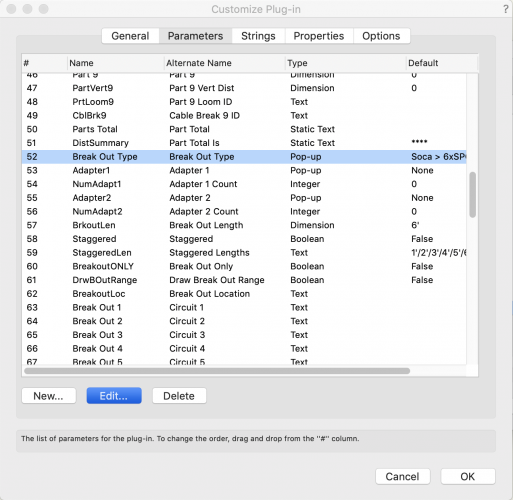
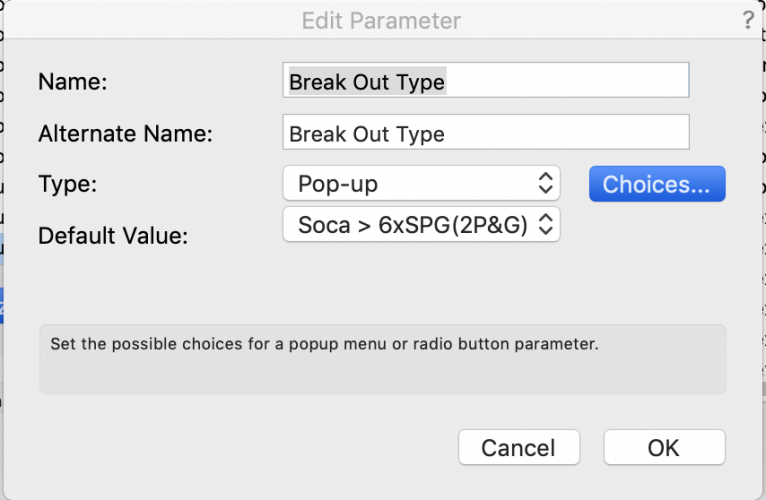
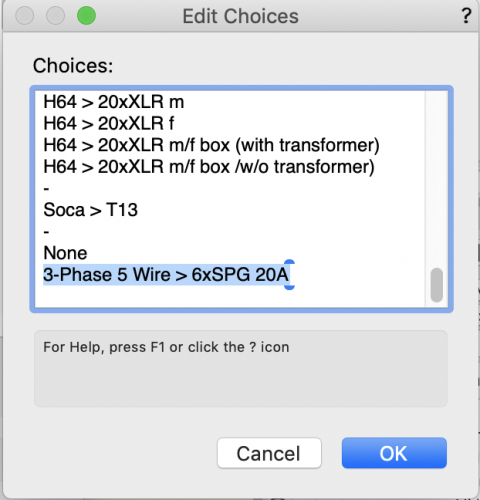
Hello Peter, I've been working on developing some cable tool workflows and have discovered some cool things you can do by editing the multicable tool plug in and adding in additional cable types, break-in types and break out types. I've attached a fairly similar example file where I'm using a power distro for going from Cams to SPG20A. It won't be a perfect solution, but it is nice that this will work with the Assign Multicable Circuits, Place Break Out Label Commands, and it will show up on your cable worksheets. Hopefully this can help you out, I've attached some screenshots for how to edit the plug-in. Since you are editing a plug-in, be careful not to change anything other than just adding in new text options. Let me know if you have any questions. And just in case you need it: Custom Break Outs.vwx


-
Hello Everybody, We often have users ask about the various settings for Spotlight Rendering. I have been creating a cheat sheet and wanted to share it with you all. Any feedback is welcome, enjoy! Spotlight Rendering Cheat Sheet.pdf