James H.
-
Posts
22 -
Joined
-
Last visited
Content Type
Profiles
Forums
Events
Articles
Marionette
Store
Everything posted by James H.
-
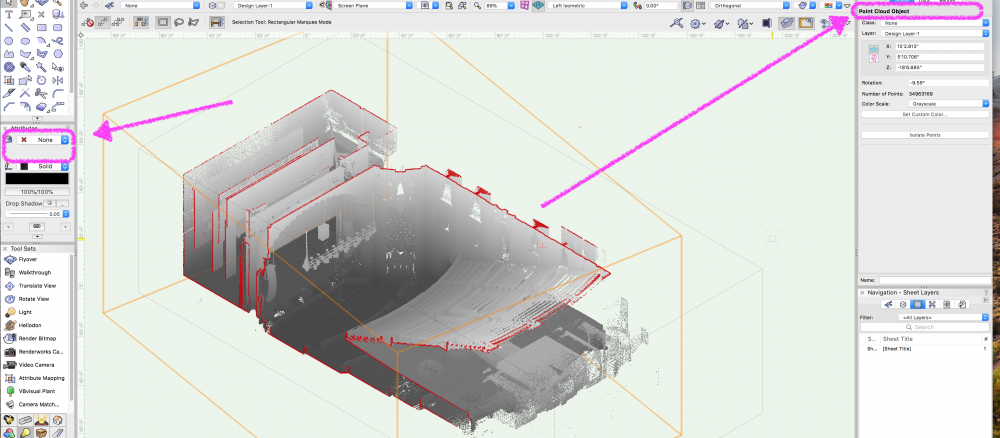
Hi @MarcW You've probably figured this out by now but, the solution I found was to make sure that with the Point Cloud Object selected, the Fill Attribute of the object is set to 'None'.
-
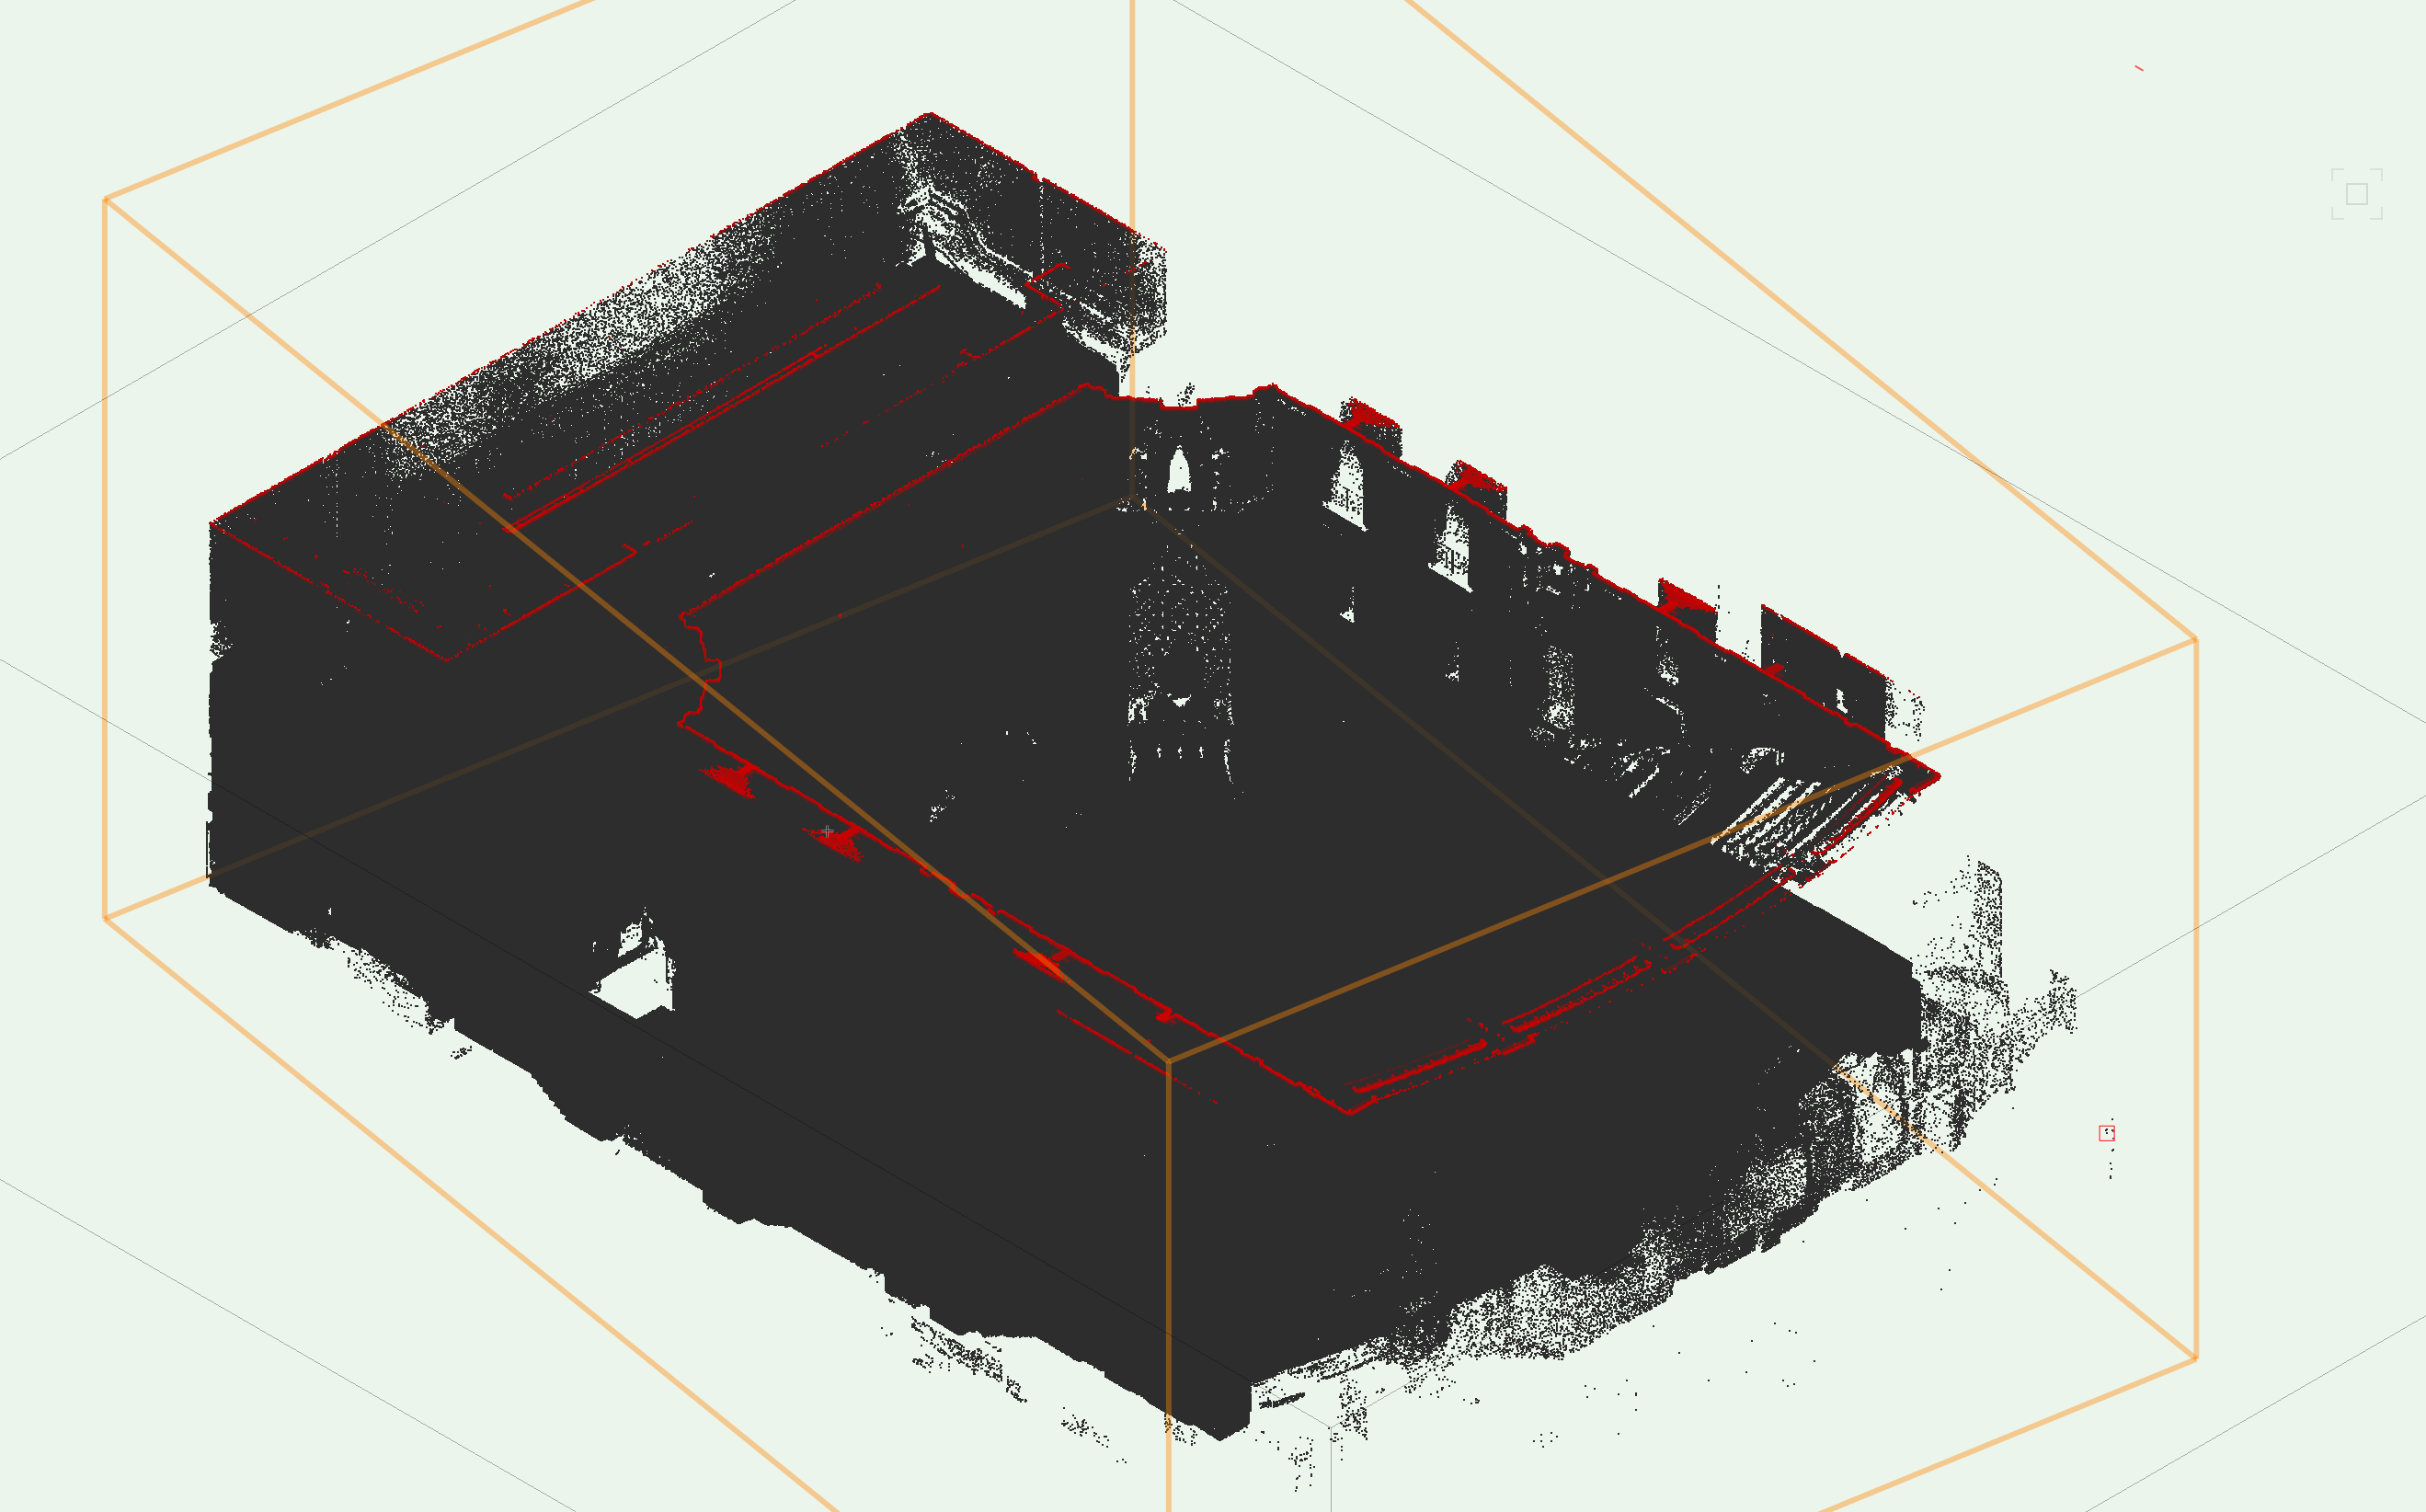
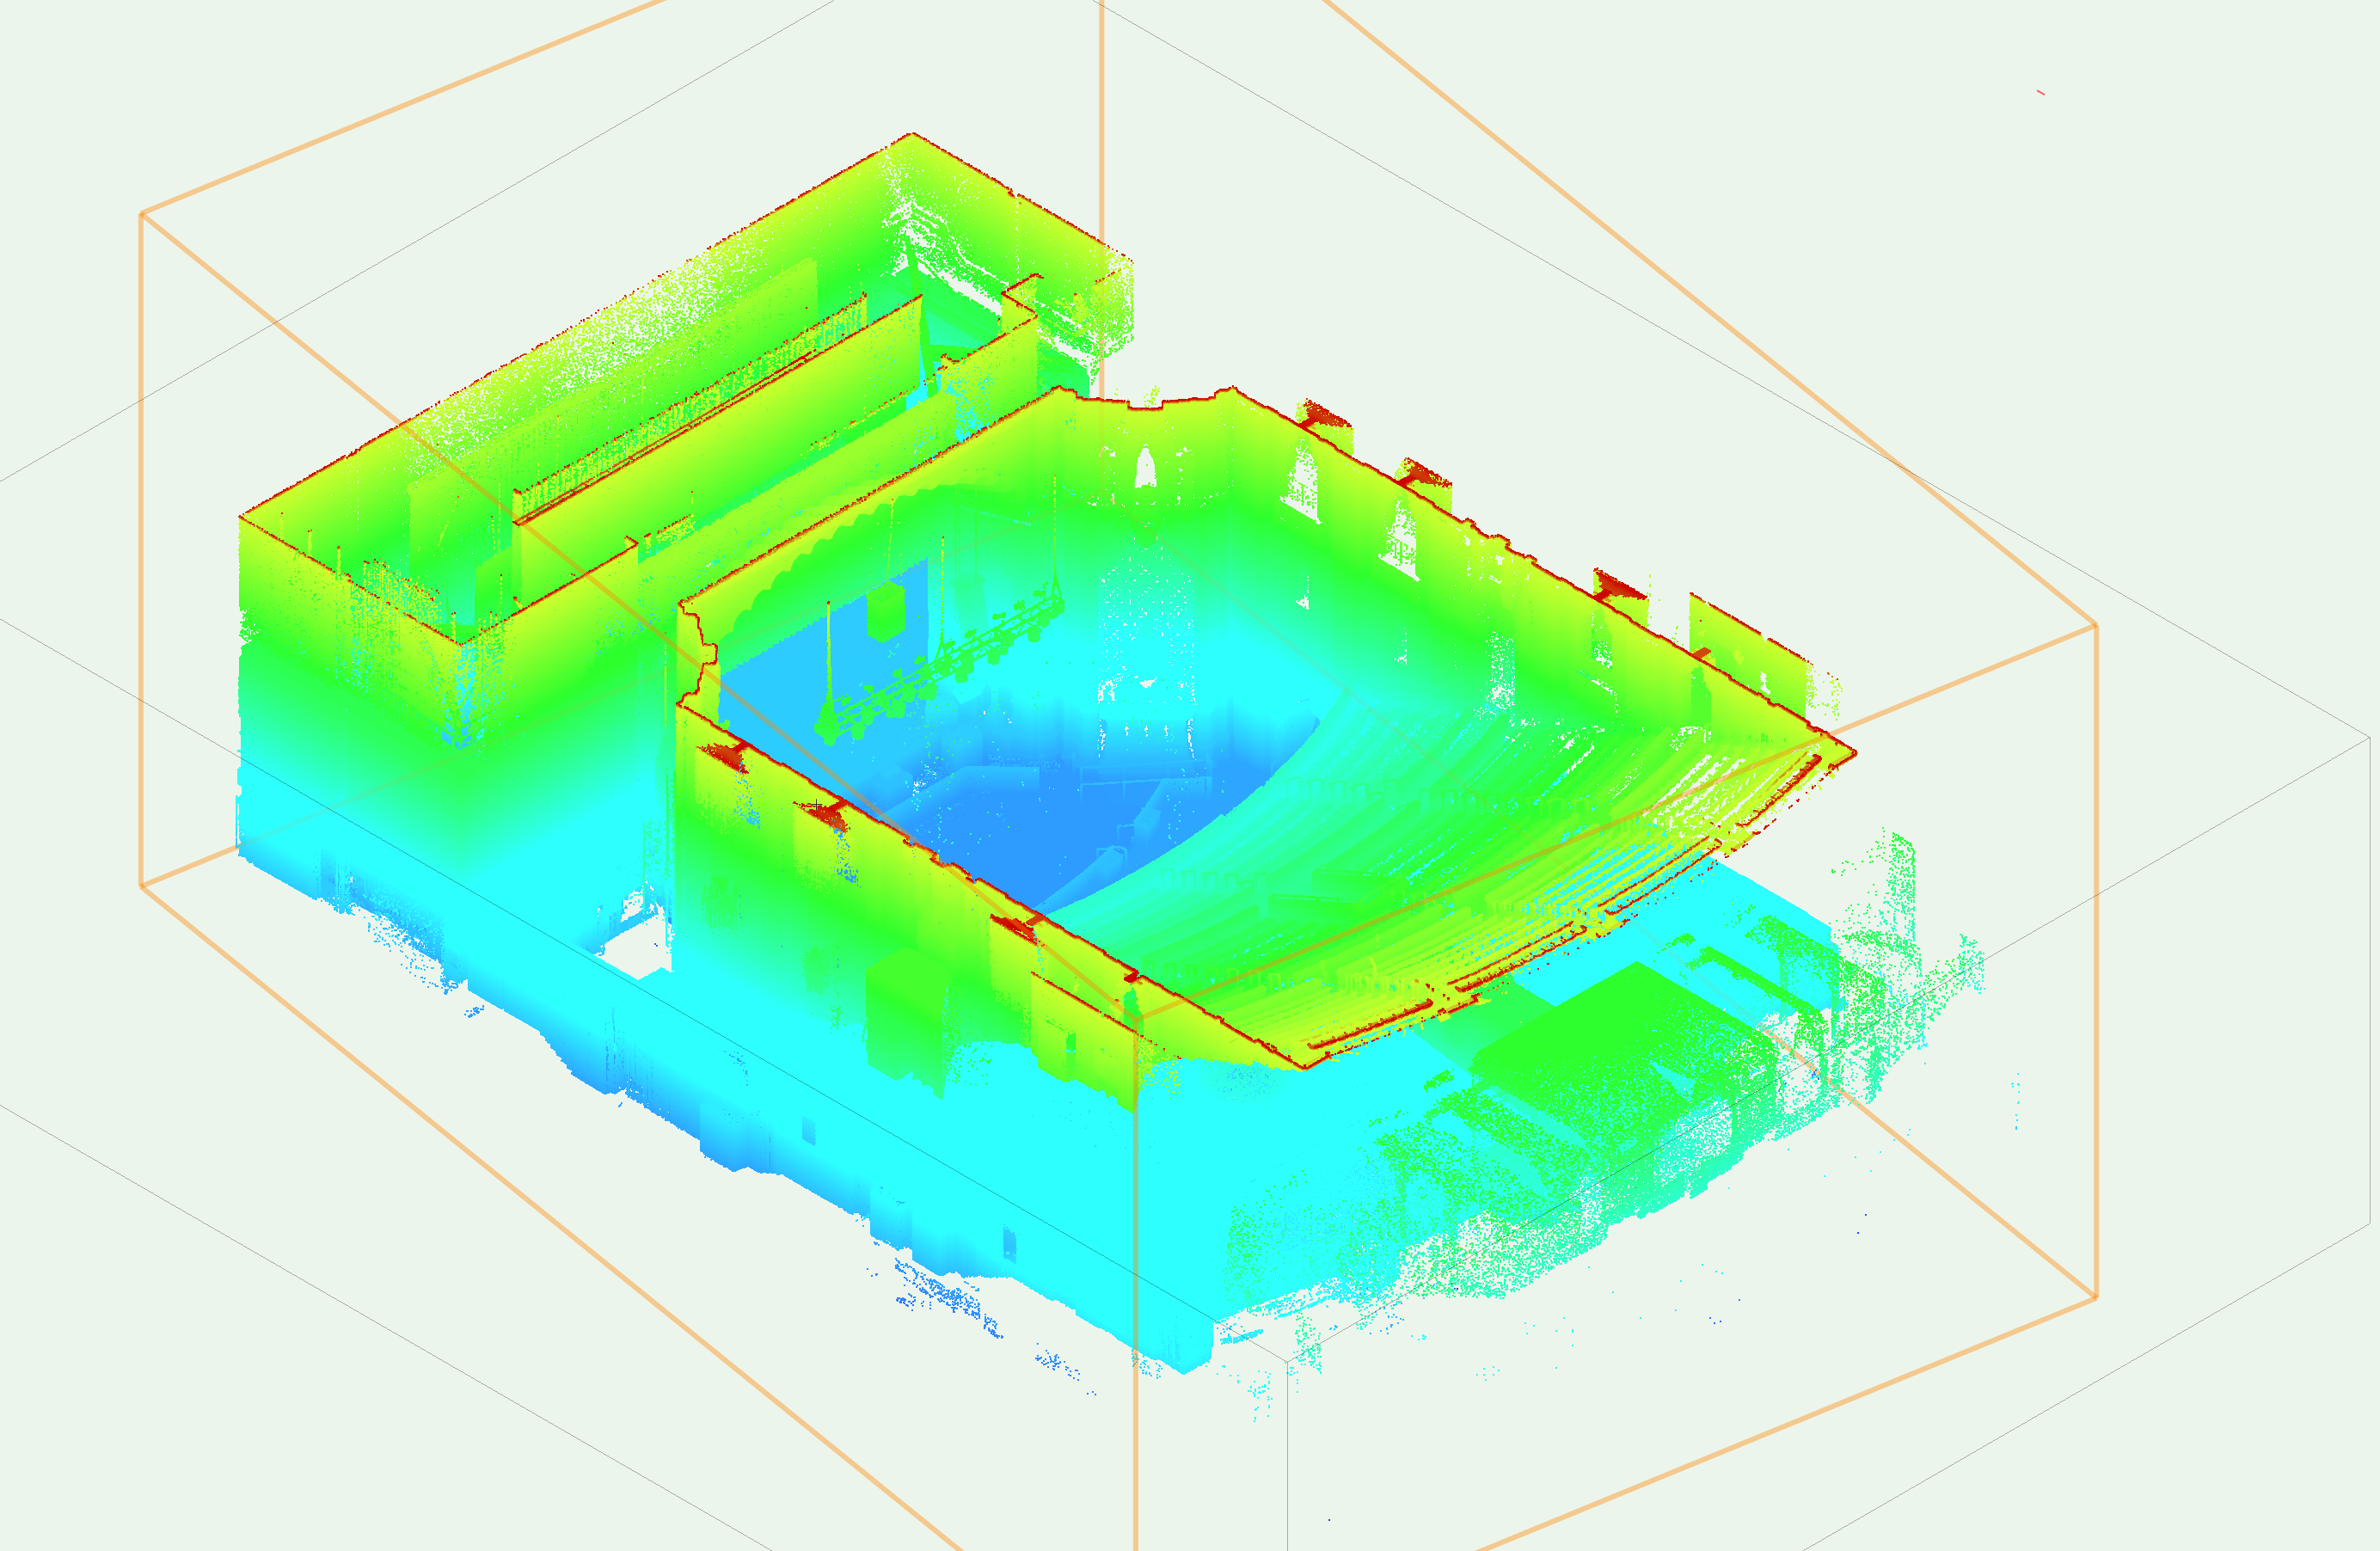
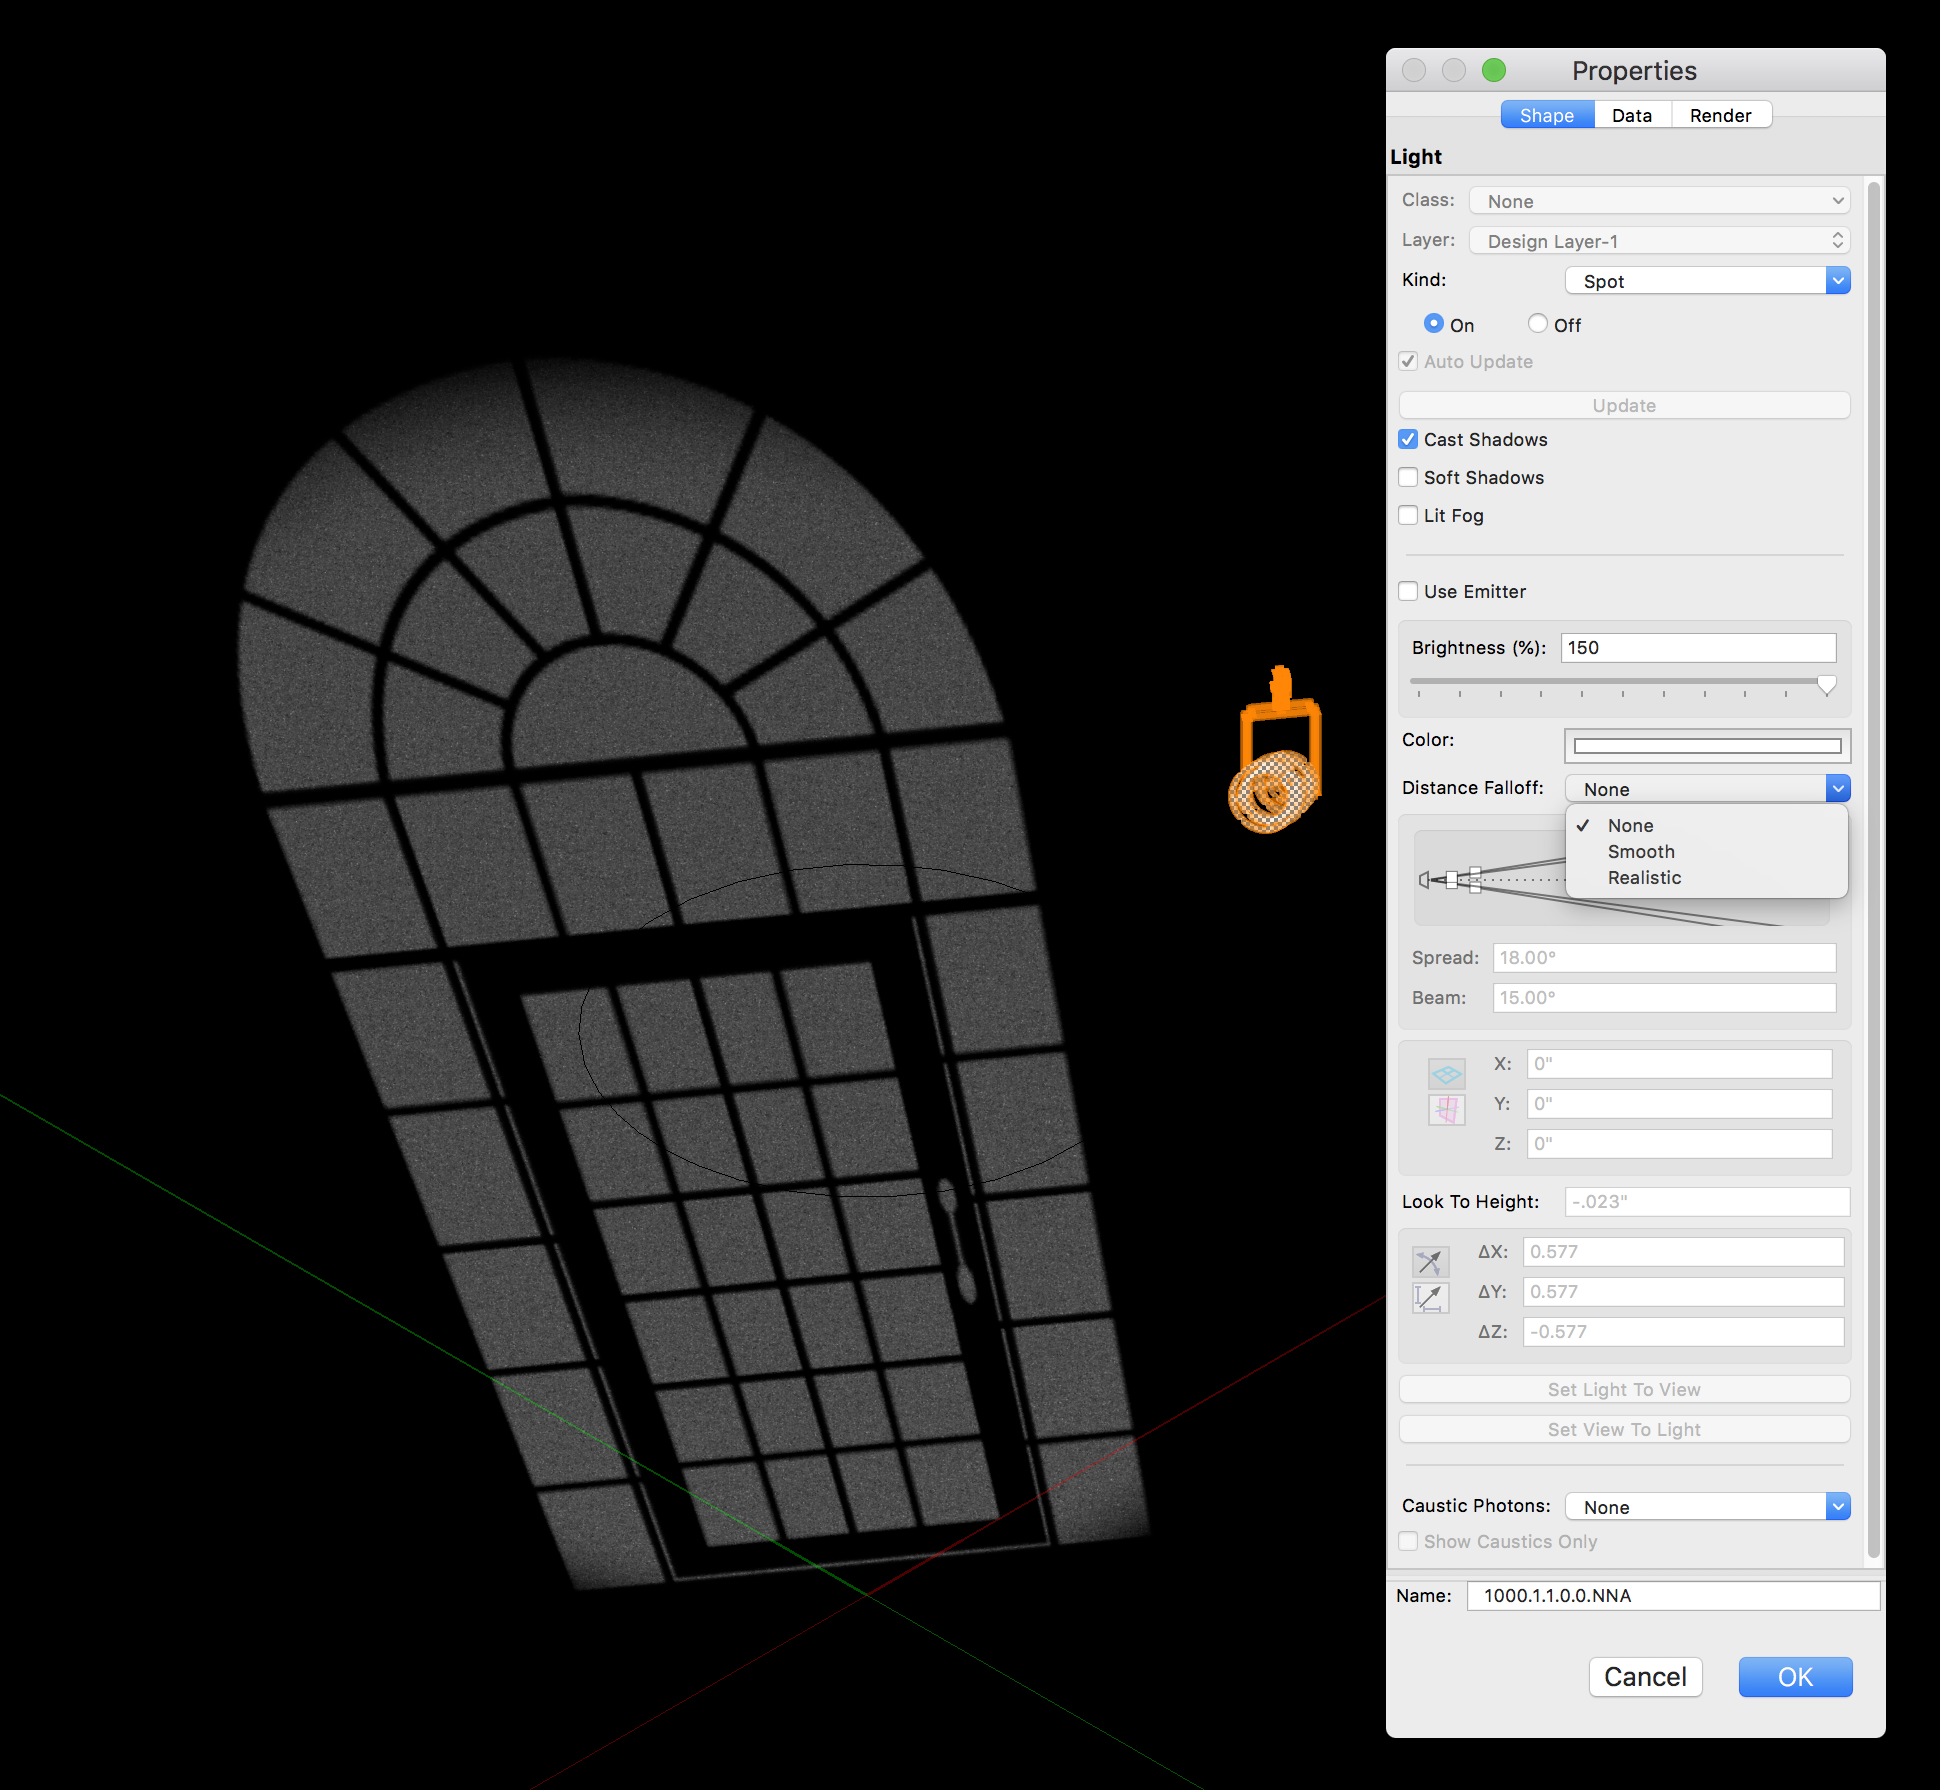
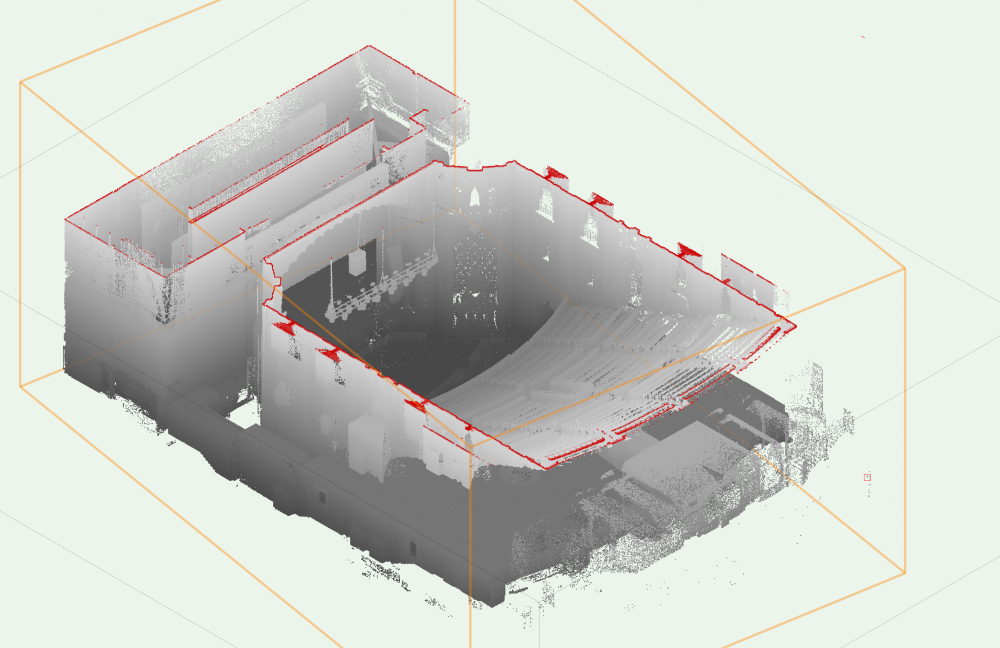
Hi all, Jumping on an old thread here but I can't seem to find much info on Point Clouds... I've got an E57 file type point cloud scan of a theater and the scan was done in 'black and white'. The company we had perform the scan for us provides a viewer that shows the the scan data in a nice gray-scale but when I import the file into Vectorworks all the points have the same black value which makes it difficult to navigate. I know there's an option to "Set Custom Colors" in the OIP for the Point Cloud Object but this seems to only set colors up from the bottom of the object in a gradient fashion. Any ideas on how to get a better gray-scale point cloud? Do I need a different file type to import? @Luis M Ruiz you seem to be the pro to go to with my point cloud issues usually, any thoughts? I need it to look more like this (how it does from the scan company):


-
Jumping in on this thread but slightly off topic, is there a way to assign a class to the beams drawn by the "draw beam" feature on Spotlight Lighting Devices so they can be turned on and off for various viewports (eg. section viewports vs render viewports etc.)?
-
Hi @Zeno Here are the results with the original file with the Renderworks Style modified as you requested (Blurriness to off and disabled "ambient info") = no improvement. Unfortunately I do not think my spot symptoms were the result of the same bug you are experiencing... And yes, you are correct on the three steps that corrected the issue in my file. Ultimately I think the issue was from the Light Objects (Spot and Point) hitting round/concave surfaces very close to them... Ostensibly the curved geometry was randomly 'focusing' the light bounces and creating the spots around the room. Sorry my issue didn't help you resolve yours. Regardless, thanks for starting this thread. Your models and renders are inspirational and this topic and the contributors have been incredibly educational. I look forward to hopefully reading about the resolution of your issue soon.
-
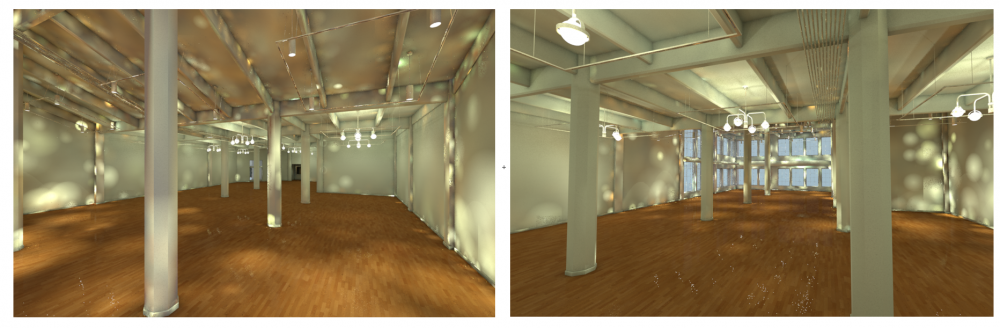
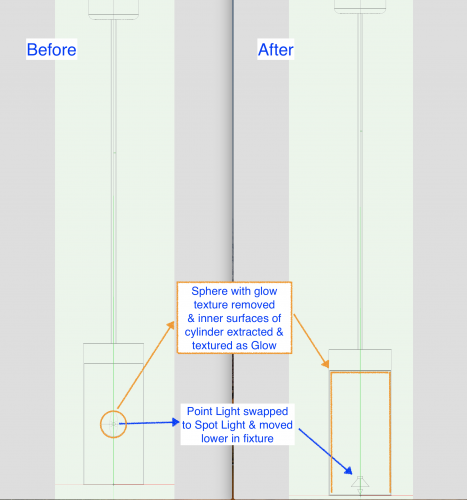
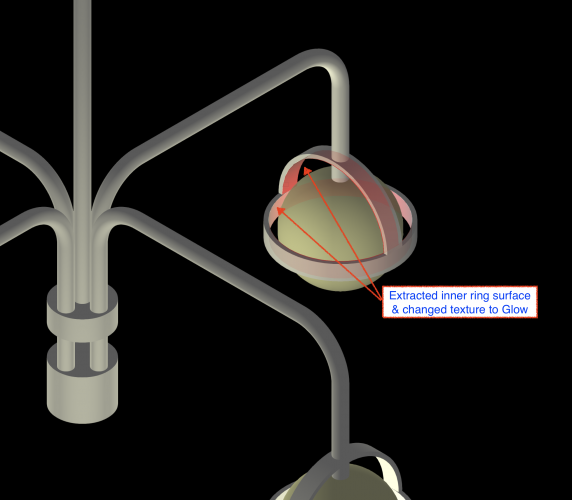
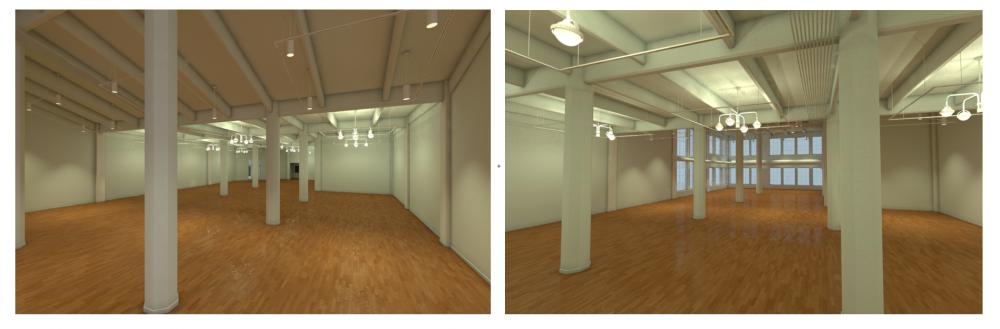
Thanks @Luis M Ruiz and @Dave Donley!! Appreciate the time and suggestions. @Dave Donley Thanks for the tip on the Portal option for the Glass RW texture. Can you tell me more about what it does? It seems like it should be triggered by default for windows as the window tool brings the glass texture into the file by default... are there cases where a window would not be a Portal? @Luis M Ruiz Thanks for digging into this one. I did some further exploration of the Pendant and Chandelier symbols I'd created and you were correct, the issues was with the Point Light objects being placed inside the cylinders of the pendant (and rings of the chandeliers too for that mater). I swapped the Point Lights out for Spot Lights in the Pendant symbols (and moved them lower in the cylinders). I also Extracted the interior surfaces of the cylinders and rings and re-textured them to a Glow texture (was able to keep the point lights in the Chandeliers without an issue). Solved the case of the mysterious spots well enough that I could add the reflective values back into all my textures without any issues! AND... Voilà: Again, super huge thank you to @Luis M Ruiz and @Dave Donley as well as the Forum community on whole for the helpful tips and for being here as a resource!!!! What a great place to keep learning. 🙏🏻 🎉❗️
-
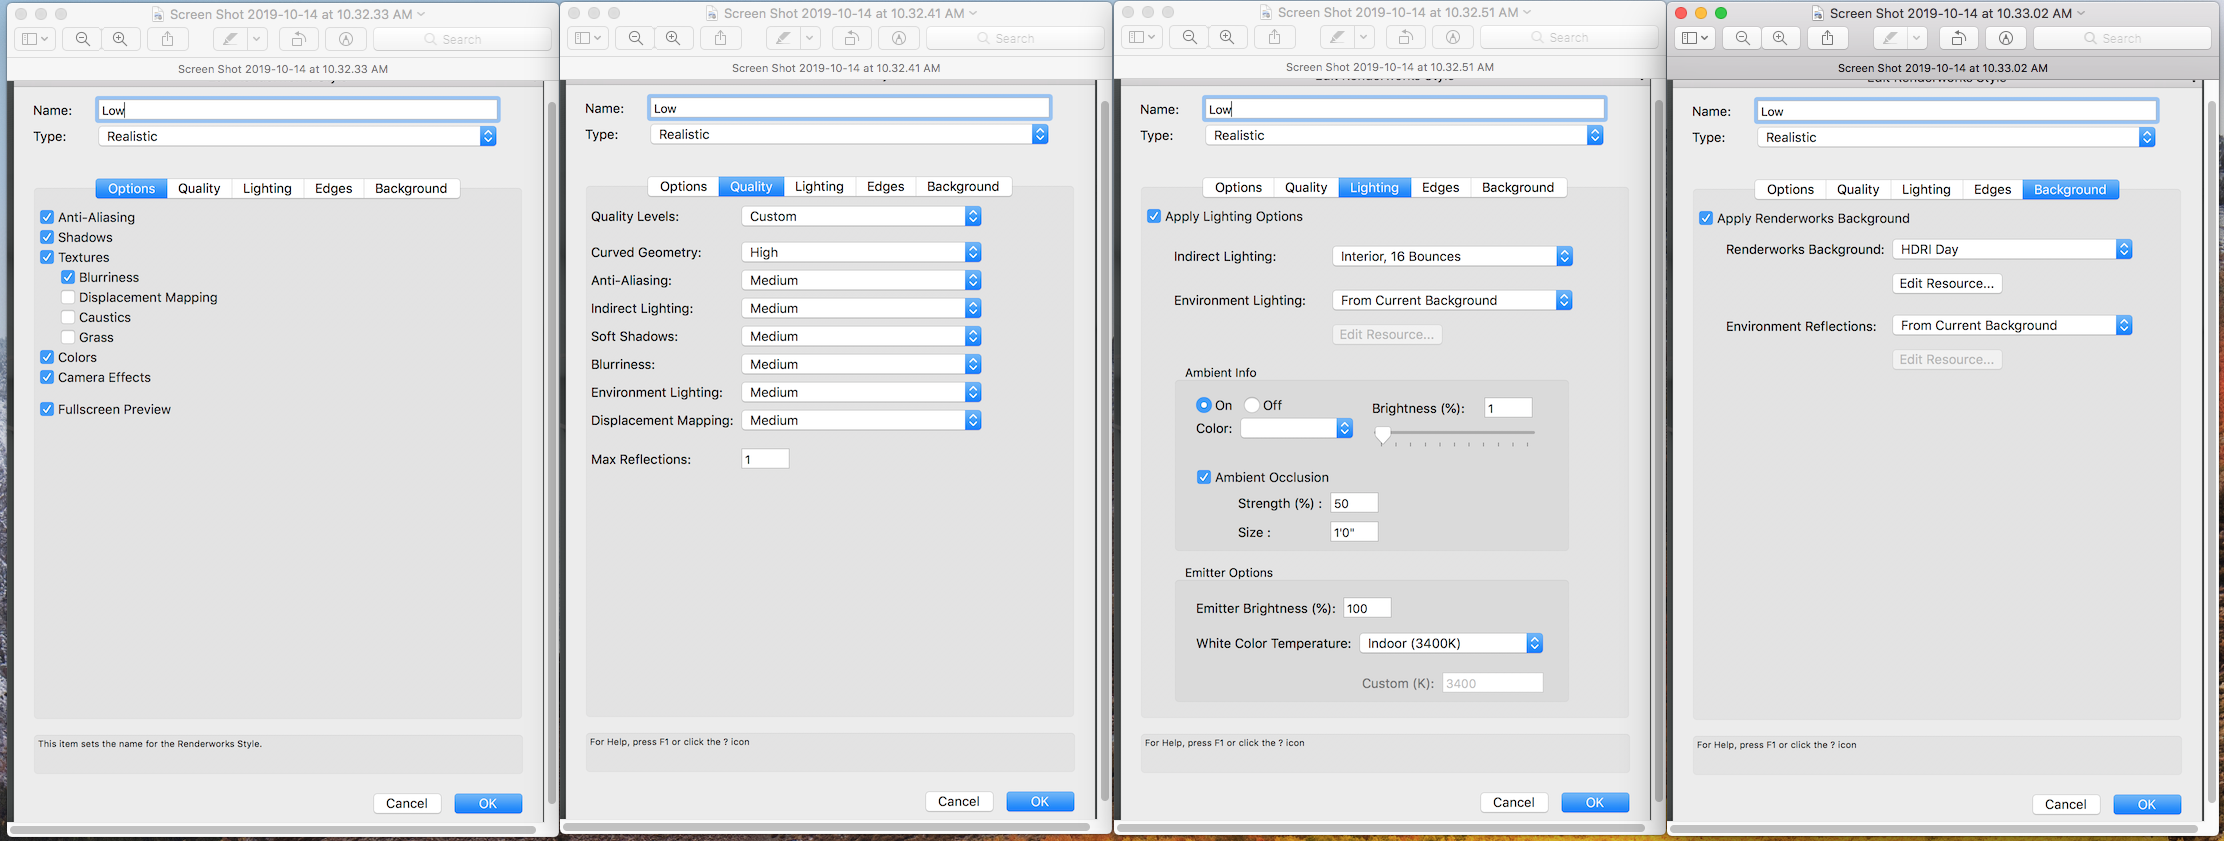
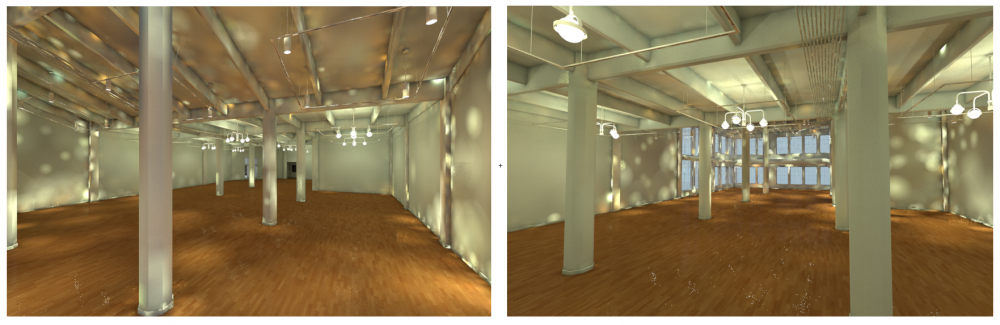
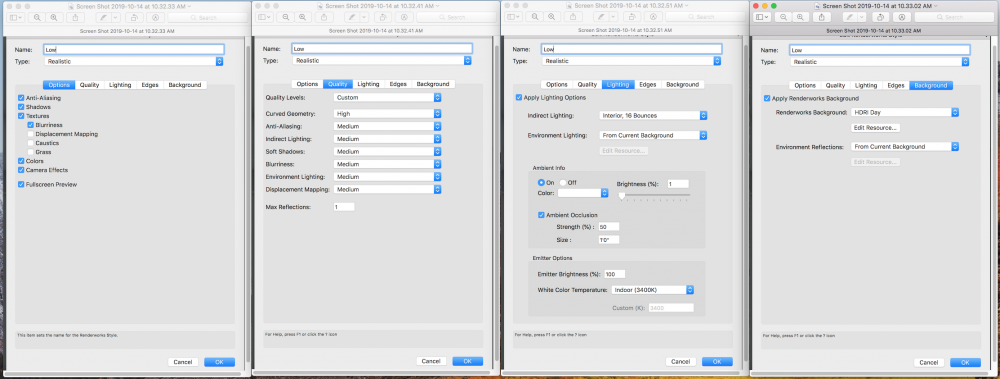
Holy spots Batman! Hey all, I'm having difficulty rendering a gallery space... It's a space with a big window wall at one end so unfortunatly @Luis M Ruiz 'build a box' option isn't going to work for this one (RW background is HDRI Day currently). I tried removing the reflection value from all the textures and still didn't see much of an improvement... Any suggestions here? Chandelier and pendant "bulbs" have glow textures (125% glow) and point light sources with falloff set to 'realistic'... Renderworks Style was a gift from the great @PVA - Jim during the last VW Design Summit (🙏🏻!!! in case you're still prowling around here sir). RWS settings are as follows:
-
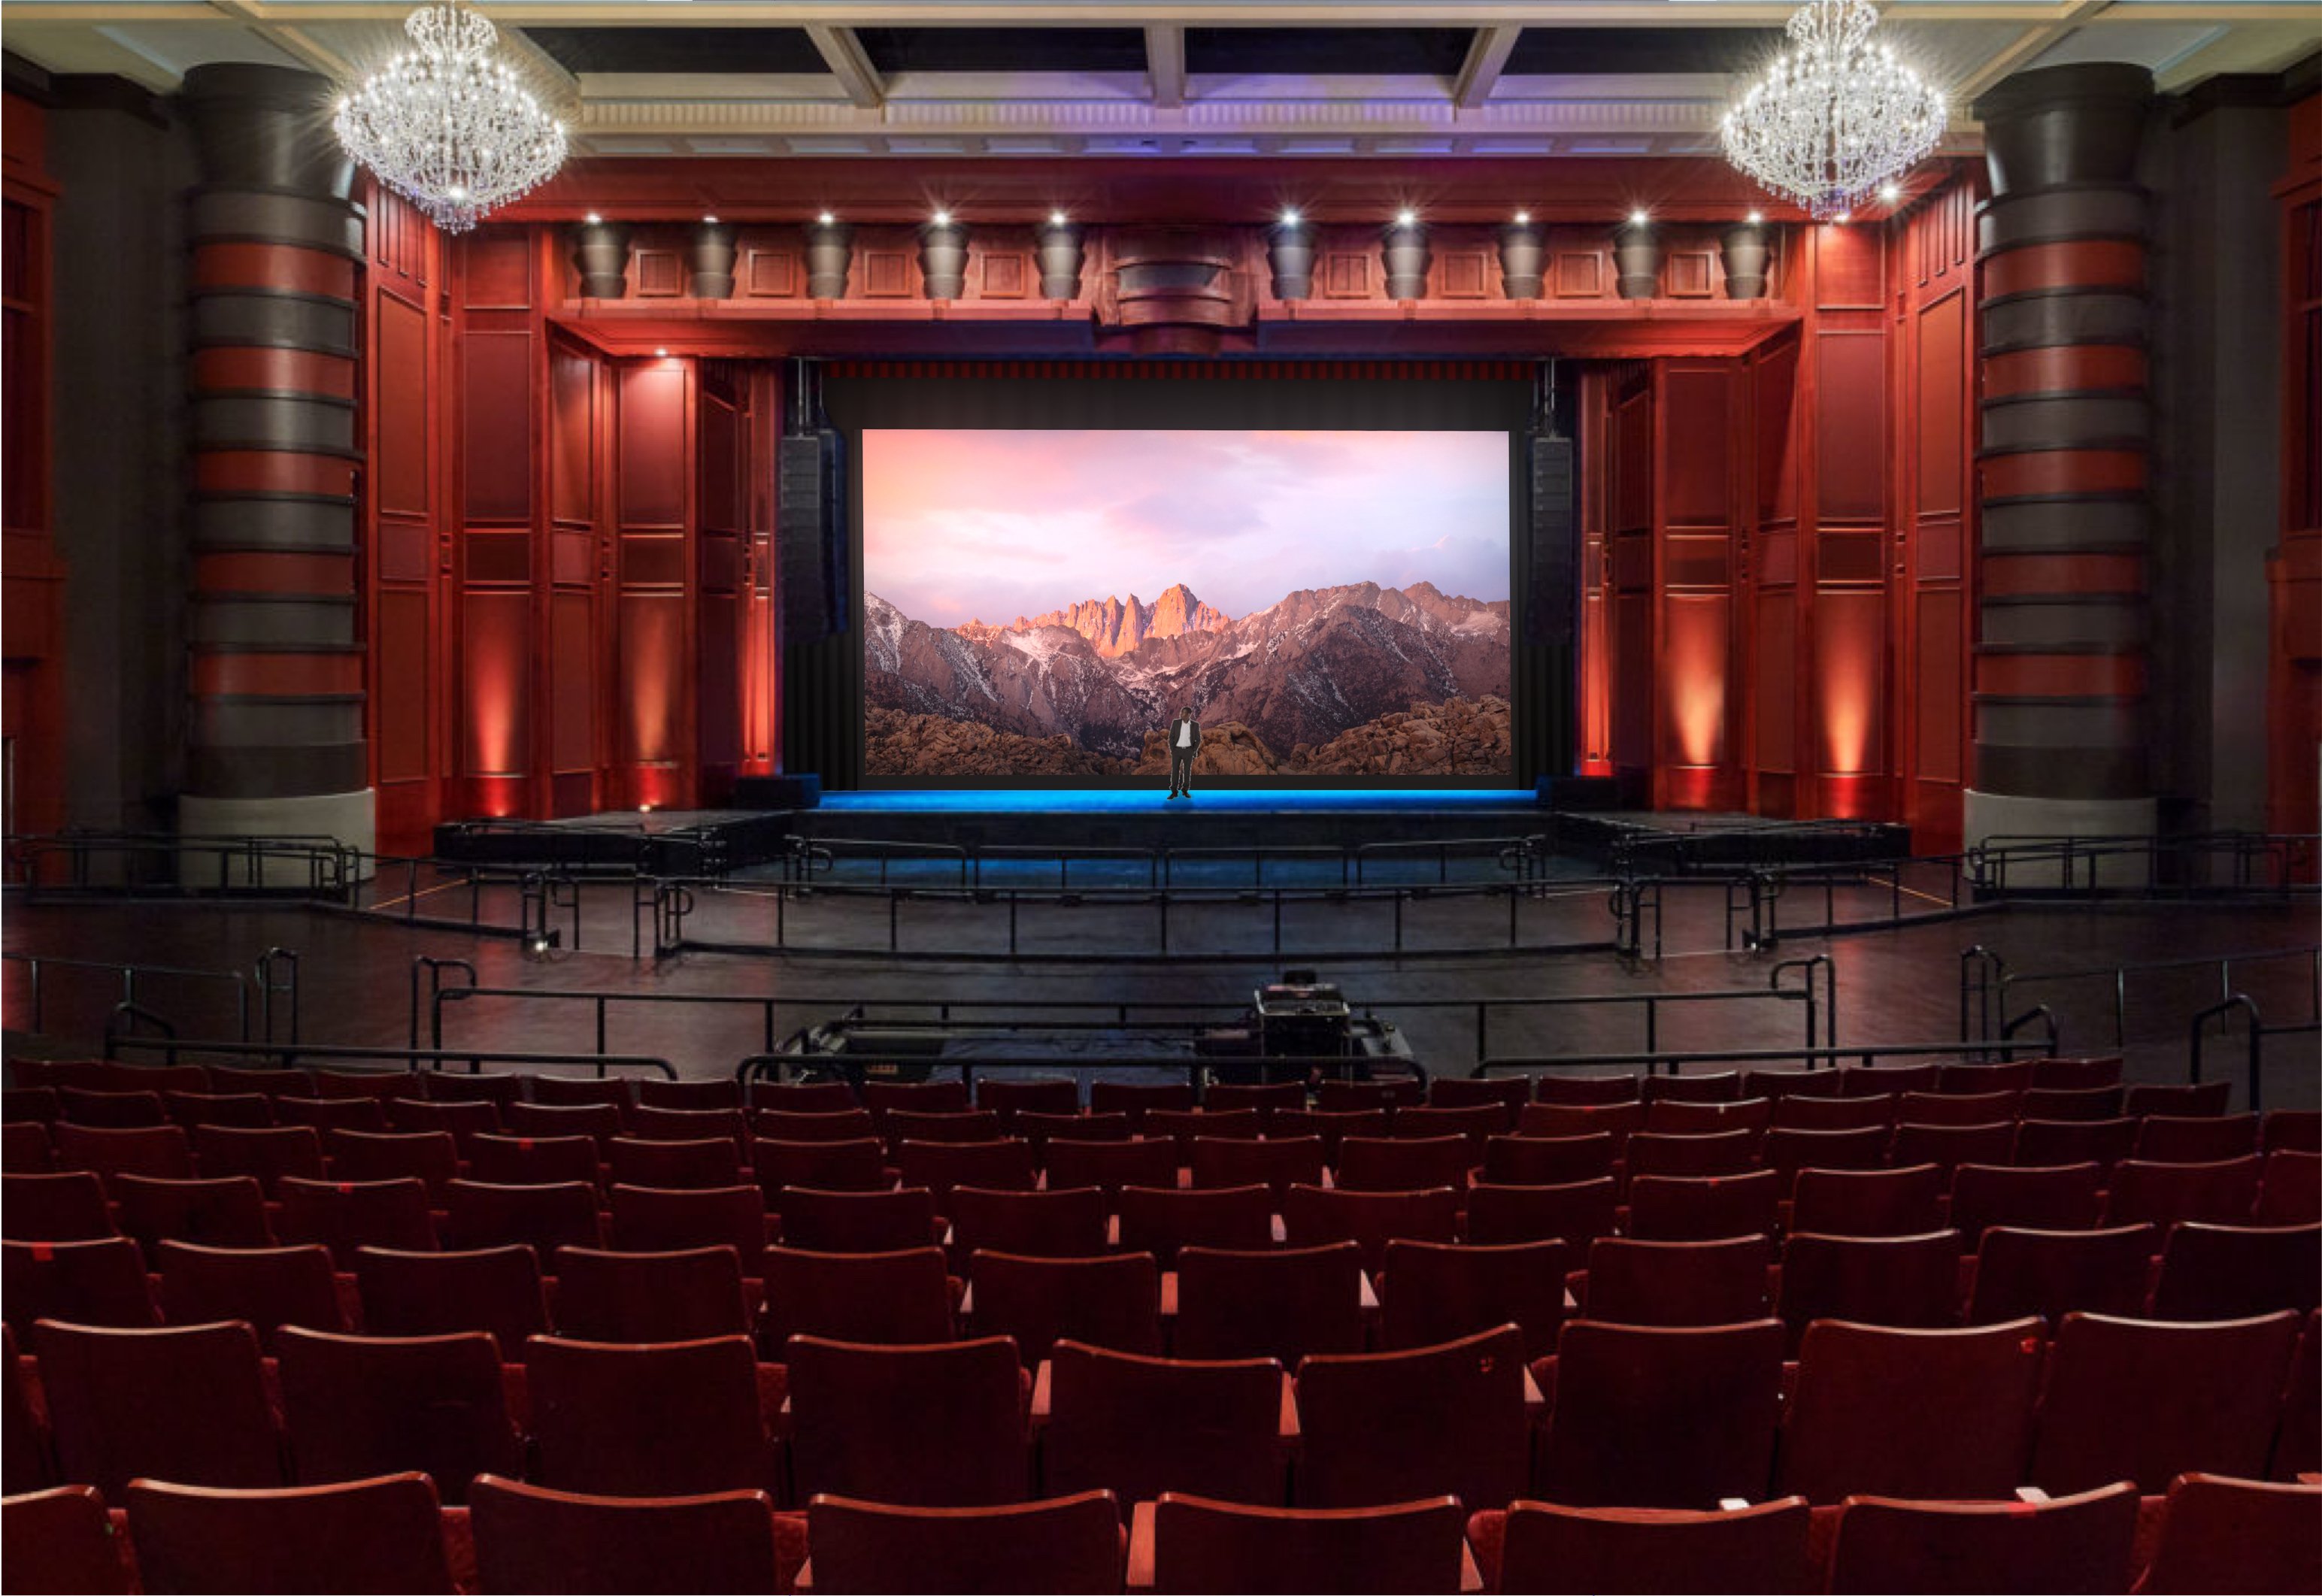
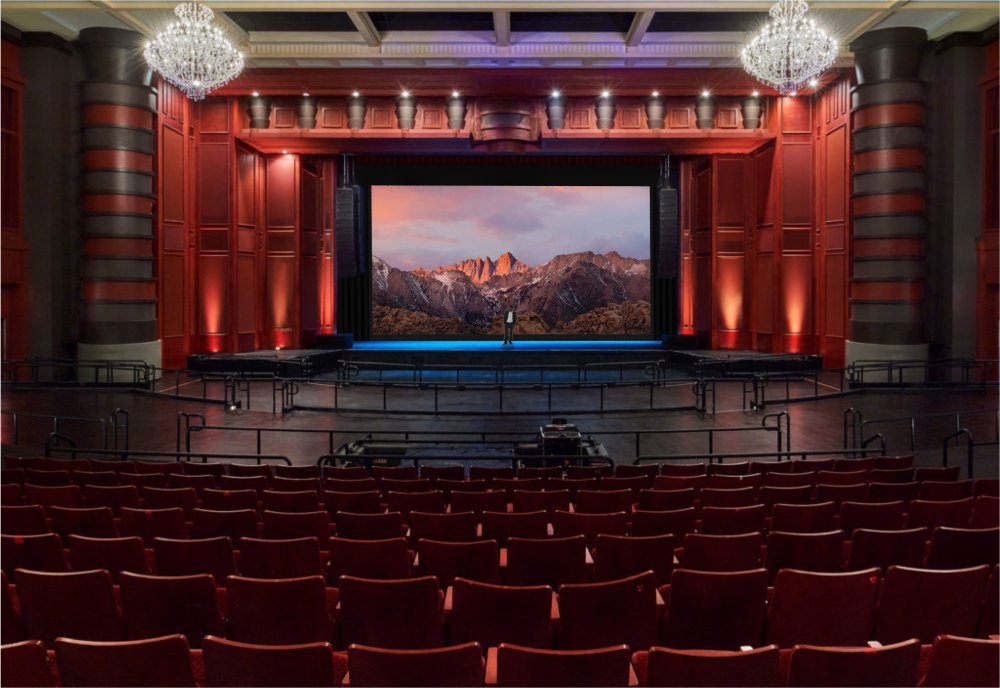
@Matt Panzer You're the BEST!!! Thanks for taking a look (and taking a look so quickly too). Yes, the head on view was tricky to match but, working remotely with only Google images to choose from, my selection for this particular venue was limited. The video tutorial on "Matching Difficult Views" was very helpful for dialing it in. Followed your recommended steps above and successfully was able to add a RW Camera with 16% Bloom. I think the screen blends much better into the photo now! I agree, it would be nice if a future version of Camera Match had it automatically create a RW Camera for the viewport and keep it in sync with the Camera Match view. 👍 Again, a great and under utilized tool in my opinion. Vectorworks is lucky to have it. Thank you again!

-
Hi all, Does any one know how to add Renderworks Camera Effects to a Viewport created via the Camera Match Tool? I'm working on some Pre-Viz for a client and using Camera Match... The photo I'm using for the camera match background has a little bit of bloom already and I'd like to be able to use the Renderworks Camera Effects - 'Bloom' feature to add a matching level of bloom to the elements from my 3D model that I'm showing in the Camera Match Viewport ( 3D model is basically just a central projection screen created using the Video Screen Tool)... As it is, the screen looks too crisp in the Viewport to blend in naturally with the rest of the photo. I've tried editing the Viewport and selecting 'Edit Camera' but no RW Camera shows up in the OIP... My next step was to place a RW Camera and select 'Match Current View' and then 'Return to Viewport' so the Viewport would have a RW camera associated with it that matched the view generated by the 'Camera Match Object' but this appears to compleatly relocate the model relitave to the Viewport and nothing shows up at all... @Matt Panzer Any thoughts on how to create (or extract? or duplicate maybe?) a Renderworks Camera that would match the perspective settings created by the Camera Match Tool? Also, @Matt Panzer many, many thanks for creating the awesome Camera Match tool!!!!! It's a huge time saver for quickly showing clients design options in various spaces.
-
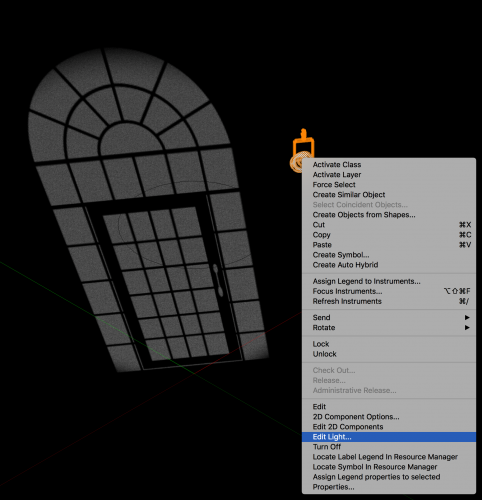
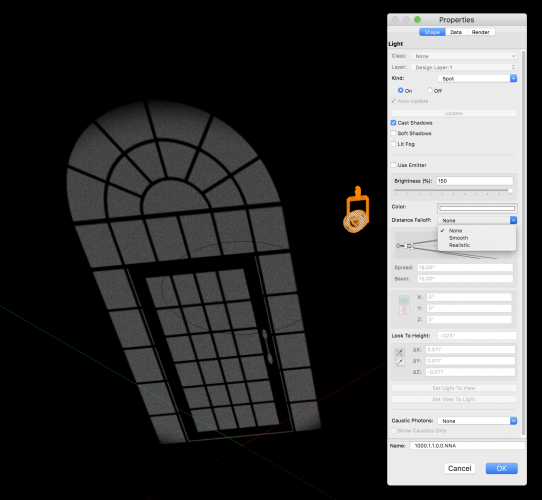
@jarjones I forgot to mention the issue may also be with the Falloff setting of the light. If you right click (ctrl click on mac) on the lighting instrument and select 'Edit Light' it should bring up a 'Properties' window for the lighting device (frustratingly different than what can be accessed through the Object Info Pallet for the same Lighting Device that also has an 'Edit' button that brings up a different settings window!) In the properties window you should have the option to set the Falloff to "None", "Smooth", or "Realistic". For ease of use purposes with something like a Gobo I would leave it set to "None" so you can see it easily in your rendering and adjust its brightness via %. The Smooth and Realistic options can dramatically reduce the apparent brightness of the light in renderings even over small distances. There's a great video on the effect of Falloff as part of the "Rendering in Action" series by Stephan Mönninghoff. Video here: Rendering in Action - Point Lights
-
Hi @jarjones I would say also make sure that "soft shadows" is not checked as that can cause issues with gobos in my experience, but since you are seeing the pattern, I don't think that's the issue.... Don't be afraid to go past 100% with lighting to get things to render as you want them to. It took me a while to learn that rendering is close to reality but not the same... As it's been said many times on the forum "Rendering is an art not a science". I would feel comfortable taking it anywhere up to 300% or so to get it to look right. You could also mess with your floor textrue and increase the 'brightness' under the reflectivity shader but that may mess up the rest of the look you're going for. Attached is a file with a Rendeworks Style called "Low" that the great @Jim W once shared with me. I would highly recommend it over "Fast Renderworks" for getting quick rendering for Theatrical purposes. The sail shift is probably due to how the texture is mapped or scaled to the object.... In my experience, texture mapping does not show up perfectly in Open GL so you may likely need to look at how the sail texture is shifted horizontally and vertically in Fast Renderworks or 'Low' Renderworks to get it to show up correctly. It may also help to edit the sail texture and de-select "tile horizontally" and "tile vertically" as it seems you only need one instance of the image. Good luck! Gobo Test.vwx
-
Custom Window & Door Trim Profiles
James H. replied to KumaCAD's question in Wishlist - Feature and Content Requests
Agree with @Kevin Allen and @KumaCAD!! ....Chair/Dado-rails would be nice to have as part of a wall object too (it seems every hotel ballroom has them)... -
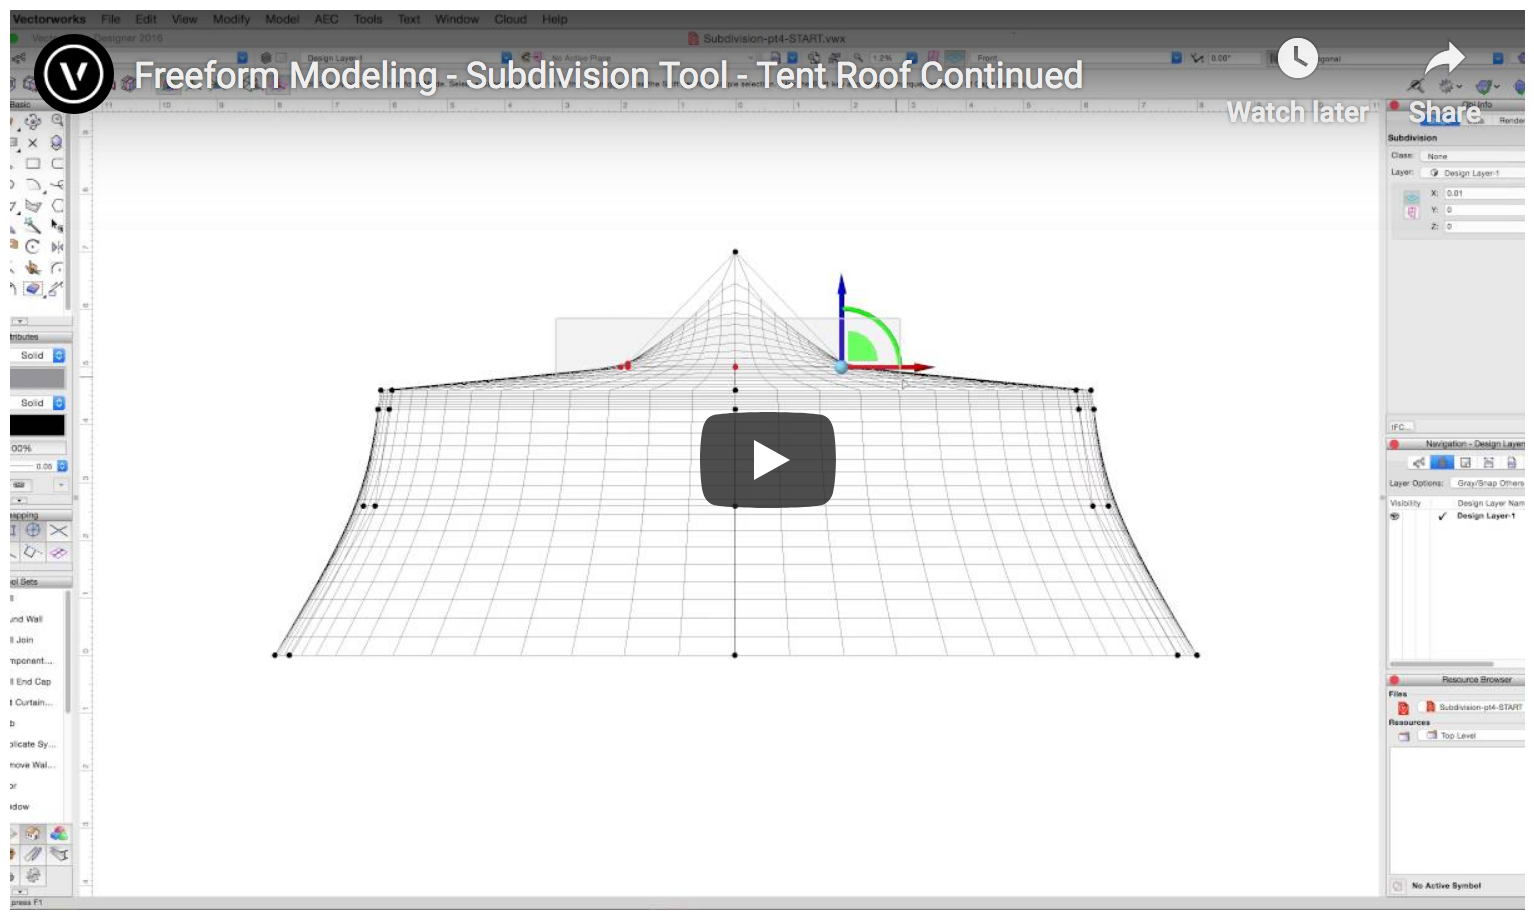
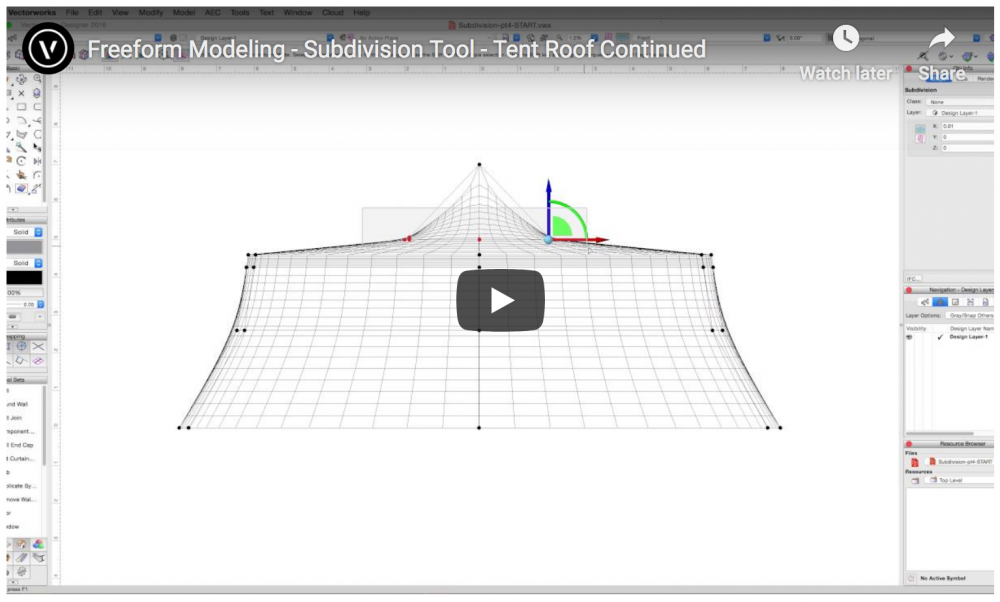
@Martin Vermeulen This is the tutorial you're looking for: https://www.vectorworks.net/training/2018/getting-started-guides/freeform-modeling/subdivsion-tool-primitive-types-and-tent-roofs It's part of the 'Freeform Modeling' series. Starts with the chapter titled "Subdivision Tool - Primitive Types and Tent Roofs" and continues with "Subdivision Tool - Tent Roof Continued". Good Luck and have fun!
-
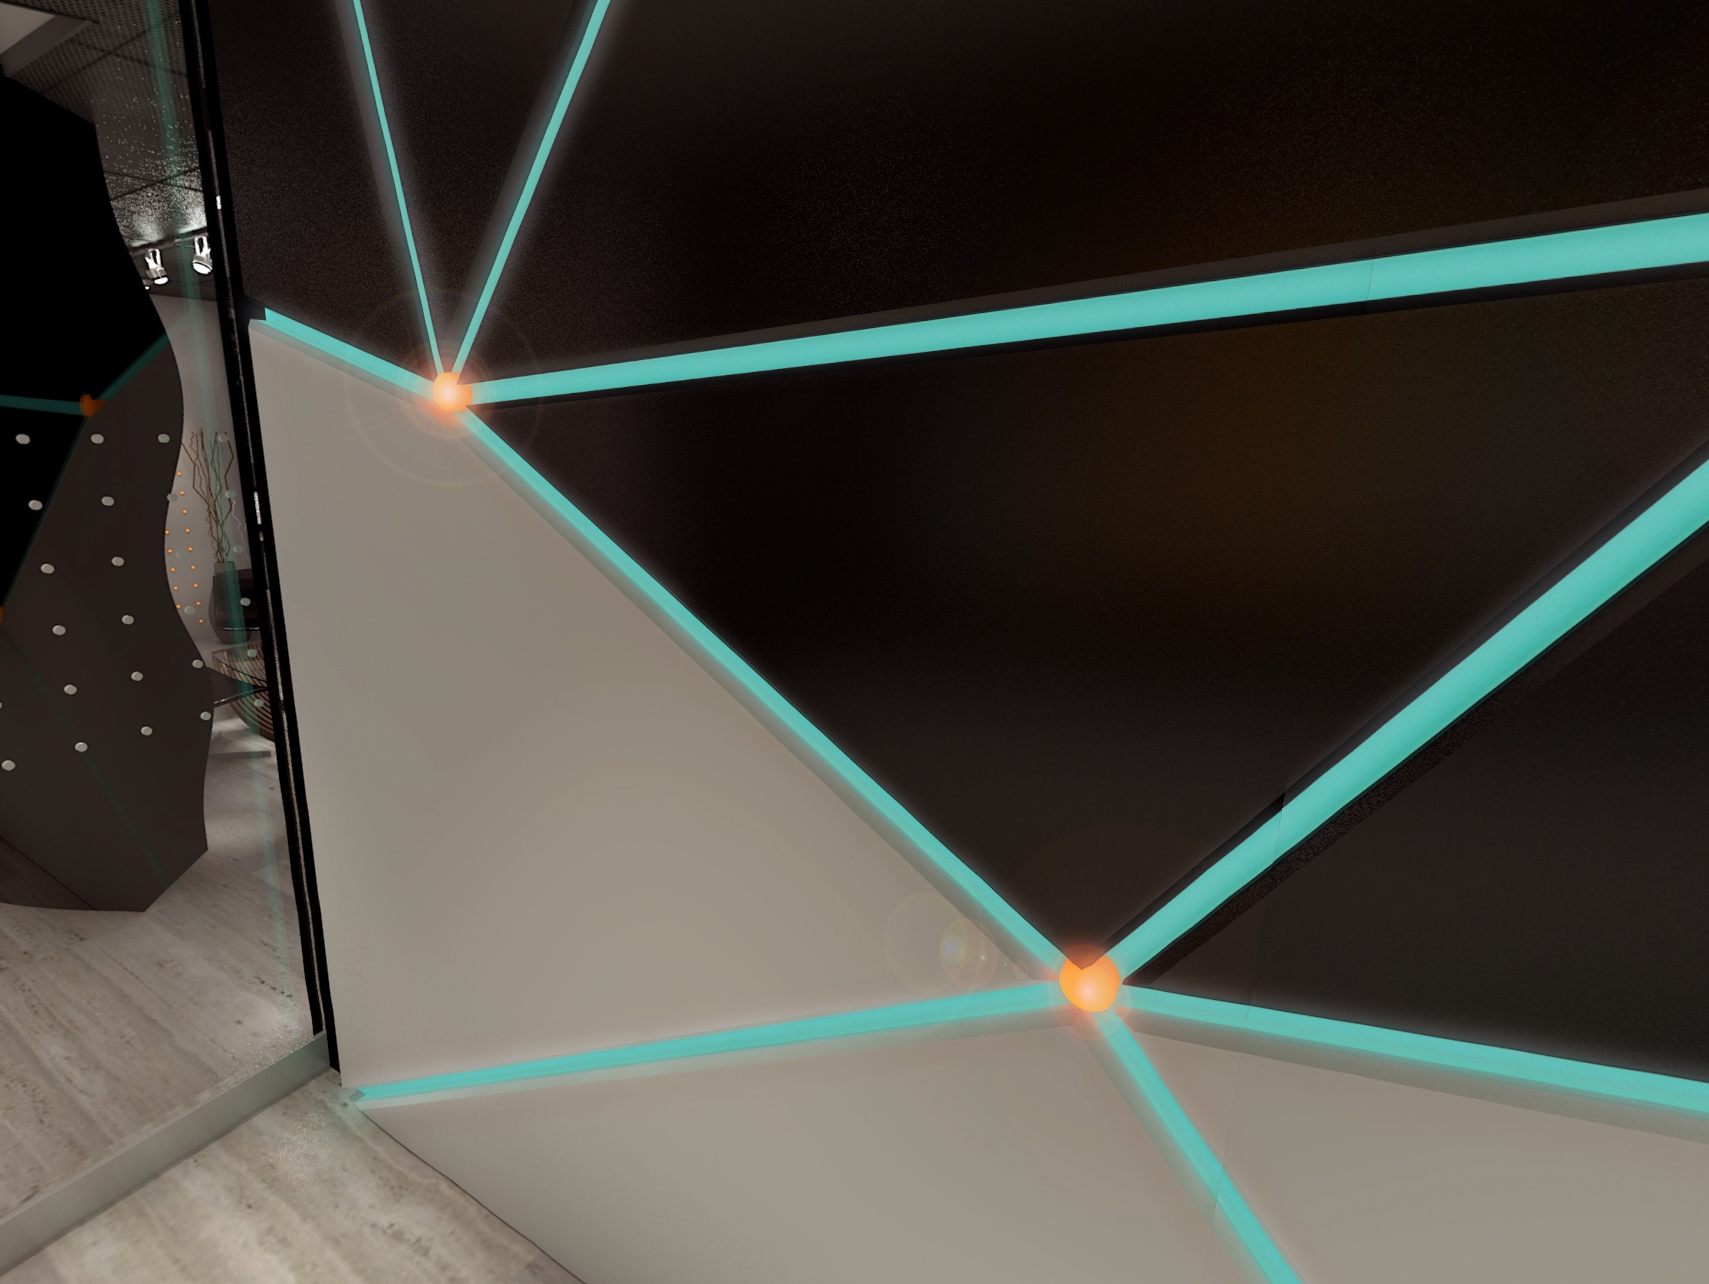
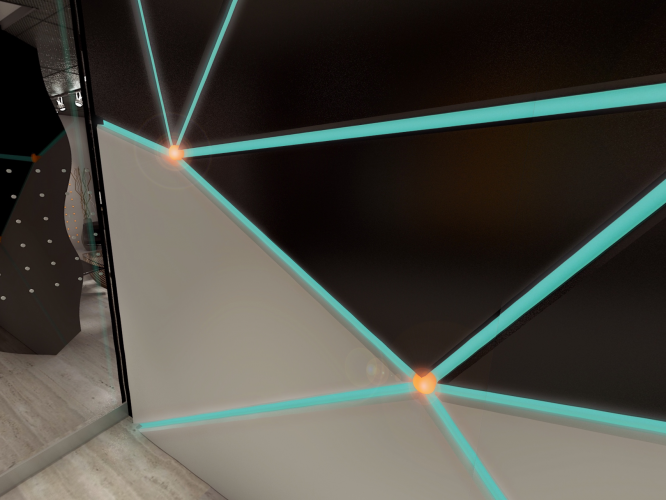
@Luis M Ruiz This looks excellent. Always enjoy and appreciate your tutorials and work! Quick questions: were you able to generate the lens flares on the orange wall nodes in vectorworks natively or was this done in post?
-
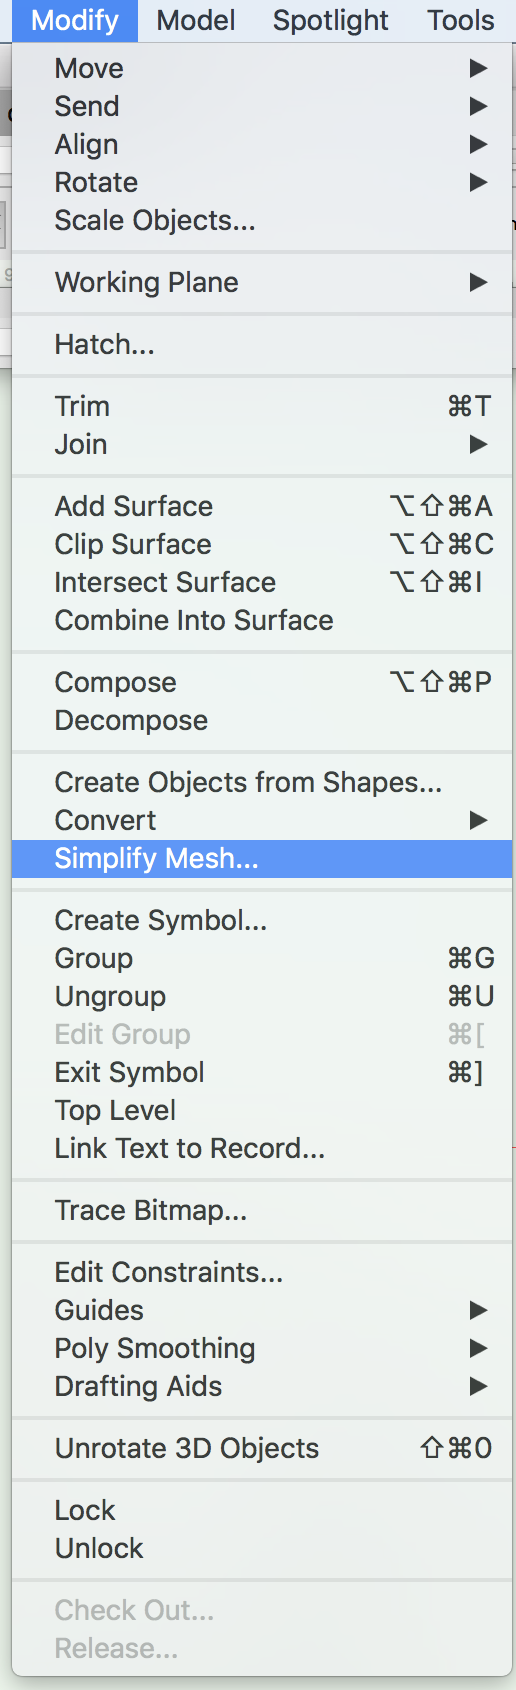
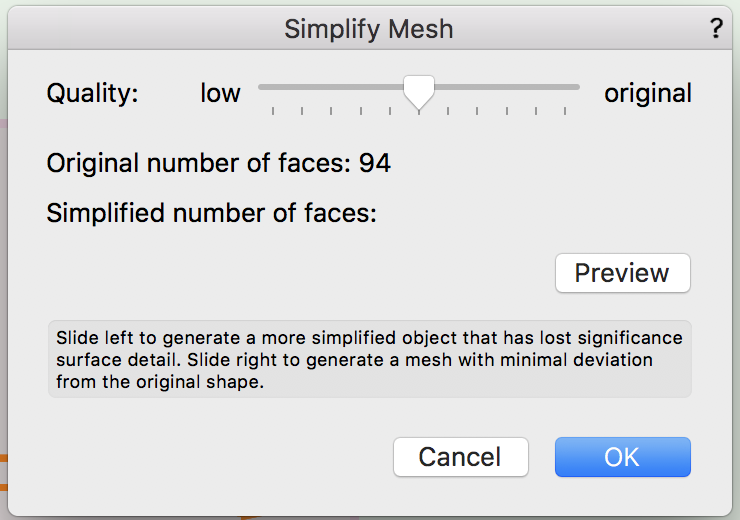
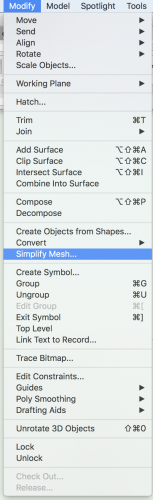
The menu bar under Modify > Simplify Mesh... will give you a dialog box with a slider that will let you reduce the complexity of the mesh... @Kevin Allen is right though, the best option would be to re-draw it natively in VW as a collection of extrude along path objects I think. Would be nice if there was a way to 'fill' a mesh shell like this with a generic solid... kind of like how you can use the 'Inner Boundary Mode' (paint bucket) of the 2D Polygon Tool to 'fill' a perimeter... Just sayin'... ...perhaps there is and I'm just in the dark about it though! 🤞

-
Duplicate Along Path 2.0
James H. replied to Kevin McAllister's question in Wishlist - Feature and Content Requests
Not sure how to place a formal 'feature request here on the Forum but, I too am looking for something to help solve this common segmented barricade fencing task... Seems like there should be some VW tool or constraint that will let me set whole number integers for snapping and/or drawing polylines... Like for making fence lines out of 8ft barricade segments... Any suggestions? I’ve tried the ‘Fence’ tool, 'Repetitive Unit' tool, 'Duplicate along path’ command, and they’re workarounds at best. Seems like the 'Snap to Distance' constraint would be a good starting place but I can’t get it to predictively snap out into space (only snap to distance along preexisting objects). The ideal would be some some sort of cross between the Repetitive Unit tool and the Rope and Stanchion tool. Or even just adding functionality to the R&S tool might do it if there was a way to change the “Ideal Spacing” to “Fixed” spacing. My firm does a lot of crowd control and attendee holding pens/pedestrian traffic management layouts and we frequently need to update / change layouts based on client requests and/or barricade stock sizes availability from vendors. A tool that would allow you to build segmented fence lines with adjustable segment lengths (ideally based on parametric symbols) and provide a segment or symbol count in the same way the R&S tool does would be a dream (if only a sad one). -
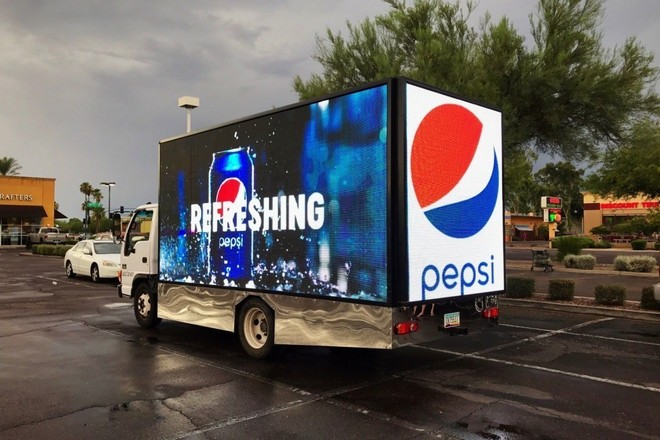
Hey Friends, I need to render a video showing an animated LED screen on the side of a moving vehicle driving along a city street... Anyone know if this can be done in Cinema 4D or TwinMontion after creating the vehicle and screens in Vectorworks?
-
Hi Tom. Awesome Renders! Can you say if Lumion create the sun lens flare seen in this interior render or was that added in post?
-
Would love to see a webinar on this! Super valuable thread. Thanks all
-
Awesome resource. Thank you @scottmoore! Now if only there was a decent library of image prop musicians, 'rock-stars', and musical event entourage people to go along with it... Anyone have any good resources to share or point me to? Many thanks!
-
Direct View RGB LED Strips
James H. replied to smeshenberg's question in Wishlist - Feature and Content Requests
@Luis M Ruiz In the 'photo edited' image here, did you apply the star style lens flares in vectorworks? If so, is it part of the bloom effect and how do you enable it? ....and (one more question) do I understand correctly that you add a bloom effect to a Renderworks Style and not just a RW Camera? How is this done? Many thanks!!!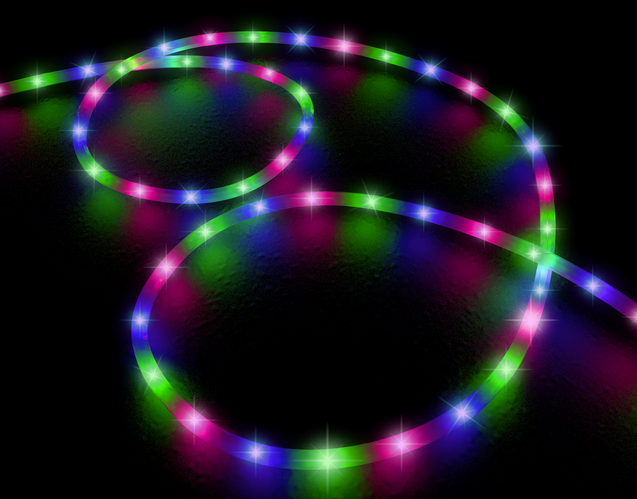
-
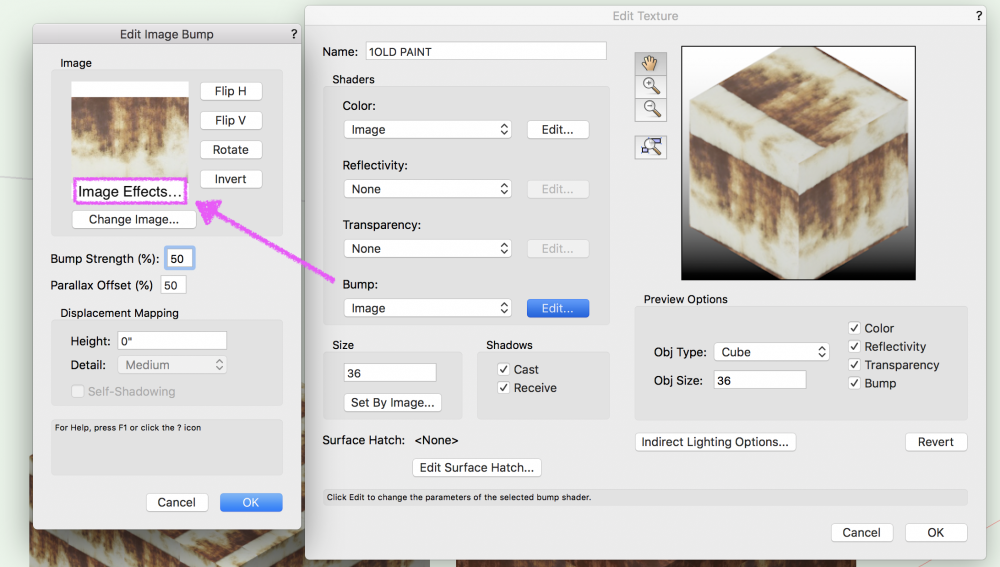
It would be great to be able to apply 'image effects' to the <Bump> - <Image> shader. This would allow you to quickly re-use an image, invert, throw it to b&w and ramp up the contrast, exposure, brightness etc. for easily creating/associating a decent bump map all within VW. #wishlist

-
Teaser Tuesday - Image Effects - Vectorworks 2019
James H. replied to PVA - Admin's topic in News You Need
Apologies, I'm late to this discussion and new to Forum, but it would be great to be able to apply 'image effects' to the <Bump> - <Image> shader too. This would allow you to quickly re-use an image, invert, throw it to black&white and ramp up the contrast, exposure, brightness etc. for easily creating/associating a decent bump map within VW. all