TomKen
-
Posts
227 -
Joined
-
Last visited
Content Type
Profiles
Forums
Events
Articles
Marionette
Store
Everything posted by TomKen
-
I recall having the same issue a while back. What I did to resolve it was choose a custom post symbol from the VW library. Once I did that it saved the symbol into my current document. I then copied the symbol in my current document renamed it opened it up and changed it to what I wanted. I was then able to select the modified symbol in the post/railing setting.
-
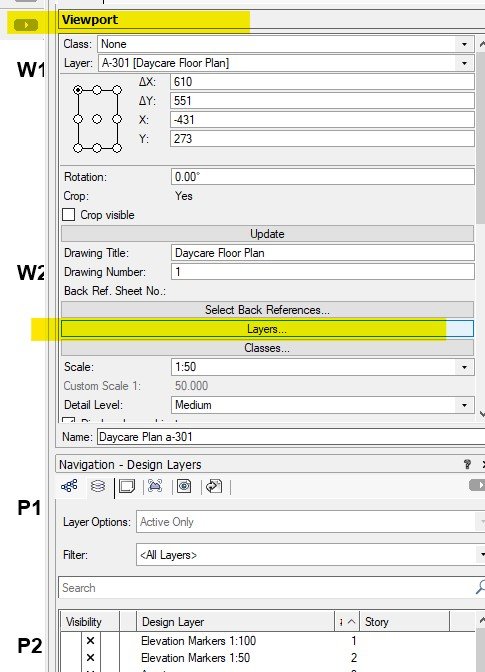
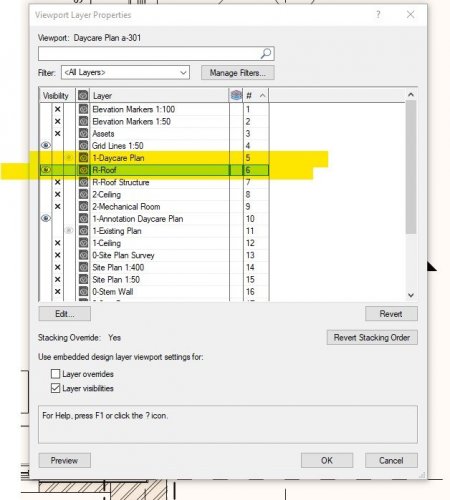
Another option is to create a sheet layer vp and in that viewport change the layer stacking order so that the floor plan is above the roof. Then set the floor plan layer in the viewport to grey.

-
@Tom W.Stacked Wall Version 2020Stacked Wall v2020.vwx
-
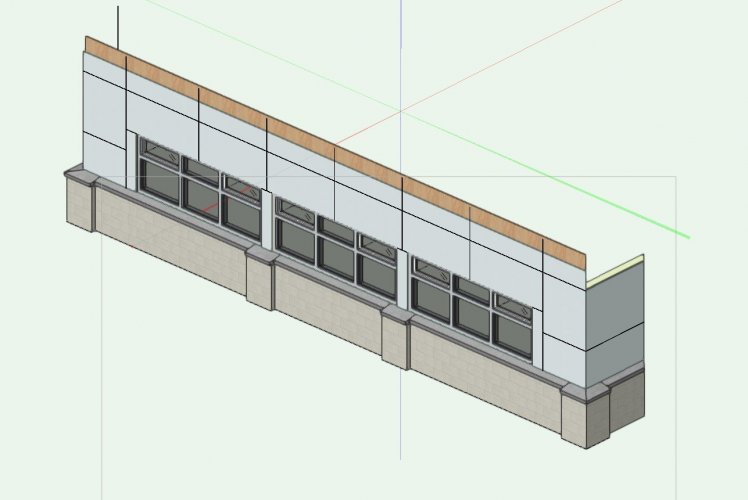
Here is an example of a stacked wall that I used for a project. It involves faking some of the material thicknesses and using component offsets. It does mean that I have to draw over the block in my section viewports to make it look correct.Stacked Wall.vwx
-
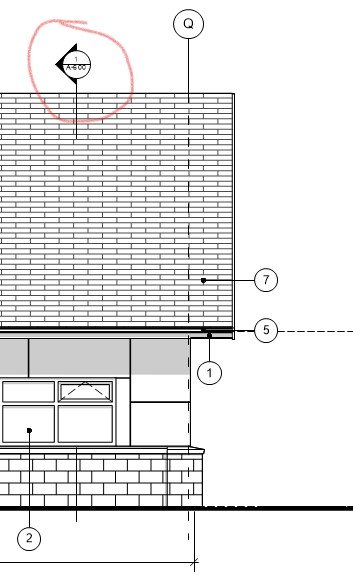
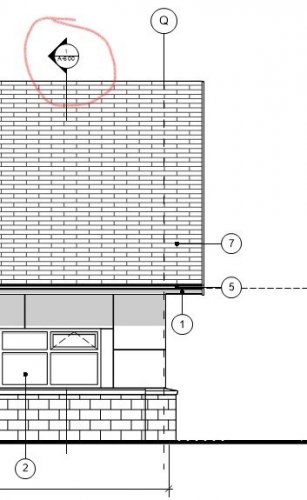
Section Markers in Elevations
TomKen replied to TomKen's question in Wishlist - Feature and Content Requests
Thanks @Matt Panzer I was going to do that but I wanted to make sure that I was not missing something first. -
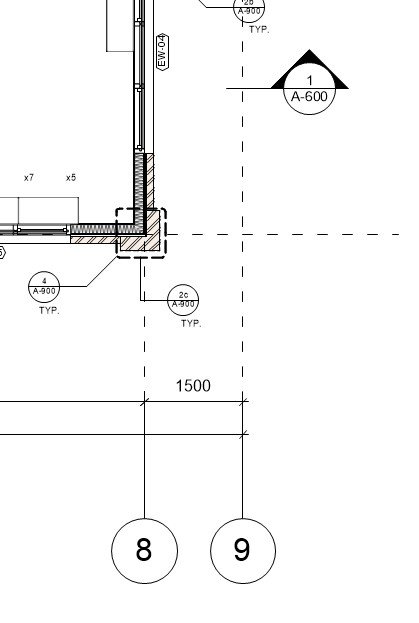
In VW 2021 the grid line tool was updated so that now grids will automatically show up in sections and elevations. This has be a great time saver for me. Does anybody know if or how I can get the section markers that I create in plan view to also automatically show up in my elevations and sections?

-
Years ago like around 1993 I did just that for AutoCAD. But back then AutoCAD was command line driven so Dragon typed the word into the command line for you. It got tedious very quickly going all day saying, line, rectangle, circle etc. I wonder how it would work for VW's as it is mainly icon driven, or keyboard shortcuts.
-
@jeff prince My thought on the ramp as well. Where I am we are required to have a level landing pad of at least 1500mm deep by the width of the opening on both sides of the doors.
-
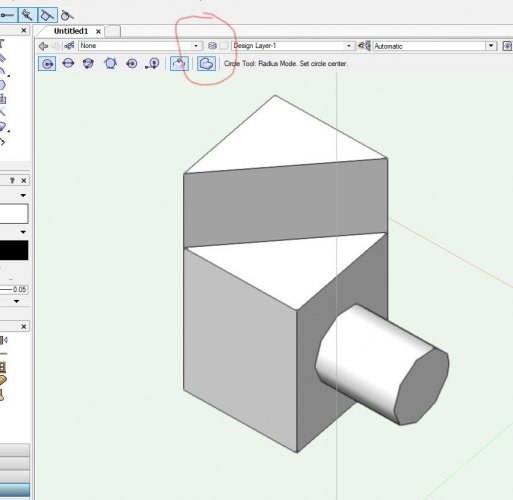
I have SP3, I just checked and it works for me. Do you have Push/Pull combine mode selected?
-
I use the curtainwall tool a lot to create my windows. Most of our projects use storefront windows. What I do is create my curtain wall then group it. Enter the group and go to a front view of the curtainwall. In the 3d modelling tool group use the set working plane tool to set the working plane to face of the curtainwall. Then I draw a horizontal or vertical reference line at the edges of the curtainwall, offset the lines to the center point of where you want your mullions. Add or Select a mullion, if you look at mullion there is a plus sign in the center of it, select the mullion at that point then drag it to the reference line. It will snap to the line. I also wish that you could just specify the distance of the mullions by clicking on them. So far though this is the best way I've found to do it. If someone has a better solution I would love to hear it. Also the reason I group the wall is so that I can turn off show other objects while editing it, and so that I can place it into a window or door opening in a wall.
-
Once you select the custom door style it will appear in your resource manager in the symbol/plug ins folder. -select it and choose edit 3d components -select the door and in the attributes palette you can change the colour, I prefer to select it and set all attributes to by class. Then in the Object info palette I set the object to a class I've created (that way I can change the door color/texture whenever I want). -select the glass objects and set them to by class then assign them to glazing clear or another glazing class you've created.
-
Yes The width and depth of bars are set to the size of the units we order.
-
I grabbed a couple walls from a project. Here you go. Window Example.vwx
-
Most of the projects I work on use aluminum storefront windows. What I have been doing is cutting the opening in my wall with the window or door tool and then setting its style to opening. Then I use the curtain wall tool to create my windows, window & door combinations. The curtain wall tool lets you place frame bars wherever you want and add openers and doors. Then I turn the curtain wall into a group and slide it into my opening. If you don't group it you won't be able to place it into the wall opening. I haven't found a solution for vinyl flanged windows yet.
-
@digitalcarbon I did a similar balcony design for an apartment building. Instead of having the support brackets below we had a steel support (seat) at the wall below the balcony and the angled rod connections back to the wall above the balcony ( similar to a canopy support) This way most of the support structure was hidden in the guardrail design. Also notice you are showing horizontal cable guards, not allowed where I live as anything over 2' above grade needs to have a non climbable guardrail.
-
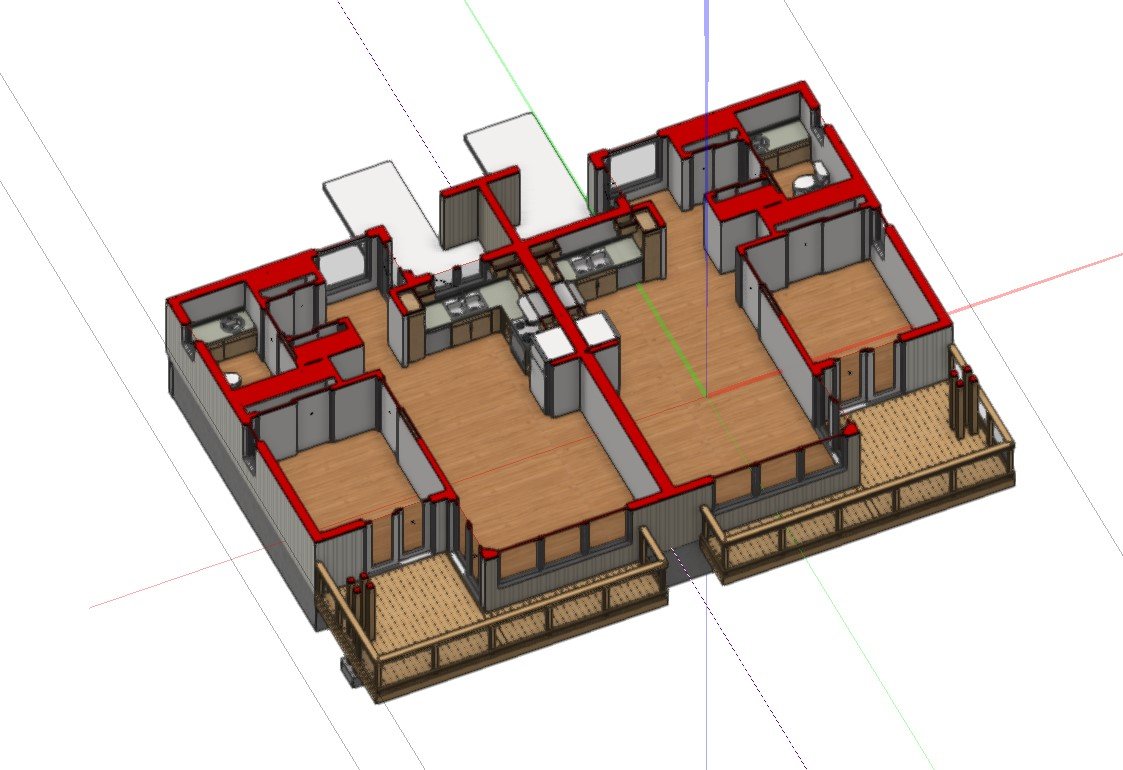
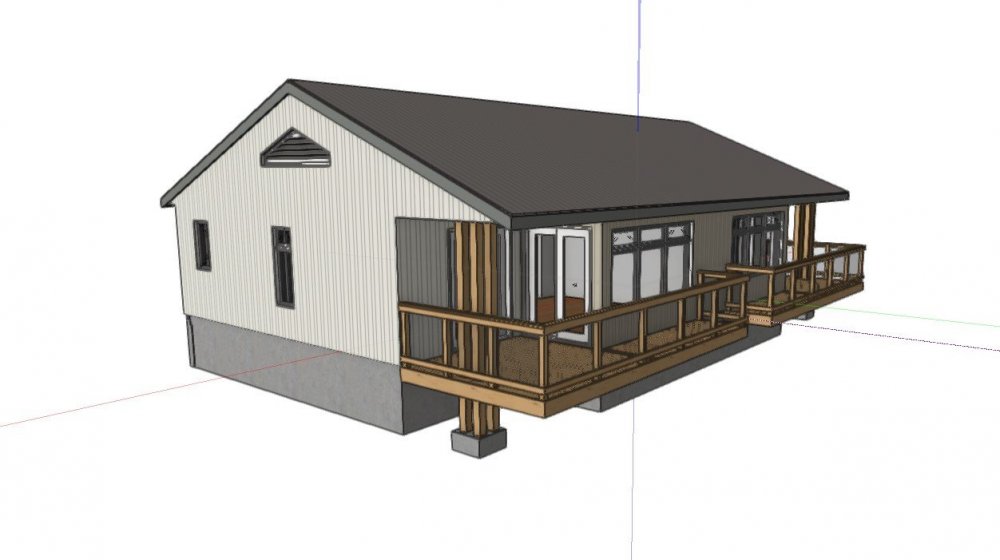
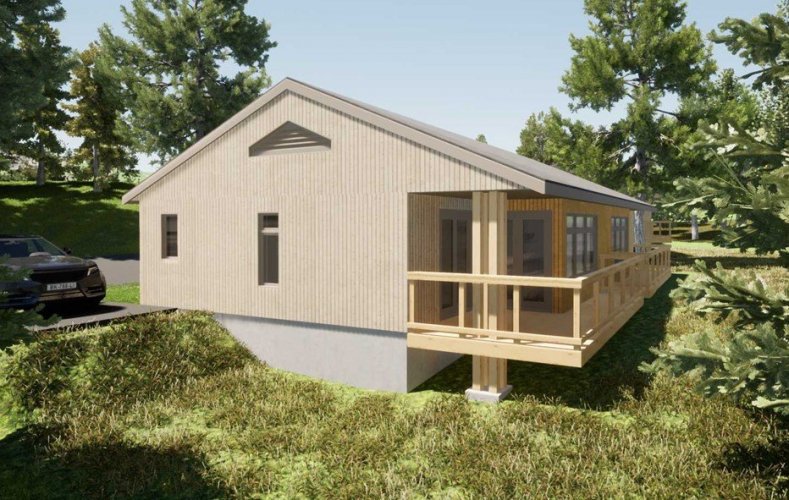
Here is a simple project I did to prove a point to the 2d only people in my office. I already had a 2d floor plan and elevations to start with so there was no design time involved. 5 hours to model the building including the kitchen. Then I spent 1-1/2 hours in Twinmotion and generated about 10 images. I'm just learning Twinmotion so the images are O.K. but I know they can get much better. From this model I can now do my, roof plan, floor plan, foundation plan, as many sections and elevations as I want, door schedule, window schedule etc. And the most important thing is that when I make a change almost everything is updated across all my views.

-
Jeff had a few minutes so here is a revised drawings for 2020 that should work for you now. Fence_v2020 r1.vwx
-
Jeff I'll make one in a 2020 version and post it. But don't have time till tomorrow morning.
-
Jeff I just opened the 2020 file on my computer it works fine. I'll open on my home computer tonight and see if it works there.
-
Jeff here it is.Fence_v2020.vwx
-
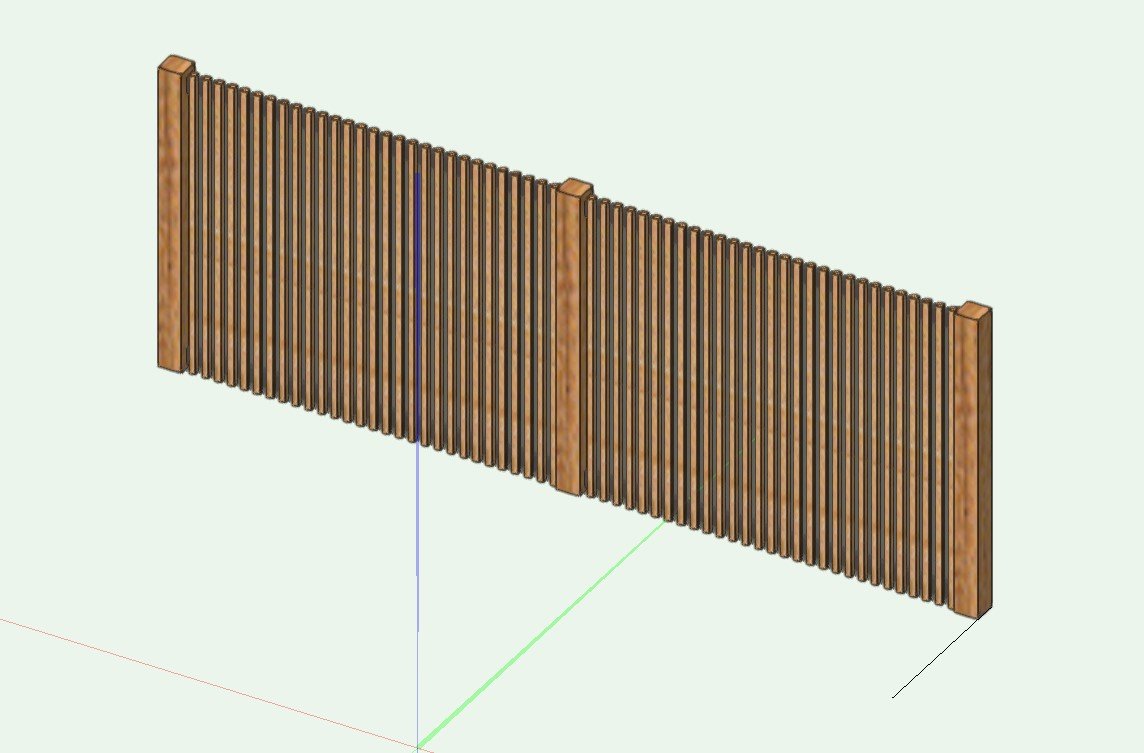
I used two fence objects. One for the post and rails and one for the pickets. For the main posts I used a custom symbol offset from centre so that the rails were towards the back of the post. Fence.vwx

-
What about drawing a rectangle over the rear viewport and applying an opacity to that.
-
You can also select your group and the object you want to add to the group, then group them again. After that if you want you can enter to the top level group and ungroup the one below (if you want).
-
Using the Railing/Fence tool I have my vertical bars set to 0 from top and 0 from bottom. No matter how long I make the railing the first and last set of bars are always short of the top and bottom. Has anyone else noticed this. Fence.vwx

-
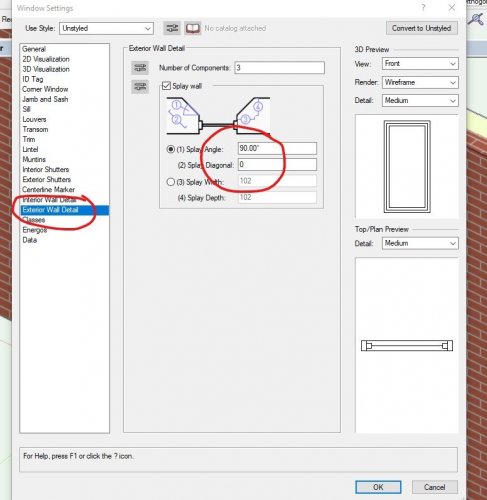
Splay command is in the settings dialog for the windows. Materials is something new to VW2021