TomKen
-
Posts
227 -
Joined
-
Last visited
Content Type
Profiles
Forums
Events
Articles
Marionette
Store
Everything posted by TomKen
-
How can I edit ID tags on window/door plug-in objects?
TomKen replied to JenWilliamson's topic in Architecture
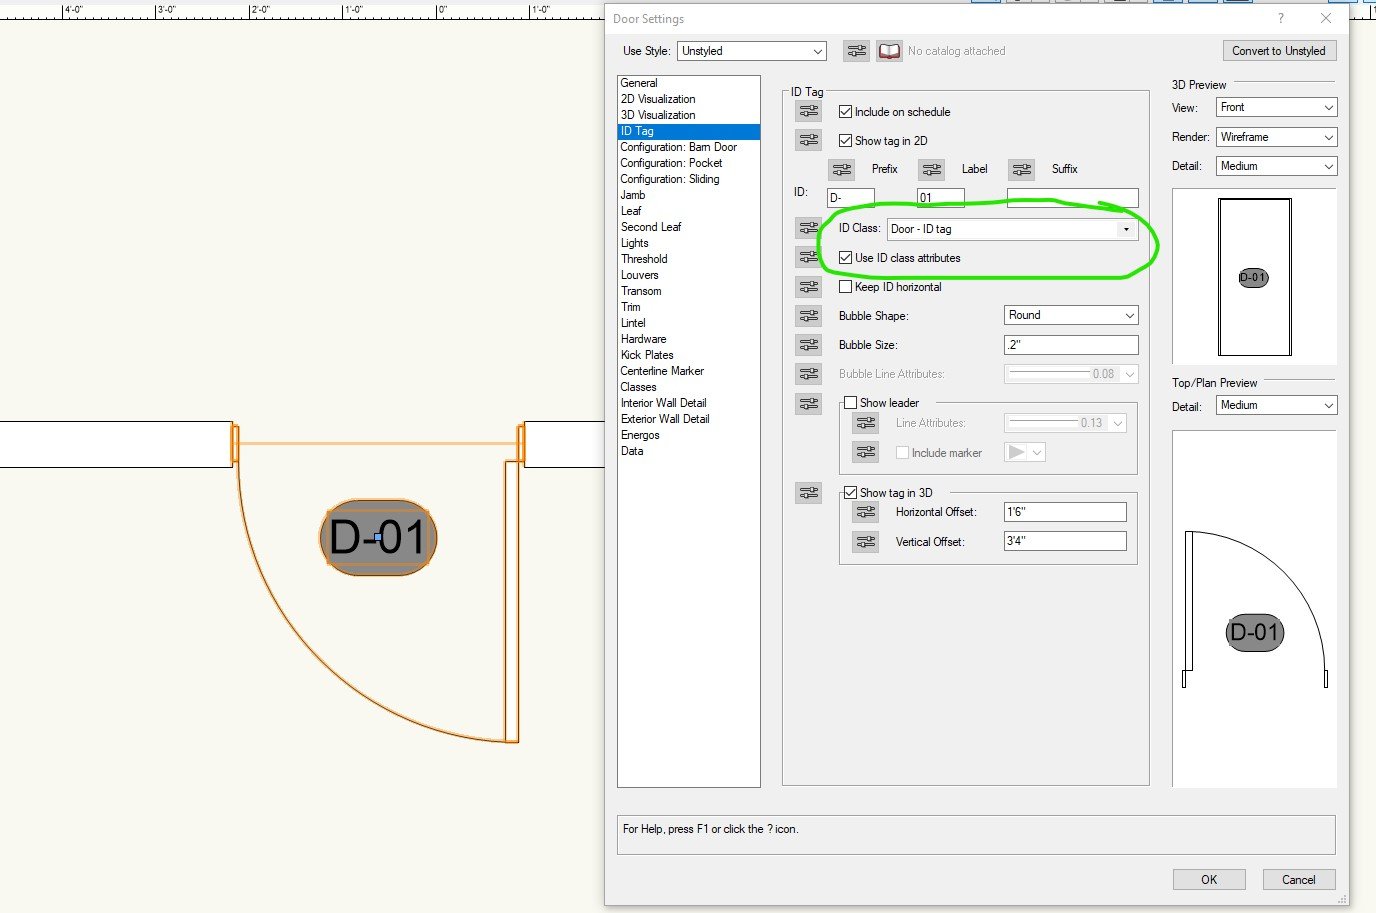
Create a class for example Door-ID Tag, set the class fill and pen to what you want. In Settings for the door under ID-Tag /ID Class select the class you want the tag to use and check the box that says Use ID class attributes. You can set the bubble shape and size there as well. If you want the text to be white set the pen color to white in your Door-ID Tag class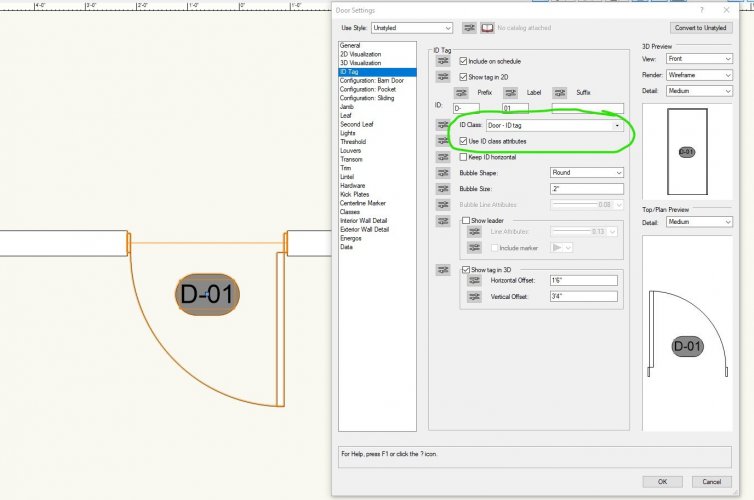
-
Vectorworks 2022 has Redshift render. I believe it is a GPU renderer.
-
Looking for tutorials and template for Data Visualization
TomKen replied to Matt Hall's topic in General Discussion
There is a webinar on Data Visualization on January the 18th. Also this weeks Planet Vectorworks had an article on Visualization with a link to this course. https://university.vectorworks.net/mod/scorm/player.php?scoid=282&cm=356¤torg=articulate_rise -
I need a way to change the wall finish on just a portion of the wall
TomKen replied to Jbscalia's topic in General Discussion
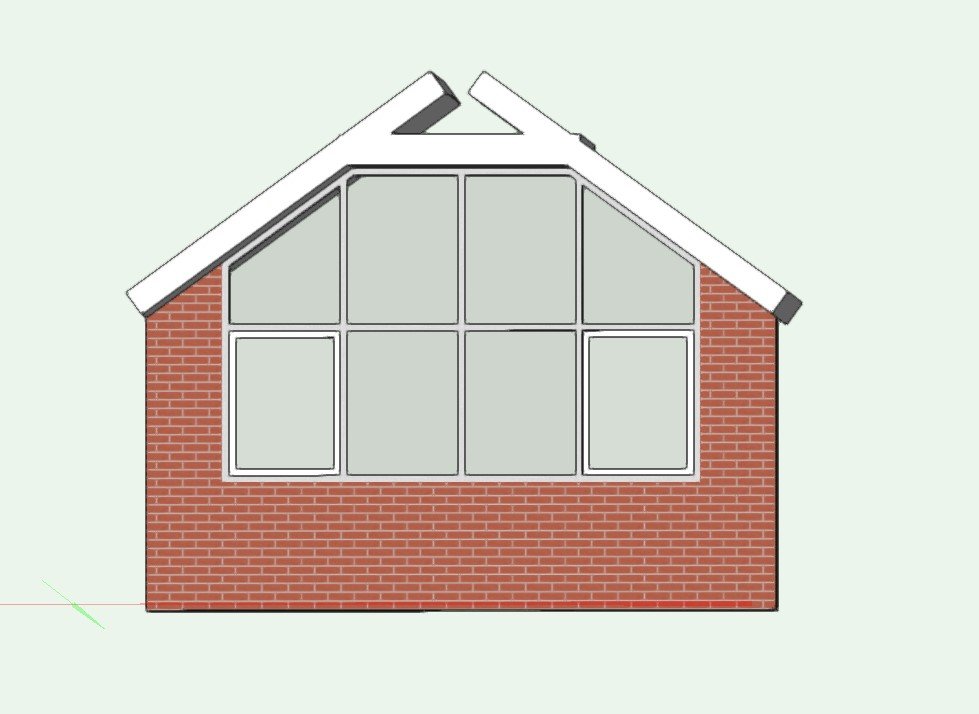
Here is a quick sample. Gable Wall.vwx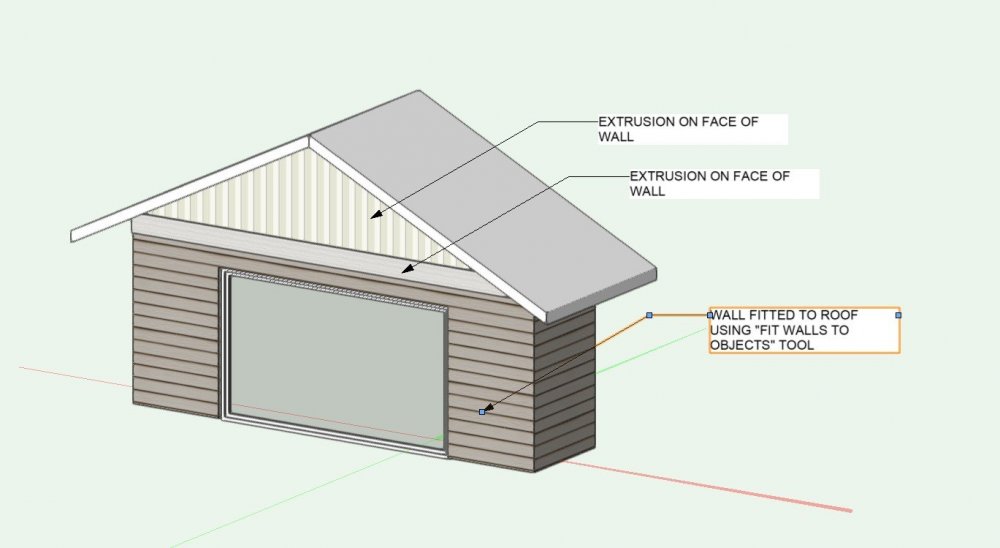
-
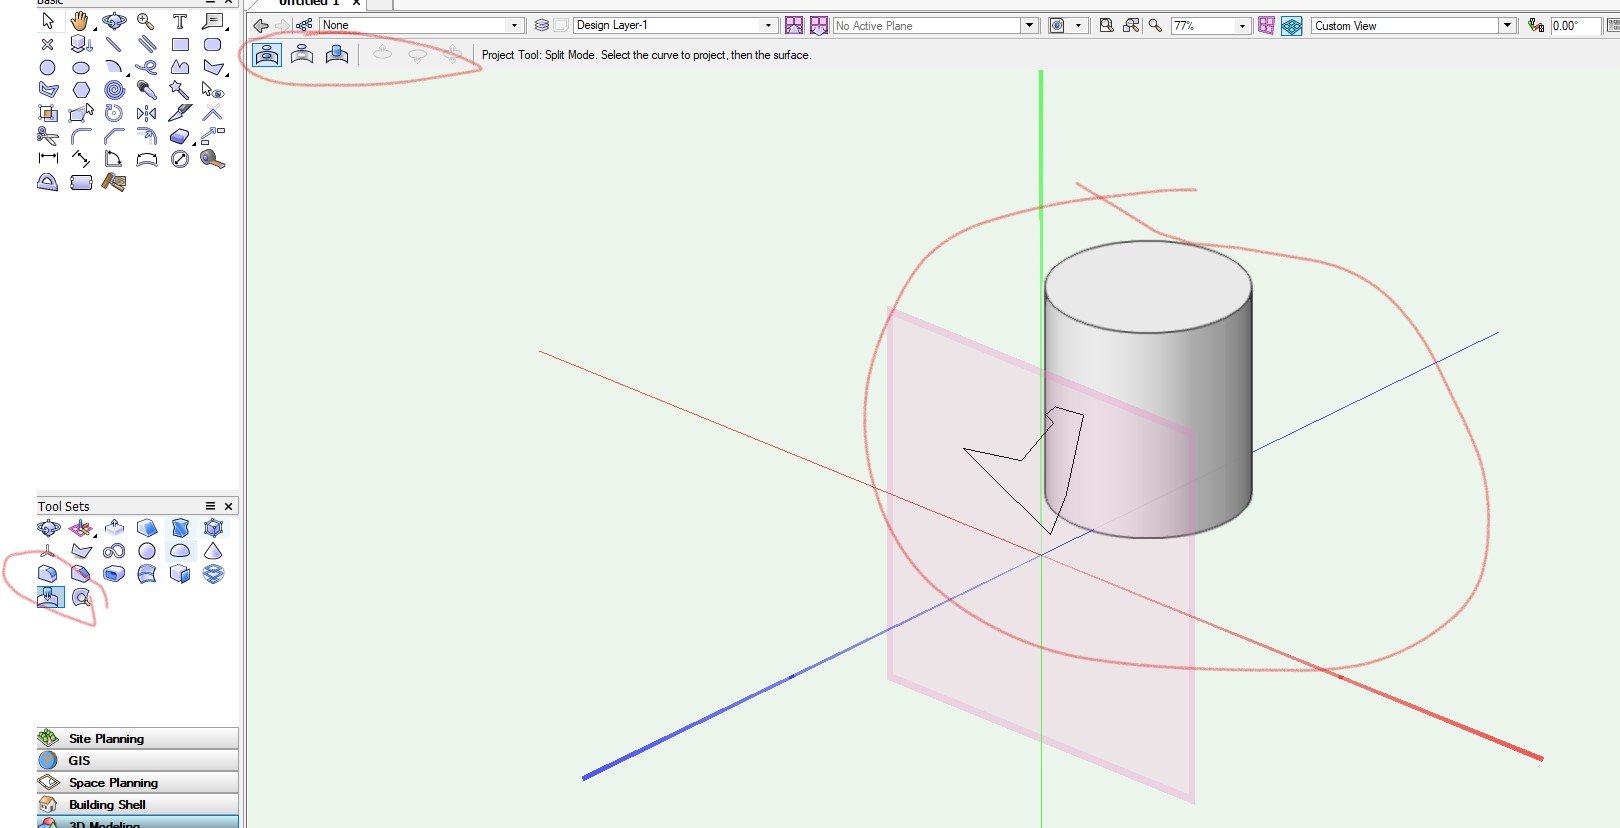
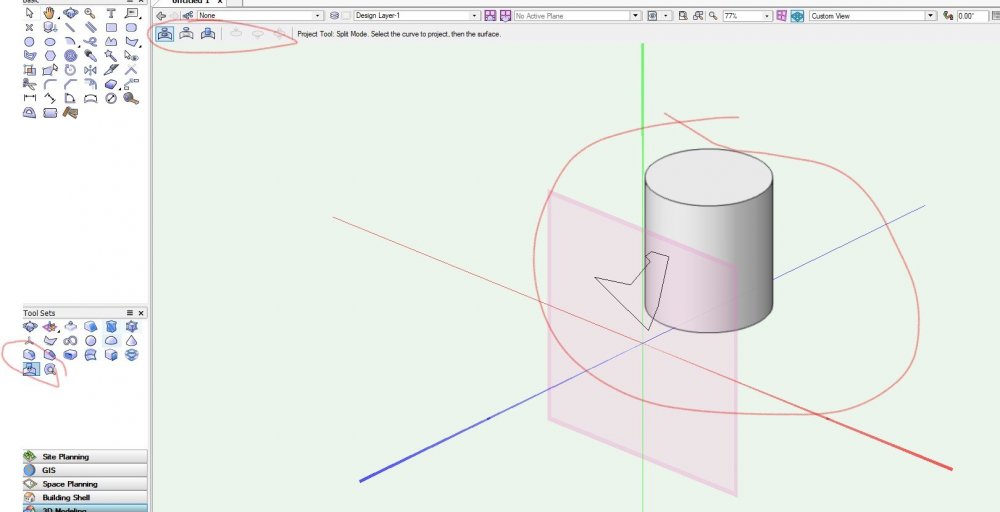
You could try using the project tool in the 3d modelling tool set. Draw closed polygons on a plane facing towards your object. Make sure your view is changed to look directly onto the plane (the projection goes in whatever direction you are looking). Select the polygon then select surface to project it onto. Pay attention to the mode options at the top of the screen, the object will either extrude to the surface, project onto the surface or subtract from the surface.
-
You can apply a texture to the doors, door jamb and cab. Create classes for each for example "Elevator-Door, Elevator-Jamb, Elevator-Cab" Attach the texture you want to each of the classes. In the OIP for the elevator open the classes dialog box and assign the class to each of the elements.


-
Just tried it and it worked for me. When you are publishing your sheet do you have the output set to black & white?
-
In VW you can generate a 2d views from a 3d symbols. Select the fridge symbol you want a front elevation of, right click and select edit 3d component. In the 3d component editor switch to a front view of the symbol, then right click a select "generate 2d component from 3d componet". This will create a 2d view of the object, select the linework copy it to the clipboard, exit the editor then past the 2d linework to your design layer.
-
Making viewport lines feint / really light
TomKen replied to Devonshire's topic in General Discussion
Create an Artistic Renderstyle and set the style to Lines and Shadows. You can set the edge thickness and colour to something thin and light. If you don't want shadows make sure you have no lights on in your viewport or set the shadow colour to white.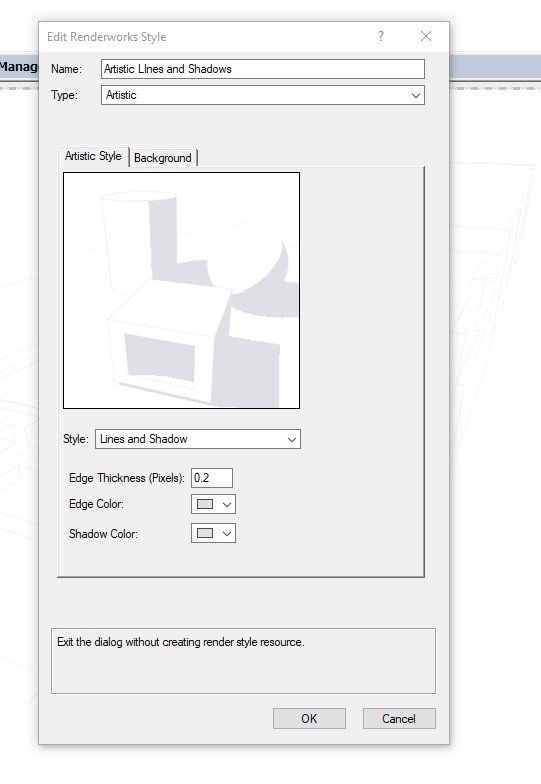
-
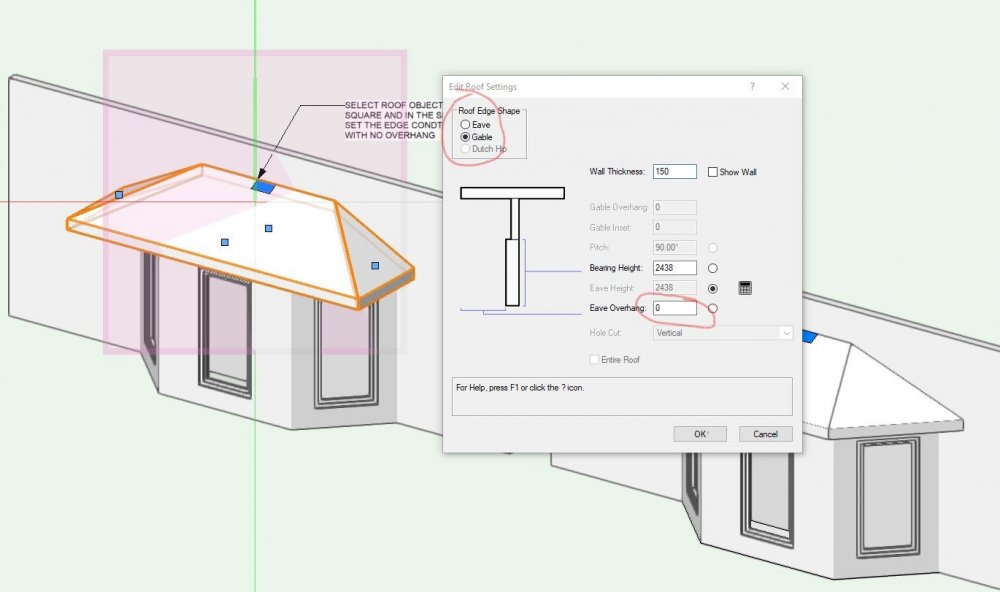
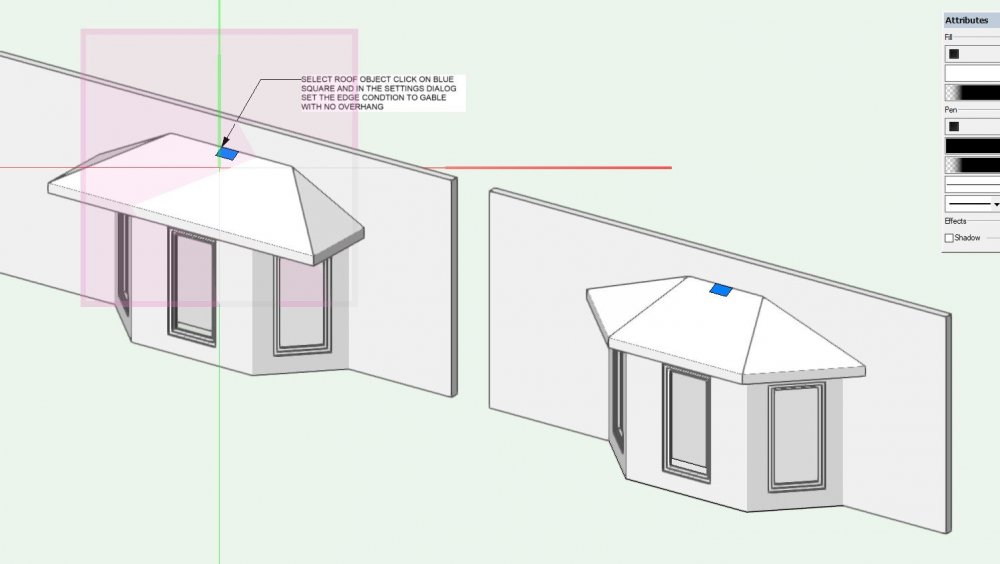
cannot seem to get all three walls in the garage to meet the roof
TomKen replied to Jbscalia's topic in General Discussion
For the door pocket (opening) in the foundation wall you can deal with that in three ways. 1. create a door or window opening in the foundation wall that aligns with the garage door in the wall above. (this is what I do when I have a window that spans two floors) 2. create a wall recess in the foundation wall that aligns with the garage door in the wall above (this is the one I use for garage doors) 3. Use the reshape tool on the foundation wall to create the door pocket around the garage door (I find this method the most cumbersome) For the gable wall in the garage, Make sure the roof extends completely over the wall, you can always temporarily extend it. Sometimes it is good to isolate the roof to it's own layer so that when you use the AEC fit walls to objects command that is the only object it has to find. -
Is this what you are trying to do? Bay Window.vwx
-
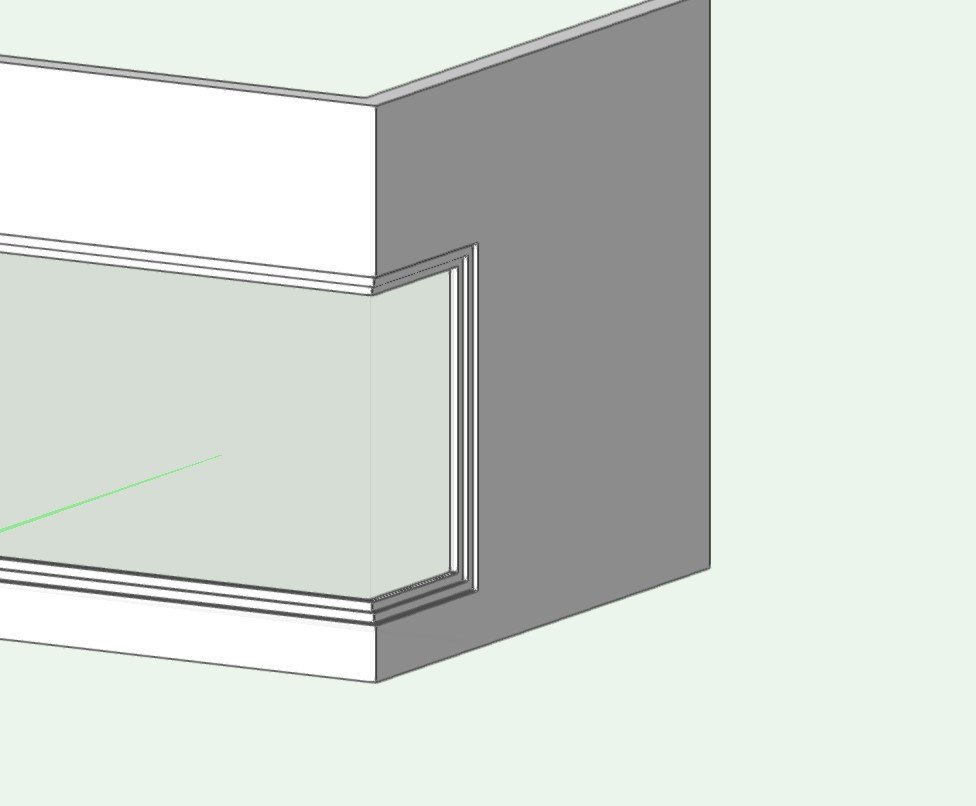
I did this with the curtain wall tool. I've attached the file so you can look at it. Window.vwx
-
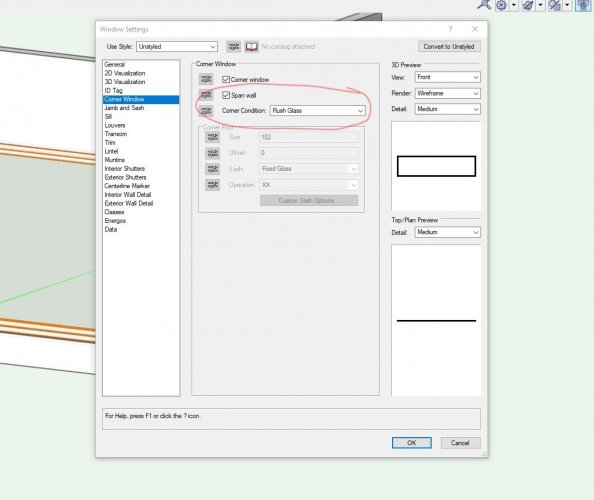
In the Settings Dialog set your corner condition to 'flush glass'
-
@markdd thanks for the reply. I'm trying to change habits and use the Smart Option Display, but using that means using the keyboard and mouse which is more than just a right click. I use tools far more than I use commands so a right click repeat last tool would be way more useful to me. In the meantime I'll keep my thumb close to the spacebar.
-
After using a command from a drop down menu I can right click in my screen and choose repeat command, and it also shows up on 'right click recent commands'. If I choose a command from a tool pallete it does not show up as an option for repeat command or recent command when I right click on my screen. I've tried this out on both my home and office computer with the same behavior. Is there a setting I'm missing somewhere or does the repeat command not work for tool pallete items?
-
I use the curtain wall tool to create custom windows then group the curtain wall and put it into a window opening in a wall. We do mostly schools and curtain wall most closely resembles the type of window we specify anyway.
-
Bottom Rail for Railing tool
TomKen replied to TomKen's question in Wishlist - Feature and Content Requests
@zoomer I'll look at the curtain wall tool, I use it for almost all my windows. Not sure if you can use a custom profile for mullions. -
Would like to be able to have a bottom rail profile for the railing tool same as well as a top rail. In the attached image I've created a glass railing using panels, I set the posts to a class that I turned off. The thing I couldn't do was create the bottom shoe rail inside the railing tool I had to do this as a separate extrude along path. Would be nice If we had the option to add additional rails in the railing tool. First image is the rail I created in VW second is linked to Twinmotion.


-
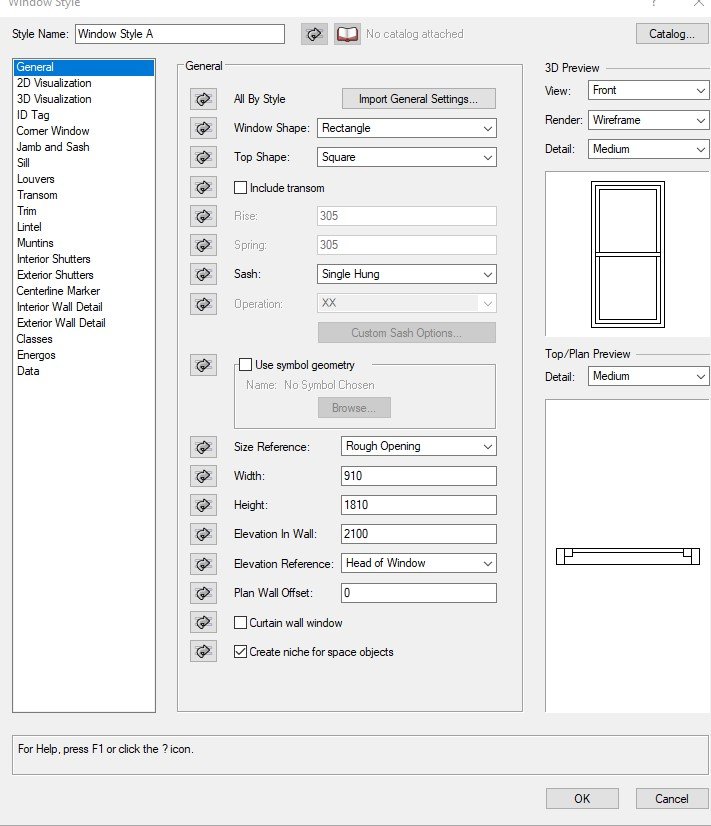
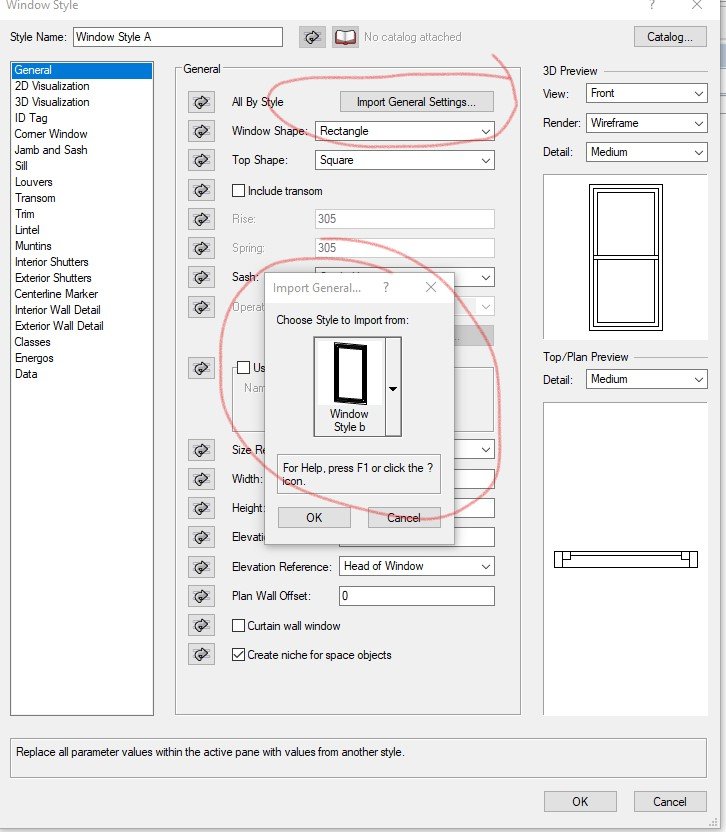
If Windows A, B, and C are all Window Styles. You can open window A in the Resource manager open the Import General Settings dialog and choose import from Window B. This of course means that window style A and B would now be exactly the same.
-
You could also just draw a bunch of rectangles click click, any random size. Then select them all and in the OIP set the width and height to the size you want for all of them at the same time.
-
Thanks @Matt Panzer and @mike m oz I got it to working now. It's always the little red button somewhere. Now to play around with the settings.
-
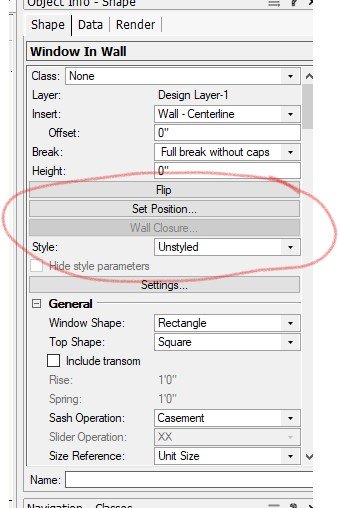
Been trying for over an hour and re-reading the help file. No matter what I do I cannot get this work. Like Fabrica the preview image in wall closure dialog shows correctly but the closures aren't showing in the model. Also I notice if I select a window or door the Wall Closure option is greyed out in OIP. Was really hoping this would be a feature that worked as I use 3d models for images all the time and the lack of wrapping really ruined the look of the models. If anyone can get this work could they post an example file for us to download and look at the settings.
-
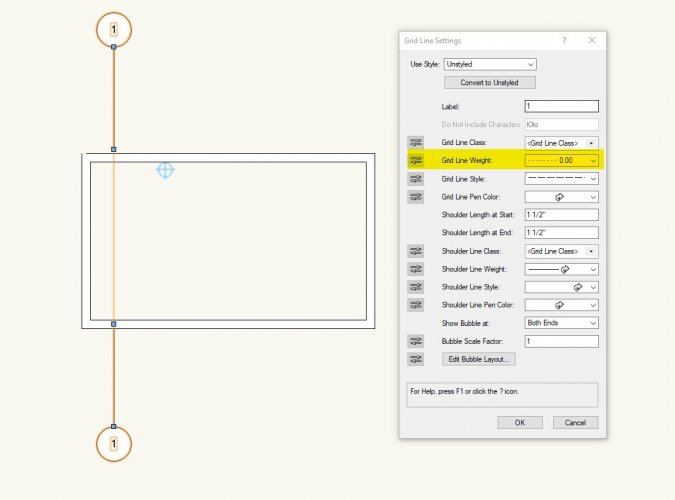
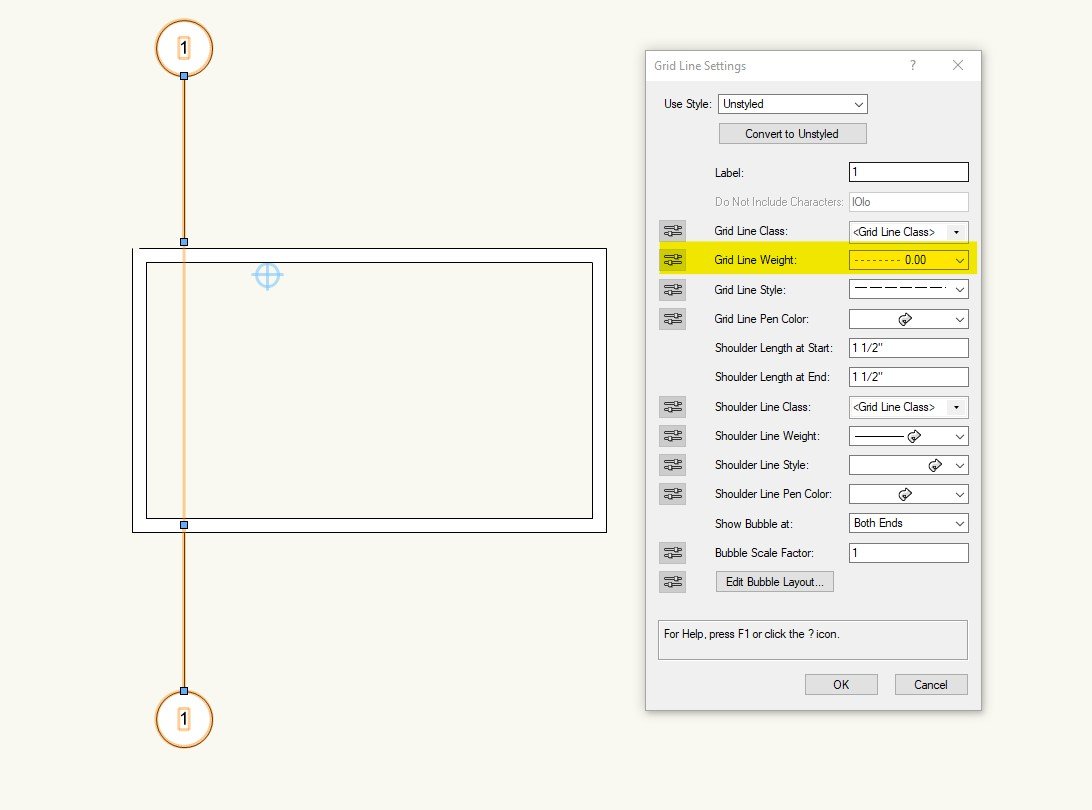
You can use the new Grid line tool to do what you want. Put your North South Grids on one layer and Your east west Grids on another layer. Create design layer viewport of your Grids and place it on the layer with your 2D elevations. You can rotate and mirror the Viewports as needed.
-
Switching the orientation of all layers
TomKen replied to Cadplan Architecture's topic in General Discussion
Turn on all your layers and classes, Set the layers to show snap modify others. Select everything and rotate 180 degrees. -
If you are using VW 2021 you can set the grid line weight to 0.00.