


NJO
-
Posts
5 -
Joined
-
Last visited
Content Type
Profiles
Forums
Events
Articles
Marionette
Store
Everything posted by NJO
-
Thanks Pat, You're right and I feel like a bit of a dummy for not figuring that one out sooner. I was so sure that I had done everything right but I forgot an obvious answer 😩 Thank you very much.
-
Hello all, I've come across a bit of a strange problem. I've created a triangular window using the 2d Polygon tool, extruding the polygons appropriately and then used the 'create symbol' tool to ensure it can be dropped into a standard wall. Unfortunately, whenever I've moved the triangular window to a wall and inserted it, the window always inserts perpendicular to the wall and I'm not able to rotate the object to put it in the correct location. I have tried rotating the window symbol prior to insertion in the hope that it then rotates again and corrects the issue and I have tried to 'flip' the symbol once it is in the wall but neither solution works. I'm assuming I have messed something up when creating the symbol but could anyone help guide me on this or help me correct my mistake? Thanks for any help you can provide. Nicolaus
-
Thank you for your response Markvl, however I'm looking to create a slope across the width of the wall. I can achieve this with the taper face tool however, the wall stops being a wall and becomes a generic solid after I perform this action. The second image below shows what I want to achieve in terms of angles. The two images are unintentionally from slightly different angles but hopefully you can see that the first image is just a straight wall following right angles, but the second has a tapered top edge so that it would theoretically meet a sloping roof exactly. Does anyone know a way of achieving the same result without the wall becoming a generic solid (keeping it as a wall)?

-
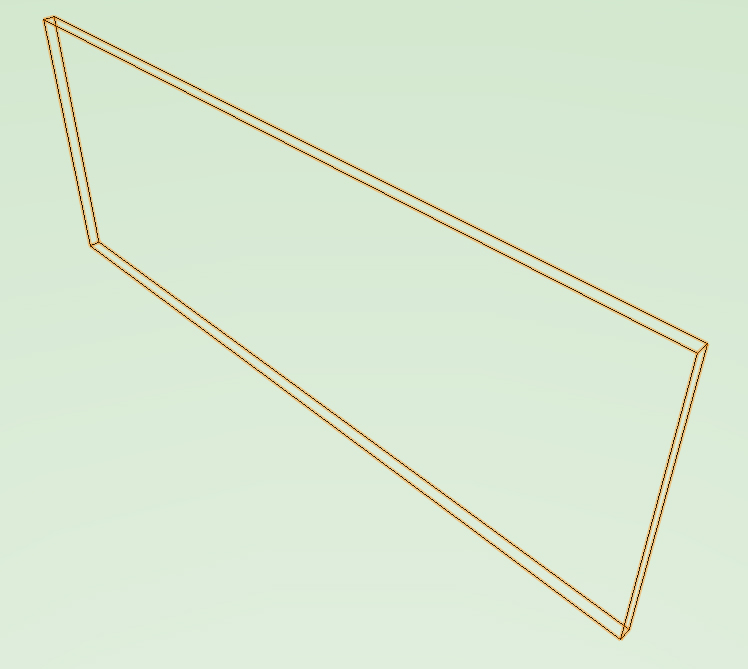
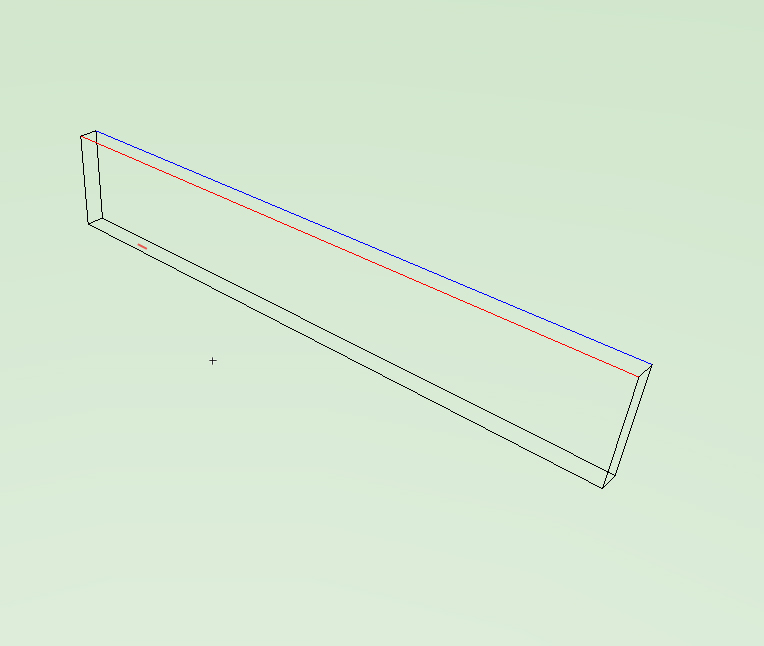
Thank you for the advice however, I think I probably haven't explained myself properly I may not understand your answer properly. If I were to use your picture as an example, it looks like the wall you have provided a picture of is getting taller along the length of the wall. What I require is a change in height across the width of the wall. I have attached a picture for clarity ( I hope the picture quality isn't terrible), what I'm looking for is essentially a change in height between the blue and red lines, the blue line needs to be at a height of approxiamtely 2.5m where as the red line needs to be at 2.3 meters. I couldn't achieve this by double clicking the wall as it gives you control points at the middle of the wall. Is there any way to get more control points on a wall so I can alter it from it's corners?
-
I think I have an extention to this question. I have a declining roof that I'm designing however, when I use fit roof to object and select the side of the wall that fits to the roof face, I'm left with an odd situation. I have one of two options, either select the interior part of the wall to meet the roof, meaning the exterior part of the wall and the don't meet or have the exterior part of the wall meet the roof but then have the interior part of the wall extends out the top of the roof. What I have done is is to have the exterior part of the wall and tried to trim away the exess. I use the subtract solids tool using the roof as the solid to subtract from the over extended wall and delete anything above that so the wall and the roof meet cleanly. However, the remaining portion of the wall that is now correct, loses the wall property. I assume there a better way to fit a wall to an angled roof accurately without loosing perperties but I'm looking for help on how to find this out. Any advice would be great, if you need images for a better idea, please let me know.