


Kevin Allen
-
Posts
2,014 -
Joined
Content Type
Profiles
Forums
Events
Articles
Marionette
Store
Posts posted by Kevin Allen
-
-
I do this, and have done exactly what you want to do in either Photoshop or VWX.
In VWX, I choose the transparency Shader and then use the eyedropper to select the white areas as transparent.
In Photoshop, I'll do a similar approach, or create a luminosity mask, save the channel, and then use the channel in the transparency shader. Sometimes it helps to save the file as a TIFF rather than a PSD file.
-
 1
1
-
-
You can export the sheets using the Cloud to process. Similarly, you can use the Publish Command on the Cloud to export saved views from the design layers into image file format.s
Not sure that answers your questions
-
1
-
-
The panorama view has to be viewed through a browser of Nomad. There's scripting that the Panorama needs to make that image into a usable view. This can only be done through the design Layer. Sheet layer Viewports are a 2D view of the 3D model, the Pano is 3D.
-
Well, the lightbox, I wouldn't use lighting as much as a glow texture on the image. Similarly, I would add a white glow texture to the downlighting in the ceiling. In this case, the texture would have "cast Shadows" turned off so that the VWX lIght Objects above could pass through.
-
2
-
-
As always, great enhancements!
-
1
-
-
3 hours ago, scottmoore said:
Which brings up another question: how is that output actually calculated? I tend to find that I cannot get enough light out of a display to render realistically before the image blows out.
That's a really good question. I've neither seen nor figured out any documentation on this kind of thing.
-
Once imported can you use the Scale command and the scale to dimension option?
-
Create two sheet layer Viewports. Use class over rides to redefine the textures for a class.
Obviously, your design has to be set up with classes.
-
toy need to make a sheet layer viewport of your design layer and put the virewport omg a sheet layer. When you make the viewport, you can assign a scale. On the sheet layer, with the viewport selected, you can change the scale in the OIP
-
1
-
-
you can add folders to any type of resource, I might be somewhat wrong there, but in general, that's true.
So, if your furniture has been saved as symbols, you can add a symbol folder for the 1059s furniture. In turn as you bring those symbols into a file, you can also add a textures folder for that furniture.
I would create a file for that furniture, add folders as needed, then save the folder in my library which is a directory on my hard drive. I would then add that file as a favorite in the RM
-
Model>3D Powerpack>create helix spiral?
-
OpenGL is restricted to 8 light sources. Use a Renderworks render mode.
-
2
-
-
The texture should have a Glow shader. It's typically at 100% but can be set higher. Too high and the image will blow out. Emit Light should be checked in both eh edit Shader dialog and in the Indirect Lighting dialog.
You won't get any beams of light, but you should get the effect of light.
-
You can texture a SubDivision. Can we see what you want to make? Deform and Fillet might do what I am picturing
-
while I'd need to see the venue and the complexity, I would make everything Hybrid so you have 2D and 3D as needed.
-
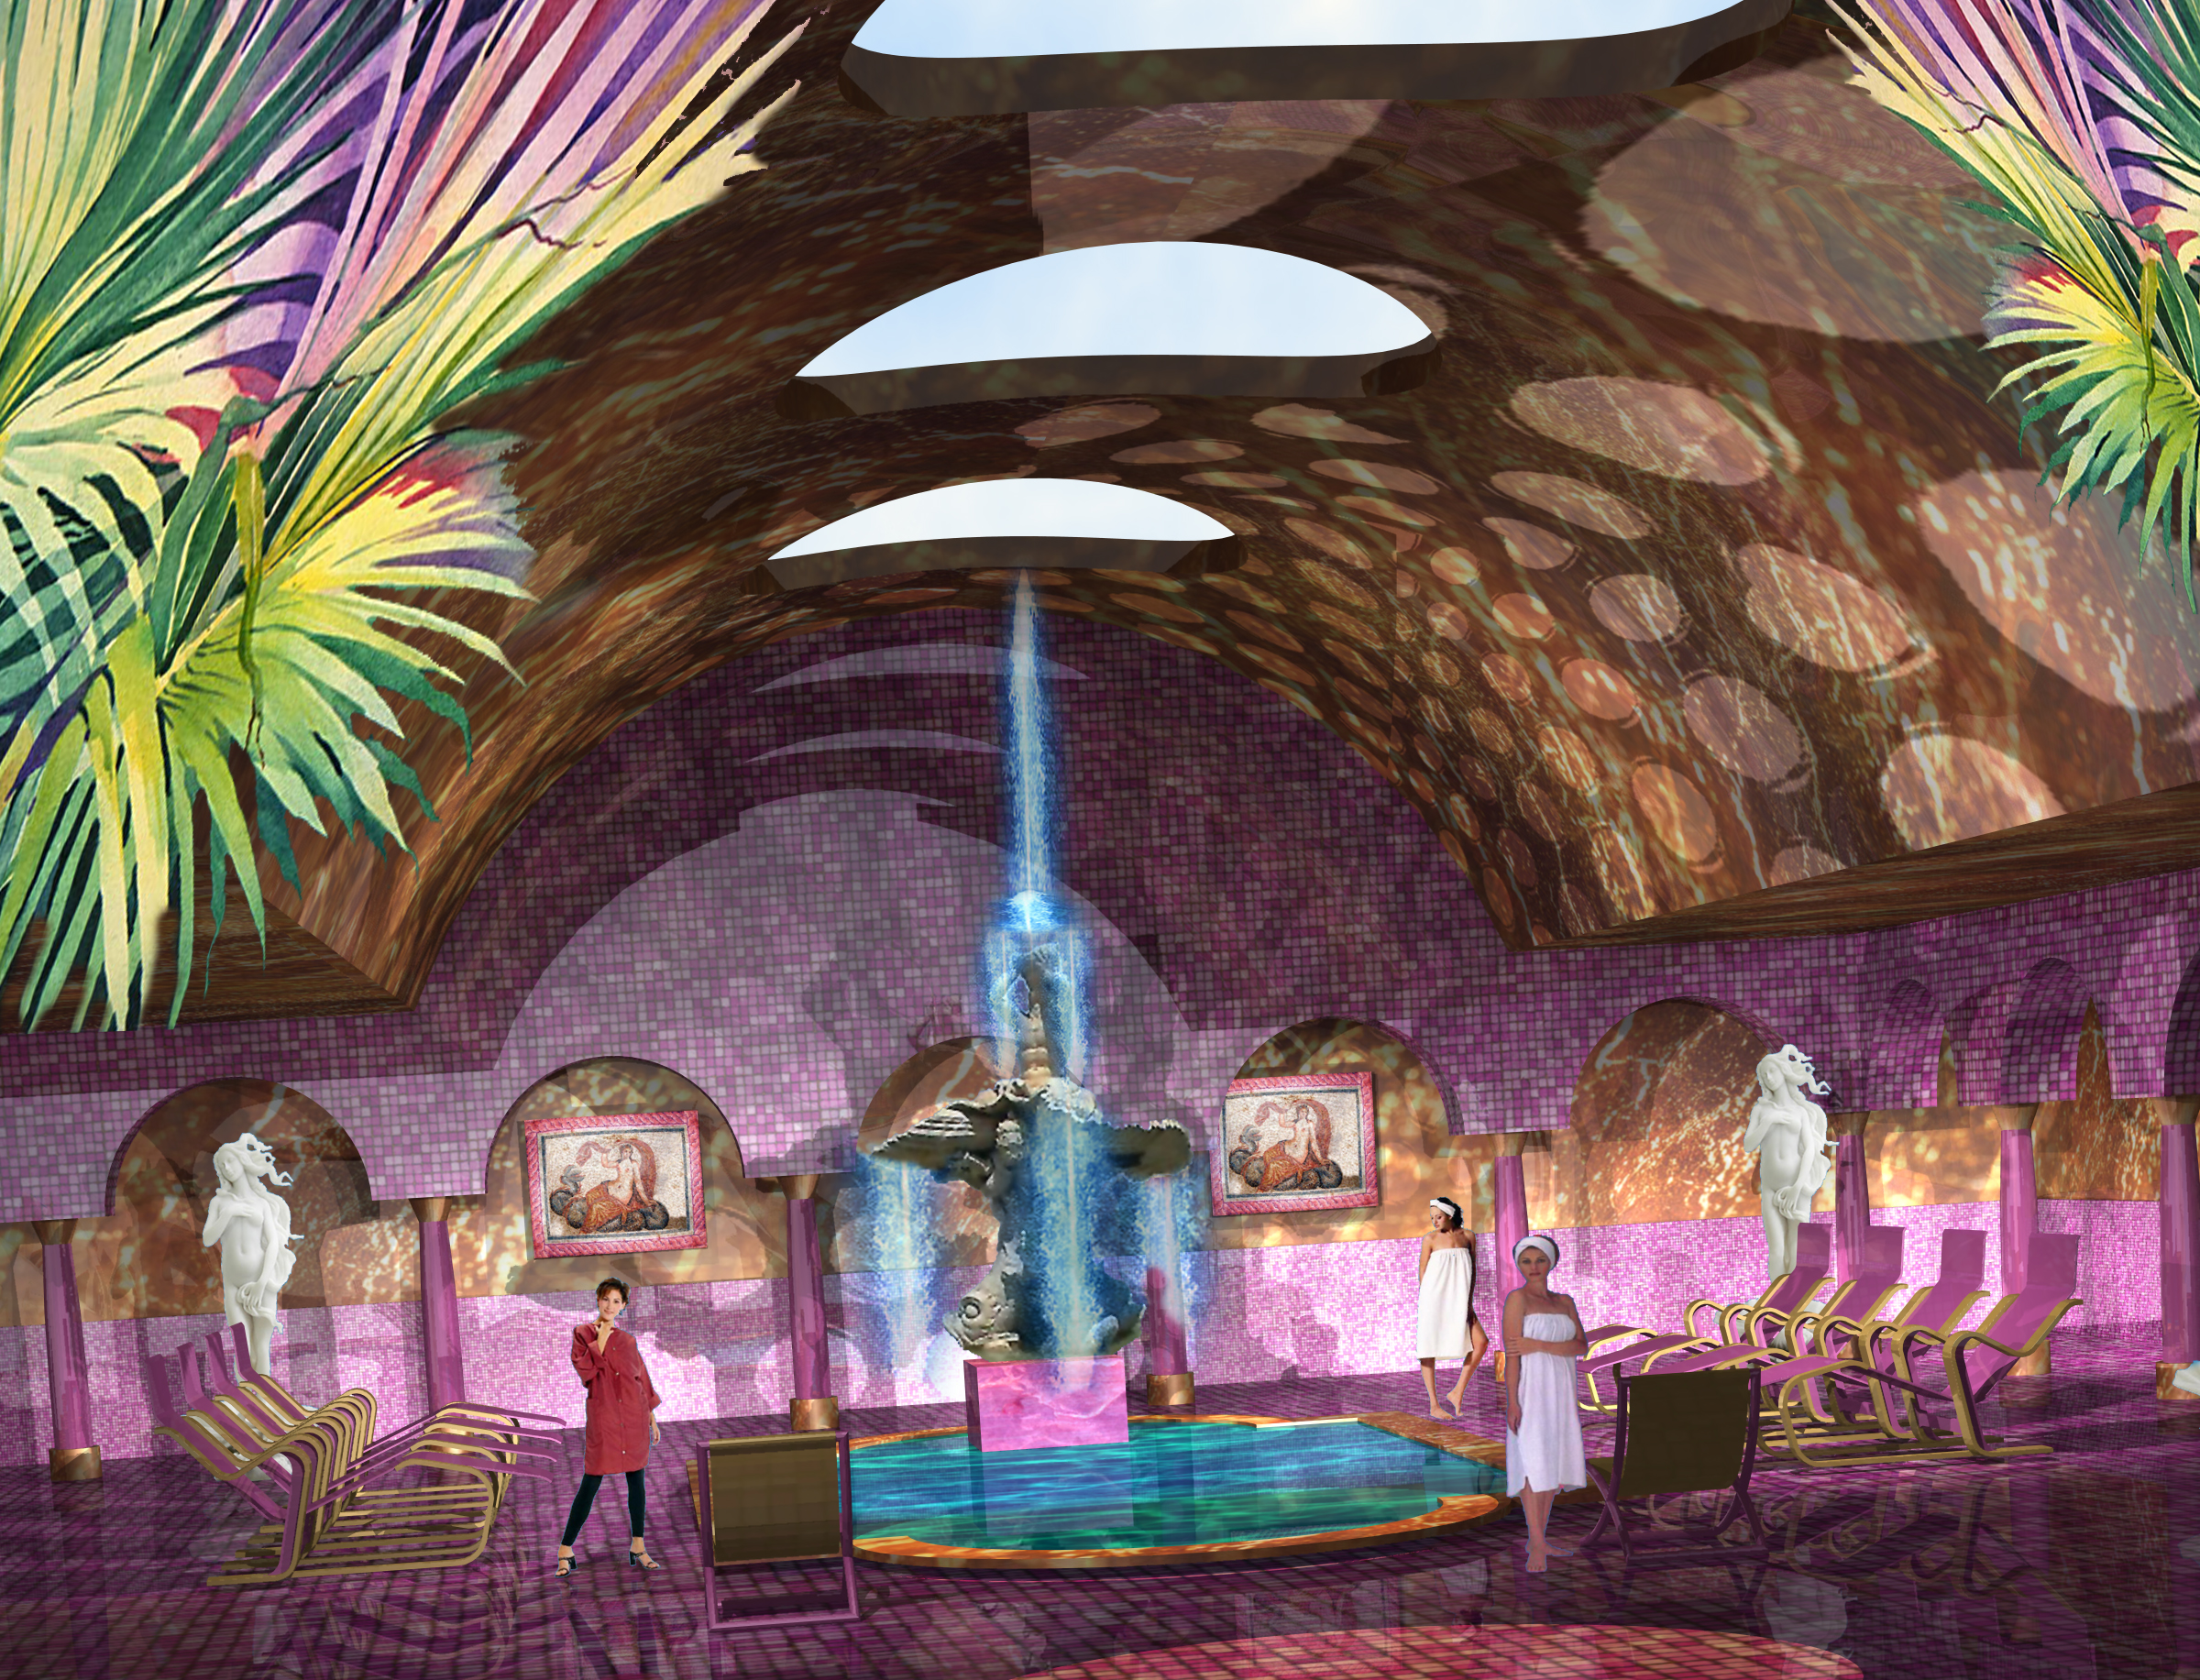
I have no idea what this is, but it sure is pretty.
-
I'm not completely sure I understand your question, but image size is based on output resolution. So, If you're outputting to an inkjet printer that has a 150 dpi resolution. the image size would be the size of the output times 150 in pixels. So, if a 5' object at 1/2" scale it would actually be 2 1/2" wide and then 2.5x150=375 pixels.
If the out put his 300dpi, then 750.
If only outputting to a screen, then only the screen resolution matters, the rest is extraneous. That's more difficult to calculate, especially since we can all zoom in and out.
Does that help?
-
right, my comment is to suggest that we should need to extract a surface from a wall or a roof. but we should be able to add the array to the original object. If you update the walls, the array has to be recreated. I'd like to eliminate that step.
-
9 minutes ago, Kevin K said:
Well, VW does have a texture that more or less mimics a barrel tile roof, but.....it is a totally flat texture, which when applied to roofs doesn't look all that realistic in my view.
Excellent Fix! Now if only surface array worked on native objects, and the extraction step could be removed...
-
sweet work, and excellent use of surface array.
-
In the Spotlight prefs, do you have the inserted instruments assigned to a class that is turned off?
-
2 minutes ago, Kevin C said:
the model is a working model - it gets too bloated.
what do you mean by working model? For me, every model is a working model.
-
22 minutes ago, Luis M Ruiz said:
Create a viewport, whatever view tells the story better. If you set your sheet at 300 dpi or higher then your OpenGL renderings will look crisp and take no time to render.
as always, Luis, great work. Especially, to me, for OpenGL
-
Can I see your file?
-
1
-
Cloud Services and OneDrive Integration
in Wishlist - Feature and Content Requests
Posted
IIRC, VWX once supported Box, but I assume each service brings its own set of programming challenges.