
Taproot
-
Posts
516 -
Joined
-
Last visited
Content Type
Profiles
Forums
Events
Articles
Marionette
Store
Everything posted by Taproot
-

Window sill improvements
Taproot replied to Christiaan's question in Wishlist - Feature and Content Requests
In complete agreement. I would add that if the sill is turned on on the outside, the stool can't be turned off on the inside. The extensions (ears) are also presently linked, so if you have different width casing on the exterior and the interior of the window (common) one of them will be wrong. -
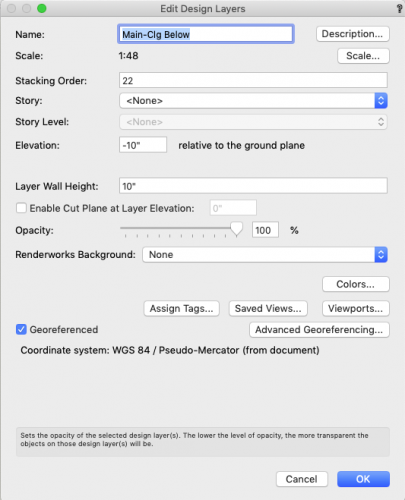
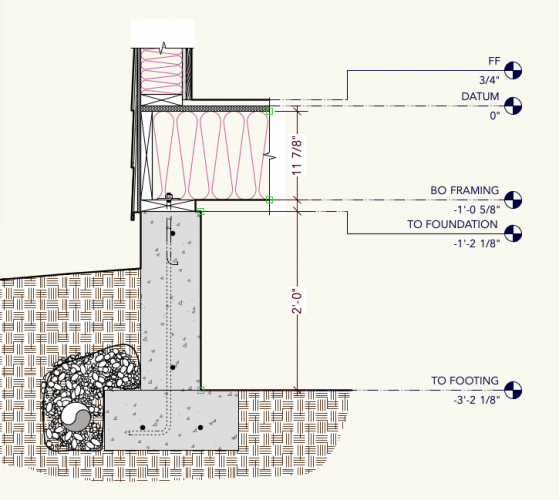
I had a chance to give STORIES a go last week and after several hours of frustration and extensive readings of this board where others expressed their on-going frustration, I found myself looking for a simpler solution. It is far easier to think in relationships than absolutes. I sure wish Vectorworks could help us design this way. My request is to allow users to set a layer elevation as an offset from another layer. That is - allow us to reference layer elevations from one another. This looks like a relatively easy integration into the current design layer setup. Substitute (or add as a separate option) "Layer Level" for "Story Level" Allow the user to set an offset value from the referenced layer. Allow the user to set the offset from either the layer elevation or the layer elevations wall height. The wall height is a means of defining the layers thickness. A layer's thickness can be positive or negative relative to it's elevation height. In the following example I'm using the components of a floor system to illustrate how this would work rather than separate floors, roof, etc. The Subfloor layer is referenced as the Datum Elevation. The subfloor has a "wall height" (thickness) of -3/4" The Finish Floor (FF) is set to the Datum Elevation. It has a thickness of 3/4" The Framing layer is linked to the Subfloor layer wall height (which is 3/4" below the datum) and has a thickness of -11 7/8". The Mudsill layer is linked to the Framing layer and has a thickness of -1 1/2" The Foundation layer is linked to the Mudsill layer and has a thickness of -24" The Footing... With this method, one doesn't have to remember that the Top of the Footing is actually -3'-2 1/8", the software is doing the math for you. I would imagine that the Edit Layer dialogue would display the absolute height (in gray) while showing the layer that it is referenced to. The user could then choose to unlink a layer at any time and set a manual elevation for it. The ease of use would be amazing. If my floor joists needed to change to say 14", I could just change the layer wall height for the Framing layer and everything linked to it (below that layer) would automatically adjust. It could actually make sections fun again.
-
Hello Ash, My first recommendation is to import all DWG files into a new blank VW file. That way you can revise (i.e. delete) a lot of the extraneous class / layer information before you bring it into your working file. Once you have it in the new blank file, verify that the scale is correct. go to the drawing layers (not the sheet layers) and calibrate an item of known length against its measured length. You can then rescale everything or "The entire drawing." Once you have the object properly scaled and organized according to the classes and layers you like, you can copy and paste them into your working file. It sounds like your current problem is that the data has imported into your file and is showing up in a viewport, but you can't actually find it in the sheet layers. That's probably because the scale of the objects is way off - often 1:1 or the origin is far away from your page. Following the above steps should correct that for you.
-
No telling what caused the error, but the first things to look at would be: 1. Is the glass still classed correctly i.e. "glazing-1" or equivalent? 2. Is the texture associated with the class still correct? 3. Try applying the glazing texture to a generic solid, extrude, etc. See if it renders correctly. 4. i.e. Try and narrow down where the problem is coming from and that will help you determine the fix. ... and if all of that fails, contact tech support.
-
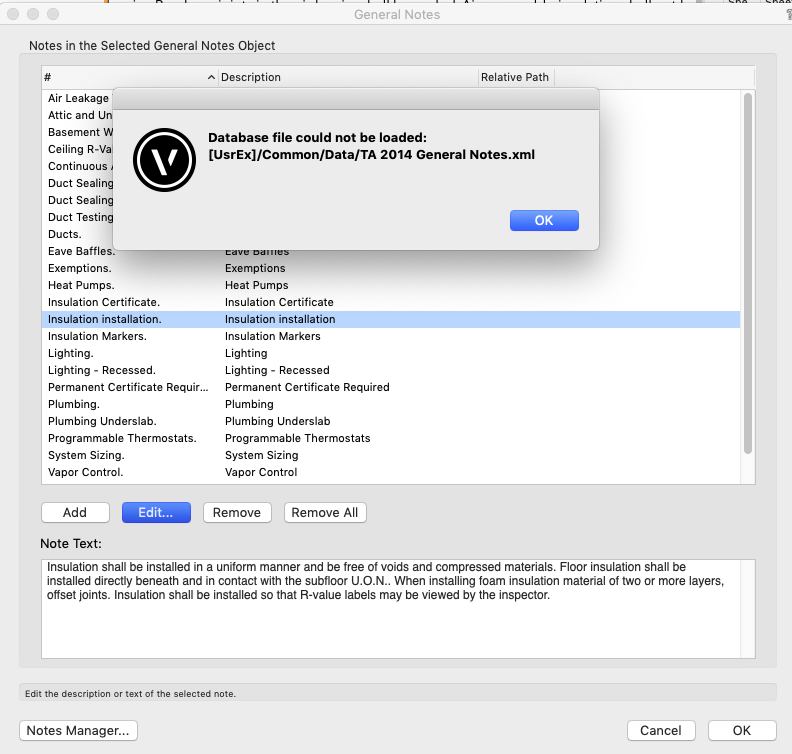
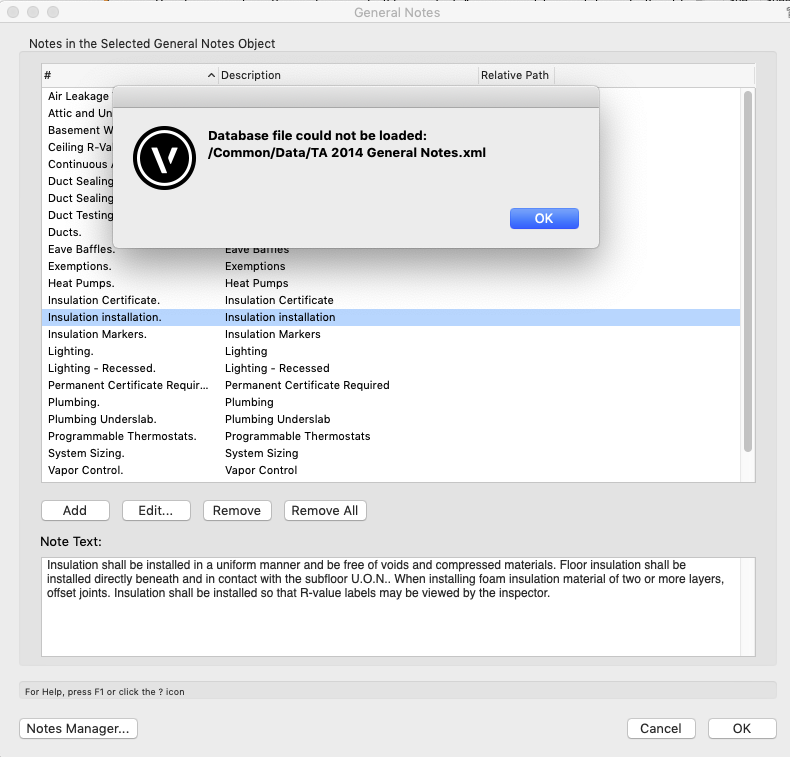
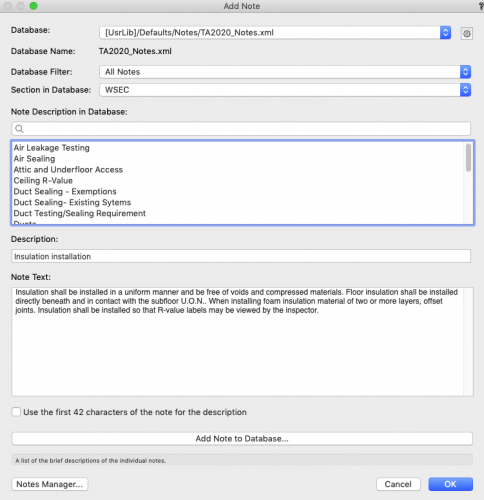
The General Notes Manager should have a much better user experience and play well with the Notes Database. Request #1: Fix addressing of notes to the note database. i.e. If the Note Manager can't find a note in a database and you correct it - ask if it should do this for all other instances. Example Situation: My Notes Database somehow disassociated from my template file during the 2020 upgrade. I have hundreds of notes organized by categories. I am now forced to go through every one of them individually and redirect the Note Manager to the correct database. Worse - the way the alerts work, this is a three step process for each note... geez. First error pop up: Second Error pop up: Make the change by manually redirecting to the correct database. Repeat for the next note, and the next... Request #2 Allow for adding multiple notes at once. This used to be possible in the Notes Manager from earlier versions. I would typically add 12 notes at a time. Now, I'm forced to add one at a time. Yuck. I considered posting these as a bug ... but assume that these features are actually working as designed - hence the wishlist posting.


-
I"m still experiencing this issue - Since everyone isn't complaining about it, I'm guessing that it is not pervasive. It takes about 10 seconds for the hatches to load in the attributes pallet. I've tried opening a blank file AND deselecting all external sources (cloud, workgroup files, etc) to limit the attribute pallet search to the file only. The lag still persists. Has anyone found a fix for this yet?
-
Vote and comments added. Thanks for the redirect.
-
Adding my vote to this topic. This is a critical omission. VW encourages a class reliant workflow and without the capacity to map and assign classes over time, the whole system breaks down. We are in the process of investing significant resources into developing our office class standards ... and now I'm really wondering if that is even worth doing.
-
Yes, it looks to be a dead end. It only works for setting up the drawing. Apparently, "smart paste" was the closest solution - but support was discontinued last year. So it seems the only solution is to periodically delete the offending classes and then "reassign" the objects to new classes until one's classes are finally scrubbed clean. That seems like a really long, slow and terrible work-around. What seems like the obvious fix would be for the "Standard Naming" to re-assign new objects placed in the file according to the mapping laid out by User. I'm surprised this hasn't been implemented. Now, if I can just remember how to move an existing thread to the wishlist part of the forum...
-
Never Mind - It looks like the Document Settings > Standard Naming is the way to resolve this.
-
I"m wanting to clean up our office class standards and having a devil of a time doing it. How do you "map" old classes to new ones? Is it possible? For example, let's say I want "nonplot" to now be "2D-nonplot" so that I can group all of my 2D classes in one section. As soon as I bring in a legacy object / symbol from our last twenty years of work with an object assigned to "nonplot" it will recreate that class. I would like to have a "map" in place that automatically assigns all incoming obsolete classes to new ones. Is there a way to do this?
-
Publish Log.txt
Taproot replied to Bruce Kieffer's question in Wishlist - Feature and Content Requests
I've been trying to figure out how to do this for years! Apparently, I didn't try hard enough because your advice worked. Thanks for eliminating all of those annoying files from my desktop. -
HI Tamsin, OK, I've enabled verbose error logging. Hopefully that will help. That is good to know about the origin. In our case, the user origin and internal origin are the same, so I don't think that could be causing the errors.
-
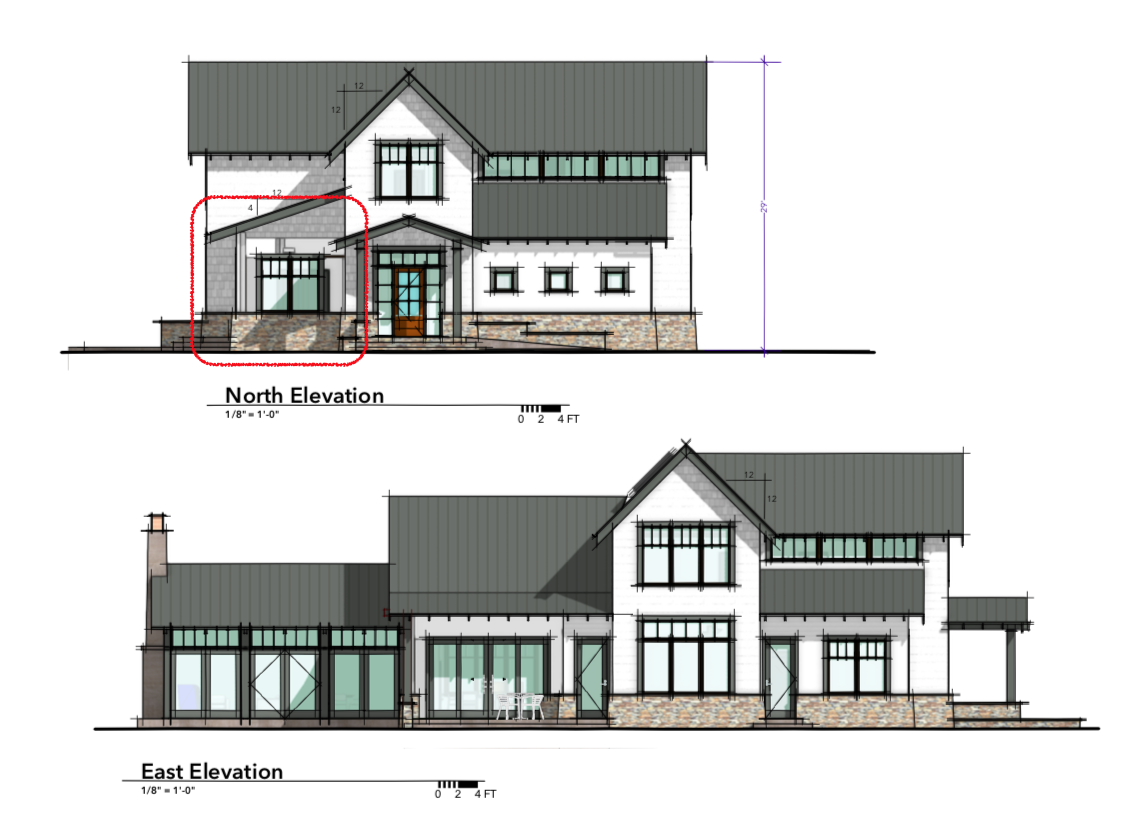
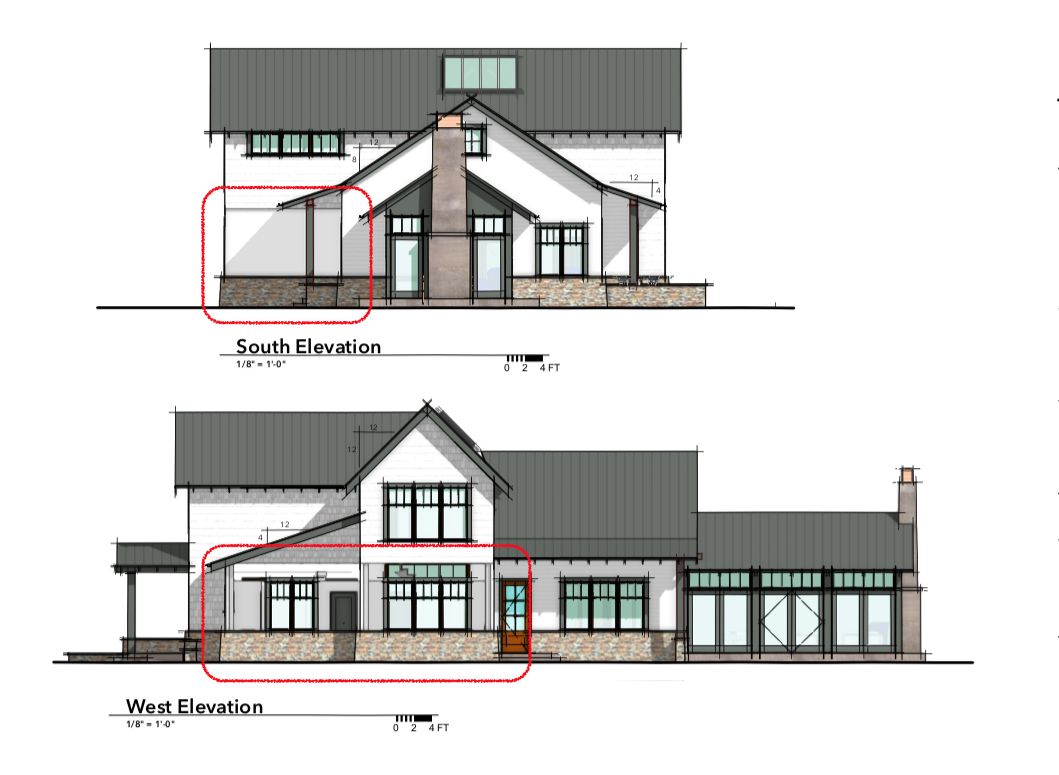
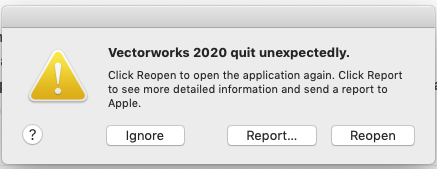
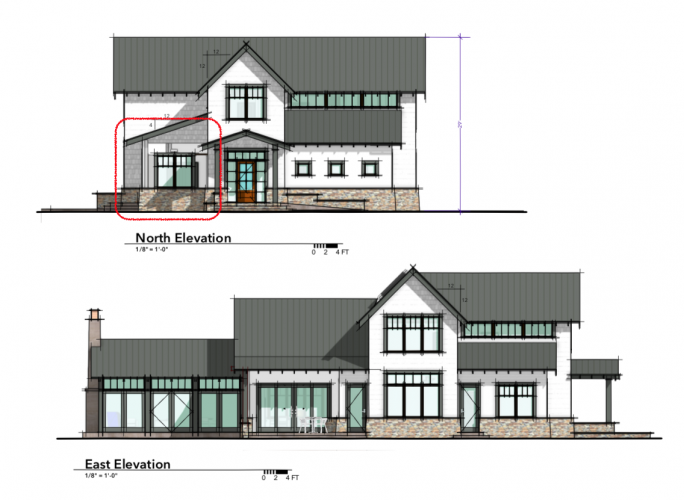
Initially our experience with v.2020 was great - faster then 2019 by far. Now we're experiencing a lot of instability in the software and erratic rendering issues. This morning, the program crashed when I changed the view from plan to isometric for a very small model. We have the default view for isometric set to openGL (or is it called "metal" now?) Should I be collecting these crash reports somewhere? I very much doubt that Apple cares about the report, but do the VW engineers want a copy? In this OpenGL rendering, you'll see that the lower part of the wall disappeared on the left side of the building. Re-rendering the viewport sometimes will fix this kind of error, but often we need to close the software down and re-open it and then re-render for it to correct. It happens sporadically in our openGL viewports: Elevations, perspectives, etc. The errors our weird and I find that I now have to check each viewport methodically before publishing a set. It takes a lot of time and I often feel like I have to get lucky to get all of the viewports correct before publishing a set. Related issues: Viewports that are out of date often "jump" to other locations on the sheet / page. They have to be updated to return to their original placement. If you continually zoom in and out, the images are correct, but as soon as you stop moving they go wacky. The software often crashes whenever we finish publishing a set - thankfully, the set is complete. We habitually save before publishing. The software usually crashes whenever we attempt to "Quit." No biggee - as that was our goal anyway. Here's a few more examples of mis-rendered elevations. I expect that you may want a copy of the file. We can provide you with one if you let us know where to send it. However, this is happening to most of our files. I looked at some older posts with related issues and can confirm that the user origin is the same as the internal origin AND we are not using layer links, only design layer viewports. Furthermore, there are no design layer viewports employed in the elevation renderings.

-
Twinmotion Plugin + Sync
Taproot replied to Tom Klaber's question in Wishlist - Feature and Content Requests
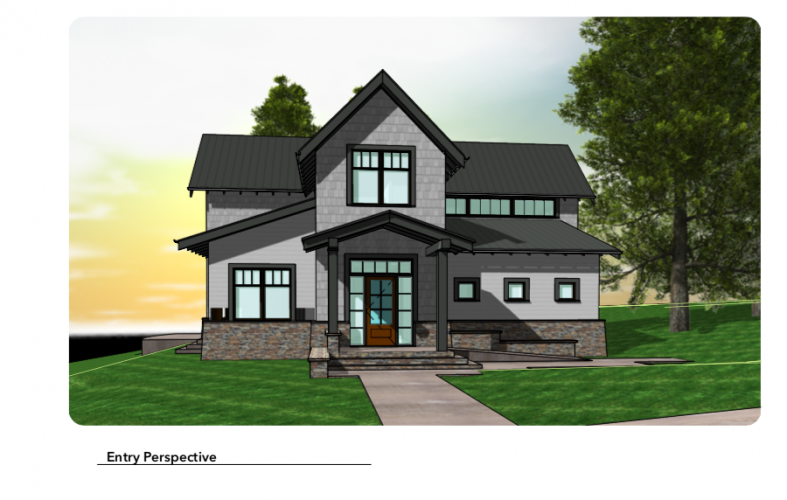
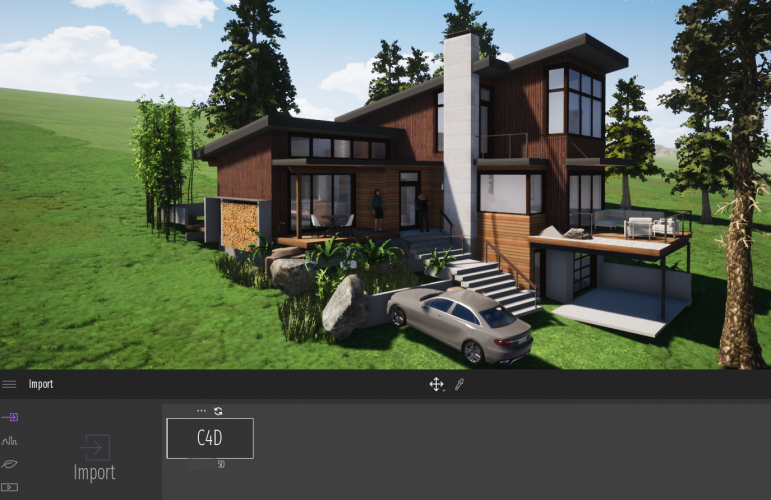
When I started using TwinMotion, I shared Chaz's concern - big time! I figured that without a VW plug-in to sync model changes all of my efforts in TwinMotion would be lost each time I exported the VW file and I would have to start over in the rendering software. Happily, that is not the case. It's actually pretty easy to update the model in TwinMotion and sync it manually. It just takes a few steps and about 30 seconds. Steps: Export your model geometry via the C4D export format Import it into TwinMotion Do all of your rendering magic Later... after you make changes to the model: Re-export it via C4D using the same file name (overwrite the original used by TwinMotion) In TwinMotion, select "Import" and where your file shows up, hover over it with your mouse and click the update arrow. The revised geometry will appear in your file with all of your rendering settings intact. Here's an image showing an export that accidentally had a class turned off. (note the missing floor at the base of the bay window) A minute later, the missing class has been added and updated into TwinMotion Next step ... let some helium out of the 'floating car..."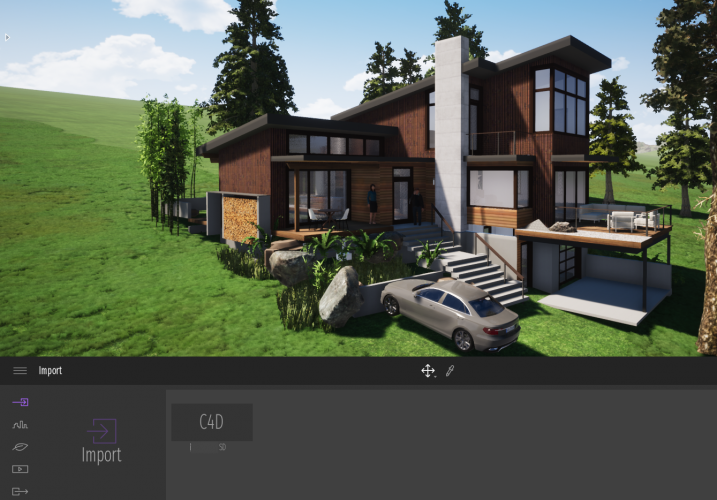
-
How do I save custom settings to Workgroup Library?
Taproot replied to Christiaan's question in Troubleshooting
I've found consistent access to user setting across our network to be somewhat problematic. It's likely a function of the network itself rather than vectorworks, but it exists, so we've developed an alternate strategy. Our solution is to sync our user folder(s) with our office workgroup folder. We use the mac based app "Chronosync Express" to selectively sync our resources based on whichever file is the most current. That way, updated libraries etc. are populated to the central folder as well as our individual machines. This works for us - as a small office where updates are intermittent, but if two different people changed the same library on the same day, one set of changes would be lost. We haven't yet had that happen. -
Import Class Types to Different Drawings
Taproot replied to Viameo's question in Wishlist - Feature and Content Requests
Boh - That's a helpful tip, one that I'll likely use now that we're updating our class attributes. -
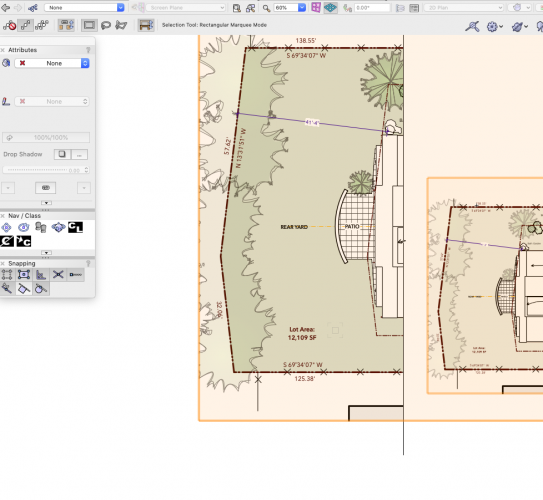
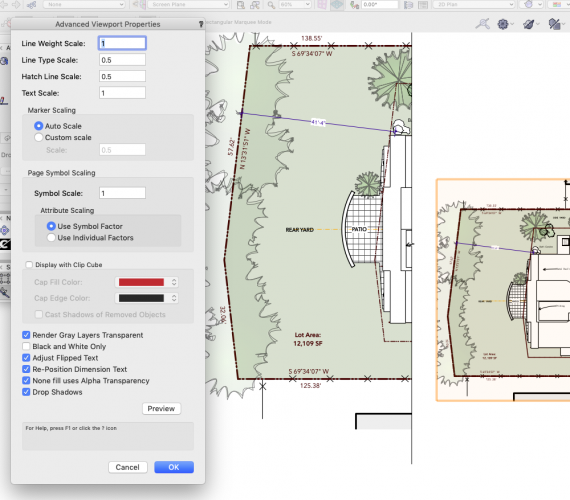
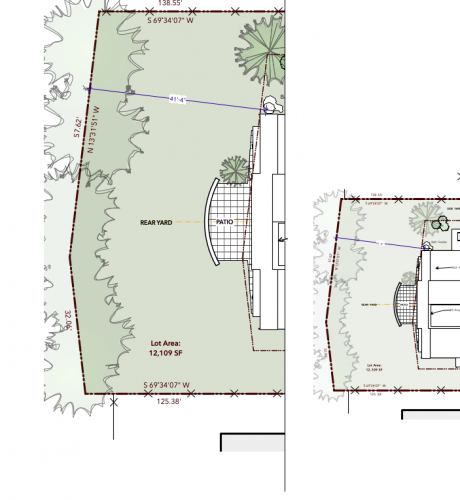
Curious. I've found this behavior to be repeatable in multiple files. Here's some screen shots to further illustrate the behavior. Note - these settings worked fine in 2019. First image: Two viewports. The one on the right is 50% the scale of the one on the left. Second Image: The test was to see if the "line type scale" could be reduced to 50%. This screen shot is a "preview" of the setting. Note the "X's" in the fence line. They are shown at the same relative spacing as in the larger viewport - as intended. However: Third Image: Once the user clicks OK, the line type display reverts to its default size. Note, the X's now appear at the same spacing in both viewports. Hatches don't change in either preview or after exiting the Advanced Viewport Properties dialog.
-
In 2020 viewports>Advanced Properties The 'line type scale' only works in preview but doesn't apply to the viewport. Hatch scaling doesn't work at all.
-
Larry - Wow - quite the innovative solution. I tried following your advice and it looks like you have to delete all of your line styles and then repopulate them from elsewhere. For me, each time I deleted the 'default' line style a different one would take it's place. I presume, therefore, that the attribute pallet maps the default to the "oldest" line style in the file. Unfortunately, we have a lot of objects in our master file that would lose their mapping if I deleted all of the line types at once. So, I'm going to use this current nuisance as the catalyst to shift our line types into class attributes and control them that way.
-
Ok this one seems like an easy one: We have our line tool default set to a solid line (for most uses) and want to leave it as the primary setting. However, we often want to draw a dashed line - so we select "line type" from the attribute pallet and ..... end up with an obscure dash style that we never use. Every time we do this we get the same obscure dash style. I've tried setting a default dash using the eyedropper, etc. to no avail. How do I set the "line type" default style so that it sticks to something (on purpose)?
-
Well, there goes that theory! Matt - thanks for the insight.
-
After a day of testing out version 2020, my overall experience is positive. A bunch of us have been asking the software team to forego new features in exchange for quality, ease of use, stability, better implementation of existing tools, etc. While there is still so much on the "wish list," this release suggests that shift is in fact happening. Core Improvements Stability: The fact that Christiaan feels comfortable enough to migrate the whole office to a SP0 release says a lot. File Size: We're finding about a 40% compression rate for our files. Removing the excess and making the file structure leaner is great engineering IMHO. Dark Mode & Retooled Icons: Demonstrates that there is an awareness to updating the user interface and experience. Rendering Speed Enhancement: Open GL is snappy - Moving about the model now feels like it should. Wow good job on that one! Hope for future tool refinement: After studying the new door tool, the barn door functionality that was added appears to be a direct integration of the Marionette tool that was developed and posted elsewhere on this site. If I am right in that regard, that means that the engineering team is using graphical scripting to code the standard tools AND that strikes me as a game changer for future tool development. For example doors and windows can be constructed using if/then conditions versus all fixed parameters, etc. I think the team is laying the groundwork for some breakthrough implementation of things like the Door / Window / Stair tools that we have been asking for. Perhaps, I'm being overly optimistic, but that seems like the natural progression of where this strategy is headed. Challenges: Not every implementation is perfect yet. • When switching to dark mode the text associated with my tool pallets doesn't toggle from black to white (or white to black) so it effectively disappears. Fortunately, you can overcome this by entering the workspace editor and toggling the settings. Once the workspace resets the screen condition it works fine. • The Notes Manager can now list the notes with the Note Description as the list # - that is awesome (as in we can finally add CSI ID's or office standard addressing to our note blocks). However, it took a bunch of steps back at the same time. In 2019, the database note selection and note block organization were in one window, making the addition and organization of notes easy. Now, they are in separate windows and the interface is cumbersome. You can no longer add multiple notes at once, but instead have to add them one by one. Imagine that I'm using this tool for my sheet specs ... way too slow. Every time that you add a note, it forgets your current note database and requires you to reselect it... More to explore...
-
I happened to check my account today and the 2020 version is now available (for Service Select members at least).
-
Hello Chris, For our purposes, we schedule directly in airtable rather than export data from VW objects. Airtable holds our core information, so we can use it as a template when moving from project to project. The only synch we need to make is the ID # from the drawings relative to the database - which we do manually. So, we don't use an automated export method in our workflow.