


justinekwood
-
Posts
54 -
Joined
-
Last visited
Content Type
Profiles
Forums
Events
Articles
Marionette
Store
Posts posted by justinekwood
-
-
Apologies for the couple of question in 1 post but I think that they go together. All for VW 2019
If I want to use a 3D image files such as those on Sketchup3D warehouse for my Vectorworks drawings how do I create a 'resource' to reuse including a 2D image so that it is visible in top plan?
What formats can I use?
Do I duplicate something from resource manager and then create an image prop for use in the 3D element as we do for plants?
Or, do I create a 2D symbol and attach the suppliers images to the 3D element?
If there is a video somewhere please send me the link. I can only find videos that deal with differing elements - image props etc.
Thanks
Justine Wood
-
I am attempting to create a tree 3D image using the attached png which I have bought and downloaded. When I select create image prop in Model, and import and elect the image nothing happens. It doesn't open up the screen allowing me to create transparencies etc. I have the image saved outside of the file, on my iCloud Drive.
Any ideas as I need this image today? I have VW 2019
Many thanks

-
thanks - am setting up some training. I didn't set any lighting that I know of but will investigate
-
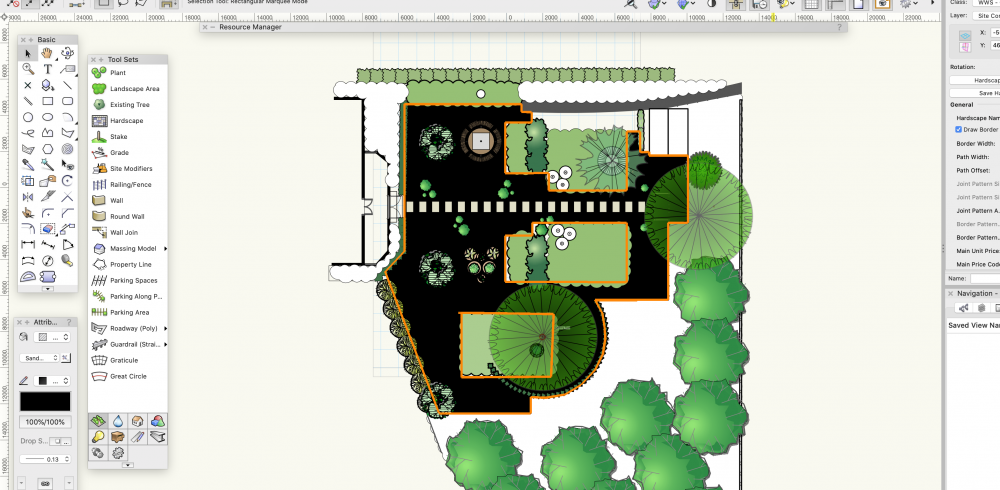
I created a garden design in VW2019 and it all looked great in top plan. Then I went into rear view and rendered open GL to see what the elevation looked like and only saw the gravel hatch not the texture. I then changed the 3D setting to slab, set the slab height at 5 and the depth at 1 and used main class for the texture and the gravel appeared in the elevation. When I returned to top plan the plan looks like the attached screengrab - solid black even though the object info says hatch.
What can I do to get the hatch back for my top plan?
Also, the landscape areas are looking really ethereal after rendering. very hazy yet dominating. Any ideas on how to keep the density but up the contrast?
Many thanks
Justine
-
I missed this previously Tamsin. Thank you. Is this also how I would add external image files for furniture etc?
So helpful.
-
-
Currently I have a file with all the plant records I have created that I use across my Client planting plans. It works but I am sure that I must be able to create my own library so that I can access it from any file and still create plant schedules etc. Is there a tutorial anywhere or can someone tell me how to do this when I duplicate a record to create my own plant record? I should add that I am on VW2019.
Thanks
-
It worked by the way! Thanks so much
-
Ahhh thanks that is all clear. Last question is how do I deduplicate. I have many borders using the same plant records. I have clicked summarise but I still have a row per mention of the plant record. I just want to deduplicate so that I have 1 row per plant record where the quantity totals ALL incidences of that plant record.
-
I have checked the number of worksheets and deleted all of them and still when I amend the report the changes do not show up after I click OK. It just appears to hang in the edit report window and then when I click outside to return to the report nothing has changed.
-
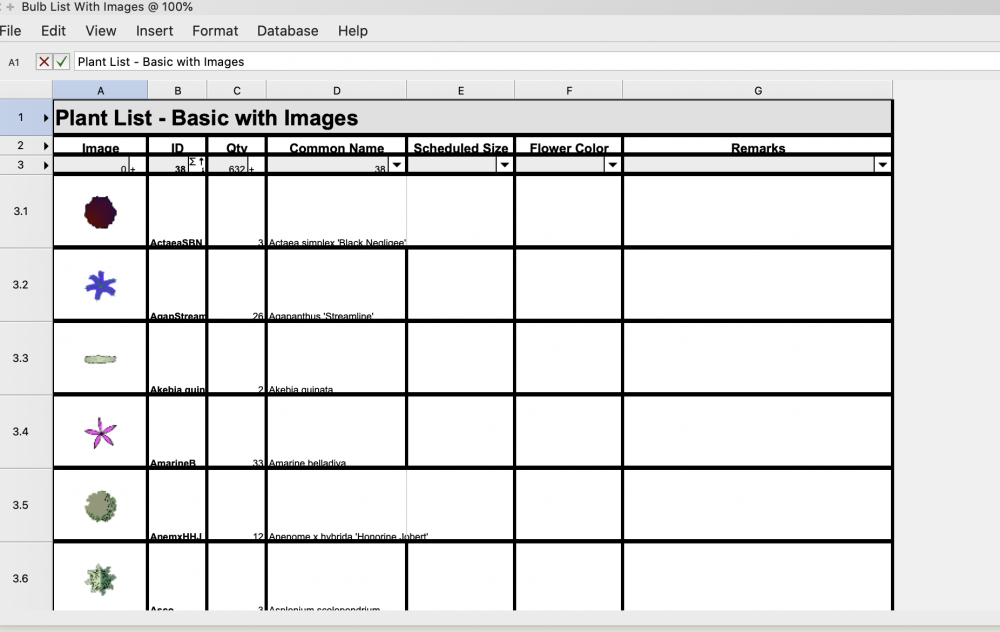
I am trying to create a customer report that has one column for the 2D symbol associated with the plan record, another column for the Latin name and the last column with the quantity that plant record. So not importing an image - using something that exists already.
When I use the reformatted report (Basic with images) it is that image field that I am trying to create in a custom report.
-
Thanks Tom. I'll check. I've just created a custom report but now I can't find teh right name for the field with the 2D symbol so that I can use this as key. Any ideas.
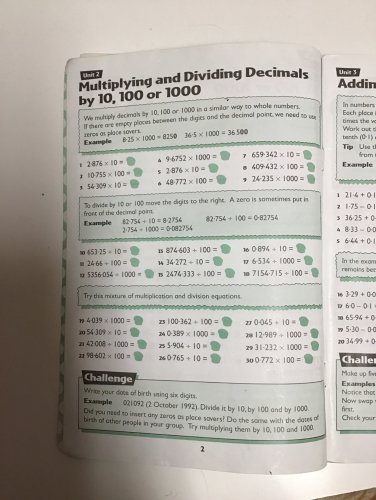
TBH I have thrown Homeschooling out of the window right now. 🤣
-
Apologies for that bit of homeschooling that I also attached😃
-
Thanks Tamsin. That was all simple and I did as you said. However when I clicked OK it didn't update the table in the document. Is there something else that I need to do?
-
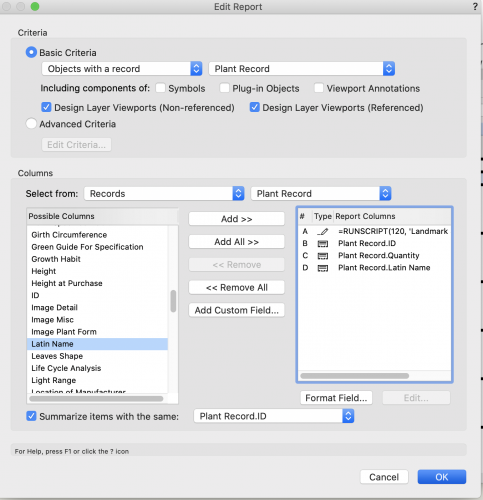
Tom and Tamsin - is there a simple way that I can add the Latin Name Criteria to the Basic Template with Images? I can add a column but I am unsure how to link the Latin name Criteria contents to it. I work with Latin names not common names with Clients and Nurseries.
Thanks
-
Thanks Tom and Tamsin. I missed Tom's post.
-
Tamsin Slatter thank you. As an aside how do I get the report to show only 1 row of the series and tally all quantities in the design?
-
I use VW2019 and I want to use the plant report tool to produce a basic key for my planting plans. Basically just showing the 2D symbol and the Latin Name. No quantities, no common names, no 1 row for each occurrence of that plant.
I have used the basic plant report with images and can delete the columns I don't want but then I have a row for each occurrence. So for example on my report I just want to show Rosa Munstead Wood once rather than the 5 times it appears.
I can't see how to do this on custom report as this doesn't show the plant field options.
Is there a tutorial on the/amending and deduplication within custom reports or can someone simply explain?
Thanks
Justine
-
I have produced a setting out plan and to keep things simple I used the mono button to make everything black and white and remove colour.
The landscaper has asked for all dimensions to be in red. Is there any simple way that I can do this? Or is there another way I can remove colour from the whole drawing using classes/layer settings?
Many thanks
Justine
-
I wonder if anyone can help. I have tried undoing but unfortunately I was too far in.
I have a revised design for a garden. Midway through amending I tried to import a dog of an outdoor shower which I thought would mean I could use as an object. I am pretty sure that I clicked this object only but I mustn't have. Now all my scale has changed. And the expression of the dims has changed to have decimal 00 after everything,
My problem is, everything in teh amended file has the right scale and dimensions but when I print it it is way out and too large. I think somehow I have rescaled against the imported dog and that has thrown the dimensions out of whack. I need the revised design but at the right dimensions. I can't rescale as that will give incorrect dimensions for the landscaper. Is there something simple I can do to get the 1:50 being at the right dimensions.
I have attached both plans for reference one entitled Original and the other entitle amended. Plus the dwg file.
Note both files are set at 1:50 on A1 but when you export the sheet the image is massive on the amended one which is what alerted me to the issue.
Thanks for any help as I am a deadline of today and I am hoping that I don't need to redraw.
Justine
-
Thanks Kevin, I did indeed use the scale bar as that was the only dimension I could use. I did ask to match the dimension too which I guess is why it changed from 1:200 in mm to 1:10,000. We got there in the end.
-
Hi Kevin,
Thank you. I did solve it in the end. As Claes mentioned it had a distant reference coordinate which was skewing positions. That is good advice. I just import 2D as I don't model from VW at the moment...just a newbie. Thank you though.
-
Thanks Claes. It is just that. I zoomed around and found it and one corner was miles away and the drawing at the other. I have now dragged to the drawing area and rescaled. Thank you.
-
I have bene sent a dwg from an architect which says it should be 1:200 at A0. When I import it it automatically imports at 1:10000. No problem I thought I will just use teh scale bar to rescale as usual. However when I import everything disappears.
I tried zooming out as obviously the file will be tiny now but I can't find it anywhere. Anybody know why this is happening or how to locate the file so that I can zoom in and move the geometry?
Have attached the dwg. I am working in VW Landmark 2019.


Using 3D image Files from Furniture Suppliers
in Troubleshooting
Posted
Thanks Tom. Am I right in saying that I can only import Sketchup models if I have VW2020 or higher? Thanks
Justine