danm01
-
Posts
35 -
Joined
-
Last visited
Content Type
Profiles
Forums
Events
Articles
Marionette
Store
Everything posted by danm01
-
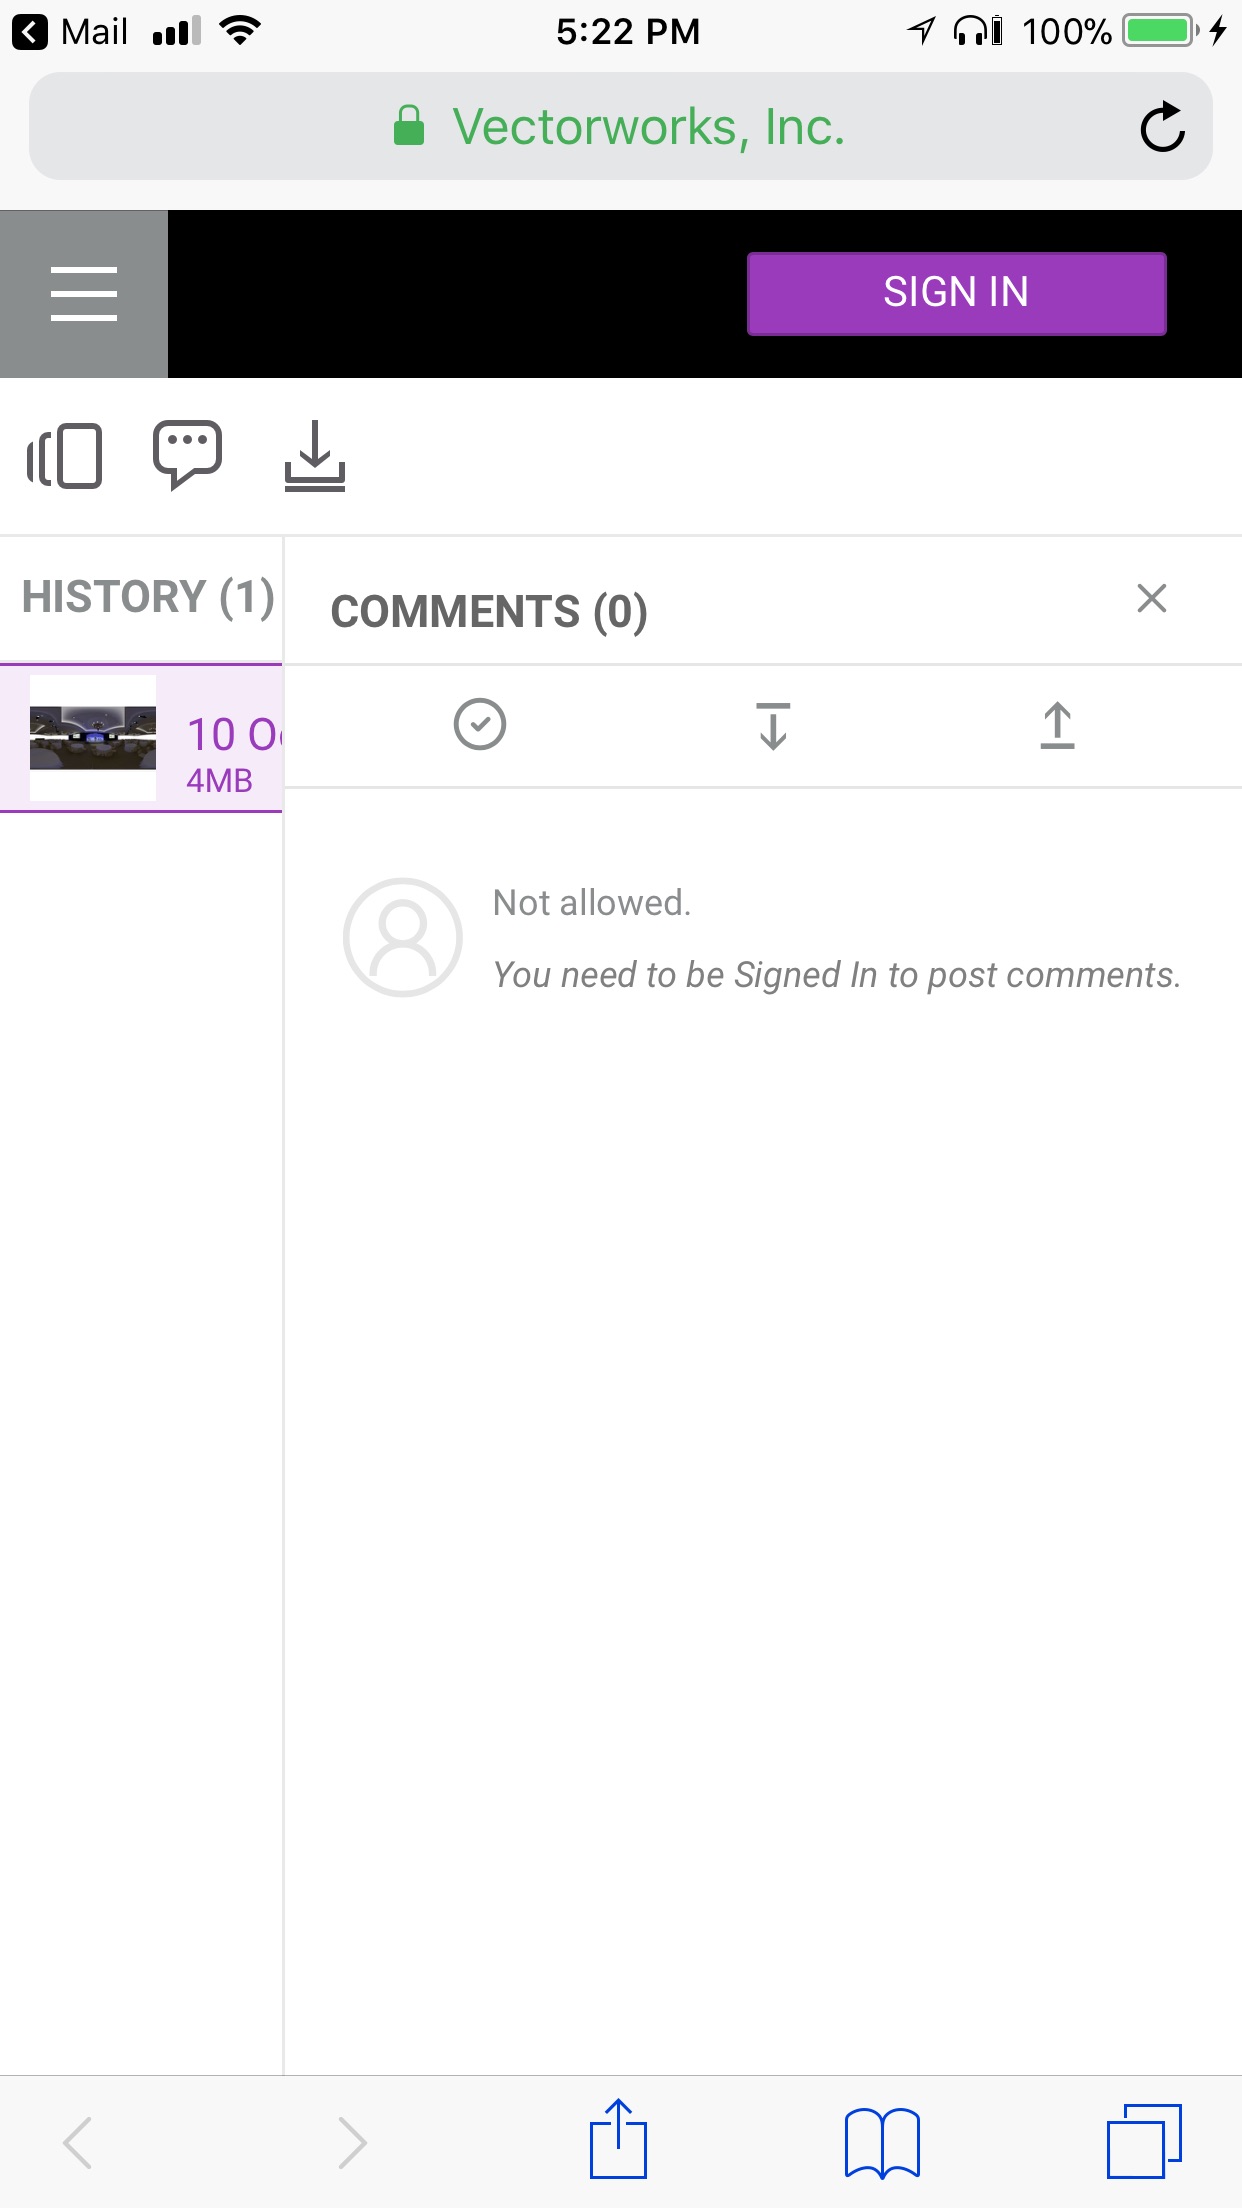
I love the rendered Panoramas. They really look great, and I think they're definitely worth the extra render time. However, I've got some challenges that seem to be related to Cloud Services and I'm wondering if anyone else has the same issues. 1) I've tested a few files and they all come out the same way. The JPG image is centered correctly when it's rendered. However, when viewed through the Cloud Services portal the camera starts off pointed towards the "left" side of the image rather than straight on center. 2) The user experience for a recipient opening the rendered image on an iPhone is not good. Regardless of whether I send the link email through Cloud Services OR copy and paste the link into an email, the recipient starts off seeing the "Comments" screen with the first line saying "Not allowed" (see attached image). In some cases, they can't click on the file to view it at all. I've tried with both Safari and Chrome. 3) It's possible to send a link to a file stored in my Dropbox account, but for some reason the recipient can't view the file unless it has been uploaded to the root Cloud Services folder. I have not tried it with other subfolders. Thanks, Dan

-
Honestly, I'm not sure why you would not want to use a Sheet Layer & Viewport. It makes it really easy. To get a specific resolution, you just need to use math. For instance, I have a SL set up as 20" wide by 11.25" tall. At 96 DPI, you get a 1920x1080 image. At 192 DPI, it's 4k. Publish to a JPG or PNG file and it looks great.
-
OK, that was really helpful. Thanks! I had not realized that this was done with records. In case this comes up for anyone else, this seems to work for me (Python script): #User defined project name strProjectName = vs.StrDialog('Set the project name','[changeme project name]'); #Sheet data record format and field strRecordName = 'Title Block Project Data' strRecordField = 'Project Name' def SetRecord(h): vs.SetRField(h,strRecordName,strRecordField,strProjectName); vs.ResetObject(h); criteria = '((R in [' + "'" + strRecordName + "'" + ']))'; vs.ForEachObject( SetRecord, criteria); The key is to use the ResetObject function after setting the drawing border field. Otherwise the record gets set but it doesn't display correctly until the drawing border is edited again. This works with Sheet data as well, but I have not messed with Revision or Issue at this point. Note that I'm a terrible coder, so there's no error checking or anything like that. But it does work! -Dan
-
I'm looking to modify the data contained in the revised Title Block tool via a script. In previous versions I had a worksheet embedded within my title blocks. In order to take advantage of the new field options I will need to modify a few scripts. Any help would be appreciated! Thanks, Dan
-
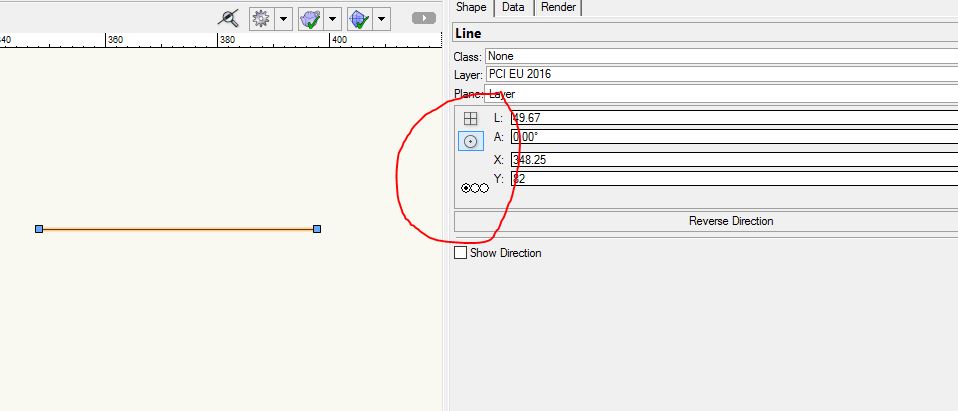
What zoomer said, but with one key addition. See the image below: I've circled 2 key pieces that aren't clearly marked. The grid and circle with a dot switch the line from rectangular to polar coordinates. You can switch at will, it does not change the line in any way. The 3 dots below indicate something called "segment position." If you extend the line with the current setting, the additional length will go to the right. If you click the center dot, any extension will go equally to either side. Note that this applies to 2 dimensional shapes too, but there are 9 dots instead of 3. -Dan
-
I don't think the Resource Manager changed the process at all. It's been essentially the same for a long time now. I've made a few screen images since SP3 was released, but I'm using the Landru plug-ins as opposed to the Spotlight versions. What specifically are you having trouble with?
-
Lighting instruments not focused in referenced DLVP
danm01 replied to danm01's question in Known Issues
Thank you! Glad I'm not crazy. This had me scratching my head for a while! -Dan -
Lighting instruments not focused in referenced DLVP
danm01 replied to danm01's question in Known Issues
Vectorworks Team, please take a look at this. I've attached 2 files: an original (reference test-original.vwx), and one referencing the original in a design layer viewport (reference test-DLVP.vwx). In the original, the lighting instrument is focused correctly. In the referenced DLVP, it's not. This is very clear if you render the model - you can see where the light from the instrument shows up. In the original, it casts a shadow from the focus point as expected. In the referenced DLVP it's pointed straight down. Is it supposed to behave this way? Thank you, Dan reference test-DLVP.vwx reference test-original.vwx -
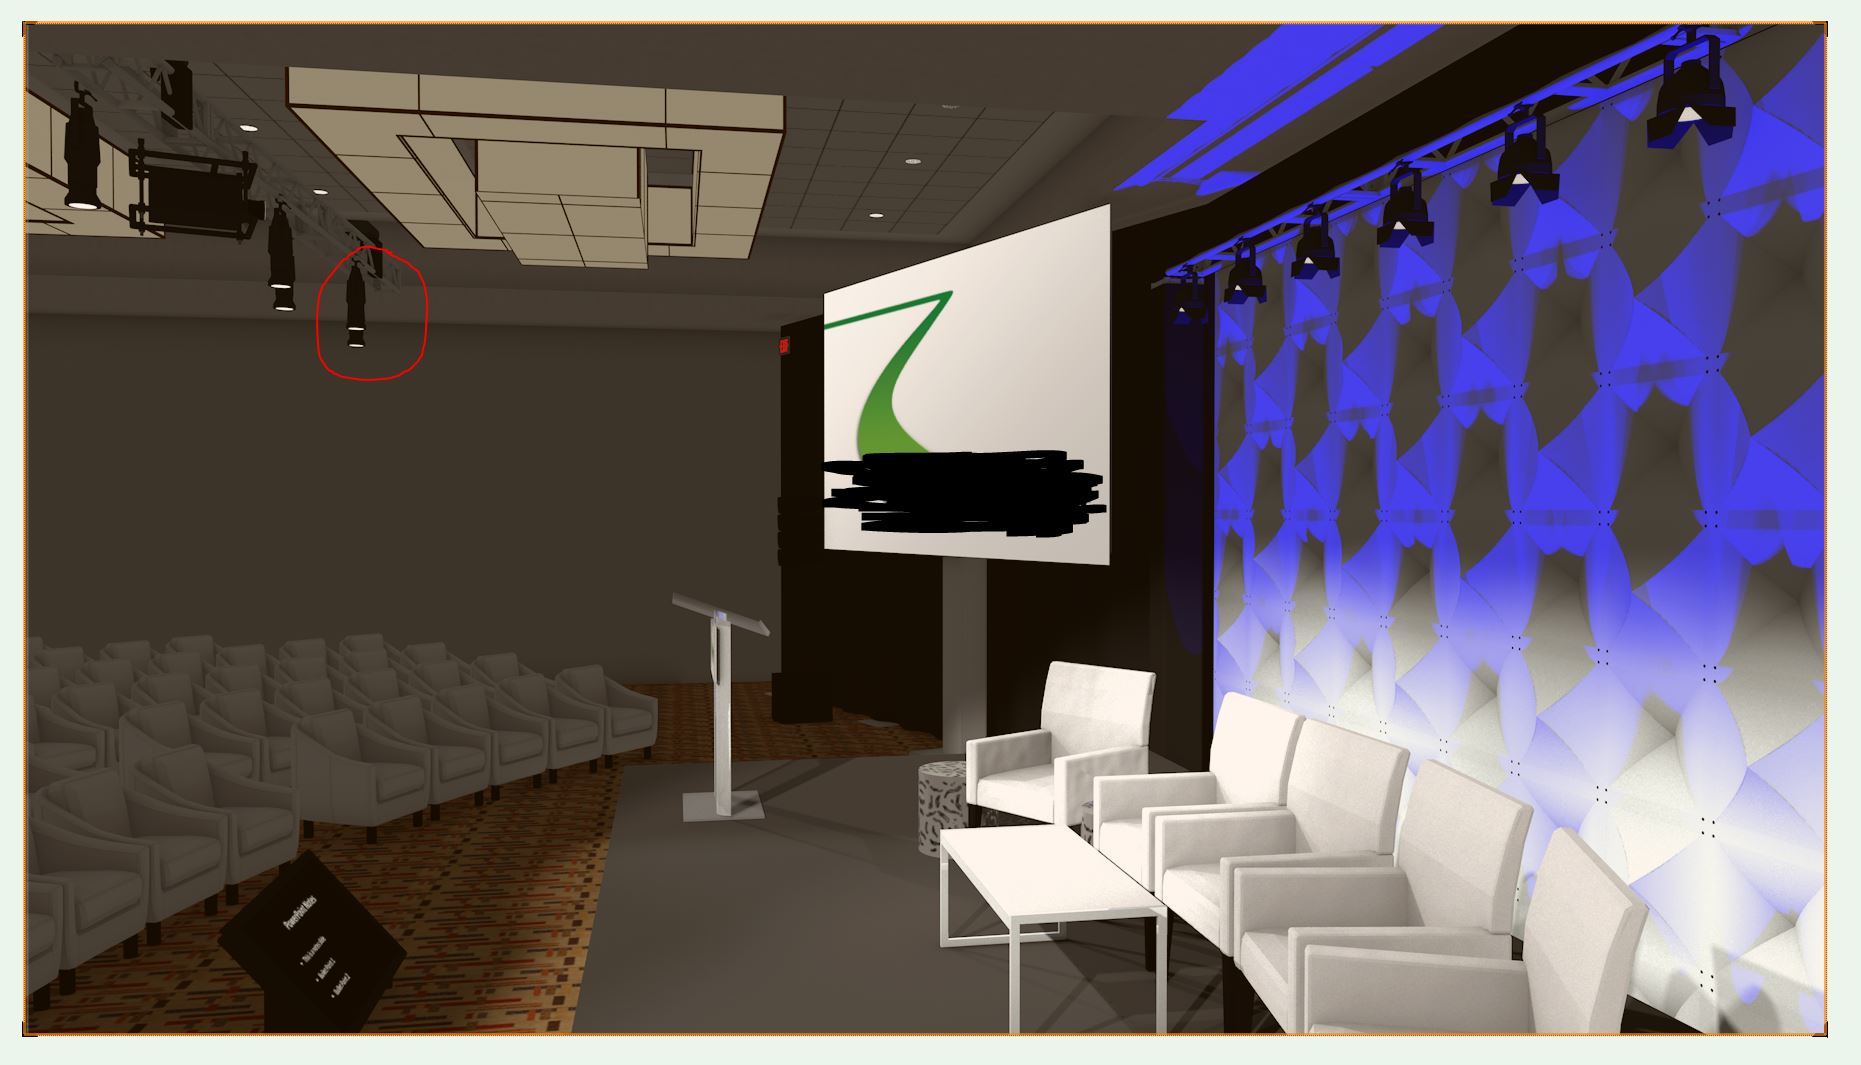
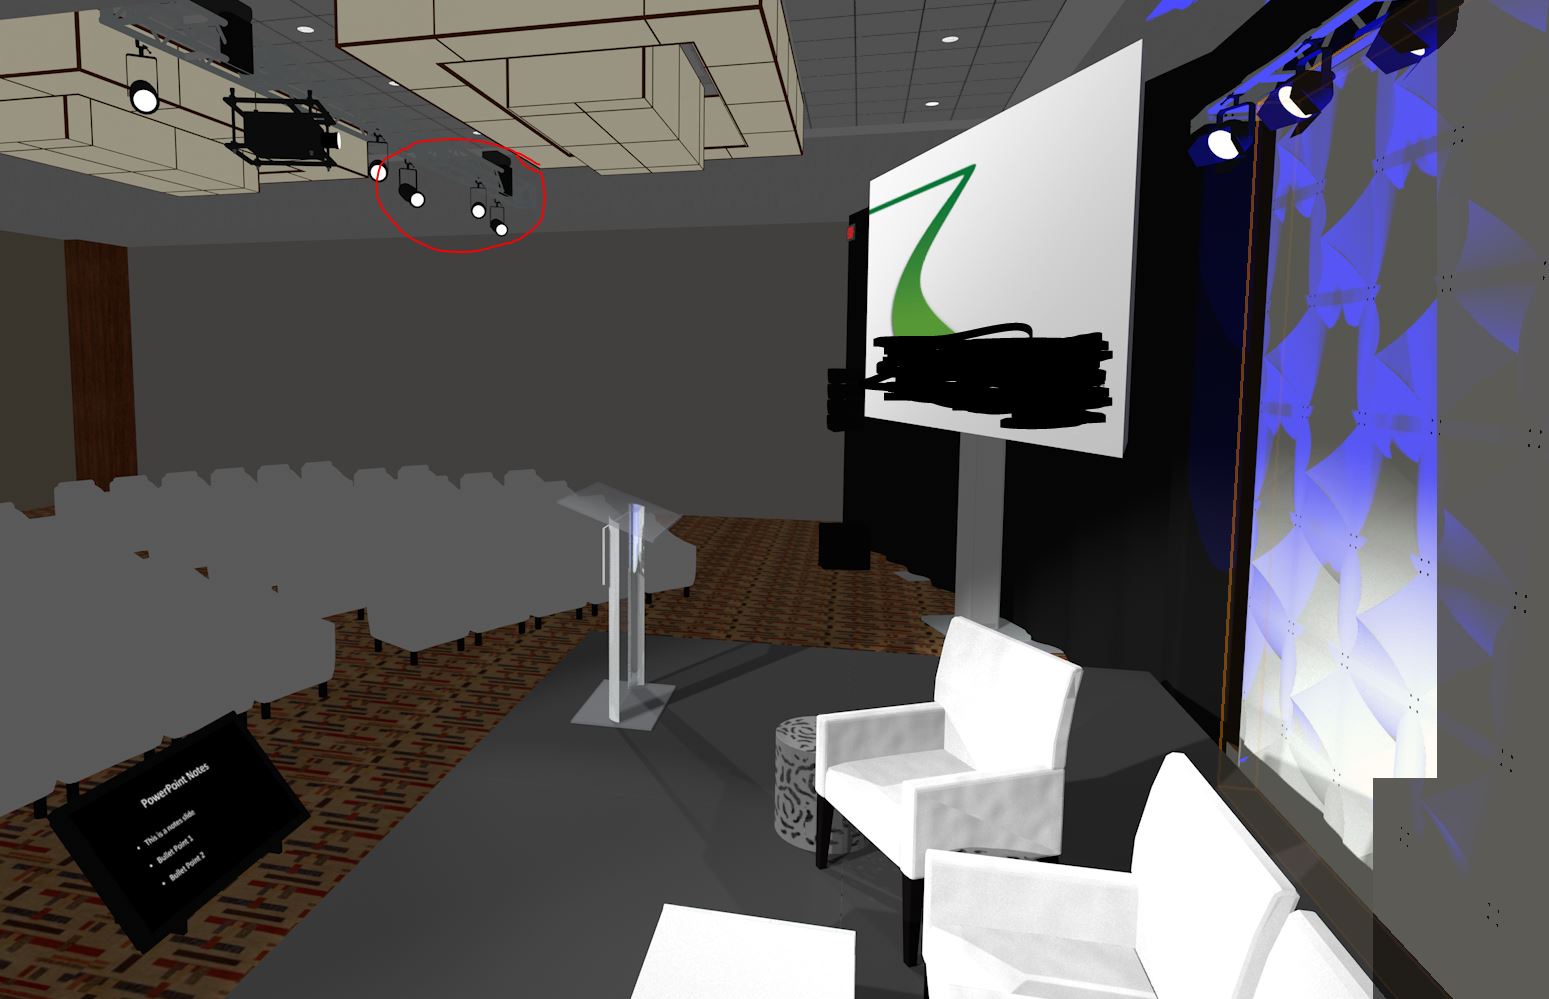
Has anyone seen this before? I created a new master file to use for path animations, with the original referenced in a design layer viewport. The original referenced file is fine, but in the DLVP the lighting instruments are not focused. I've tried refreshing the instruments, referencing other files, and creating a new master file from a blank template. What am I missing? Images below. Thanks! Dan DLVP with unfocused instruments: Referenced File:
-
You can't do it with the plug-in. The projection plug-in generates the screen object for you, and it doesn't allow for 3D rotation. Your best bet is to create your own screen object using an extrude or other 3D object and add the content using a texture. Don't forget the screen border. Then separately add a projector using the plug in, and once you've got it lined up use the "hide screen" checkbox. As Kevin pointed out, most large event projectors aren't happy being angled like this. It's a heat management thing. You can do it, but it will kill your lamps quickly. More than likely you will want to keep it horizontal, and do the math to figure out the actual projection raster by superimposing your "diamond" on a 16x9 (or 4x3 or 16x10) rectangle. Some machines do allow for 90 degree rotation, which may work in your favor. The plug-in has some "side" versions of the stock projectors, but if you're using custom objects you will need to create another version of your projector symbol and re-jigger the lens placement numbers in the attached VS-ModData record. I did a quick and dirty version in the attached file. -Dan Rotated screen example.vwx